2006 MERCEDES-BENZ SPRINTER brake fluid
[x] Cancel search: brake fluidPage 22 of 2305

Static Heater Signal
A status of9ON9indicates that the heater module
sees the9Stationary Heating Mode ON9signal after
switching on the heater with the heater timer or the
auxiliary heater switch. A status of9OFF9indicates
that the9Stationary Heating Mode ON9signal is
not present at the heater module.
Heater Booster Mode Signal
A status of9ON9indicates that the heater module
sees the9Heater Booster Mode ON9signal after
switching on the heater with the auxiliary heater
switch. A status of9OFF9indicates that the9Heater
Booster Mode ON9signal is not present at the
heater module.
3.4 INSTRUMENT CLUSTER
The Instrument Cluster has easy-to-read instru-
ments, is capable of CAN bus communication and
provides a diagnostic function. The Instrument
Cluster with analog speedometer, tachometer, fuel
and coolant temperature gauges comes in two ver-
sions.
²Speedometer with outer miles-per-hour (mph)
scale and inner kilometers-per-hour (km/h) scale.
Coolant temperature is indicated in Fahrenheit
(for US).
²Speedometer with outer kilometers-per-hour
(km/h) scale and inner miles-per-hours (mph)
scale. Coolant temperature is indicated in de-
grees Celsius (for Canada).
Below the speedometer, there is a LCD multi-
function indicator in clear view of the driver. Warn-
ing and indicator lights (based on colored light
emitting diodes) are located in the bottom of the
instrument cluster with the exception of the turn
signal indicator lights, ASR warning light and re-
serve fuel warning light. The warning lights for the
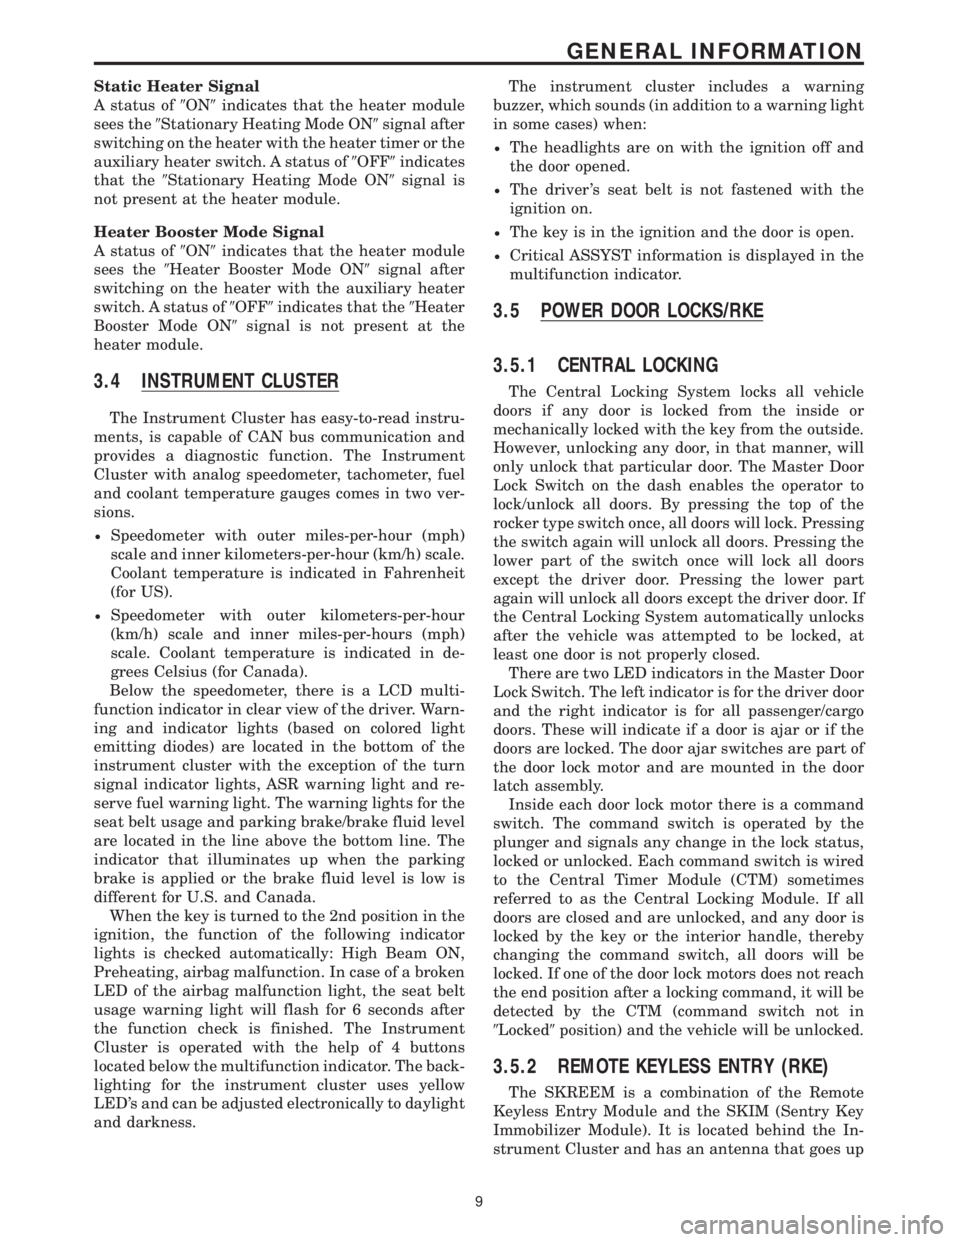
seat belt usage and parking brake/brake fluid level
are located in the line above the bottom line. The
indicator that illuminates up when the parking
brake is applied or the brake fluid level is low is
different for U.S. and Canada.
When the key is turned to the 2nd position in the
ignition, the function of the following indicator
lights is checked automatically: High Beam ON,
Preheating, airbag malfunction. In case of a broken
LED of the airbag malfunction light, the seat belt
usage warning light will flash for 6 seconds after
the function check is finished. The Instrument
Cluster is operated with the help of 4 buttons
located below the multifunction indicator. The back-
lighting for the instrument cluster uses yellow
LED's and can be adjusted electronically to daylight
and darkness.The instrument cluster includes a warning
buzzer, which sounds (in addition to a warning light
in some cases) when:
²The headlights are on with the ignition off and
the door opened.
²The driver 's seat belt is not fastened with the
ignition on.
²The key is in the ignition and the door is open.
²Critical ASSYST information is displayed in the
multifunction indicator.
3.5 POWER DOOR LOCKS/RKE
3.5.1 CENTRAL LOCKING
The Central Locking System locks all vehicle
doors if any door is locked from the inside or
mechanically locked with the key from the outside.
However, unlocking any door, in that manner, will
only unlock that particular door. The Master Door
Lock Switch on the dash enables the operator to
lock/unlock all doors. By pressing the top of the
rocker type switch once, all doors will lock. Pressing
the switch again will unlock all doors. Pressing the
lower part of the switch once will lock all doors
except the driver door. Pressing the lower part
again will unlock all doors except the driver door. If
the Central Locking System automatically unlocks
after the vehicle was attempted to be locked, at
least one door is not properly closed.
There are two LED indicators in the Master Door
Lock Switch. The left indicator is for the driver door
and the right indicator is for all passenger/cargo
doors. These will indicate if a door is ajar or if the
doors are locked. The door ajar switches are part of
the door lock motor and are mounted in the door
latch assembly.
Inside each door lock motor there is a command
switch. The command switch is operated by the
plunger and signals any change in the lock status,
locked or unlocked. Each command switch is wired
to the Central Timer Module (CTM) sometimes
referred to as the Central Locking Module. If all
doors are closed and are unlocked, and any door is
locked by the key or the interior handle, thereby
changing the command switch, all doors will be
locked. If one of the door lock motors does not reach
the end position after a locking command, it will be
detected by the CTM (command switch not in
9Locked9position) and the vehicle will be unlocked.
3.5.2 REMOTE KEYLESS ENTRY (RKE)
The SKREEM is a combination of the Remote
Keyless Entry Module and the SKIM (Sentry Key
Immobilizer Module). It is located behind the In-
strument Cluster and has an antenna that goes up
9
GENERAL INFORMATION
Page 292 of 2305

INSTRUMENT CLUSTER C1CAV CIRCUIT FUNCTION
1 20BR FUEL LEVEL SENSOR SIGNAL RETURN
2 20BR/DG AMBIENT TEMPERATURE SENSOR SIGNAL RETURN
4 20WT/GY K-IC/ATC/HBM/CHM
5 20BR/BK PARK BRAKE INDICATOR SIGNAL
7 20BK/DG RIGHT TURN SIGNAL
10 20BL/BK FUEL LEVEL SENSOR SIGNAL (+)
11 20BL/DG AMBIENT TEMPERATURE SENSOR SIGNAL (+)
14 20DG/WT/BL ENGINE COOLANT LEVEL SWITCH SIGNAL
15 20BR/WT FRONT COURTESY LAMPS CONTROL
16 20YL/RD SEAT BELT SWITCH SIGNAL
17 20DG CAN C BUS (-)
18 20DG/WT CAN C BUS (+)
INSTRUMENT CLUSTER C2 - WHITECAV CIRCUIT FUNCTION
1- -
2- -
3 20RD/YL FUSED B(+)
4 20BR/WT BRAKE WEAR SENSOR SIGNAL
5- -
6 18BR GROUND
7 20GY/DG/RD LAMP DRIVER
8 20BL/WT FUSED HIGH BEAM SWITCH OUTPUT
9 20BL/RD/WT VEHICLE SPEED SENSOR OUTPUT
10 20BK FUSED IGNITION SWITCH OUTPUT (RUN-START)
11 20BL/BK KEY-IN IGNITION SWITCH SIGNAL
12 - -
13 20BK/WT LEFT TURN SIGNAL
14 20BR/YL BRAKE FLUID LEVEL INDICATOR SIGNAL
15 20BL GENERATOR FIELD DRIVER
16 20YL AIRBAG WARNING INDICATOR DRIVER
17 - -
18 20BL/VT D(+) RELAY NO. 1 CONTROL
18 20BL/VT D(+) RELAY NO. 1 CONTROL
INTRUSION SENSOR NO. 1 - BLACKCAV CIRCUIT FUNCTION
1 20BR GROUND
2 20DG/BK INTRUSION SENSOR 1 SIGNAL
3 20DG/YL INTRUSION SENSOR INTERFACE
4 20RD/DG FUSED B(+)
INTRUSION SENSOR NO. 2 - BLACKCAV CIRCUIT FUNCTION
1 20BR GROUND
2 20GY/BK INTRUSION SENSOR 2 SIGNAL
3 20DG/YL INTRUSION SENSOR INTERFACE
4 20RD/DG FUSED B(+)
C
O
N
N
E
C
T
O
R
P
I
N
O
U
T
S
279
CONNECTOR PINOUTS
Page 318 of 2305

TABLE OF CONTENTS
1.0 INTRODUCTION.........................................................1
1.1SYSTEM COVERAGE...............................................1
1.2SIX-STEP TROUBLESHOOTING PROCEDURE..........................1
2.0 INDENTIFICATION OF SYSTEM............................................1
3.0 SYSTEM DESCRIPTION AND FUNCTIONAL OPERATION......................1
3.1ESP ..............................................................1
3.2ABS ..............................................................1
3.3BRAKE ASSIST SYSTEM (HBA).......................................2
3.4TCS (ASR).........................................................2
3.5ELECTRONIC BRAKE DISTRIBUTION (EBD)............................2
3.6VEHICLE CONTROLLING (FZR).......................................2
3.7SYSTEM COMPONENTS.............................................2
3.7.1ABS AND TCS (ASR) INDICATORS............................3
3.7.2CONTROLLER ANTILOCK BRAKE (CAB).......................3
3.7.3HYDRAULIC CONTROL UNIT (HCU)...........................3
3.7.4SWITCHES/SENSORS.......................................3
3.7.5SELF TESTS...............................................4
3.8USING THE DRBIIIT.................................................4
3.9DRBIIITERROR MESSAGES.........................................4
3.9.1DRBIIITDOES NOT POWER UP (BLANK SCREEN)...............5
3.9.2DISPLAY IS NOT VISIBLE....................................5
4.0 DISCLAIMERS, SAFETY, WARNINGS.......................................5
4.1DISCLAIMERS......................................................5
4.2SAFETY...........................................................5
4.2.1TECHNICIAN SAFETY INFORMATION..........................5
4.2.2VEHICLE PREPARATION FOR TESTING........................5
4.2.3SERVICING SUB-ASSEMBLIES...............................5
4.2.4DRBIIITSAFETY INFORMATION...............................6
4.3WARNING.........................................................6
4.3.1VEHICLE DAMAGE WARNINGS...............................6
4.3.2ROAD TESTING A COMPLAINT VEHICLE.......................6
4.4DIAGNOSIS........................................................6
5.0 REQUIRED TOOLS AND EQUIPMENT......................................7
6.0 GLOSSARY OF TERMS...................................................7
7.0 DIAGNOSTIC INFORMATION AND PROCEDURES............................9
BRAKES (CAB)
ANTI-LOCK BRAKE MODULE INTERNAL...................................10
CAB INTERNAL.........................................................10
BRAKE FLUID LEVEL....................................................13
BRAKE PRESSURE SENSOR CIRCUIT.....................................15
BRAKE SWITCH CIRCUIT................................................17
CAB CHECK SUM......................................................21
CAB OPTION...........................................................23
CAN COMMUNICATION ERROR..........................................25
i
Page 320 of 2305

TABLE OF CONTENTS - Continued
9.0 CONNECTOR PINOUTS.................................................83
BRAKE FLUID LEVEL SWITCH............................................83
BRAKE LAMP SWITCH C1 (EXCEPT ESP)..................................83
BRAKE LAMP SWITCH C2 (EXCEPT ESP) - BLACK..........................83
CONTROLLER ANTILOCK BRAKE.........................................84
INSTRUMENT CLUSTER C2 - WHITE......................................85
STEERING ANGLE SENSOR..............................................85
TCS SWITCH (ASR) - BLACK.............................................85
WHEEL SPEED SENSOR-LEFT FRONT....................................85
WHEEL SPEED SENSOR-LEFT REAR......................................86
WHEEL SPEED SENSOR-RIGHT FRONT...................................86
WHEEL SPEED SENSOR-RIGHT REAR....................................86
10.0 SCHEMATIC DIAGRAMS.................................................87
10.1BOSCH 5.7 ANTILOCK BRAKE SYSTEM ± ABS.........................87
iii
Page 323 of 2305

enable the HCU to perform the brake fluid manage-
ment control as the combination/proportioning
valves.
The Bosch 5.7 system uses the CAB/HCU/Pump
Motor to make an integral electronic/hydraulic unit
which shares data with other electronic modules on
the vehicle via the CAN C Bus network. To access
DTCs from the CAB, the DRBIIItuses the K-ABS
line located in the Data Link Connector (DLC).
3.3 BRAKE ASSIST SYSTEM (HBA)
The Brake Assist System (HBA) analyzes how
hard and fast the driver wants to brake. It monitors
the brake pressure via a pressure sensor. The
passenger car brake assist system uses a vacuum
booster solenoid. The Sprinter uses the hydraulic
control unit to develop the brake pressure.
3.4 TCS (ASR)
The primary function of the Traction Control System
is to reduce wheel slip and maintain traction at the
driven wheels when the road surfaces are slippery. The
Traction Control System reduces wheel slip by applying
the brake that has lost traction. The system is designed
to operate at speeds below 50 km/h (30 mph). The
engine's torque can be reduced by the ECM via the CAN
C Bus, if necessary. The TCS can be deactivated with
switch on the dash. The Traction Control System uses
the ABS to indicate spinning tires to enable the traction
control function. The TCS software is in the CAB.
The TCS (ASR) performs the following functions:
1. Engine power derate
2. Engine deceleration regulation. If the vehicle is
on a patch of ice, the simple action of releasing
the throttle is enough to cause the rear wheels to
slip. To avoid this, the throttle input is regulated
so power drops slowly instead of abruptly. The
engine power is reduced (decelerated) as neces-
sary.
3.5 ELECTRONIC BRAKE DISTRIBUTION
(EBD)
The system was enhanced and eliminates the
need for the ALB system (load sensing valve). All
ESP equipped models will not have ALB. The EBV
system self-adapts to operating conditions. It de-
tects the vehicle's payload when the vehicle starts
and pulls away. Based on the acceleration rate
when the vehicle first pulls away from a standstill,
the system is able to calculate the actual payload.
This is a rough estimate which is used initially.
Later on, the system gathers more precise informa-
tion by monitoring the brake pressure and wheel
speed and negative slip when the driver applies thebrakes. The system will then produce a more accu-
rate calculation of payload depending on brake
retardation. The adaptation is erased when the
ignition is switched off. A new adaptation will occur
on the next driving cycle. By default, the system
acts upon the vehicle as if in an unloaded condition
(safe mode).
Once a new driving cycle begins with the vehicle
in a fully loaded condition (without having gathered
more precise information) the system will detect
ABS actuation in the front wheels and will allow
enough pressure to be applied to the rear axle, to an
extent where the wheels are just about to lock up
(maximum braking possible).
The system calculates the braking force at the
front and rear axles. If the driver applies the brakes
gently and then realizes he needs to apply the
brakes further, the EBV allows the proper pressure
to be applied to the front and rear brakes.
The EBV also contains a feature called ªcorner
brake systemº (CBS) which operates when the ve-
hicle is braked while cornering to avoid a possible
oversteering condition. The EBV monitors the
wheel speed of both rear wheels to detect when the
vehicle is cornering and allows precise brake pres-
sure application to the front and rear brakes. Also
when the brakes are applied during cornering, the
outer wheels get more of the vehicle's weight while
the inner wheels get less weight and could lose
traction (wheel lock up). The EBV system splits the
pressure between left and right sides in addition to
front and rear brakes.
3.6 VEHICLE CONTROLLING (FZR)
Vehicle controlling (FZR)requires additional
sensors to operate. The term ESP refers to the
software of the system. The term FZR refers to the
system controller. The TCS (ASR) system requires
wheel speed sensors to monitor wheel slip and CAN
bus communications to regulate engine power. In
addition to these inputs, the vehicle controlling
(FZR) requires a steering angle sensor, and a lateral
acceleration/yaw rate sensor.
The ESP system does not take the vehicle load
into account. Instead, the coefficient of friction is
calculated in a 20 millisecond period, where the
controller measures the rate at which the wheel
speed is decelerated, as brake pressure is applied to
the wheel.
3.7 SYSTEM COMPONENTS
²Controller Antilock Brake (CAB)
²Hydraulic Control Unit (HCU)
²Pump Motor
2
GENERAL INFORMATION
Page 324 of 2305

²Four Wheel Speed Sensors/Tone Wheel assem-
blies
²ABS warning indicator
²TCS (ASR) event indicator
²TCS (ASR) warning indicator
²Steering Angle Sensor
²Lateral Acceleration/Yaw Rate Sensor
²Brake Pressure Sensor
²ESP event indicator
²Brake Fluid Level switch
²Brake Switch (BS)
²Brake Lamp Switch (BLS)
²TCS Switch (TCSS)
²K - ABS
²CAN C Bus
²Fuses, grounds, and wiring
3.7.1 ABS AND TCS (ASR) INDICATORS
This system is equipped with an ABS warning
indicator, TCS (ASR) warning indicator, and TCS
(ASR) event indicator to alert the driver of a
malfunction/event it has detected. The CAB can
request the illumination of the ABS warning indi-
cator, TCS (ASR) warning indicator, and TCS (ASR)
event indicator via CAN C BUS. The CAB controls
the ABS warning indicator by:
²Light steady during an initial test at the begin-
ning of an ignition cycle to function as a bulb
check
²Light steady when a system malfunction exists
(DTC)
²Light steady - If you have not met the speed
required to reset/retest the ABS components
The Instrument Cluster (IC) controls the indica-
tors. The Instrument Cluster transmits a message
over the CAN C Bus relating to diagnostics and
current lamp status for the ABS and TCS (ASR)
indicators. The CAB can control the operation of
TCS warning and TCS event indicators by:
²Both light steady with engine off and both go out
with engine running
²TCS warning indicator lights steady when a TCS
malfunction exists
²TCS event indicator will flash when TCS is in an
active event
3.7.2 CONTROLLER ANTILOCK BRAKE
(CAB)
The CAB is mounted directly to the Hydraulic
Control Unit (HCU) that includes a microprocessor
and twelve solenoids that control valves that con-trol brake pressure during antilock braking or trac-
tion control events. The CAB also has circuits that
monitor the following:
²Double brake switch outputs are monitored to
determine whether or not to prepare for possible
ABS braking
²Wheel Speed Sensors are monitored to determine
when a wheel is tending to lock up. The CAB will
operate the valves in the HCU to control braking
pressure during ABS braking
²Detect ABS system related problems and take
diagnostic action
²Able to execute self-tests and output control com-
mands
When equipped with Electronic Stability (ESP),
the CAB also monitors the following:
²The ESP looks at the Steering Angle Sensor value
and monitors the speed of the inner and outer
wheels to ensure that the values are plausible.
The Steering Angle Sensor also monitors the
speed that the steering wheel is turned.
²The Lateral Acceleration/Yaw Rate Sensor is con-
tained in one unit. The sensor measures side to
side (lateral) motion and rotational motion (how
fast the vehicle is turning).
²The ESP uses data from the Brake Pressure
Sensor to analyze how hard and fast that the
driver wants to brake.
3.7.3 HYDRAULIC CONTROL UNIT (HCU)
The HCU on the Bosch 5.7 has an integral valve
body for controlling the front and rear brakes.
Within the HCU are inlet, outlet, and shuttle
valves, to release brake pressure as required to
avoid wheel lockup, keeping the wheels rolling, and
maintain optimum deceleration with stability. The
Pump Motor is attached to the HCU which works
with the ABS and TCS and is controlled by the
CAB. The primary function is to provide extra
amount of fluid when needed.
3.7.4 SWITCHES/SENSORS
BRAKE SWITCH (BS):This switch prepares the
CAB for a possible antilock event. The CAB uses an
output state voltage from the BS when the brake
pedal is either released/depressed. The Fused Igni-
tion Switch Output circuit supplies 12 volts to the
BS. A released brake pedal will close the BS circuit
and the BS Output circuit supplies 12 volts to the
CAB. When the driver depresses the brake pedal,
the BS Output circuit voltage drops to 0 volts and
the CAB senses the brake pedal state. This tells the
CAB what position the brake pedal is currently in to
make an ABS event possible. When using the
DRBIIItin Inputs/Outputs, the BS and BLS will
3
GENERAL INFORMATION
Page 334 of 2305

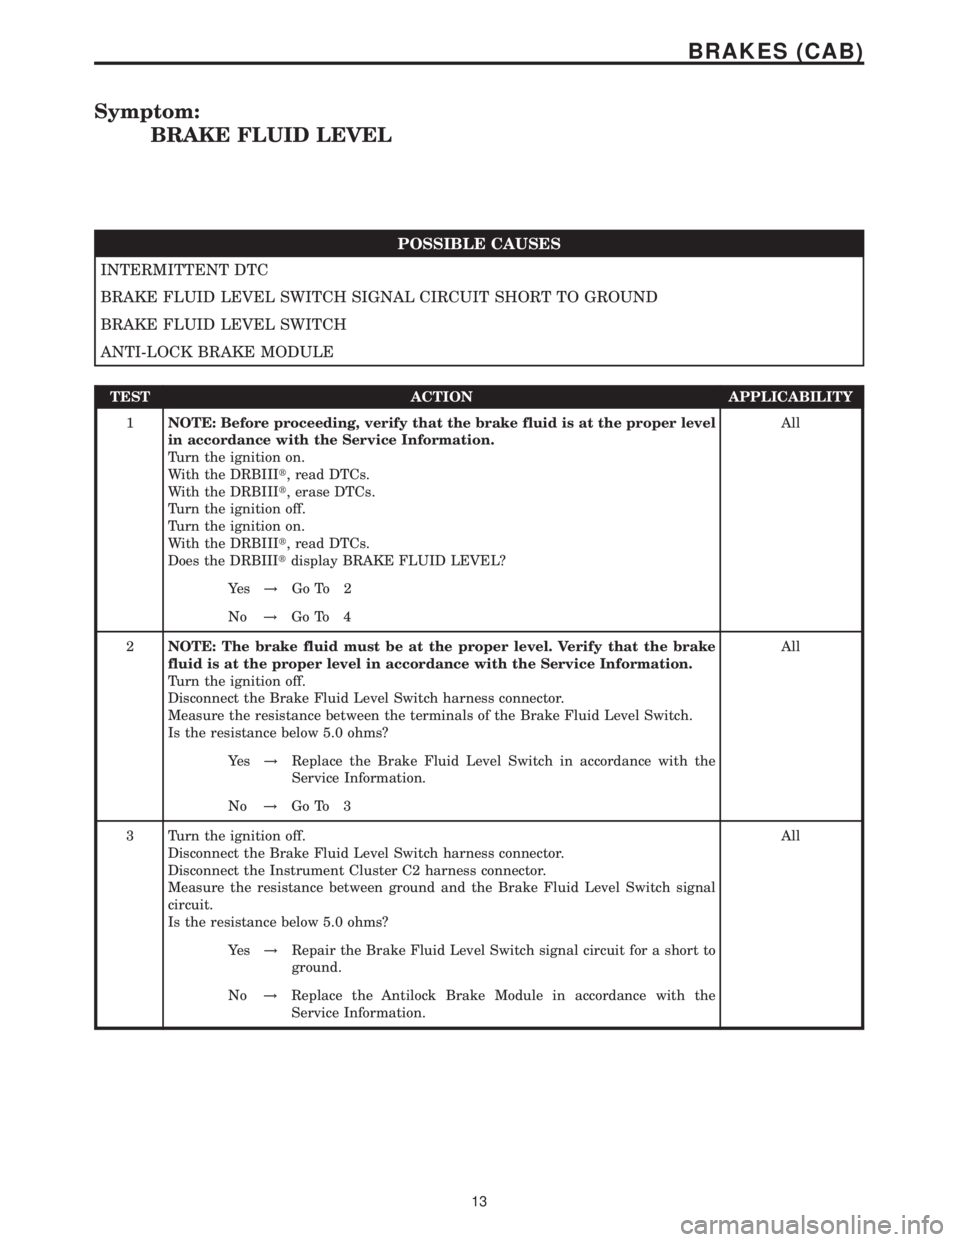
Symptom:
BRAKE FLUID LEVEL
POSSIBLE CAUSES
INTERMITTENT DTC
BRAKE FLUID LEVEL SWITCH SIGNAL CIRCUIT SHORT TO GROUND
BRAKE FLUID LEVEL SWITCH
ANTI-LOCK BRAKE MODULE
TEST ACTION APPLICABILITY
1NOTE: Before proceeding, verify that the brake fluid is at the proper level
in accordance with the Service Information.
Turn the ignition on.
With the DRBIIIt, read DTCs.
With the DRBIIIt, erase DTCs.
Turn the ignition off.
Turn the ignition on.
With the DRBIIIt, read DTCs.
Does the DRBIIItdisplay BRAKE FLUID LEVEL?All
Ye s!Go To 2
No!Go To 4
2NOTE: The brake fluid must be at the proper level. Verify that the brake
fluid is at the proper level in accordance with the Service Information.
Turn the ignition off.
Disconnect the Brake Fluid Level Switch harness connector.
Measure the resistance between the terminals of the Brake Fluid Level Switch.
Is the resistance below 5.0 ohms?All
Ye s!Replace the Brake Fluid Level Switch in accordance with the
Service Information.
No!Go To 3
3 Turn the ignition off.
Disconnect the Brake Fluid Level Switch harness connector.
Disconnect the Instrument Cluster C2 harness connector.
Measure the resistance between ground and the Brake Fluid Level Switch signal
circuit.
Is the resistance below 5.0 ohms?All
Ye s!Repair the Brake Fluid Level Switch signal circuit for a short to
ground.
No!Replace the Antilock Brake Module in accordance with the
Service Information.
13
BRAKES (CAB)
Page 335 of 2305

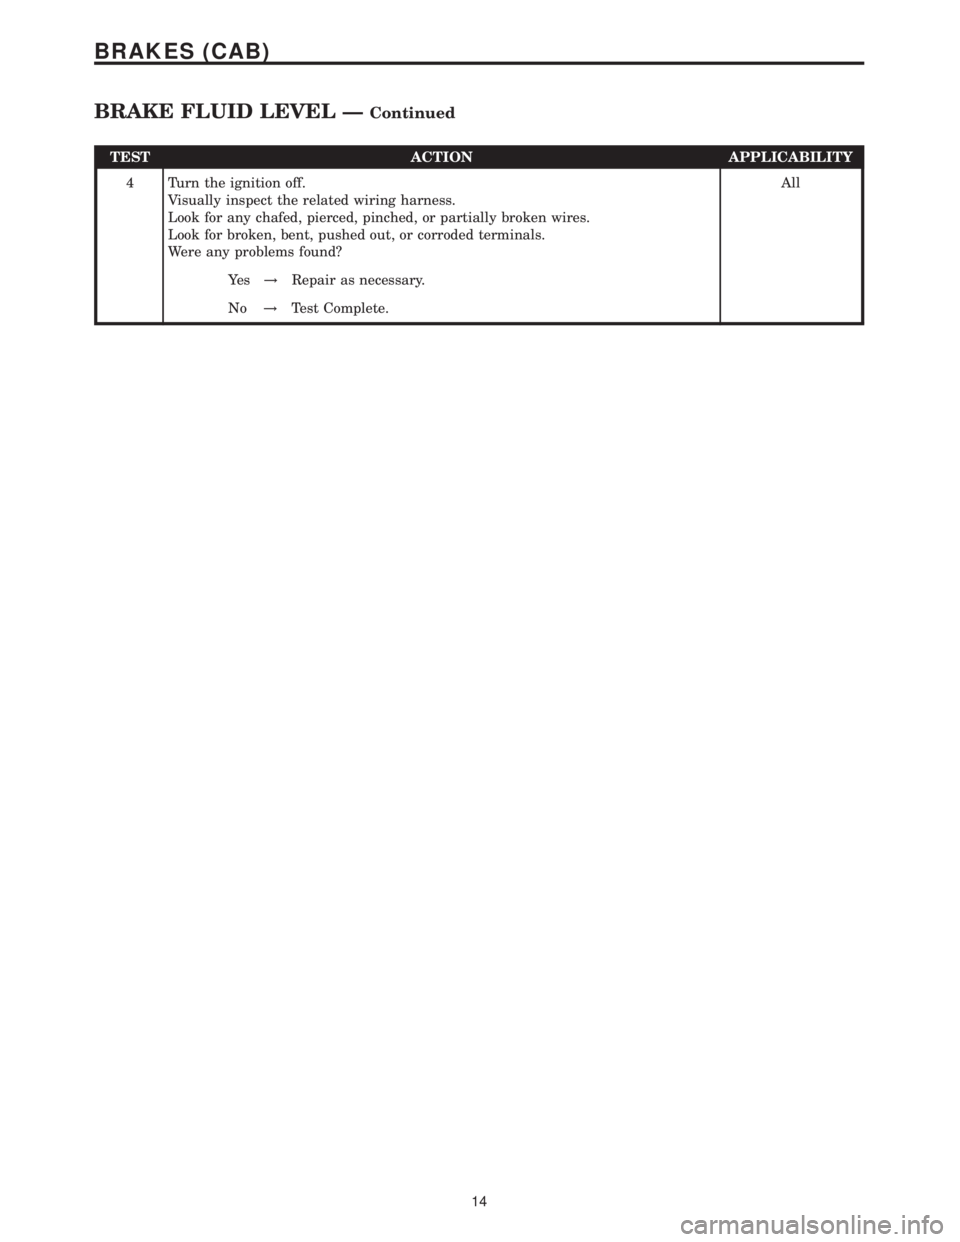
TEST ACTION APPLICABILITY
4 Turn the ignition off.
Visually inspect the related wiring harness.
Look for any chafed, pierced, pinched, or partially broken wires.
Look for broken, bent, pushed out, or corroded terminals.
Were any problems found?All
Ye s!Repair as necessary.
No!Test Complete.
14
BRAKES (CAB)
BRAKE FLUID LEVEL ÐContinued