Page 156 of 409

Switching on the skip blank function�
Press the
SB key.
SB is highlighted in the display.
If the system does not detect a sound")
155 Controls in detail
Audio system
Skipping blank sections (skip blank)
Switching on the skip blank function�
Press the
SB key.
SB is highlighted in the display.
If the system does not detect a sound
signal, the cassette will automatically
fast forward to the next sound signal.
Switching off the skip blank function
�
Press the
SB key.
The highlighted
SB in the display disap-
pears.Dolby NR
1 (noise reduction system)
To enable optimum sound reproduction of
cassettes recorded using Dolby B NR, the
Dolby NR system should be switched on.Switching on
�
Press the
NR key.
NR is highlighted in the display.
Switching off
�
Press the
NR key.
The highlighted
NR in the display disap-
pears.
1DOLBY and the double-D symbolÙ are trade-
marks of Dolby Laboratories Licensing Corpora-
tion.
The Dolby noise reduction system is manufactured
under license from Dolby Laboratories Licensing
Corporation.iThe Dolby NR function should be
switched off when playing cassettes
not recorded with Dolby B NR.
Page 157 of 409

156 Controls in detailAudio systemCD changer operation
General notes
Should excessively high temperatures oc-
cur while in CD mode,
CD TEMP HIGH
will
appear on the display and the CD will be
muted. The unit will then switch back to
the last operating mode used until the tem-
perature has decreased to a safe operating
level.
Should excessively low temperatures oc-
cur while in CD mode,
CD TEMP LOW
will ap-
pear on the display, but the CD will
continue to play.
Handle CDs carefully to prevent interfer-
ence during playback. Avoid fingerprints
and dust on CDs. Do not write on CDs or
apply any labels or other material to them.Only use original CDs. Using copied CDs
may create problems during playback.
Clean CDs from time to time with a com-
mercially available cleaning cloth. Do not
use solvents, anti-static sprays, etc. for
cleaning. Replace the CD in its case after
use. Protect CDs from heat and direct sun-
light.
Only use CDs, which bear the label shown
and that conform to the compact disc
digital audio standard (IEC 60908). You
can therefore only use CDs with a maxi-
mum thickness of 1.3 mm.
iUse of CDs which do not meet this
standard may cause damage to the CD
changer. Do not play single-CDs
(80 mm) with an adapter.
Your CD drive has been designed to
play CDs which correspond to the
IEC 60908 standard.
If you insert thicker data carriers, e.g.
ones that have data on both sides (one
side with DVD data, the other side with
audio data), they cannot be ejected and
will damage the drive.Warning!
G
The CD changer is a Class 1 laser product.
There is a danger of invisible laser radiation
if the cover is opened or damaged.
Do not remove the cover. The CD changer
does not contain any parts which can be ser-
viced by the user. For safety reasons, have
any service work which may be necessary
performed only by qualified personnel.
Page 160 of 409
159 Controls in detail
Audio system
�
Ending scan�
Press2, d, c, f or
ebutton.
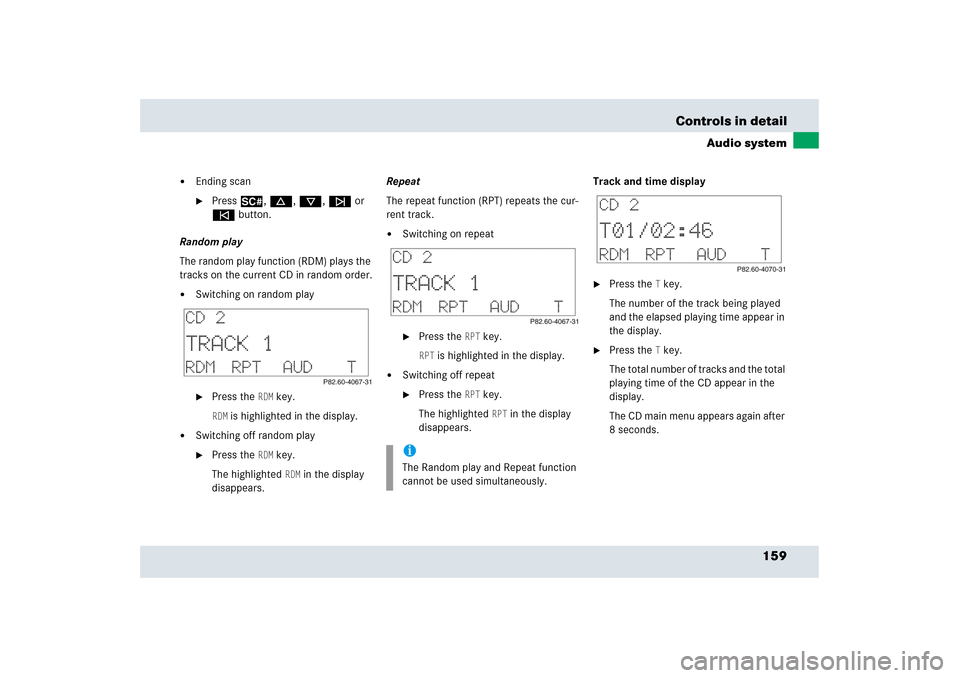
Random play
The random play function (RDM) plays the
tracks on the current CD in random order.
�
Switching on random play�
Press the
RDM
key.
RDM
is highlighted in the display.
�
Switching off random play�
Press the
RDM
key.
The highlighted RDM
in the display
disappears.Repeat
The repeat function (RPT) repeats the cur-
rent track.
�
Switching on repeat�
Press the
RPT
key.
RPT
is highlighted in the display.
�
Switching off repeat�
Press the
RPT
key.
The highlighted RPT
in the display
disappears.Track and time display
�
Press the
T key.
The number of the track being played
and the elapsed playing time appear in
the display.
�
Press the
T key.
The total number of tracks and the total
playing time of the CD appear in the
display.
The CD main menu appears again after
8 seconds.
iThe Random play and Repeat function
cannot be used simultaneously.
Page 162 of 409
161 Controls in detail
Audio system
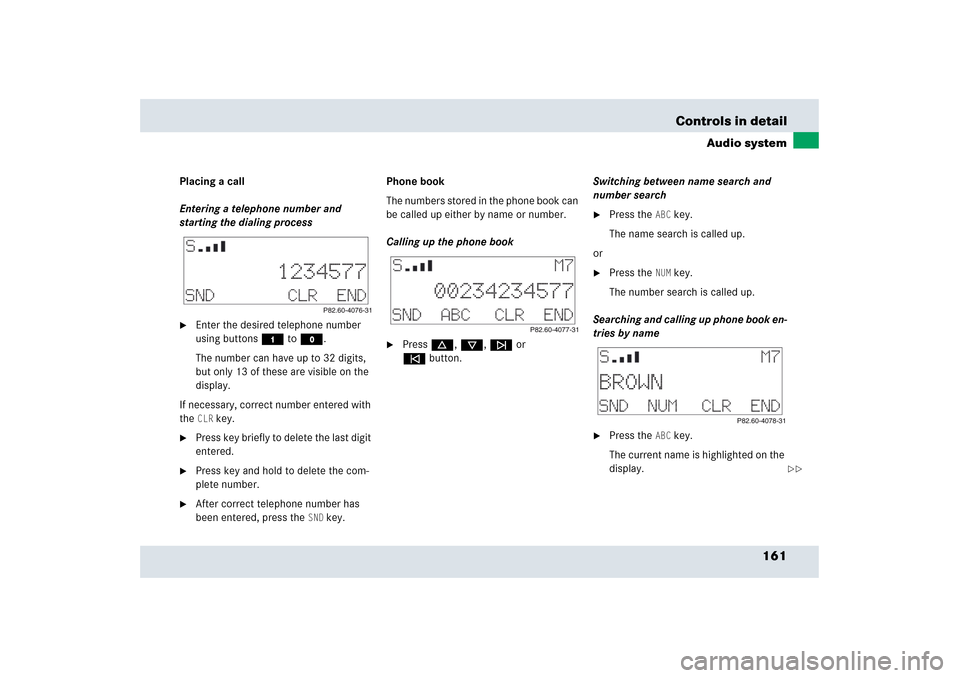
Placing a call
Entering a telephone number and
starting the dialing process�
Enter the desired telephone number
using buttons4 toM.
The number can have up to 32 digits,
but only 13 of these are visible on the
display.
If necessary, correct number entered with
the CLR
key.
�
Press key briefly to delete the last digit
entered.
�
Press key and hold to delete the com-
plete number.
�
After correct telephone number has
been entered, press the
SND
key.Phone book
The numbers stored in the phone book can
be called up either by name or number.
Calling up the phone book
�
Pressd, c, f or
ebutton.Switching between name search and
number search
�
Press the
ABC
key.
The name search is called up.
or
�
Press the
NUM
key.
The number search is called up.
Searching and calling up phone book en-
tries by name
�
Press the
ABC
key.
The current name is highlighted on the
display.
��
Page 175 of 409
174 Controls in detailAutomatic transmissionStopping
When you stop briefly, e.g. at traffic lights:�
Leave the transmission in gear.
�
Hold the vehicle with the brake.
When you stop longer with the engine
idling and/or on a hill:
�
Set the parking brake.
�
Move the gear selector lever to
positionP.Maneuvering
When you maneuver in tight areas,
e.g. when pulling into a parking space:
�
Control the vehicle speed by gradually
releasing the brakes.
�
Accelerate gently.
�
Never abruptly step on the accelerator.
Working on the vehicle
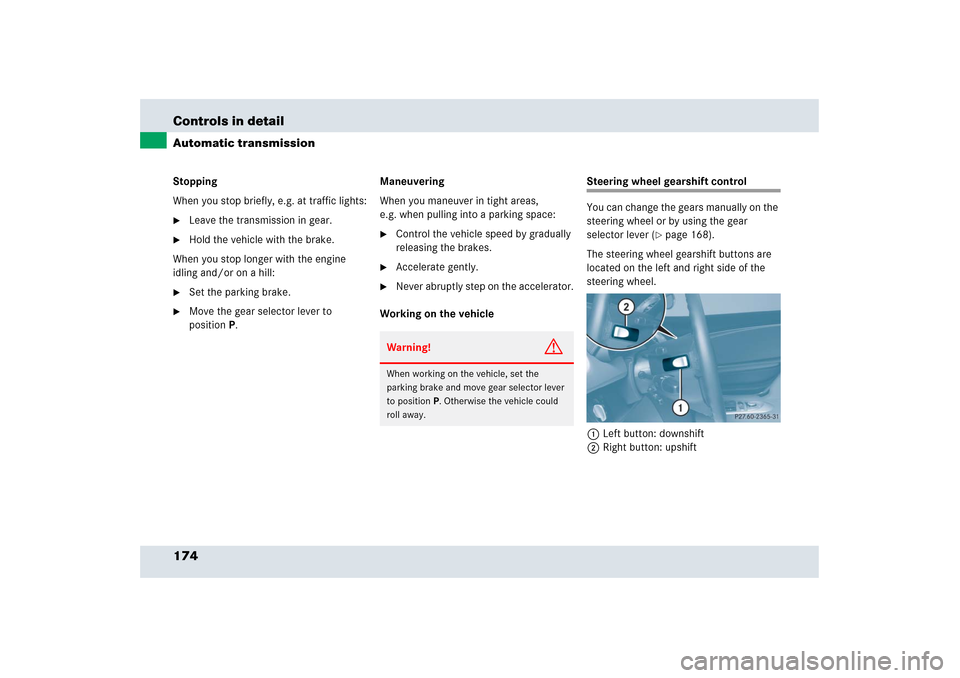
Steering wheel gearshift control
You can change the gears manually on the
steering wheel or by using the gear
selector lever (
�page 168).
The steering wheel gearshift buttons are
located on the left and right side of the
steering wheel.
1Left button: downshift
2Right button: upshift
Warning!
G
When working on the vehicle, set the
parking brake and move gear selector lever
to positionP. Otherwise the vehicle could
roll away.
Page 180 of 409
 and adjusting the mirrors,
see (�page 44).
Headlamp cleaning system
The switch is lo")
179 Controls in detail
Good visibility
�Good visibility
For information on the windshield wipers,
see (
�page 54) and adjusting the mirrors,
see (�page 44).
Headlamp cleaning system
The switch is located on the left side of the
dashboard.
1To clean the headlamps�
Switch on the ignition (
�page 40).
�
Press switch 1.
The headlamps are cleaned with a
high-pressure water jet.For information on filling up the washer
reservoir, see “Windshield washer system
and headlamp cleaning system”
(
�page 252).
Rear view mirrors
For more information on setting the rear
view mirrors, see “Mirrors” (
�page 44).
Auto-dimming mirror
The reflection brightness of the interior
rear view mirror will respond automatically
to glare when
�
the ignition is switched on
and
�
incoming light from headlamps falls on
the sensor in the interior rear view
mirror.
The rear view mirror will not react if
�
reverse gearR is engaged
�
the interior lighting is turned on
Warning!
G
The auto-dimming function does not react if
incoming light is not aimed directly at sen-
sors in the interior rear view mirror.
Glare can endanger you and others.Warning!
G
In case of an accident, liquid electrolyte may
escape from the mirror housing if the mirror
glass breaks.
Electrolyte has an irritating effect. Do not
allow the liquid to come into contact with
eyes, skin, clothing, or respiratory system.
In case it does, immediately flush affected
area with water, and seek medical help if
necessary.
Page 182 of 409

181 Controls in detail
Good visibility
Rear window defroster
The rear window defroster uses a large
amount of power. To keep the battery
drain to a minimum, switch off the
defroster as soon as the rear window is
clear. The defroster is automatically
deactivated after approximately
6 to 17 minutes of operation depending on
the outside temperature.
Activating�
Press buttonF on the climate
control panel (
�page 184).
The indicator lamp on the button
comes on.Deactivating
�
Press buttonF again.
The indicator lamp on the button goes
out.
iIf sunlight enters through a side
window, close mirror cover1
(if open), disengage sun visor from
mounting3 and pivot to the side.
Warning!
G
Any accumulation of snow and ice should be
removed from the rear window before
driving. Visibility could otherwise be
impaired, endangering you and others.
!If the rear window defroster switches
off too soon and the indicator lamp
starts flashing, this means that too
many electrical consumers are
operating simultaneously and there is
insufficient voltage in the battery. The
system responds automatically by
deactivating the rear window defroster.
As soon as the battery has sufficient
voltage, the rear window defroster
automatically turns itself back on.
Page 186 of 409

185 Controls in detail
Automatic climate control
The automatic climate control is operation-
al whenever the engine is running. You can
operate the climate control system in ei-
ther the automatic or manual mode. The
system cools or heats the interior depend-
ing on the selected interior temperature
and the current outside temperature.Nearly all dust particles, pollutants and
odors are filtered out before outside air en-
ters the passenger compartment through
the air distribution system.
Adjusting the temperature
Use temperature controls6 andb to
separately adjust the air temperature on
each side of the passenger compartment.
You should raise or lower the temperature
setting in small increments, preferably
starting at 72°F (22°C).
Increasing�
Turn the outer adjustment ring slightly
to the right.
The automatic climate control system
will correspondingly adjust the interior
air temperature.
Warning!
G
When operating the automatic climate con-
trol, the air that enters the passenger com-
partment through the air vents can be very
hot or very cold (depending on the set tem-
perature). This may cause burns or frostbite
to unprotected skin in the immediate area of
the air vents. Always keep sufficient dis-
tance between unprotected parts of the
body and the air vents. If necessary, use the
air distribution controls (
�page 187) to di-
rect the air to air vents in the vehicle interior
that are not in the immediate area of unpro-
tected skin.
Warning!
G
Follow the recommended settings for heat-
ing and cooling given on the following pag-
es. Otherwise the windows could fog up,
impairing visibility and endangering you and
others.iIf the vehicle interior is hot, ventilate
the interior before driving off.
Keep the air intake grille in front of the
windshield free of snow and debris.
iWhen operating the climate control
system in automatic mode, you will
only rarely need to adjust the tempera-
ture, air volume and air distribution.