Page 88 of 417

87 Safety and Security
Driving and safety systems
Even if the ESP has been turned off, it is
still active in the following situations:
�when braking
�at vehicle speeds up to approximately
37 mph (60 km / h), if one wheel reach-
es the grip limit, e.g. when the street is
icy on one side
The brake is applied until the wheel re-
gains sufficient traction.
If one or more drive wheels are spinning,
the ESP warning lampv in the instru-
ment cluster flashes, regardless of the
speed.Switching on the ESP
�Press lower half of switch.
The ESP warning lampv in the in-
strument cluster goes out. You are now
again in normal driving mode.
For more information, see “Practical hints”
(
�page 295).
i
If the ESP is switched off, it will be au-
tomatically activated when exceeding a
vehicle speed of 37 mph (60 km / h) or
exceeding a severity threshold of side
acceleration.
Warning!G
When the ESP warning lampv is
illuminated continuously, the ESP is
switched off.
Adapt your speed and driving to the prevail-
ing road conditions and to the non-operating
status of the ESP.
Page 89 of 417

88 Safety and Security
Anti-theft systems
Immobilizer
The immobilizer prevents unauthorized
persons from starting your vehicle.
Activating
Removing the SmartKey from the starter
switch activates the immobilizer.
Deactivating
Inserting the SmartKey in the starter
switch deactivates the immobilizer.Anti-theft alarm
Once the alarm system has been armed, a
visual and audible alarm is triggered when
someone opens
�a door
�the tailgate
�the hood
The alarm will stay on even if the activating
element (a door, for example) is immedi-
ately closed.
The alarm system will also be triggered
when
�someone attempts to raise the vehicle
�the vehicle is opened with the mechan-
ical key
�someone opens a door from the inside
�someone opens the tailgate from the
insideArming the alarm system
The alarm system is armed after locking
the vehicle with the SmartKey. The turn
signal lamps blink three times to indicate
that the alarm system is being armed.
A red lamp in the tow-away alarm switch
begins to blink after arming the alarm
system (
�page 28).
i
In case the engine cannot be started
(yet the vehicle’s battery is charged),
the system is not operational. Contact
an authorized Mercedes-Benz Light
Truck Center or call
1-800-FOR-MERCedes (in the USA), or
1-800-387-0100 (in Canada).
i
If the alarm stays on for more than
20 seconds, an emergency call is initi-
ated automatically by the Tele Aid sys-
tem (
�page 202) provided Tele Aid
service was subscribed to and properly
activated, and that necessary cellular
service and GPS coverage are avail-
able.
Page 90 of 417

89 Safety and Security
Anti-theft systems
Disarming the alarm system
The alarm system is disarmed when you
unlock your vehicle with the SmartKey. The
turn signal lamps blink once to indicate
that the alarm system is disarmed.Canceling the alarm
To cancel the alarm:
�Press the Œ or ‹ button on the
SmartKey.
or
�Insert the SmartKey in the starter
switch.
Tow-away alarm
Once the tow-away alarm is armed, a visual
and audible alarm will be triggered when
someone attempts to raise the vehicle.i
If the turn signal lamps do not blink
three times, one of the following ele-
ments may not be properly closed:
�a door
�the tailgate
�the hood
Close the respective element and lock
the vehicle again.
i
The alarm system will rearm automati-
cally after approximately 40 seconds if
neither a door nor the tailgate was
opened.
i
The tow-away protection alarm is trig-
gered, for example, if the vehicle is lift-
ed on one side.
If the alarm stays on for more than
20 seconds, an emergency call is initi-
ated automatically by the Tele Aid sys-
tem provided Tele Aid service was
subscribed to and properly activated,
and that necessary cellular service and
GPS coverage are available.
Page 91 of 417

90 Safety and Security
Anti-theft systems
Arming tow-away alarm
When you lock your vehicle, the tow-away
alarm is automatically armed.
When you unlock your vehicle, the
tow-away protection disarms
automatically.
Disarming tow-away alarm
To prevent triggering the tow-away alarm
feature, switch off the tow-away alarm be-
fore towing the vehicle, or when parking on
a surface subject to movement, such as
a ferry or auto train.The switch is located on the center con-
sole.
1Tow-away alarm off switch
2Indicator lamp
�Switch off the ignition and remove the
SmartKey from the starter switch.
�Press upper half1 of the switch.
Indicator lamp2 in the switch comes
on briefly.
�Lock your vehicle with the SmartKey.
The tow-away alarm remains disarmed un-
til you lock your vehicle again.
Canceling the tow-away alarm
To cancel the alarm:
�Press the Œ or ‹ button on the
SmartKey.
or
�Insert the SmartKey in the starter
switch.
i
You cannot disarm the tow-away alarm
when the ignition is switched on.
Page 104 of 417
103 Controls in detail
Seats
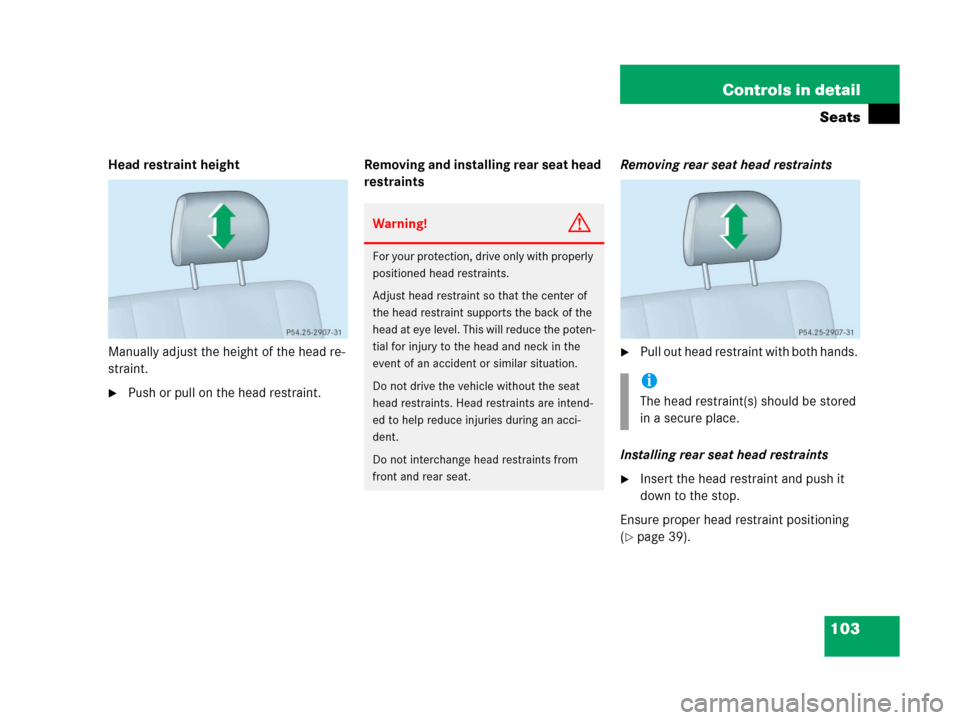
Head restraint height
Manually adjust the height of the head re-
straint.
�Push or pull on the head restraint.Removing and installing rear seat head
restraintsRemoving rear seat head restraints
�Pull out head restraint with both hands.
Installing rear seat head restraints
�Insert the head restraint and push it
down to the stop.
Ensure proper head restraint positioning
(
�page 39).
Warning!G
For your protection, drive only with properly
positioned head restraints.
Adjust head restraint so that the center of
the head restraint supports the back of the
head at eye level. This will reduce the poten-
tial for injury to the head and neck in the
event of an accident or similar situation.
Do not drive the vehicle without the seat
head restraints. Head restraints are intend-
ed to help reduce injuries during an acci-
dent.
Do not interchange head restraints from
front and rear seat.
i
The head restraint(s) should be stored
in a secure place.
Page 108 of 417

107 Controls in detail
Memory function
�Memory function
The memory button and stored position
switch are located on the door.
You can store up to three different settings
per SmartKey.
The following settings are saved for each
stored position:
�Driver’s seat and seat backrest posi-
tion, head restraint position
�Steering wheel position
�Driver’s side exterior rear view mirror
position
�Passenger-side exterior rear view
mirror positionThe following settings are not key-depen-
dent. They are stored when using the but-
tons on the front passenger door:
�Front passenger seat and backrest po-
sition, head restraint position.
These key-dependent memory settings
can be deactivated if desired
(
�page 144).
!
Prior to operating the vehicle, the driv-
er should check and adjust the seat
height, seat position fore and aft, and
seat backrest angle if necessary, to
ensure adequate control, reach and
comfort. The head restraint should also
be adjusted for proper height. See also
the section on airbags (
�page 63) for
proper seat positioning.
In addition, adjust the steering wheel to
ensure adequate control, reach, opera-
tion and comfort. Both the interior and
exterior rear view mirrors should be ad-
justed for adequate rear vision.
Fasten seat belts. Infants and small
children should be seated in a properly
secured restraint system that complies
with U.S. Federal Motor Vehicle Safety
Standards 213 and 225 and Canadian
Motor Vehicle Safety Standards 213
and 210.2.
Warning!G
Do not activate the memory function while
driving. Activating the memory function
while driving could cause the driver to lose
control of the vehicle.
Page 114 of 417

113 Controls in detail
Lighting
Locator lighting and night security illu-
mination
The locator lighting and the night security
illumination are described in the “Control
system section”, see (
�page 139) and
(
�page 140).
Exterior rear view mirror lamps
If the vehicle is centrally unlocked in the
darkness, the lamps in the exterior rear
view mirrors come on.
If a door is opened, the lamp on this side
goes out. If no doors are opened, the
lamps will switch off:
�after a maximum of 40 seconds
�immediately, when you switch on the
ignition (
�page 35)Fog lamps
Front fog lamps
�Switch on the low beam headlamps
(
�page 110).
�Pull out the exterior lamp switch to first
stop.
The front fog lamps switch on.
The green indicator lamp‡ in the
exterior lamp switch comes on
(
�page 110).
�Push in the exterior lamp switch.
The front fog lamps switch off.
The green indicator lamp‡ in the
exterior lamp switch goes out.
Warning!G
In low ambient lighting or foggy conditions,
only switch from position UtoBwith
the vehicle at a standstill in a safe location.
Switching from UtoB will briefly
switch off the headlamps. Doing so while
driving in low ambient lighting conditions
may result in an accident.
i
Fog lamps will operate with the parking
lamps and/or low beam headlamps on.
Fog lamps should only be used in con-
junction with low beam headlamps.
Consult your State or Province Motor
Vehicle Regulations regarding allow-
able lamp operation.
i
Fog lamps cannot be switched on with
the exterior lamp switch in
positionU. For switching on the fog
lamps, turn the exterior lamp switch to
positionB first.
Page 136 of 417
135 Controls in detail
Control system
The table below shows what settings can
be changed within the various menus.
Detailed instructions on making individual
settings can be found on the following
pages.
INSTRUMENT CLUSTERLIGHTINGVEHICLECONVENIENCE
(�page 136)(�page 138)(�page 142)(�page 143)
Select time display modeSet daytime running lamp mode
(USA only)Set station selection mode
(radio)Activate easy-entry/exit feature
Select temperature display
modeSet locator lightingSet automatic lockingSet key-dependency
Select speedometer display
modeSet night security illuminationSet parking position for exterior
rear view mirror
Select languageSet interior lighting delayed
shut-off
Select display (speed display or
outside temperature)