Page 395 of 473
394 Practical hints
Replacing bulbs
Safe vehicle operation depends on proper
exterior lighting and signaling. It is there-
fore essential that all bulbs and lamp
assemblies are in good working order at all
times.
Correct headlamp adjustment is extremely
important. Have headlamps checked and
readjusted at regular intervals and when a
bulb has been replaced. See an authorized
Mercedes-Benz Center for headlamp
adjustment.i
If the headlamps or front fog lamps are
fogged up on the inside as a result of
high humidity, driving the vehicle a
distance with the lights on should clear
up the fogging.
i
Substitute bulbs will be brought into
use when lamps malfunction. Observe
the messages in the multifunction
display (
�page 374).
Page 397 of 473

396 Practical hints
Replacing bulbs
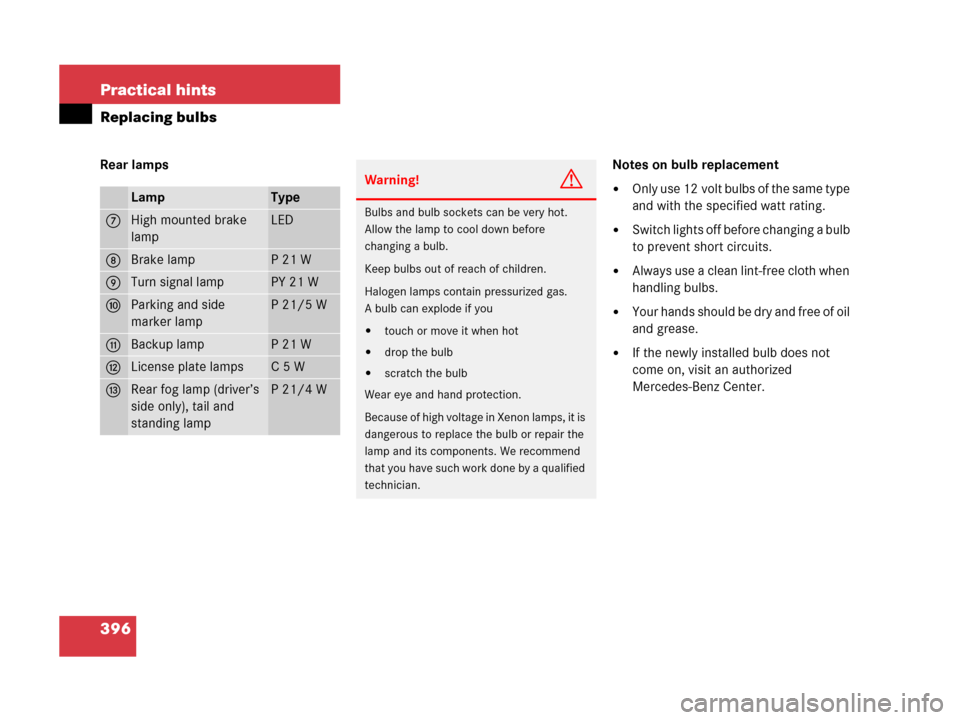
Rear lamps Notes on bulb replacement
�Only use 12 volt bulbs of the same type
and with the specified watt rating.
�Switch lights off before changing a bulb
to prevent short circuits.
�Always use a clean lint-free cloth when
handling bulbs.
�Your hands should be dry and free of oil
and grease.
�If the newly installed bulb does not
come on, visit an authorized
Mercedes-Benz Center.
LampType
7High mounted brake
lampLED
8Brake lampP21W
9Turn signal lampPY 21 W
aParking and side
marker lampP 21/5 W
bBackup lampP21W
cLicense plate lampsC5W
dRear fog lamp (driver’s
side only), tail and
standing lampP 21/4 W
Warning!G
Bulbs and bulb sockets can be very hot.
Allow the lamp to cool down before
changing a bulb.
Keep bulbs out of reach of children.
Halogen lamps contain pressurized gas.
A bulb can explode if you
�touch or move it when hot
�drop the bulb
�scratch the bulb
Wear eye and hand protection.
Because of high voltage in Xenon lamps, it is
dangerous to replace the bulb or repair the
lamp and its components. We recommend
that you have such work done by a qualified
technician.
Page 408 of 473

407 Practical hints
Flat tire
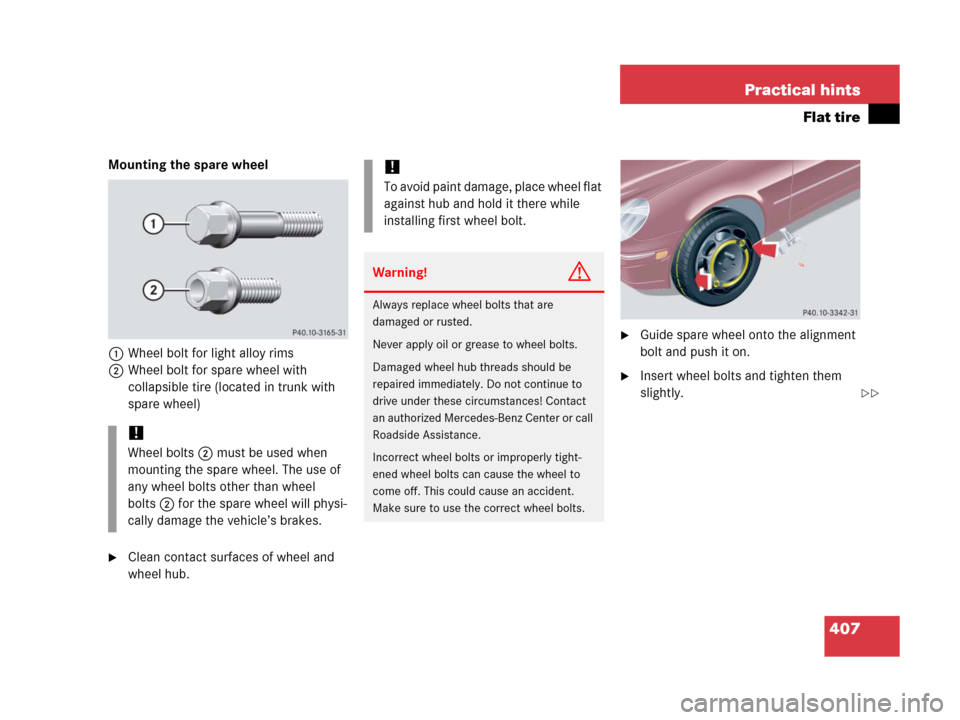
Mounting the spare wheel
1Wheel bolt for light alloy rims
2Wheel bolt for spare wheel with
collapsible tire (located in trunk with
spare wheel)
�Clean contact surfaces of wheel and
wheel hub.
�Guide spare wheel onto the alignment
bolt and push it on.
�Insert wheel bolts and tighten them
slightly.
!
Wheel bolts2 must be used when
mounting the spare wheel. The use of
any wheel bolts other than wheel
bolts2 for the spare wheel will physi-
cally damage the vehicle’s brakes.
!
To avoid paint damage, place wheel flat
against hub and hold it there while
installing first wheel bolt.
Warning!G
Always replace wheel bolts that are
damaged or rusted.
Never apply oil or grease to wheel bolts.
Damaged wheel hub threads should be
repaired immediately. Do not continue to
drive under these circumstances! Contact
an authorized Mercedes-Benz Center or call
Roadside Assistance.
Incorrect wheel bolts or improperly tight-
ened wheel bolts can cause the wheel to
come off. This could cause an accident.
Make sure to use the correct wheel bolts.
��
Page 409 of 473

408 Practical hints
Flat tire
�Unscrew the alignment bolt, install last
wheel bolt and tighten slightly.Inflating the collapsible tire
�Take the electric air pump out of the
trunk (
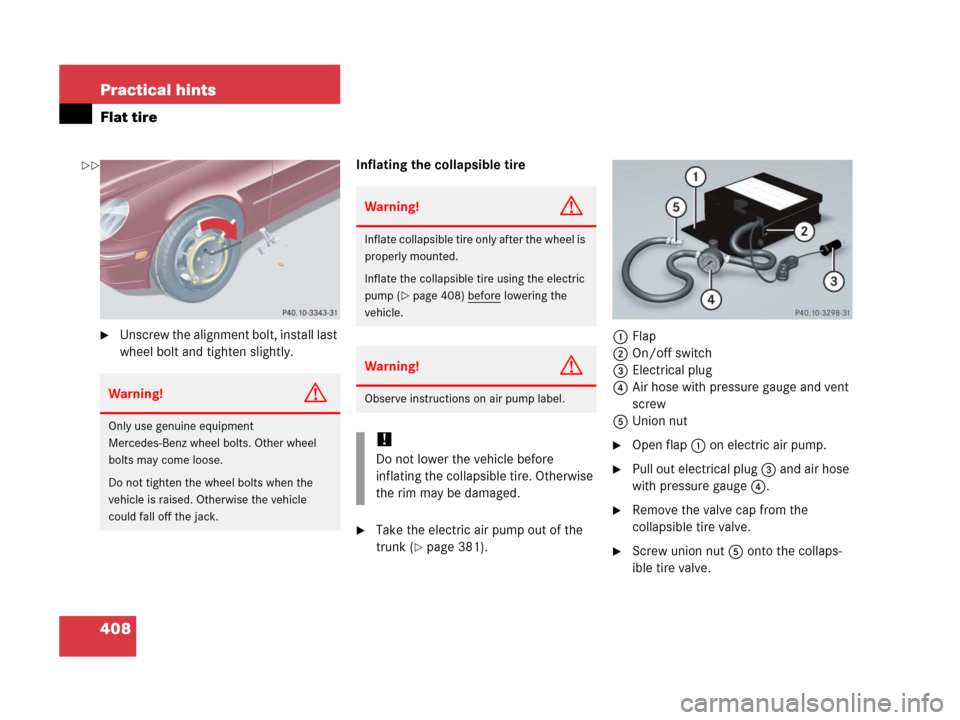
�page 381).1Flap
2On/off switch
3Electrical plug
4Air hose with pressure gauge and vent
screw
5Union nut
�Open flap 1 on electric air pump.
�Pull out electrical plug 3 and air hose
with pressure gauge 4.
�Remove the valve cap from the
collapsible tire valve.
�Screw union nut5 onto the collaps-
ible tire valve.
Warning!G
Only use genuine equipment
Mercedes-Benz wheel bolts. Other wheel
bolts may come loose.
Do not tighten the wheel bolts when the
vehicle is raised. Otherwise the vehicle
could fall off the jack.
Warning!G
Inflate collapsible tire only after the wheel is
properly mounted.
Inflate the collapsible tire using the electric
pump (
�page 408) before lowering the
vehicle.
Warning!G
Observe instructions on air pump label.
!
Do not lower the vehicle before
inflating the collapsible tire. Otherwise
the rim may be damaged.
��
Page 410 of 473

409 Practical hints
Flat tire
�Insert electrical plug 3 into vehicle
cigarette lighter socket (
�page 263).
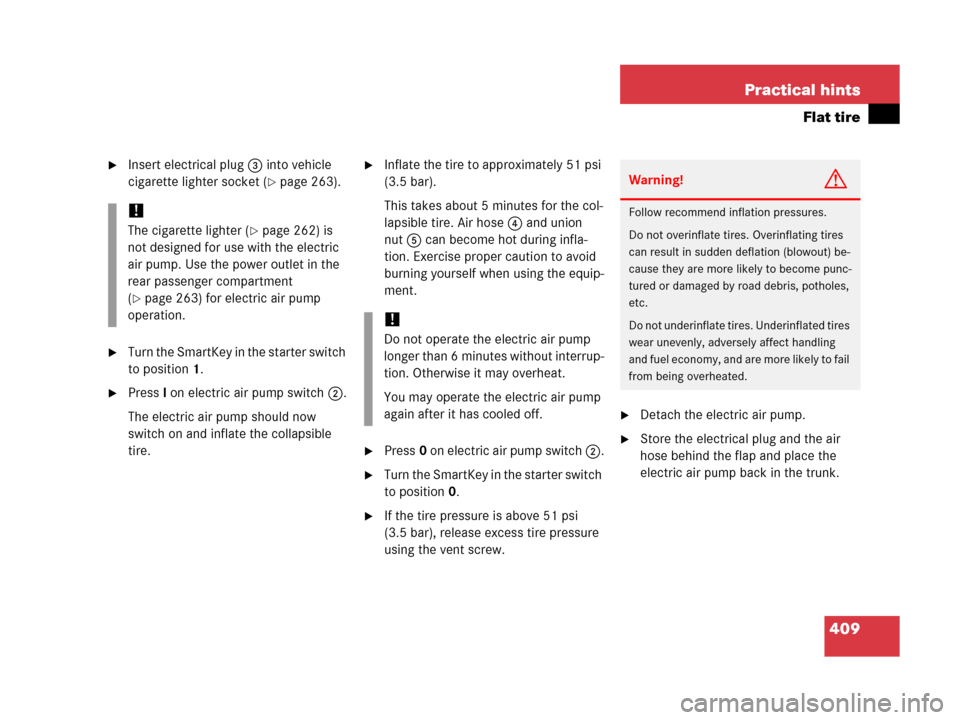
�Turn the SmartKey in the starter switch
to position1.
�PressI on electric air pump switch 2.
The electric air pump should now
switch on and inflate the collapsible
tire.
�Inflate the tire to approximately 51 psi
(3.5 bar).
This takes about 5 minutes for the col-
lapsible tire. Air hose 4 and union
nut5 can become hot during infla-
tion. Exercise proper caution to avoid
burning yourself when using the equip-
ment.
�Press0 on electric air pump switch 2.
�Turn the SmartKey in the starter switch
to position0.
�If the tire pressure is above 51 psi
(3.5 bar), release excess tire pressure
using the vent screw.
�Detach the electric air pump.
�Store the electrical plug and the air
hose behind the flap and place the
electric air pump back in the trunk.
!
The cigarette lighter (�page 262) is
not designed for use with the electric
air pump. Use the power outlet in the
rear passenger compartment
(
�page 263) for electric air pump
operation.
!
Do not operate the electric air pump
longer than 6 minutes without interrup-
tion. Otherwise it may overheat.
You may operate the electric air pump
again after it has cooled off.
Warning!G
Follow recommend inflation pressures.
Do not overinflate tires. Overinflating tires
can result in sudden deflation (blowout) be-
cause they are more likely to become punc-
tured or damaged by road debris, potholes,
etc.
Do not underinflate tires. Underinflated tires
wear unevenly, adversely affect handling
and fuel economy, and are more likely to fail
from being overheated.
Page 417 of 473

416 Practical hints
Jump starting
The battery is located in the engine
compartment on the right hand side. The
terminals for jump starting are located in
front of the battery.
�Make sure the two vehicles do not
touch.
�Turn off all electrical consumers.
�Apply parking brake.
�Shift gear selector lever to positionP.
�Open the hood (�page 297).
�Flip up cover positive under hood
terminal2 in front of the filter box
(
�page 411).1Positive terminal of charged battery
2Positive under hood terminal in front of
discharged battery
3Negative under hood terminal in front
of discharged battery
4Negative terminal of charged battery
�Connect positive terminal1 of the
charged battery with positive under
hood terminal2 in front of the filter
box with the jumper cables. Clamp ca-
ble to charged battery1 first.
�Start engine of the vehicle with the
charged battery and run at idle speed.
�Connect negative terminal4 of the
charged battery with negative under
hood terminal3 in front of the filter
box with the jumper cables. Clamp ca-
ble to charged battery4 first.
�Start the engine of the disabled
vehicle.
You can now again turn on the electrical
consumers. Do not turn on the lights under
any circumstances.
�Remove the jumper cables first from
negative terminals3 and4 and then
from positive terminals2 and1.
You can now turn on the lights.
�Have the battery checked at the near-
est authorized Mercedes-Benz Center.
Warning!G
Keep flames or sparks away from battery.
Do not smoke.
Observe all safety instructions and precau-
tions when handling automotive batteries
(
�page 303).
!
Never invert the terminal connections!
Page 432 of 473
431 Technical data
Rims and Tires
Same size tires
ModelC55AMG
Winter tires1,2
1Radial-ply tires2Not available as factory equipment.
205/50 R17 89H M+S.
Rims (light alloy)7.5 J x 17 H2
Wheel offset1.46 in (37 mm)
Winter tires1,2,3
3For use with snow chains contact an authorized Mercedes-Benz Center.
225/45 R17 91H M+S.
Rims (light alloy)7.5 J x 17 H2
Wheel offset1.46 in (37 mm)
Winter tires1,2,3225/40 R18 92H XL (Extra Load) M+S.
Rims (light alloy)7.5 J x 18 H2
Wheel offset1.46 in (37 mm)
Page 433 of 473
432 Technical data
Rims and Tires
Mixed size tires
ModelC55AMG
Front axle:
Rims (light alloy)7.5 J x 18 H2
Wheel offset1.18 in (30 mm)
Summer tires1, 2225/40 ZR18 92Y XL (Extra Load)
Rear axle:
Rims (light alloy)8.5 J x 18 H2
Wheel offset1.34 in (34 mm)
Summer tires1, 2245/35 ZR18 92Y XL (Extra Load)
1Radial-ply tires2Must not be used with snow chains.