2006 KIA Sportage tow
[x] Cancel search: towPage 14 of 354
357
1
2
3
4
5
6
7
8
9
Knowing your vehicle
Airbag system components The main components of your SRS
are:
To indicate that your vehicle isequipped with airbags, the corre-
sponding airbag covers are
marked with “SRS AIRBAG”.
- Driver’s airbag (see page 3- 59)
- Passenger’s airbag (see page 3- 60)
- Side airbag (if equipped, see page 3- 67)
- Curtain airbag (if equipped, see page 3- 67)
A diagnostic system that continual- ly monitors the system operation.
Airbag warning light to warn you of a possible problem with the sys-
tem.
Emergency power backup in case your car’s electrical system is dis-
connected in a crash. The SRS uses a collection of sen-
sors to gather information about the
driver’s and front passenger’s seat
position, the driver’s and front pas-
senger’s safety belt usage and
impact severity.
The driver's and front passenger's
seat position sensors, which are
installed on the seat track let the
airbag control module know where
the seats are positioned. Similarly,
the safety belt usage sensors meas-
ure if the driver and front passenger’s
safety belts are fastened. These sen-
sors provide the ability to control the
SRS deployment based on how
close the driver’s seat is to the steer-
ing wheel, how close the passen-
ger’s seat is to the instrument panel,
whether or not the safety belts are
fastened, and the severity of the
impact.
(Continued)
If your vehicle has been sub-
jected to flood conditions (e.g.
soaked carpeting/standing
water on the floor of the vehi-
cle, etc.) or if your vehicle has
become flood damaged in any
way, do not attempt to start
the vehicle or put the key in
the ignition. Have the vehicle
towed to an authorized Kia
dealer for inspection and nec-
essary repairs.
Disregarding this precaution
may cause an unexpected
airbag deployment, which
could result in serious per-
sonal injury or death.
KM CAN (ENG) 3 (55~)new.qxd 7/29/05 9:37 AM Page 57
Page 21 of 354
Knowing your vehicle64
3
1
2
3
4
5
6
7
8
9
(Continued)
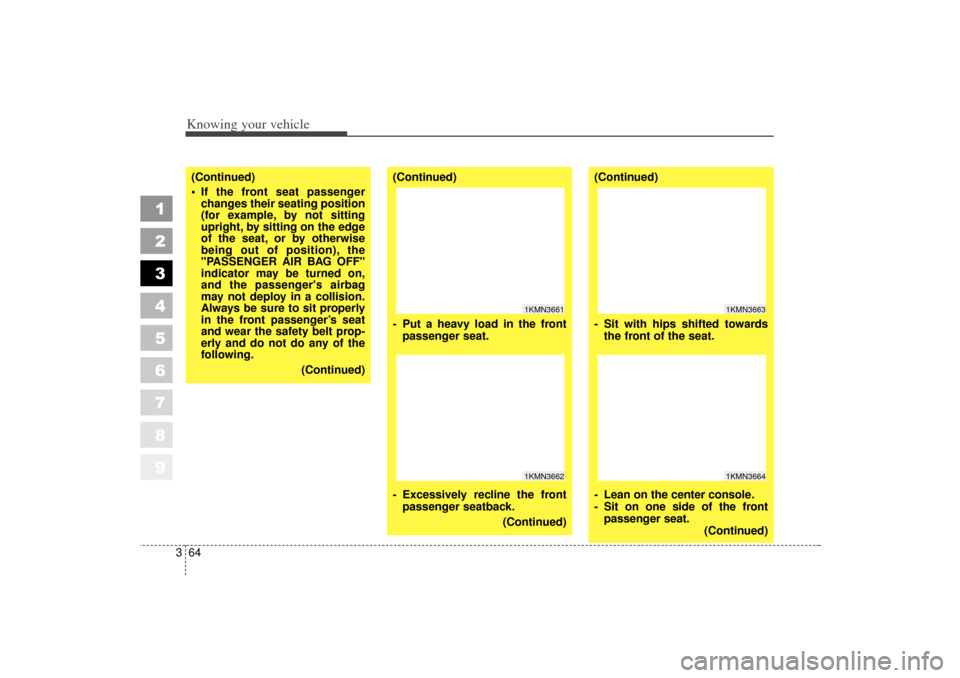
If the front seat passenger
changes their seating position
(for example, by not sitting
upright, by sitting on the edge
of the seat, or by otherwise
being out of position), the
"PASSENGER AIR BAG OFF"
indicator may be turned on,
and the passenger's airbag
may not deploy in a collision.
Always be sure to sit properly
in the front passenger’s seat
and wear the safety belt prop-
erly and do not do any of the
following.
(Continued)
(Continued)
- Put a heavy load in the frontpassenger seat.
- Excessively recline the front passenger seatback.
(Continued)
1KMN36611KMN3662
(Continued)
- Sit with hips shifted towardsthe front of the seat.
- Lean on the center console.
- Sit on one side of the front passenger seat. (Continued)
1KMN36631KMN3664
KM CAN (ENG) 3 (55~)new.qxd 7/29/05 9:37 AM Page 64
Page 43 of 354
Knowing your vehicle86
3
1
2
3
4
5
6
7
8
9
Electric remote control
(if equipped)
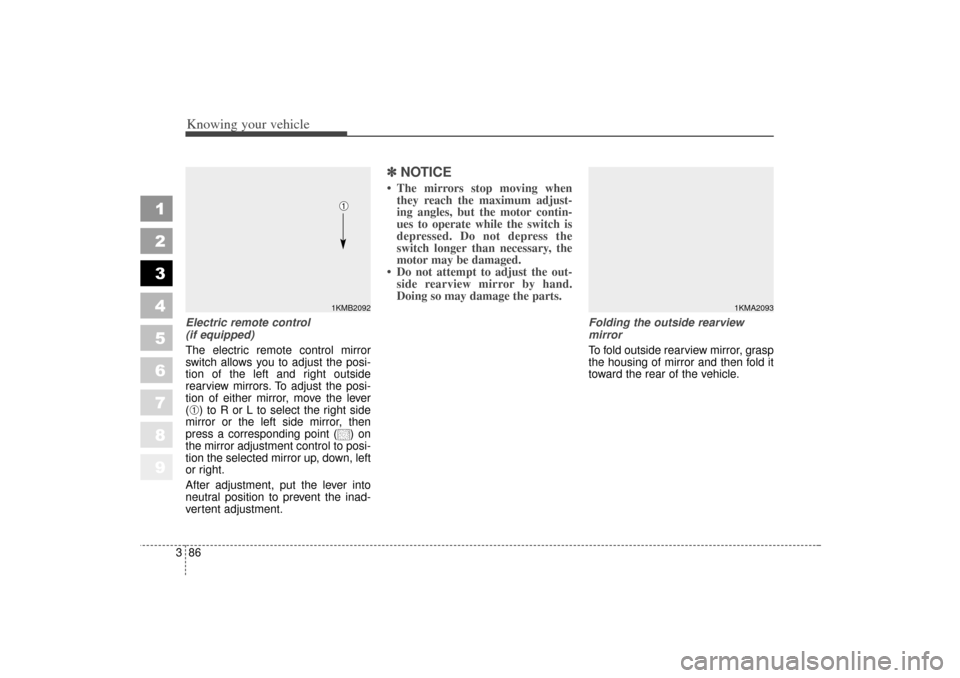
The electric remote control mirror
switch allows you to adjust the posi-
tion of the left and right outside
rearview mirrors. To adjust the posi-
tion of either mirror, move the lever
(➀) to R or L to select the right side
mirror or the left side mirror, then
press a corresponding point ( ) on
the mirror adjustment control to posi-
tion the selected mirror up, down, left
or right.
After adjustment, put the lever into
neutral position to prevent the inad-
vertent adjustment.
✽ ✽ NOTICE The mirrors stop moving when
they reach the maximum adjust-
ing angles, but the motor contin-
ues to operate while the switch is
depressed. Do not depress the
switch longer than necessary, the
motor may be damaged.
Do not attempt to adjust the out- side rearview mirror by hand.
Doing so may damage the parts.
Folding the outside rearview
mirror
To fold outside rearview mirror, grasp
the housing of mirror and then fold it
toward the rear of the vehicle.
1KMB2092➀
1KMA2093
KM CAN (ENG) 3 (55~)new.qxd 7/29/05 9:37 AM Page 86
Page 44 of 354
387
1
2
3
4
5
6
7
8
9
Knowing your vehicle
Outside rearview mirror heater
(if equipped)
The outside rearview mirror heater is
actuated in connection with the rear
window defroster. To heat the outside
rearview mirror glass, push the but-
ton for the rear window defroster.
The rearview mirror heater (and rear
window defroster) will not operate
unless the engine is running.
The outside rearview mirror glass will
be heated for defrosting or defogging
and will give you improved rear
vision in inclement weather condi-
tions. Push the button again to turn
the heater off. The outside rearview
mirror heater automatically turns off
after 20 minutes.
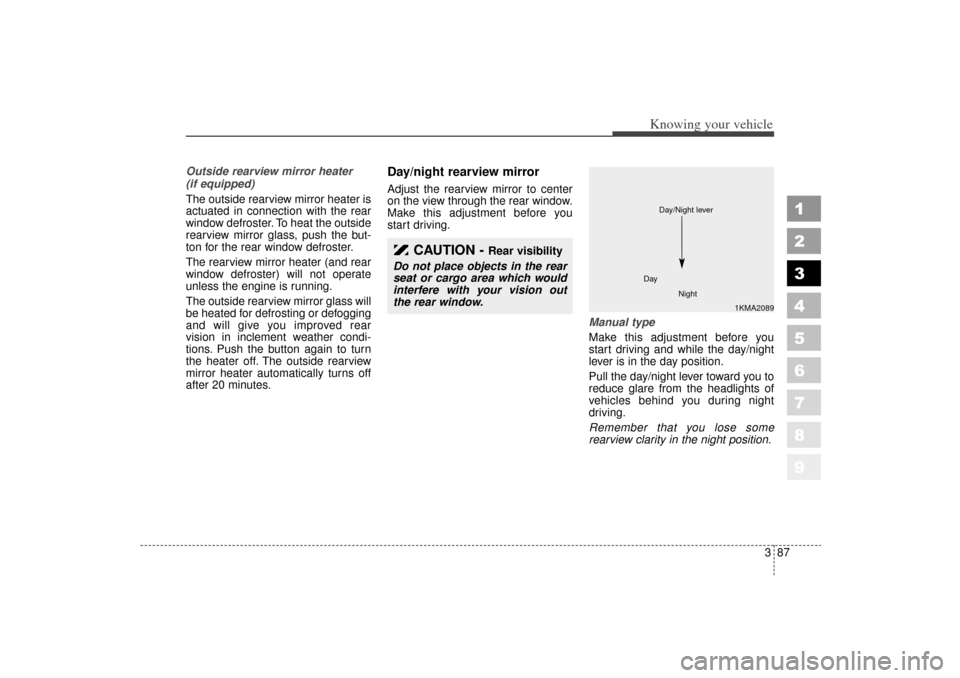
Day/night rearview mirror Adjust the rearview mirror to center
on the view through the rear window.
Make this adjustment before you
start driving.Manual type
Make this adjustment before you
start driving and while the day/night
lever is in the day position.
Pull the day/night lever toward you to
reduce glare from the headlights of
vehicles behind you during night
driving.
Remember that you lose some
rearview clarity in the night position.
CAUTION -
Rear visibility
Do not place objects in the rear
seat or cargo area which would
interfere with your vision out
the rear window.
1KMA2089
Day
Night
Day/Night lever
KM CAN (ENG) 3 (55~)new.qxd 7/29/05 9:37 AM Page 87
Page 45 of 354
Knowing your vehicle88
3
1
2
3
4
5
6
7
8
9
Electric type (if equipped)
The electric day/night rearview mir-
ror automatically controls the glare
from the headlights of the car behind
you in nighttime or low light driving
conditions. The sensor mounted in
the mirror senses the light level
around the vehicle, and through a
chemical reaction, automatically
controls the headlight glare (10% to
70 %) from vehicles behind you.
When the engine is running, the
glare is automatically controlled by
the sensor mounted in the rearview
mirror.
Whenever the shift lever is shifted
into reverse (R), the mirror will auto-
matically go to the brightest setting in
order to improve the drivers view
behind the vehicle.✽ ✽
NOTICEWhen cleaning the mirror, use a
paper towel or similar material
dampened with glass cleaner. Do not
spray glass cleaner directly on the
mirror as that may cause the liquid
cleaner to enter the mirror housing.
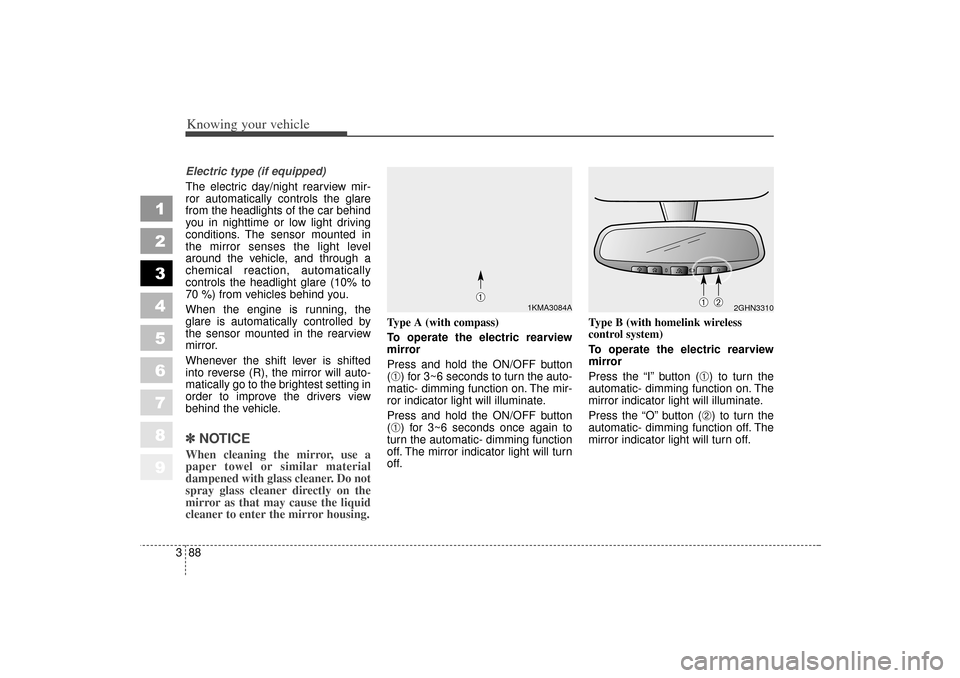
Type A (with compass)
To operate the electric rearview
mirror
Press and hold the ON/OFF button
(➀) for 3~6 seconds to turn the auto-
matic- dimming function on. The mir-
ror indicator light will illuminate.
Press and hold the ON/OFF button
(➀) for 3~6 seconds once again to
turn the automatic- dimming function
off. The mirror indicator light will turn
off. Type B (with homelink wireless
control system)
To operate the electric rearview
mirror
Press the “I” button (
➀) to turn the
automatic- dimming function on. The
mirror indicator light will illuminate.
Press the “O” button (➁) to turn the
automatic- dimming function off. The
mirror indicator light will turn off.
2GHN3310
➀
➁
1KMA3084A
➀
KM CAN (ENG) 3 (55~)new.qxd 7/29/05 9:37 AM Page 88
Page 70 of 354
Knowing your vehicle43
1
2
3
4
5
6
7
8
9
✽ ✽NOTICEKeep the transmitter away from
water or any liquid. If the keyless
entry system is inoperative due to
exposure to water or liquids, it will
not be covered by your manufactur-
er vehicle warranty. Operational distance may vary
depending upon the area the trans-
mitter is used in. For example, if the
vehicle is parked near police sta-
tions, government and public offices,
broadcasting stations, military instal-
lations, airports, or transmitting tow-
ers, etc. This device complies with
Industry Canada Standard RSS-
210.
Operation is subject to the fol-
lowing two conditions:
1. This device may not cause inter- ference, and
2. This device must accept any inter- ference, including interference that
may cause undesired operation of
the device.
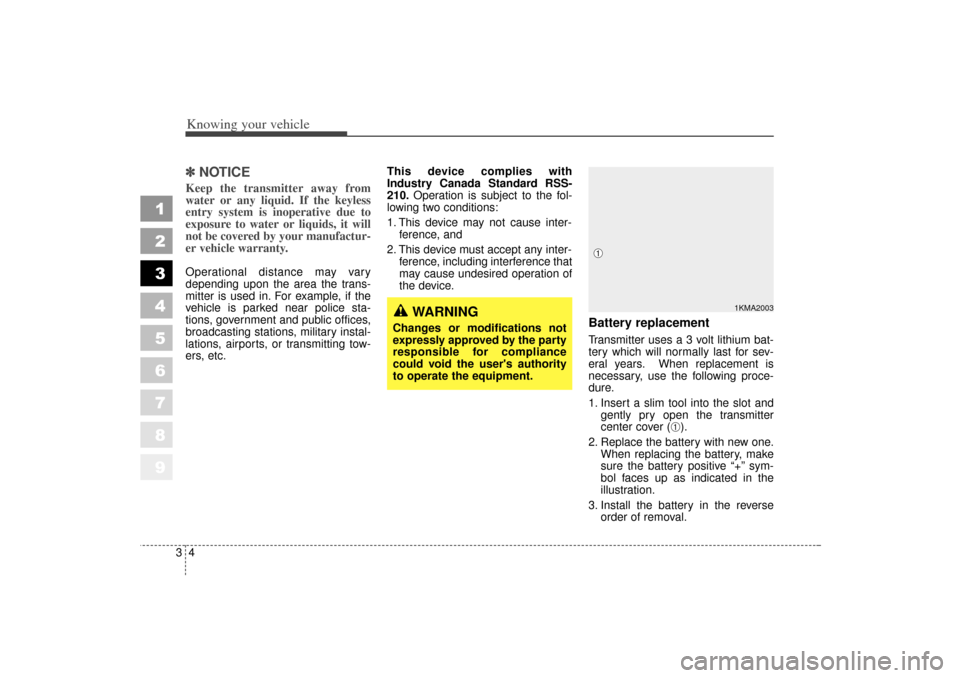
Battery replacementTransmitter uses a 3 volt lithium bat-
tery which will normally last for sev-
eral years. When replacement is
necessary, use the following proce-
dure.
1. Insert a slim tool into the slot andgently pry open the transmitter
center cover (
➀).
2. Replace the battery with new one. When replacing the battery, make
sure the battery positive “+” sym-
bol faces up as indicated in the
illustration.
3. Install the battery in the reverse order of removal.
1KMA2003
➀
WARNING
Changes or modifications not
expressly approved by the party
responsible for compliance
could void the user's authority
to operate the equipment.
KM CAN (ENG) 3 (~54)new.qxd 7/29/05 9:33 AM Page 4
Page 74 of 354
Knowing your vehicle83
1
2
3
4
5
6
7
8
9
4. If all of the digits have been inputsuccessfully, you have to start the
engine within 30 seconds. If you
attempt to start the engine after 30
seconds, the engine will not start
and you will have to input your
password again.
After performing the limp home pro-
cedure, you have to see an author-
ized Kia dealer immediately to
inspect and repair your ignition key
or immobilizer system.✽ ✽ NOTICEIf you cannot start your engine in
spite of limp home procedure, have
your vehicle towed by an authorized
Kia dealer for inspection and neces-
sary repairs.
✽ ✽NOTICEThe transponder in your ignition
key is an important part of the
immobilizer system. It is designed to
give years of troublefree service,
however you should avoid exposure
to moisture, static electricity and
rough handling. Immobilizer sys-
tem malfunction could occur.✽ ✽NOTICEDo not change, alter or adjust the
immobilizer system because it could
cause the immobilizer system to
malfunction and should only be
serviced by an authorized Kia deal-
er.
Malfunctions caused by improper
alterations, adjustments or modifi-
cations to the immobilizer system
are not covered by your vehicle
manufacturer warranty.
This device complies with
Industry Canada Standard RSS-
210. Operation is subject to the fol-
lowing two conditions:
1. This device may not cause inter- ference, and
2. This device must accept any inter- ference, including interference that
may cause undesired operation of
the device.
WARNING
Changes or modifications not
expressly approved by the party
responsible for compliance
could void the user's authority
to operate the equipment.
KM CAN (ENG) 3 (~54)new.qxd 7/29/05 9:33 AM Page 8
Page 75 of 354
39
Knowing your vehicle
1
2
3
4
5
6
7
8
9
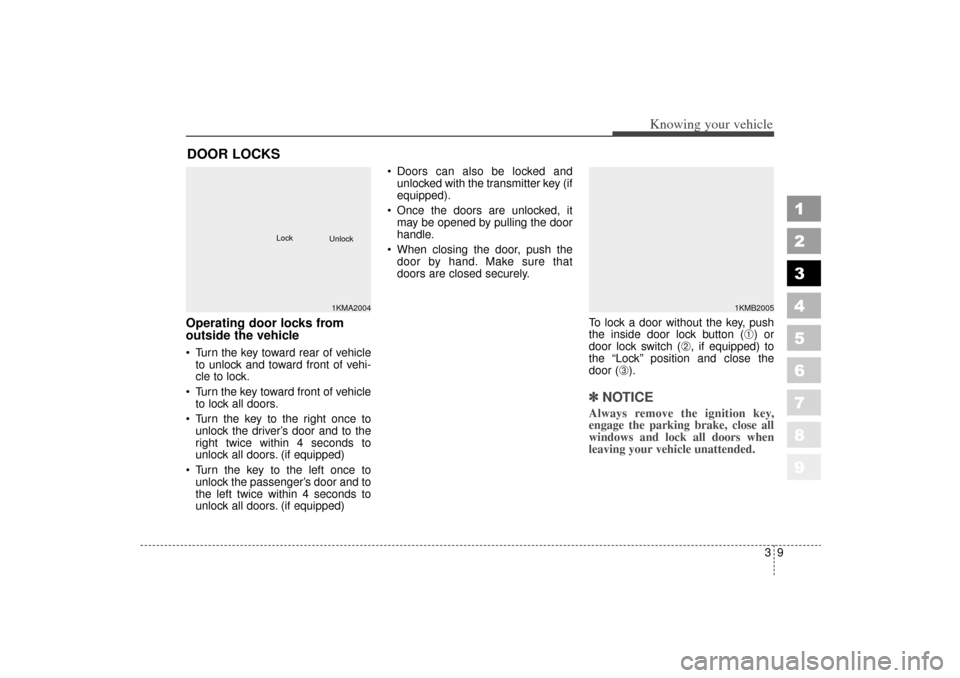
Operating door locks from
outside the vehicle Turn the key toward rear of vehicleto unlock and toward front of vehi-
cle to lock.
Turn the key toward front of vehicle to lock all doors.
Turn the key to the right once to unlock the driver’s door and to the
right twice within 4 seconds to
unlock all doors. (if equipped)
Turn the key to the left once to unlock the passenger’s door and to
the left twice within 4 seconds to
unlock all doors. (if equipped) Doors can also be locked and
unlocked with the transmitter key (if
equipped).
Once the doors are unlocked, it may be opened by pulling the door
handle.
When closing the door, push the door by hand. Make sure that
doors are closed securely.
To lock a door without the key, push
the inside door lock button (
➀) or
door lock switch (
➁, if equipped) to
the “Lock” position and close the
door (
➂).
✽ ✽ NOTICEAlways remove the ignition key,
engage the parking brake, close all
windows and lock all doors when
leaving your vehicle unattended.
DOOR LOCKS
1KMA2004
Lock
Unlock
1KMB2005
KM CAN (ENG) 3 (~54)new.qxd 7/29/05 9:33 AM Page 9