2006 KIA Sportage tow
[x] Cancel search: towPage 182 of 354
Driving your vehicle62
4
1
2
3
4
5
6
7
8
9
One - touch wiper For a single wiping cycle, push the
lever upward and release it with the
lever in the OFF position.
The wipers will operate continuously
if the lever is pushed upward and
held.
✽ ✽
NOTICE To prevent possible damage to the
wipers or windshield, do not oper-
ate the wipers when the wind-
shield is dry.
To prevent damage to the wiper blades, do not use gasoline,
kerosene, paint thinner, or other
solvents on or near them.
To prevent damage to the wiper arms and other components, do
not attempt to move the wipers
manually.
Windshield washers In the OFF position, pull the lever
gently toward you to spray washer
fluid on the windshield and to run the
wipers 2-3 cycles.
Use this function when the wind-
shield is dirty.
The spray and wiper operation will
continue until you release the lever.
1KMB2133
1KMA2119
KM CAN (ENG) 4 new.qxd 7/29/05 9:35 AM Page 62
Page 189 of 354

469
Driving your vehicle
1
2
3
4
5
6
7
8
9
Face position Air flow is directed towardthe upper body and face.
Additionally, each outlet
can be controlled to direct
the air discharged from
the outlet.
(outlet port: , )
Face - floor position Air flow is directedtowards the face and the
floor. The air to the floor is
warmer than the air to the
face (except when the
temperature control is set
to the extreme cold posi-
tion).
(outlet port: , , , )
OFF position The climate control sys-
tem is turned off. Floor position
Most of the air flow is
directed to the floor, with a
small amount of the air
being directed to the wind-
shield and side window
defroster.
(outlet port: , , , , )
Floor - defrost position Most of the air flow is
directed to the floor and
the windshield with a
small amount directed to
the side window
defrosters.
(outlet port:
, , ,
,)
Defrost position Most of the air flow is
directed to the windshield
with a small amount of air
directed to the side win-
dow defrosters.
(outlet port: , , )
Instrument panel ventsIf air flow control is not satisfactory,
check the instrument panel vents.
The outlet port ( , ) can be opened
or closed separately using the hori-
zontal thumbwheel. To close the
vent, rotate it left to the maximum
position. To open the vent, rotate it
right to the desired position.
Also, you can adjust the direction of
air delivery from these vents using
the vent control lever as shown.
BB
C
E
F
C
A
D
E
F
C
A
D
E
F
E
A
D
E
1KMA2132
B
E
OFF
KM CAN (ENG) 4 new.qxd 7/29/05 9:35 AM Page 69
Page 202 of 354
Driving your vehicle82
4
1
2
3
4
5
6
7
8
9
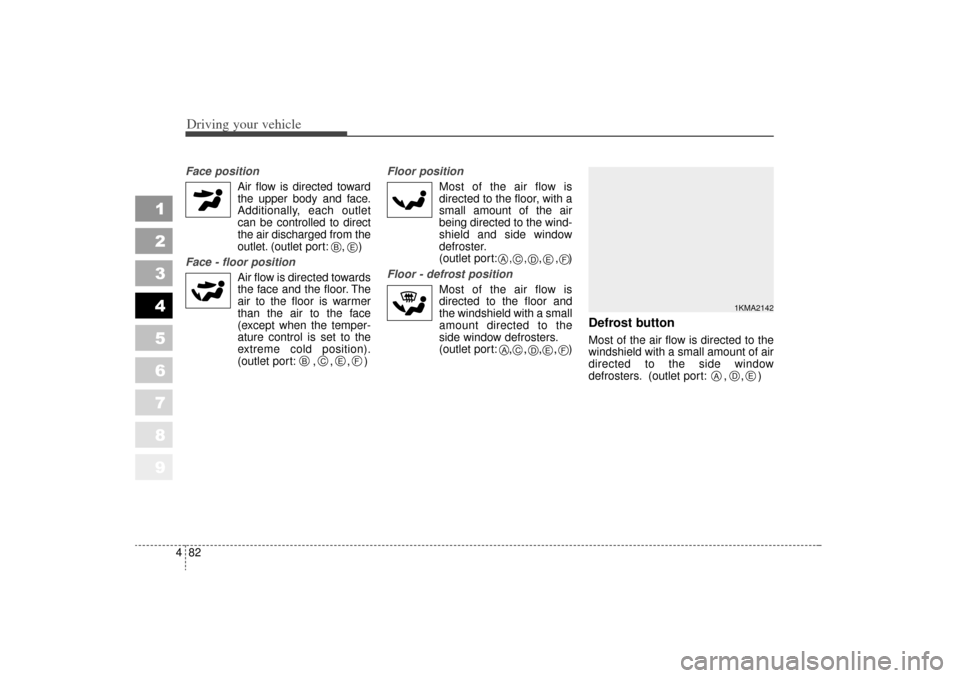
Face position
Air flow is directed towardthe upper body and face.
Additionally, each outlet can be controlled to direct
the air discharged from the
outlet. (outlet port: , )
Face - floor position Air flow is directed towardsthe face and the floor. The
air to the floor is warmer
than the air to the face
(except when the temper-
ature control is set to the
extreme cold position).
(outlet port: , , , ) Floor position
Most of the air flow isdirected to the floor, with a
small amount of the air
being directed to the wind-
shield and side window
defroster.
(outlet port:
, ,
, , )
Floor - defrost position Most of the air flow isdirected to the floor and
the windshield with a small
amount directed to the
side window defrosters.
(outlet port:
, , , ,
)
Defrost button Most of the air flow is directed to the
windshield with a small amount of air
directed to the side window
defrosters. (outlet port: , , )
1KMA2142
A
D
E
B
B
C
E
F
C
A
D
E
F
C
A
D
E
F
E
KM CAN (ENG) 4 new.qxd 7/29/05 9:35 AM Page 82
Page 213 of 354
1
2
3
4
5
6
7
8
9
Fuel requirements / 5-2
Emission control system / 5-3
Before driving / 5-5
Suggestions for economical operation / 5-6
Special driving conditions / 5-8
Using four-wheel drive / 5-14
Weight of the vehicle / 5-32
Trailer towing / 5-33
Overloading / 5-40
Vehicle load limit / 5-41
Homelink® wireless control system / 5-45
Label information / 5-51
Driving tips
KM CAN (ENG) 5 new.qxd 7/29/05 9:38 AM Page 1
Page 220 of 354
Driving tips85SPECIAL DRIVING CONDITIONS Hazardous driving conditions When hazardous driving conditions
are encountered such as water,
snow, ice, mud, sand, or similar haz-
ards, follow these suggestions:
Drive cautiously and allow extradistance for braking.
Avoid sudden movements in brak- ing or steering.
When braking with non-ABS brakes pump the brake pedal with
a light up-and-down motion until
the vehicle is stopped. If stalled in snow, mud, or sand,
use second gear. Accelerate slow-
ly to avoid spinning the drive
wheels.
Use sand, rock salt, tire chains, or other non-slip material under the
drive wheels to provide traction
when stalled in ice, snow, or mud.
Rocking the vehicle If it is necessary to rock the vehicle
to free it from snow, sand, or mud,
first turn the steering wheel right and
left to clear the area around your
front wheels. Then, shift back and
forth between 1 (First) and R
(Reverse) in vehicles equipped with
a manual transaxle or R (Reverse)
and any forward gear in vehicles
equipped with an automatic
transaxle. Do not race the engine,
and spin the wheels as little as pos-
sible. If you are still stuck after a few
tries, have the vehicle pulled out by a
tow vehicle to avoid engine overheat-
ing and possible damage to the
transaxle.✽ ✽ NOTICEProlonged rocking may cause engine
over-heating, transaxle damage or
failure, and tire damage.
1
2
3
4
5
6
7
8
9
WARNING
- Downshifting
Downshifting with an automatic
transaxle, while driving on slip-
pery surfaces can cause an
accident. The sudden change in
tire speed could cause the tires
to skid. Be careful when down-
shifting on slippery surfaces.
CAUTION -
ABS
Do not pump the brake pedal on
a vehicle equipped with ABS.
KM CAN (ENG) 5 new.qxd 7/29/05 9:38 AM Page 8
Page 228 of 354
Driving tips16
5
1
2
3
4
5
6
7
8
9
Off-road driving with your
four-wheel drive vehicleOff-road driving can be great fun. But
it has definite hazards. The greatest
of these is the terrain itself.
“Off-roading” means you’ve left the
paved road system behind. Traffic
lanes are not marked. Curves are not
banked.
There are no carefully engineered
road signs to warn you of dangerous
conditions or to advise you of a safe
speed. You have to assess the envi-
ronment yourself. Surfaces can be
slippery, rough, uphill or downhill.
Off-road driving involves learning
new skills. That’s why it’s important
that you read and understand this
section. You’ll find useful driving
information and suggestions. These
will help make your off-road driving
safer and more enjoyable. Before you go off-roading
There are some things to do before
you leave the paved roads. Be sure
to have all necessary maintenance
and service work done beforehand.
Be sure to read all the information
about your four-wheel drive vehicle
in this manual. Is there enough fuel?
Is the spare tire fully inflated? Are the
fluid levels at the proper levels? What
are the local laws that apply to off-
roading where you’ll be driving? If
you don’t know, you should check
with law enforcement people in the
area. Will you be on someone’s pri-
vate land? If so, be sure to get the
necessary permission.
Loading your vehicle for off-road
driving
There are some important items to
remember about how to properly
load your vehicle.
The heaviest things should be in
the cargo area and forward of your
rear axle. Place heavier items as
far forward as you can.
Be sure the load is properly secured, so driving over off-road
terrain doesn’t shift your load or
throw items toward the driver or
passengers.
KM CAN (ENG) 5 new.qxd 7/29/05 9:38 AM Page 16
Page 244 of 354

Driving tips32
5
1
2
3
4
5
6
7
8
9
WEIGHT OF THE VEHICLE This section will guide you in the
proper loading of your vehicle and/or
trailer, to keep your loaded vehicle
weight within its design rating capa-
bility, with or without a trailer.
Properly loading your vehicle will
provide maximum return of the vehi-
cle design performance. Before load-
ing your vehicle, familiarize yourself
with the following terms for determin-
ing your vehicle's weight ratings, with
or without a trailer, from the vehicle's
Specifications and the Vehicle
Certification Label:Base curb weight This is the weight of the vehicle
including a full tank of fuel and all
standard equipment. It does not
include passengers, cargo, or option-
al equipment.Vehicle curb weightThis is the weight of your new vehicle
when you picked it up from your deal-
er plus any aftermarket equipment.
Cargo weightThis figure includes all weight added
to the Base Curb Weight, including
cargo and optional equipment. When
towing, trailer tongue load or king pin
weight also is part of the Cargo
Weight.GAW (Gross axle weight)This is the total weight placed on
each axle (front and rear) - including
vehicle curb weight and all payload.GAWR (Gross axle weight rating)This is the maximum allowable
weight that can be carried by a single
axle (front or rear). These numbers
are shown on the Vehicle
Certification Label. The total load on
each axle must never exceed its
GAWR.
GVW (Gross vehicle weight)This is the Base Curb Weight plus
actual Cargo Weight plus passen-
gers.GVWR (Gross vehicle weight
rating)This is the maximum allowable weight
of the fully loaded vehicle (including
all options, equipment, passengers
and cargo). The GVWR is shown on
the Vehicle Certification Label located
on the driver's door pillar.
KM CAN (ENG) 5 new.qxd 7/29/05 9:38 AM Page 32
Page 245 of 354
533
Driving tips
1
2
3
4
5
6
7
8
9
TRAILER TOWING✽ ✽NOTICE
Pulling a trailer improperly can
damage your vehicle and result in
costly repairs not covered by your
warranty. To pull a trailer correctly,
follow the advice in this section. Your vehicle can tow a trailer. To
identify what the vehicle trailering
capacity is for your vehicle, you
should read the information in
“Weight of the Trailer” that appears
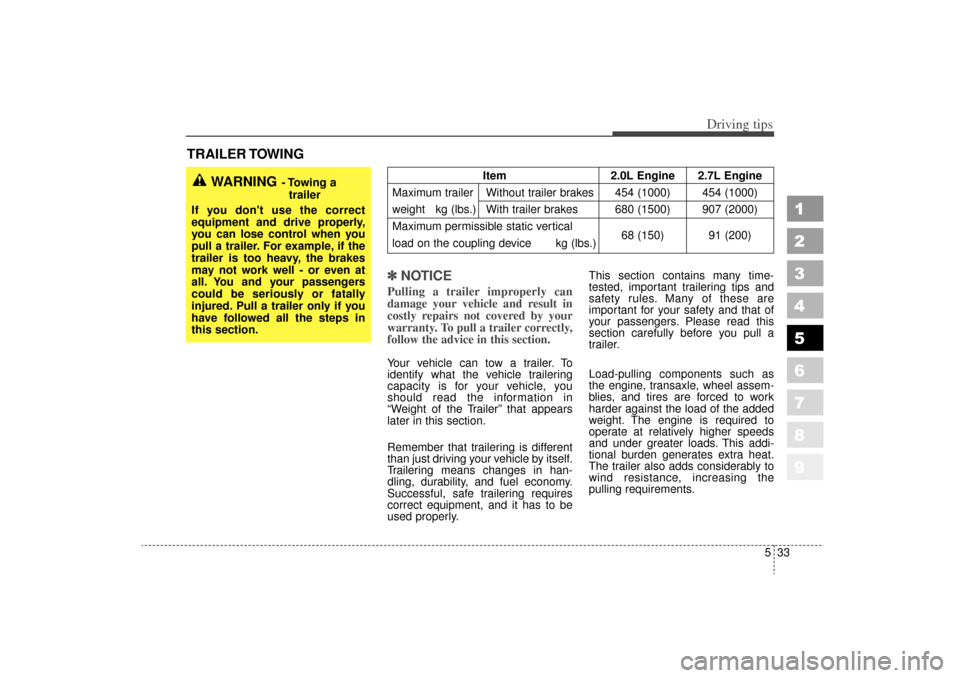
later in this section.
Remember that trailering is different
than just driving your vehicle by itself.
Trailering means changes in han-
dling, durability, and fuel economy.
Successful, safe trailering requires
correct equipment, and it has to be
used properly. This section contains many time-
tested, important trailering tips and
safety rules. Many of these are
important for your safety and that of
your passengers. Please read this
section carefully before you pull a
trailer.
Load-pulling components such as
the engine, transaxle, wheel assem-
blies, and tires are forced to work
harder against the load of the added
weight. The engine is required to
operate at relatively higher speeds
and under greater loads. This addi-
tional burden generates extra heat.
The trailer also adds considerably to
wind resistance, increasing the
pulling requirements.
WARNING
- Towing a
trailer
If you don't use the correct
equipment and drive properly,
you can lose control when you
pull a trailer. For example, if the
trailer is too heavy, the brakes
may not work well - or even at
all. You and your passengers
could be seriously or fatally
injured. Pull a trailer only if you
have followed all the steps in
this section.
Item 2.0L Engine 2.7L Engine
Maximum trailer Without trailer brakes 454 (1000) 454 (1000)
weight kg (lbs.) With trailer brakes 680 (1500) 907 (2000)
Maximum permissible static vertical
load on the coupling device kg (lbs.) 68 (150) 91 (200)
KM CAN (ENG) 5 new.qxd 7/29/05 9:38 AM Page 33