Page 2485 of 3383

LT-78
FRONT FOG LAMP
Revision: November 20092006 QX56
Aiming AdjustmentEKS00B9M
The fog lamp is a semi-sealed beam type which uses a replaceable halogen bulb. Before performing aiming
adjustment, make sure of the following.
�Keep all tires inflated to correct pressure.
�Place vehicle on level ground.
�See that vehicle is unloaded (except for full levels of coolant,
engine oil and fuel, and spare tire, jack, and tools). Have the
driver or equivalent weight placed in driver seat.
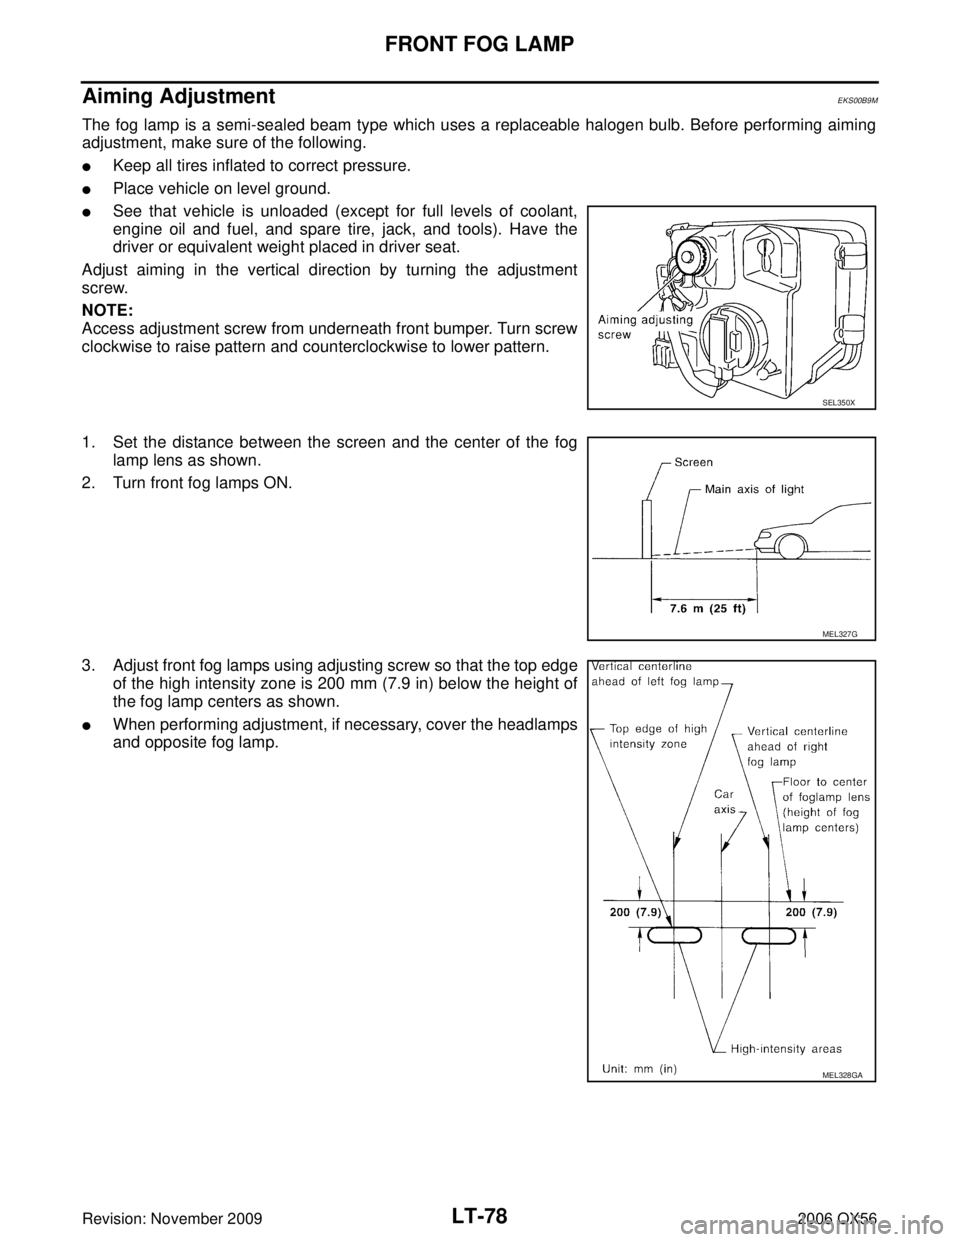
Adjust aiming in the vertical direction by turning the adjustment
screw.
NOTE:
Access adjustment screw from underneath front bumper. Turn screw
clockwise to raise pattern and counterclockwise to lower pattern.
1. Set the distance between the screen and the center of the fog lamp lens as shown.
2. Turn front fog lamps ON.
3. Adjust front fog lamps using adjusting screw so that the top edge of the high intensity zone is 200 mm (7.9 in) below the height of
the fog lamp centers as shown.
�When performing adjustment, if necessary, cover the headlamps
and opposite fog lamp.
SEL350X
MEL327G
MEL328GA
Page 2509 of 3383

LT-102
COMBINATION SWITCH
Revision: November 20092006 QX56
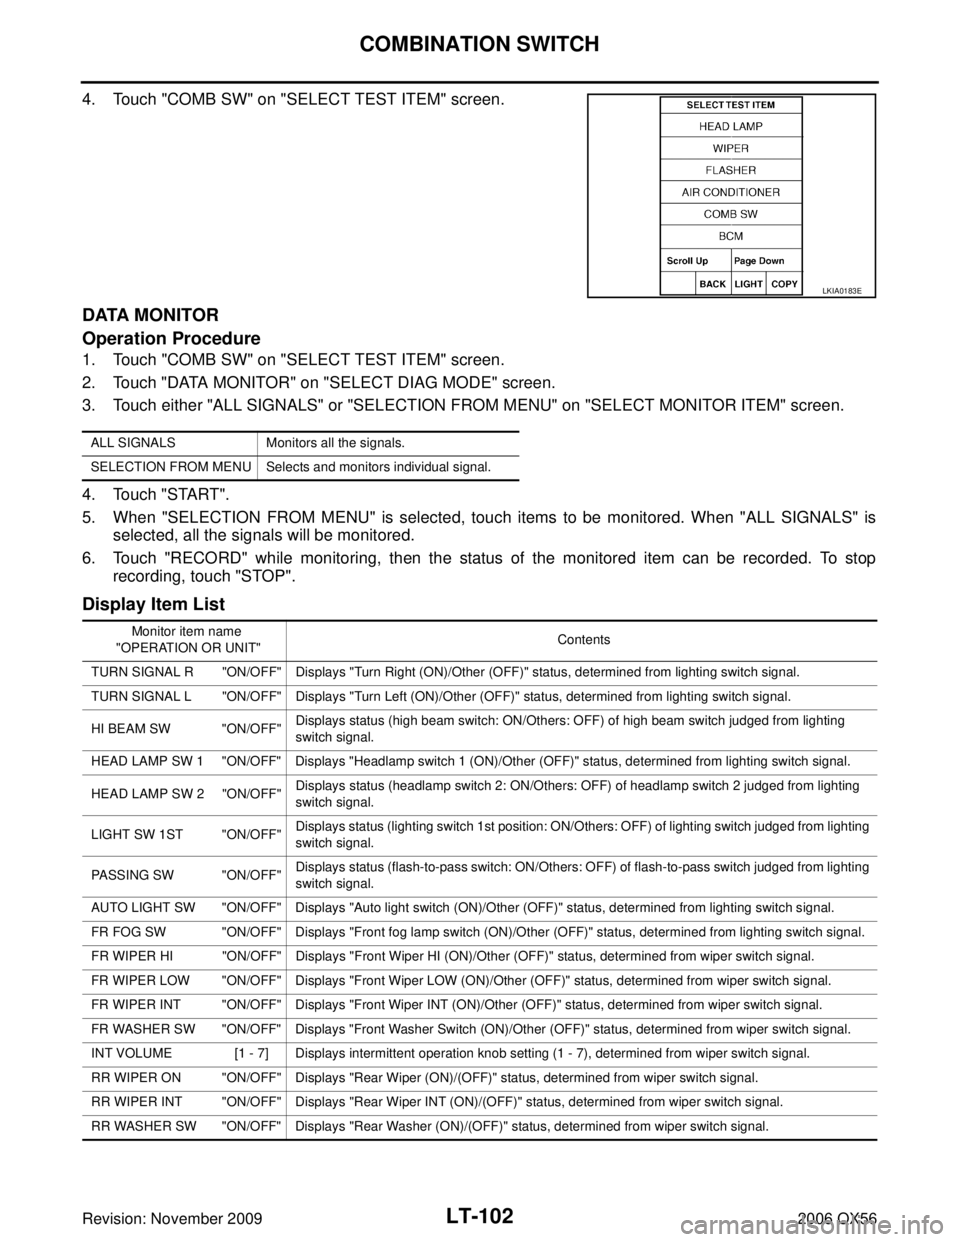
4. Touch "COMB SW" on "SELECT TEST ITEM" screen.
DATA MONITOR
Operation Procedure
1. Touch "COMB SW" on "SELECT TEST ITEM" screen.
2. Touch "DATA MONITOR" on "SELECT DIAG MODE" screen.
3. Touch either "ALL SIGNALS" or "SELECTION FROM MENU" on "SELECT MONITOR ITEM" screen.
4. Touch "START".
5. When "SELECTION FROM MENU" is selected, touch items to be monitored. When "ALL SIGNALS" is
selected, all the signals will be monitored.
6. Touch "RECORD" while monitoring, then the status of the monitored item can be recorded. To stop recording, touch "STOP".
Display Item List
LKIA0183E
ALL SIGNALS Monitors all the signals.
SELECTION FROM MENU Selects and monitors individual signal.
Monitor item name
"OPERATION OR UNIT" Contents
TURN SIGNAL R "ON/OFF" Displays "Turn Right (ON)/Other (OFF)" status, determined from lighting switch signal.
TURN SIGNAL L "ON/OFF" Displays "Turn Left (ON)/Other (OFF)" status, determined from lighting switch signal.
HI BEAM SW "ON/OFF" Displays status (high beam switch: ON/Others: OFF) of high beam switch judged from lighting
switch signal.
HEAD LAMP SW 1 "ON/OFF" Displays "Headlamp switch 1 (ON)/Other (OFF)" status, determined from lighting switch signal.
HEAD LAMP SW 2 "ON/OFF" Displays status (headlamp switch 2: ON/Others: OFF) of headlamp switch 2 judged from lighting
switch signal.
LIGHT SW 1ST "ON/OFF" Displays status (lighting switch 1st position: ON/Others: OFF) of lighting switch judged from lighting
switch signal.
PASSING SW "ON/OFF" Displays status (flash-to-pass switch: ON/Others: OFF) of flash-to-pass switch judged from lighting
switch signal.
AUTO LIGHT SW "ON/OFF" Displays "Auto light switch (ON)/Other (OFF)" status, determined from lighting switch signal.
FR FOG SW "ON/OFF" Displays "Front fog lamp switch (ON)/Other (OFF)" status, determined from lighting switch signal.
FR WIPER HI "ON/OFF" Displays "Front Wiper HI (ON)/Other (OFF)" status, determined from wiper switch signal.
FR WIPER LOW "ON/OFF" Displays "Front Wiper LOW (ON)/Other (OFF)" status, determined from wiper switch signal.
FR WIPER INT "ON/OFF" Displays "Front Wiper INT (ON)/Other (OFF)" status, determined from wiper switch signal.
FR WASHER SW "ON/OFF" Displays "Front Washer Switch (ON)/Other (OFF)" status, determined from wiper switch signal.
INT VOLUME [1 - 7] Displays intermittent operation knob setting (1 - 7), determined from wiper switch signal.
RR WIPER ON "ON/OFF" Displays "Rear Wiper (ON)/(OFF)" status, determined from wiper switch signal.
RR WIPER INT "ON/OFF" Displays "Rear Wiper INT (ON)/(OFF)" status, determined from wiper switch signal.
RR WASHER SW "ON/OFF" Displays "Rear Washer (ON)/(OFF)" status, determined from wiper switch signal.
Page 2664 of 3383

IPDM E/R (INTELLIGENT POWER DISTRIBUTION MODULE ENGINE ROOM)PG-23
C
DE
F
G H
I
J
L
M A
B
PG
Revision: November 2009 2006 QX56
All Signals, Main Signals, Selection From Menu
NOTE:
�Perform monitoring of IPDM E/R data with the ignition switch ON. When the ignition switch is in ACC posi-
tion, display may not be correct.
�(*1) This item is displayed, but does not function.
ACTIVE TEST
Operation Procedure
1. Touch “ACTIVE TEST” on “SELECT DIAG-MODE ” screen.
2. Touch item to be tested, and check operation.
3. Touch “START”.
4. Touch "STOP" while testing to stop the operation.
Item name CONSULT-II
screen display Display or unit Monitor item selection
Description
ALL
SIGNALS MAIN
SIGNALS SELECTION
FROM MENU
Motor fan request MOTOR FAN
REQ
1/2/3/4
X X X Signal status input from ECM
Compressor
request AC COMP REQ ON/OFF
X XX Signal status input from ECM
Parking, license,
and tail lamp
request TAIL & CLR REQ ON/OFF
X XX Signal status input from BCM
Headlamp low
beam request HL LO REQ ON/OFF
X XX Signal status input from BCM
Headlamp high
beam request HL HI REQ ON/OFF
X XX Signal status input from BCM
Front fog request FR FOG REQ ON/OFF X XX Signal status input from BCM
Front wiper
request FR WIP REQSTOP/1LOW/
LOW/HI
X X
X Signal status input from BCM
Wiper auto stop WIP AUTO
STOPACT P/STOP P X X
X Output status of IPDM E/R
Wiper protection WIP PROT OFF/Block X XX Control status of IPDM E/R
Starter request ST RLY REQ ON/OFF XX
Status of input signal
NOTE
Ignition relay
status IGN RLY ON/OFF
X XXIgnition relay status monitored
with IPDM E/R
Rear defogger
request RR DEF REQ ON/OFF
X XX Signal status input from BCM
Oil pressure
switch OIL P SW (*1) OPEN/CLOSE X
XSignal status input from IPDM
E/R
Hood switch HOOD SW OFF XSignal status input from IPDM
E/R
Theft warning
horn request THFT HRN REQ ON/OFF
XX Signal status input from BCM
Horn chirp HORN CHIRP ON/OFF XX Output status of IPDM E/R
Daytime running
lamp request DTRL REQ ON/OFF
XX Signal status input from BCM
Test nameCONSULT-II screen display Description
Rear defogger output REAR DEFOGGER With a certain ON-OFF operation, the rear defogger relay can be oper-
ated.
Front wiper (HI, LO) output FRONT WIPER With a certain operation (OFF, HI ON, LO ON), the front wiper relay
(Lo, Hi) can be operated.
Cooling fan output MOTOR FAN With a certain operation (1, 2, 3, 4), the cooling fan can be operated.
Page 2924 of 3383

CHARGING SYSTEMSC-19
C
DE
F
G H
I
J
L
M A
B
SC
Revision: November 2009 2006 QX56
Trouble Diagnoses with Battery/Starting/Charging System TesterEKS00B7J
NOTE:
To ensure a complete and thorough diagnosis, the battery, starter and generator test segments must be done
as a set from start to finish.
1. Turn off all loads on the vehicle electrical system.
2. Perform battery and starting system test with Battery/Starting/
Charging system tester.
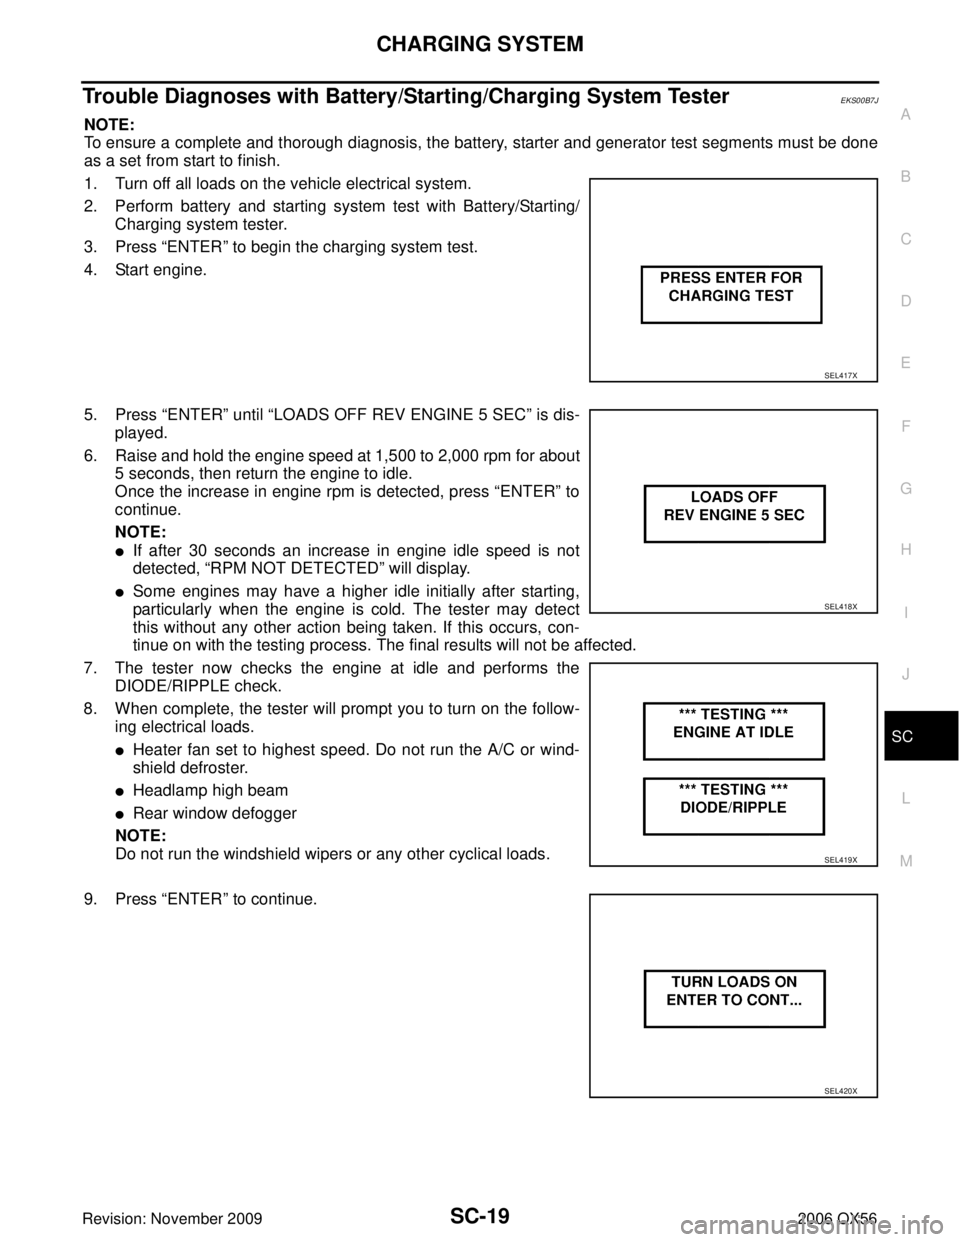
3. Press “ENTER” to begin the charging system test.
4. Start engine.
5. Press “ENTER” until “LOADS OFF REV ENGINE 5 SEC ” is dis-
played.
6. Raise and hold the engine speed at 1,500 to 2,000 rpm for about 5 seconds, then return the engine to idle.
Once the increase in engine rpm is detected, press “ENTER” to
continue.
NOTE:
�If after 30 seconds an increase in engine idle speed is not
detected, “RPM NOT DETECTED” will display.
�Some engines may have a higher idle initially after starting,
particularly when the engine is cold. The tester may detect
this without any other action being taken. If this occurs, con-
tinue on with the testing process. The final results will not be affected.
7. The tester now checks the engine at idle and performs the DIODE/RIPPLE check.
8. When complete, the tester will prompt you to turn on the follow- ing electrical loads.
�Heater fan set to highest speed. Do not run the A/C or wind-
shield defroster.
�Headlamp high beam
�Rear window defogger
NOTE:
Do not run the windshield wipers or any other cyclical loads.
9. Press “ENTER” to continue.
SEL417X
SEL418X
SEL419X
SEL420X