2006 Hyundai Terracan battery
[x] Cancel search: batteryPage 29 of 539
1
FEATURES OF YOUR HYUNDAI
15
!
After completion of the step above, the turn signal lights will blink twice toindicate that the system is disarmed. NOTE: If any door, tail gate or engine hood is not opened within 30 seconds,the system will be rearmed.
CAUTION:
Only the transmitter can disarm thearmed stage. If the transmitter does not disarm the system, it is neces- sary to take the following steps;
1. Unlock the door with the key, which will cause the alarm to be activated.
2. Insert the key in the ignition key
cylinder and turn the ignition keyto "ON" position.
3. Wait for 30 seconds. After completing the steps above, the system will be disarmed. B070F02A-GAT Keyless Entry System (If Installed) Locking doors
1. Close all doors.
2. Push the "LOCK" button on the trans-
mitter.
3. At the same time all doors lock, the
turn signal lights will blink once toindicate that the system is armed.
Unlocking doors
1. Push the "UNLOCK" button on the transmitter.
2. At the same time all doors unlock,
the turn signal lights will blink twice to indicate that the system is dis- armed.
NOTE: The transmitter will not work if any of following occur:
- The ignition key is in ignition switch.
- You exceed the operating distance
limit (10 m).
- The battery in the transmitter is weak. - Other vehicles or objects may be
blocking the signal.
- The weather is extremely cold.
- The transmitter is close to a radio transmitter such as a radio station or an airport which can interfere with normal operation of the trans- mitter.
When the transmitter does not work correctly, open and close the door with the ignition key. If you have aproblem with the transmitter, con- tact an authorized Hyundai Dealer. NOTE: Keep the transmitter away from wa- ter or any liquid. If the keyless entry system is inoperative due to expo- sure to water or liquids, it will not becovered by your manufacturer ve- hicle warranty.
Page 30 of 539
1FEATURES OF YOUR HYUNDAI
16
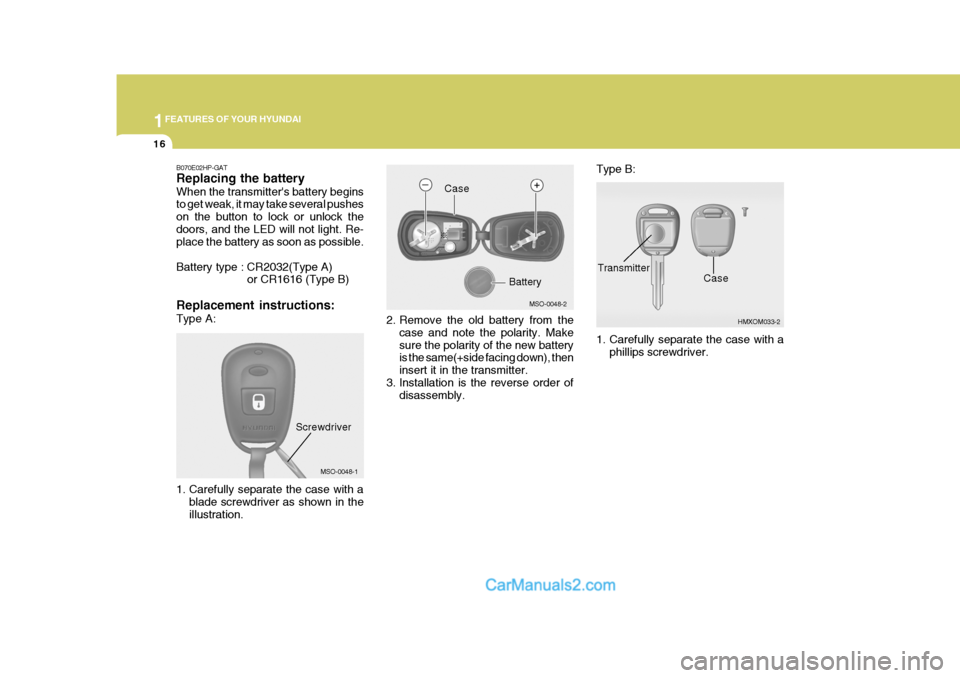
2. Remove the old battery from the
case and note the polarity. Make sure the polarity of the new battery is the same(+side facing down), then insert it in the transmitter.
3. Installation is the reverse order of disassembly. Type B:
1. Carefully separate the case with a
phillips screwdriver.
MSO-0048-2
HMXOM033-2
Case
Battery
CaseTransmitter
B070E02HP-GAT Replacing the battery When the transmitter's battery begins to get weak, it may take several pushes on the button to lock or unlock thedoors, and the LED will not light. Re- place the battery as soon as possible.
Battery type : CR2032(Type A) or CR1616 (Type B)
Replacement instructions: Type A:
MSO-0048-1
1. Carefully separate the case with a blade screwdriver as shown in the illustration.
Screwdriver
Page 31 of 539

1
FEATURES OF YOUR HYUNDAI
17
2. Take off the battery cover after sepa-
rating the transmitter.
3. Remove the old battery from the transmitter with a blade screwdriver inserted in the hole and note the polarity. Make sure the polarity ofthe new battery is the same(+side facing up), then insert it in the trans- mitter.
4. Installation is the reverse order of disassembly. HMXOM033-3
Hole
Battery
Battery Cover
POWER WINDOWS
B060A03L-AAT The power windows operate when the ignition key is in the "ON" position. The main switches are located on the driver's armrest and control the frontand rear windows on both sides of the vehicle. The windows may be opened by depressing the appropriate windowswitch and closed by pulling up the switch. To open the window on the driver's side, press the switch(1) half-way down. The window moves as long as the switch is operated. To fully open the driver's window automatically, pressthe switch fully down. In automatic operation, the window will fully open even if you let go of the switch. To stopat the desired opening, pull up and release the switch. B060A01HP
(1)
In order to prevent operation of the passanger front and rear windows, a window lock switch(2) is provided on the armrest of the driver's door. To disable the power windows, press the window lock switch. To revert to nor-mal operation, press the window lock switch a second time.
Close
Open
(2)
B060A02HP
Page 65 of 539
1
FEATURES OF YOUR HYUNDAI
51
!WARNING:
o When the SRS is activated, there may be a loud noise and fine dust will be released through the ve-hicle. These conditions are nor- mal and are not hazardous. How- ever, the fine dust generated dur-ing airbag deployment may cause skin irritation. Wash your hands and face thoroughly with luke-warm water and a mild soap after an accident in which the airbags were deployed. o The SRS can function only when
the ignition key is in the "ON"position. If the SRS SRI does notflash, or continuously remains on after flashing for about 6 sec- onds when the ignition key isturned to the "ON" position or after the engine is started, comes on while driving, the SRS is notworking properly. If this occurs, have your vehicle immediately inspected by your Hyundaidealer.
o Before you replace a fuse or dis-
connect a battery terminal, turnthe ignition key to the "LOCK" position or remove the ignition key. Never remove or replace theair bag related fuse(s) when the ignition key is in the "ON" posi- tion. Failure to heed this warningwill cause the SRS SRI to illumi- nate.! CAUTION:
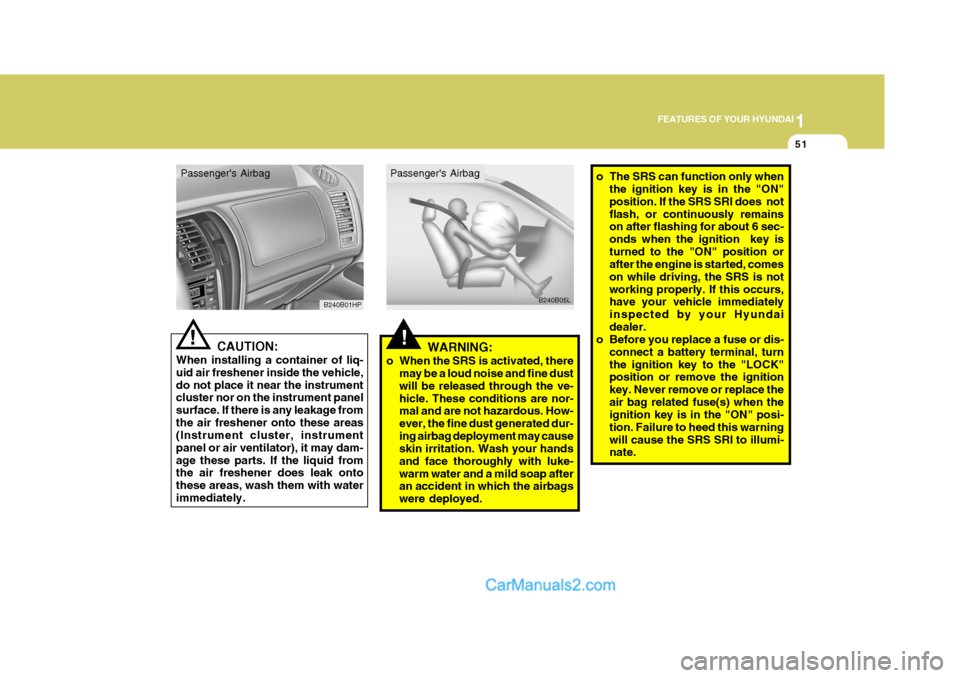
When installing a container of liq- uid air freshener inside the vehicle,do not place it near the instrument cluster nor on the instrument panel surface. If there is any leakage fromthe air freshener onto these areas (Instrument cluster, instrument panel or air ventilator), it may dam-age these parts. If the liquid from the air freshener does leak onto these areas, wash them with waterimmediately. B240B01HP
B240B05L
Passenger's Airbag Passenger's Airbag
Page 84 of 539
1FEATURES OF YOUR HYUNDAI
70
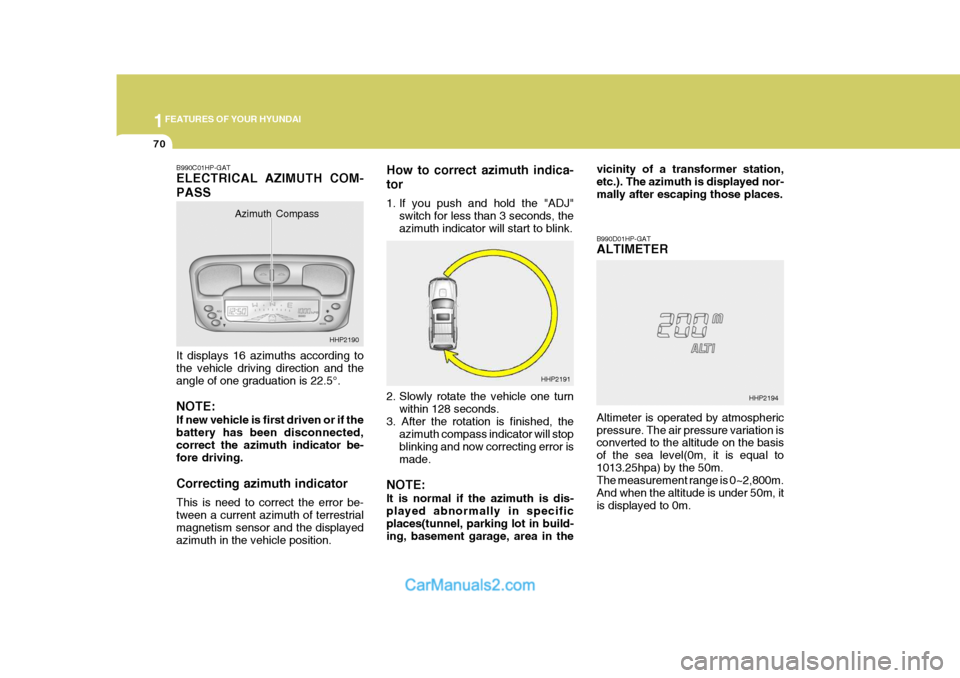
B990C01HP-GAT ELECTRICAL AZIMUTH COM- PASS It displays 16 azimuths according to the vehicle driving direction and theangle of one graduation is 22.5°. NOTE: If new vehicle is first driven or if the battery has been disconnected, correct the azimuth indicator be- fore driving. Correcting azimuth indicator This is need to correct the error be- tween a current azimuth of terrestrialmagnetism sensor and the displayed azimuth in the vehicle position. How to correct azimuth indica- tor
1. If you push and hold the "ADJ"
switch for less than 3 seconds, the azimuth indicator will start to blink.
2. Slowly rotate the vehicle one turn within 128 seconds.
3. After the rotation is finished, the azimuth compass indicator will stopblinking and now correcting error ismade.
NOTE: It is normal if the azimuth is dis- played abnormally in specificplaces(tunnel, parking lot in build- ing, basement garage, area in the B990D01HP-GAT ALTIMETER Altimeter is operated by atmospheric pressure. The air pressure variation is converted to the altitude on the basis of the sea level(0m, it is equal to1013.25hpa) by the 50m. The measurement range is 0~2,800m. And when the altitude is under 50m, itis displayed to 0m.
Azimuth Compass
HHP2191vicinity of a transformer station,etc.). The azimuth is displayed nor-mally after escaping those places.
HHP2194
HHP2190
Page 127 of 539
1
FEATURES OF YOUR HYUNDAI
113
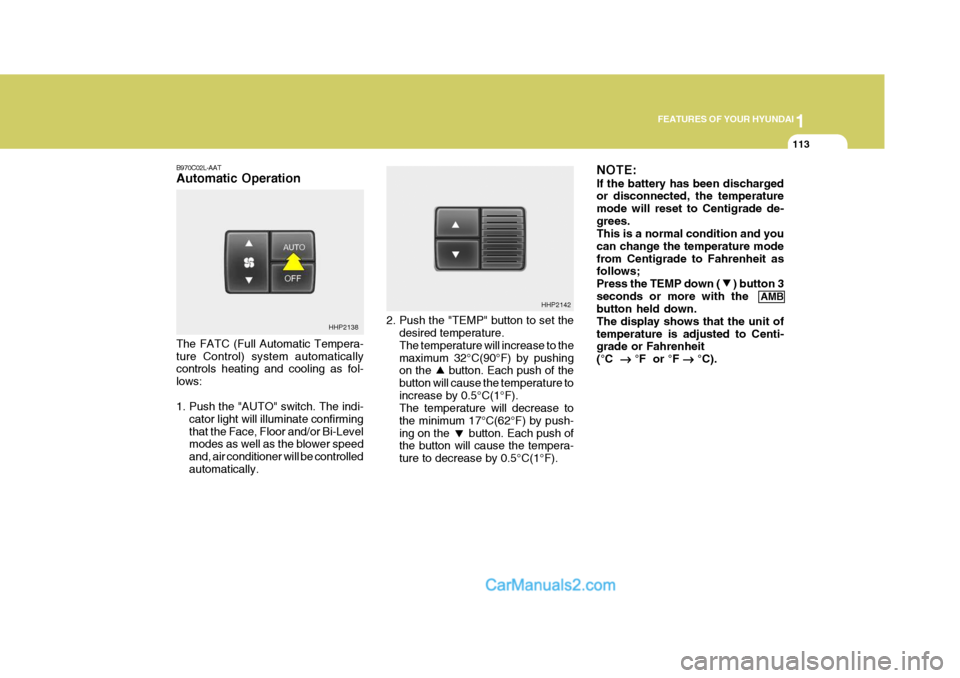
B970C02L-AAT Automatic Operation The FATC (Full Automatic Tempera- ture Control) system automatically controls heating and cooling as fol- lows:
1. Push the "AUTO" switch. The indi-
cator light will illuminate confirming that the Face, Floor and/or Bi-Level modes as well as the blower speed and, air conditioner will be controlledautomatically. 2. Push the "TEMP" button to set the
desired temperature. The temperature will increase to the maximum 32°C(90°F) by pushing on the button. Each push of the button will cause the temperature toincrease by 0.5°C(1°F). The temperature will decrease to the minimum 17°C(62°F) by push-ing on the button. Each push of the button will cause the tempera- ture to decrease by 0.5°C(1°F). NOTE: If the battery has been discharged or disconnected, the temperature mode will reset to Centigrade de-grees. This is a normal condition and you can change the temperature modefrom Centigrade to Fahrenheit as follows; Press the TEMP down ( ) button 3seconds or more with the
AMB
button held down.The display shows that the unit oftemperature is adjusted to Centi- grade or Fahrenheit (°C ��
��
� °F or °F
��
��
� °C).
HHP2138 HHP2142
Page 147 of 539
1
FEATURES OF YOUR HYUNDAI
133
!
o Do not add any oil to the rotating
parts. Keep magnets, screwdriv- ers and other metallic objects away from the tape mechanism and head.
o This equipment is designed to be used only in a 12 volt DCbattery system with negativeground.
o This unit is made of precision
parts. Do not attempt to disas-semble or adjust any parts.
o When driving your vehicle, be
sure to keep the volume of theunit set low enough to allow you to hear sounds coming from the outside.
o Do not expose this equipment (including the speakers and tape)to water or excessive moisture. CAUTION:
o Do not insert warped or poor quality discs into the CD player as damage to the unit may occur.
o Do not insert anything like coins into the player slot as damage tothe unit may occur.
o Do not place beverages close to
the audio system. The playbackmechanism may be damaged if you spill them.
o Do not impact on the audio sys- tem, or the playback mechanismcould be damaged.
o Driving on the off-roads or other vibrations may skip your com-pact disc. Do not use the audiosystem on off-roads as the discs could be scratched and damaged.
o Do not grip or pull out the disc
with your hand while the disc isbeing pulled into the unit by the self loading mechanism. Thesecan cause poor disc scratching to occur or trouble in the com- pact disc player. o Avoid using CD-Recordable or CD-
Rewritable as the player could not be operated in recording way of the CD maker. When using thecompact disc player, genuine CDs are recommended.
Page 150 of 539
1FEATURES OF YOUR HYUNDAI
136
NOTE:
o When replacing the fuse, replaceit with a fuse having the correct capacity.
o This equipment is designed to be used only in a 12 volt DCbattery system with negativeground.
o This unit is made of precision
parts. Do not attempt to disas-semble or adjust any parts.
o When driving your vehicle, be
sure to keep the volume of theunit set low enough to allow you to hear sounds coming from the outside. CAUTION:
o Do not insert warped or poor quality discs into the CD changeras damage to the unit may occur.
o Do not insert anything like coins into the changer slot as damageto the unit may occur.
o Do not place beverages close to the audio system. The playbackmechanism may be damaged ifyou spill them.
o Do not impact on the audio sys-
tem, or the playback mechanismcould be damaged.
o Driving on the off-roads or other
vibrations may skip your com-pact disc. Do not use the audio system on off-roads as the discs could be scratched and damaged.
o Do not grip or pull out the disc with your hand while the disc isbeing pulled into the unit by theself loading mechanism. These can cause poor disc scratching to occur or trouble in the com-pact disc player.
!
o Avoid using CD-Recordable or CD-
Rewritable as the player could not be operated in recording way of the CD maker. When using the compact disc changer, genuineCDs are recommended.