Page 307 of 420

�Î
You should never pump the brake pedal.
Let the ABS work f or you by always
keeping f irm, steady pressure on the
brake pedal. This is sometimes
ref erred to as ‘‘stomp and steer.’’
You will f eel a pulsation in the brake
pedal when the ABS activates, and
you may hear some noise. This is
normal: it is the ABS rapidly
pumpingthebrakes.Ondry
pavement, you will need to press on
thebrakepedalveryhardbeforethe
ABS activates. However, you may
feel the ABS activate immediately if
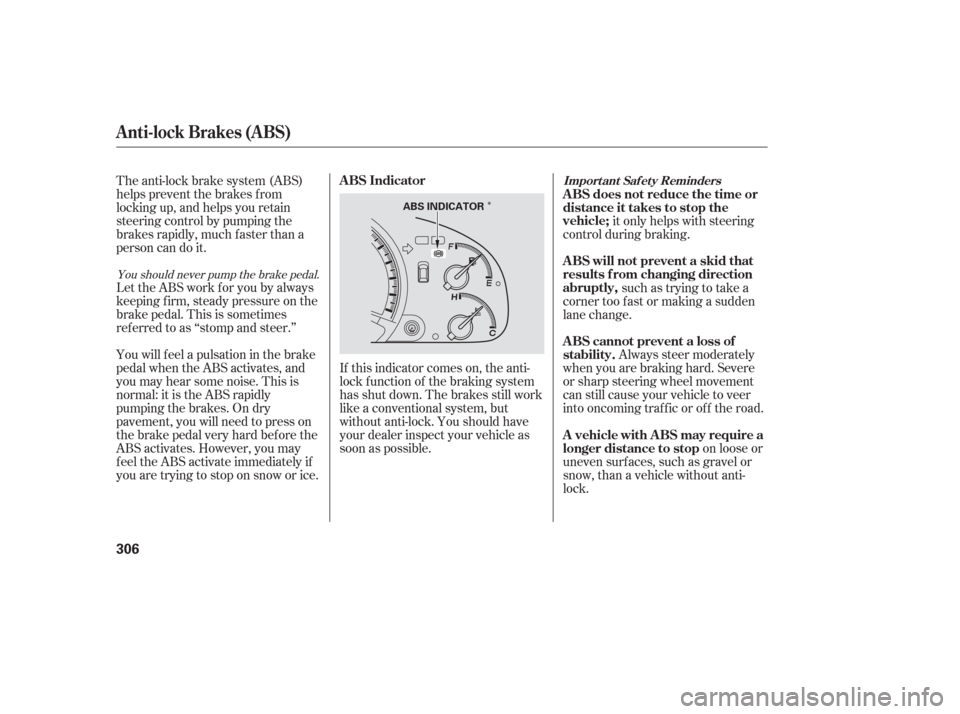
you are trying to stop on snow or ice.If this indicator comes on, the anti-
lock f unction of the braking system
has shut down. The brakes still work
like a conventional system, but
without anti-lock. You should have
your dealer inspect your vehicle as
soon as possible.
on loose or
uneven surf aces, such as gravel or
snow, than a vehicle without anti-
lock. Always steer moderately
when you are braking hard. Severe
or sharp steering wheel movement
can still cause your vehicle to veer
into oncoming traffic or off the road. such as trying to take a
corner too f ast or making a sudden
lane change. it only helps with steering
control during braking.
The anti-lock brake system (ABS)
helps prevent the brakes f rom
locking up, and helps you retain
steering control by pumping the
brakes rapidly, much f aster than a
person can do it.
Anti-lock Brakes (ABS)
ABS Indicator
A vehicle with A BS may require a
longer distance to stop A BS cannot prevent a loss of
stability. A BS will not prevent a skid that
results f rom changing direction
abruptly, A BS does not reduce the time or
distance it takes to stop the
vehicle;Import ant Saf et y Reminders
306
ABS INDICATOR
Page 331 of 420

�Ì
�Î
�Ì �Ì
�Ì
�Î
Maintenance Minder
330
:
If the message ‘‘SERVICE DUE NOW’’ does not appear more than 12 months
after the display is reset, change the engine oil every year.
See information on maintenance and emissions warranty on page .
Independent of the maintenance messages in the multi-information
display, replace the brake fluid every 3 years.
Inspect idle speed every 160,000 miles (256,000 km).
Adjust the valves during services A, B, 1, 2, or 3 only if they are noisy.
NOTE: 1:
329
Maintenance Sub Items
Rotate tires
Replace air cleaner element If you drive in dusty conditions, replace
every 15,000 miles (24,000 km).
Replace dust and pollen filter If you drive primarily in urban areas that have high
concentrations of soot in the air from industry and
from diesel-powered vehicles, replace every 15,000
miles (24,000 km).
Inspect drive belt
Replace transmission fluid Driving in mountainous areas at very low vehicle
speeds or trailer towing results in higher
transmission temperatures.
This requires transmission fluid changes more
frequently than recommended by the Maintenance
Minder. If you regulary drive your vehicle under these
conditions, have the transmission fluid changed
every 30,000 miles (48,000 km).
Replace spark plugs
Replace timing belt and inspect water pump If you drive regularly in very high temperatures (over
110°F, 43°C), or in very low temperatures (under-20°F,
29°C), replace every 60,000 mile (U.S.)/100,000 km
(Canada)
Inspect valve clearance
Replace engine coolant
Maintenance Main Items
Replace engine oil
Replace engine oil and oil filter
Rotate tires
Inspect front and rear brakes
Check parking brake adjustment
Inspect these items: Tie rod ends, steering gear box, and boots
Suspension components
Driveshaft boots
Brake hoses and lines (including ABS)
All fluid levels and condition of fluids
Exhaust system
Fuel lines and connections
A
B
Symbol
Symbol
1
2
3
4
51
Maintenance Minder
Page 352 of 420
Remove the blade f rom its holder
by grasping the tabbed end of the
blade. Pull f irmly until the tabs
come out of the holder.Pull one end of the blade out f rom
the holder.
Slide the blade out of the holder.
Disconnect the blade assembly f rom
the wiper arm by pivoting the blade
assembly upward. 4.
Rear Wiper : Front Wiper :Rear Wiper :
CONT INUED
Wiper Blades
Maint enance
351
BLADE
Page 353 of 420
Examine the new wiper blades. If
they have no plastic or metal
reinf orcement along the back
edge, remove the metal
reinf orcement strips f rom the old
wiper blade, and install them in
the slots along the edge of the new
blade.
Slide the new wiper blade into the
holder until the tabs lock.Lower the wiper arm against the
windshield.
Front windshield: Lower the
passenger’s side f irst, then the
driver’s side.
Insert both ends of the blade into the
holder.Makesuretheyaresecure. Slide the new blade into the holder.
Make sure it is engaged in the slot
along its f ull length. Install the wiper blade assembly
onto the wiper arm. Make sure it
locks in place.
6.
7.
4.
5. Front Wiper : Rear Wiper :
Wiper Blades
352
BLADE
REINFORCEMENT
Page 357 of 420

Replace your tires with radial tires of
the same size, load range, speed
rating, and maximum cold tire
pressure rating (as shown on the
tire’s sidewall). Mixing radial and
bias-ply tires on your vehicle can
reduce braking ability, traction, and
steering accuracy. Using tires of a
dif f erent size or construction can
cause the ABS to work inconsistently.See page f or DOT tire quality
grading inf ormation, and pagef or tire size inf ormation.
Replacement wheels are available at
your dealer.
It is best to replace all f our tires at
thesametime.If thatisnotpossible
or necessary, replace the two f ront
tires or two rear tires as a pair. If you
replace just the f ront tires, move the
rear tires to the front, and install the
new tires on the rear. Replacing just
onetirecanseriouslyaffectyour
vehicle’s handling.
If you ever replace a wheel, make
sure that the wheel’s specif ications
match those of the original wheels. Wheel:
Tire:
Touring models
394
396
Touring models LX, EX, and EX-L models
LX, EX, and EX-L models
Replacing T ires
Wheels and T ires
Tires
356
16x7J
235/65R16 103T 225 x 460A
235-710R460A 104T
Installing improper tires on your
vehicle can affect handling and
stability. This can cause a crash
in which you can be seriously
hurt or killed.
Always use the size and type of
tires recommended in this
owner’s manual.
Page 367 of 420

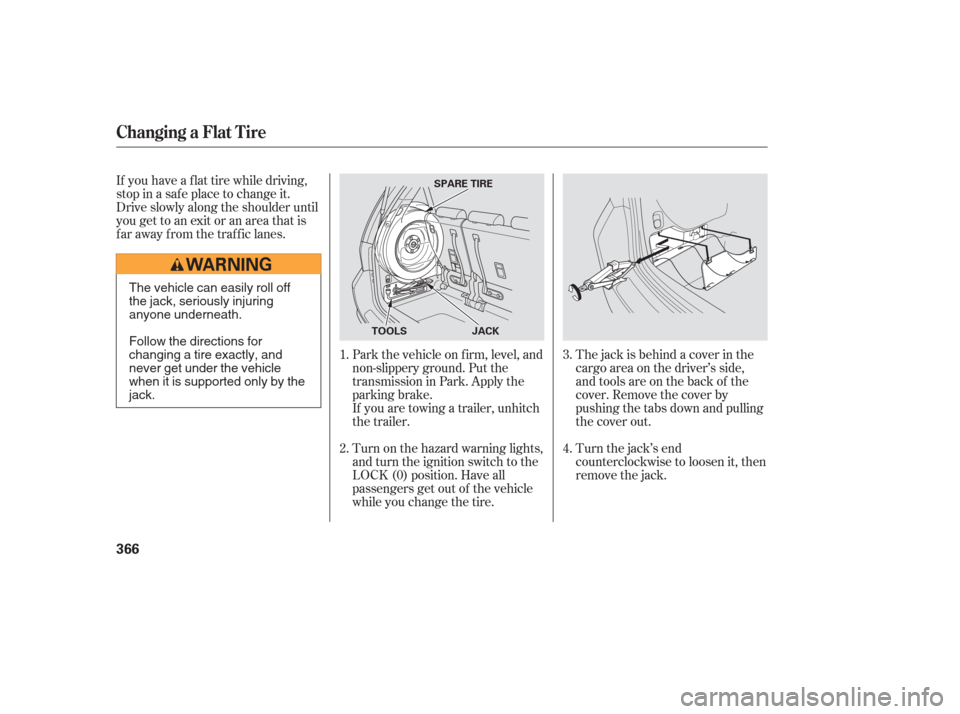
If you have a f lat tire while driving,
stop in a saf e place to change it.
Drive slowly along the shoulder until
you get to an exit or an area that is
far away from the traffic lanes.The jack is behind a cover in the
cargo area on the driver’s side,
and tools are on the back of the
cover. Remove the cover by
pushing the tabs down and pulling
the cover out.
Turn the jack’s end
counterclockwise to loosen it, then
remove the jack.
Park the vehicle on f irm, level, and
non-slippery ground. Put the
transmission in Park. Apply the
parking brake.
If you are towing a trailer, unhitch
the trailer.
Turn on the hazard warning lights,
and turn the ignition switch to the
LOCK (0) position. Have all
passengers get out of the vehicle
while you change the tire.
2. 1.
3.
4.
Changing a Flat Tire
366
JACK
SPARE TIRE
TOOLS
The vehicle can easily roll off
the jack, seriously injuring
anyone underneath.
Follow the directions for
changing a tire exactly, and
never get under the vehicle
when it is supported only by the
jack.
Page 380 of 420

However, if the brake pedal does not
f eel normal, you should take
immediate action. A problem in one
part of the system’s dual circuit
design will still give you braking at
two wheels. You will f eel the brake
pedal go down much f arther bef ore
the vehicle begins to slow down, and
you will have to press harder on the
pedal.
Slow down by shif ting to a lower
gear, and pull to the side of the road
when it is saf e. Because of the long
distance needed to stop, it is
hazardous to drive the vehicle. You
should have it towed and repaired as
soon as possible (seeon page ). If you must drive the vehicle a short
distance in this condition, drive
slowly and caref ully.
If the brake system indicator comes
on while driving, the brake f luid level
is probably low. Press lightly on the
brake pedal to see if it f eels normal.
If it does, check the brake f luid level
thenexttimeyoustopataservice
station (see page ).
If the f luid level is low, take your
vehicle to a dealer, and have the
brake system inspected f or leaks or
worn brake pads. The brake system
indicator normally
comesonwhenyou
turn the ignition switch to the ON
(II) position, and as a reminder to
check the parking brake. It will stay
on if you do not f ully release the
parking brake. If the ABS indicator and the VSA
indicator come on with the brake
system indicator, have the vehicle
inspected by your dealer
immediately.
You will also see a ‘‘CHECK BRAKE
SYSTEM’’ message on the multi-
inf ormation display when this
indicator comes on.
387
341
On Touring models
Emergency
Towing
Brake System Indicator
T aking Care of t he Unexpect ed
379
U.S. Canada
Page 382 of 420
The vehicle’s f uses are contained in
f our f use boxes (three, if the vehicle
does not have a rear entertainment
system).To open the passenger’s f use box,
pull the right edge of the cover.
Theinteriorfuseboxesarelocated
under the dashboard on the driver’s
and passenger’s side. The primary under-hood f use box is
on the passenger’s side. To open it,
pushthetabsasshown.
The secondary under-hood f use box
is behind the primary f use box.
Fuses
T aking Care of t he Unexpect ed
381
DRIVER’S SIDE INTERIOR
PASSENGER’S SIDE
INTERIORPRIMARY UNDER-HOOD FUSE BOX
SECONDARY UNDER-HOOD FUSE BOX