2006 GMC SIERRA lock
[x] Cancel search: lockPage 157 of 600

3. Keep pressing the on/off button until the desired
zone number appears in the display. Release the
button. After approximately four seconds of inactivity,
the new zone number will be locked in and the
compass/temperature display will return.
4. Calibrate the compass as described below.
Compass Calibration
The compass may need calibration if one of the
following occurs:
After approximately �ve seconds, the display does
not show a compass heading (N for North, for
example), there may be a strong magnetic �eld
interfering with the compass. Such interference may
be caused by a magnetic antenna mount, magnetic
note pad holder or a similar magnetic item.
The compass does not display the correct heading
and the compass zone variance is set correctly.
In order to calibrate, CAL must be displayed in the
mirror compass windows. If CAL is not displayed,
push the on/off button for approximately 12 seconds
or until CAL is displayed.
The compass can be calibrated by driving the vehicle
in circles at 5 mph (8 km/h) or less until the display
reads a direction.
Passenger Airbag Indicator
The vehicle may be equipped with a passenger airbag
indicator, on the mirror glass, just above the buttons.
If the vehicle has this feature, the mirror will display the
word ON, or an airbag symbol in Canada, when the
passenger airbag is enabled. For more information,
seePassenger Sensing System on page 1-81.
Cleaning the Mirror
When cleaning the mirror, use a paper towel or similar
material dampened with glass cleaner. Do not spray
glass cleaner directly on the mirror as that may cause
the liquid cleaner to enter the mirror housing.
Automatic Dimming Rearview Mirror
with Compass
Your vehicle may have an automatic-dimming rearview
mirror with a compass.
2-63
Page 167 of 600

OnStar®System
OnStar®uses global positioning system (GPS) satellite
technology, wireless communications, and live advisors
to provide you with a wide range of safety, security,
information, and convenience services. If your airbags
deploy, the system is designed to make an automatic call
to OnStar
®Emergency where we can request emergency
services be sent to your location. If you lock your keys in
the car, call OnStar
®at 1-888-4-ONSTAR and they can
send a signal to unlock your doors. If you need roadside
assistance, press the OnStar
®button and they will get
you the help you need.
A complete OnStar
®User’s Guide and the Terms
and Conditions of the OnStar®Subscription Service
Agreement are included in the vehicle’s glove box
literature. For more information, visit www.onstar.com or
www.onstar.ca. Contact OnStar
®at 1-888-4-ONSTAR
(1-888-466-7827), or press the OnStar®button to speak
to an OnStar®advisor 24 hours a day, 7 days a week.Terms and conditions of the Subscription Service
Agreement can be found at www.onstar.com or
www.onstar.ca.
OnStar®Services
For new vehicles equipped with OnStar®, the Safe and
Sound Plan is included for one year from the date of
purchase. You can extend this plan beyond the �rst year,
or upgrade to the Directions and Connections
®Plan to
meet your needs. For more information, press the
OnStar
®button to speak to an advisor.
Safe and Sound Plan
Automatic Noti�cation of Airbag Deployment
Emergency Services
Roadside Assistance
Stolen Vehicle Tracking
AccidentAssist
Remote Door Unlock/Vehicle Alert
Remote Diagnostics
Online Concierge
2-73
Page 169 of 600

Universal Home
Remote System
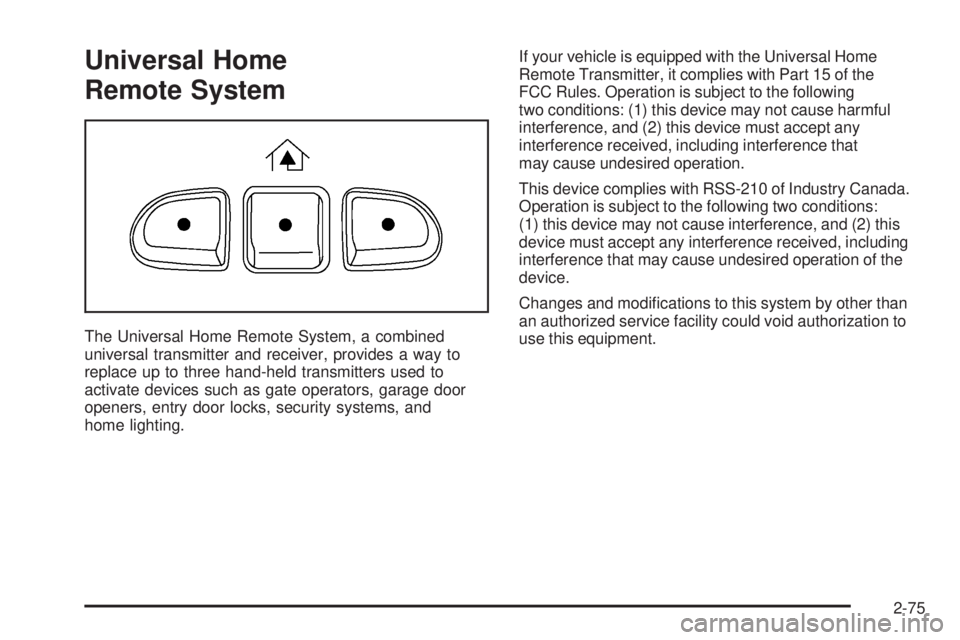
The Universal Home Remote System, a combined
universal transmitter and receiver, provides a way to
replace up to three hand-held transmitters used to
activate devices such as gate operators, garage door
openers, entry door locks, security systems, and
home lighting.If your vehicle is equipped with the Universal Home
Remote Transmitter, it complies with Part 15 of the
FCC Rules. Operation is subject to the following
two conditions: (1) this device may not cause harmful
interference, and (2) this device must accept any
interference received, including interference that
may cause undesired operation.
This device complies with RSS-210 of Industry Canada.
Operation is subject to the following two conditions:
(1) this device may not cause interference, and (2) this
device must accept any interference received, including
interference that may cause undesired operation of the
device.
Changes and modi�cations to this system by other than
an authorized service facility could void authorization to
use this equipment.
2-75
Page 176 of 600

Sunroof
The vehicle may be equipped with a power sliding
sunroof. To open or close your sunroof, the ignition
must be on or Retained Accessory Power (RAP) must
be active. SeeRetained Accessory Power (RAP) on
page 2-23for more information.
The sunroof control is
located on the overhead
console. Press the rear
of the control to open the
sunroof to the vent position,
then press the rear of
the control again to
express-open the sunroof.
To close the sunroof, press and hold the front of the
control. The control must be held until the glass stops
moving, so that the sunroof will be fully seated.The sunroof also has a roller sunscreen that can be used
to block the rays of the sun. The roller sunscreen can be
manually operated with the sunroof in an open or closed
position. To open the sunscreen, press up to unlatch it
and roll it back. To close, pull it forward and latch it to the
close position.
If the battery has been recharged, disconnected, or not
working, the sunroof may need to be reprogrammed. To
do this, start the vehicle and press forward on the sunroof
control until it moves to a fully closed position. This resets
the sunroof memory, enabling the sunroof to function
properly.
Vehicle Personalization
In addition to the following features, your vehicle may
also have features that can be programmed through
the Driver Information Center (DIC). SeeDIC Vehicle
Customization on page 3-64for more information.
2-82
Page 179 of 600

Instrument Panel Overview...............................3-4
Hazard Warning Flashers................................3-6
Other Warning Devices...................................3-6
Horn.............................................................3-6
Tilt Wheel.....................................................3-6
Turn Signal/Multifunction Lever.........................3-7
Turn and Lane-Change Signals........................3-7
Headlamp High/Low-Beam Changer..................3-8
Flash-to-Pass.................................................3-9
Windshield Wipers..........................................3-9
Windshield Washer.......................................3-10
Cruise Control..............................................3-10
Headlamps..................................................3-14
Headlamps on Reminder................................3-14
Daytime Running Lamps (DRL).......................3-15
Automatic Headlamp System..........................3-15
Fog Lamps..................................................3-17
Auxiliary Roof Mounted Lamp.........................3-18
Instrument Panel Brightness...........................3-18
Dome Lamps...............................................3-18
Dome Lamp Override....................................3-19
Entry Lighting...............................................3-19
Exit Lighting.................................................3-19
Front Reading Lamps....................................3-19
Cargo Lamp.................................................3-19
Accessory Power Outlet(s).............................3-20
Ashtray(s) and Cigarette Lighter......................3-20Climate Controls............................................3-21
Climate Control System.................................3-21
Dual Climate Control System..........................3-22
Dual Automatic Climate Control System...........3-25
Outlet Adjustment.........................................3-30
Warning Lights, Gages, and Indicators............3-31
Instrument Panel Cluster................................3-32
Speedometer and Odometer...........................3-33
Trip Odometer..............................................3-33
Tachometer.................................................3-34
Safety Belt Reminder Light.............................3-34
Airbag Readiness Light..................................3-35
Airbag Off Light............................................3-35
Passenger Airbag Status Indicator...................3-37
Battery Warning Light....................................3-40
Voltmeter Gage............................................3-40
Up-Shift Light (Manual Transmission)...............3-41
Brake System Warning Light..........................3-41
Anti-Lock Brake System Warning Light...............3-42
Traction Off Light..........................................3-43
Engine Coolant Temperature Gage..................3-43
Transmission Temperature Gage.....................3-44
Malfunction Indicator Lamp.............................3-46
Oil Pressure Gage........................................3-48
Security Light...............................................3-49
Cruise Control Light......................................3-49
Section 3 Instrument Panel
3-1
Page 183 of 600

The main components of your instrument panel are the
following:
A. Dome Lamp Override Button. SeeDome Lamp
Override on page 3-19.
B. Headlamp Controls. SeeHeadlamps on page 3-14.
C. Air Outlets. SeeOutlet Adjustment on page 3-30.
D. Automatic Transfer Case/Electronic Transfer
Case/Traction Assist System (TAS). SeeFour-Wheel
Drive on page 2-38andTraction Assist System (TAS)
on page 4-8.
E. Multifunction Lever. SeeTurn Signal/Multifunction
Lever on page 3-7.
F. Instrument Panel Cluster. SeeInstrument Panel
Cluster on page 3-32.
G. Range Selection Mode (Allison Transmission
®only)
Button (If Equipped). SeeAutomatic Transmission
Operation on page 2-26.
H. Gearshift Lever. SeeAutomatic Transmission
Operation on page 2-26orManual Transmission
Operation on page 2-34for manual transmissions.
I. Tow/Haul Selector Button (If Equipped).
SeeTow/Haul Mode on page 2-31.
J. Audio System. SeeAudio System(s) on page 3-70.
K. Climate Control System. SeeClimate Control System
on page 3-21,Dual Climate Control System on
page 3-22andDual Automatic Climate Control
System on page 3-25.L. Instrument Panel Fuse Block.Instrument Panel Fuse
Block on page 5-124.
M. Cargo Lamp Button. SeeCargo Lamp on page 3-19.
N. Hood Release. SeeHood Release on page 5-13.
O. Steering Wheel Control Buttons (If Equipped).
SeeDriver Information Center (DIC) on page 3-52
orAudio Steering Wheel Controls on page 3-129.
P. Center Instrument Panel Fuse Block. SeeCenter
Instrument Panel Fuse Block on page 5-126.
Q. Parking Brake Release. SeeParking Brake on
page 2-52.
R. Tilt Wheel Lever. SeeTilt Wheel on page 3-6.
S. Cigarette Lighter. SeeAshtray(s) and Cigarette
Lighter on page 3-20.
T. Accessory Power Outlet. SeeAccessory Power
Outlet(s) on page 3-20.
U. Manual Selectable Ride Control (If Equipped).
SeeManual Selectable Ride on page 4-10.
V. Auxiliary Roof Mounted Lamp Button (If Equipped).
SeeAuxiliary Roof Mounted Lamp on page 3-18.
W. Passenger Airbag Off Switch (If Equipped).
SeeAirbag Off Switch on page 1-78.
X. Glove Box. SeeGlove Box on page 2-79.
3-5
Page 185 of 600

To tilt the wheel, hold the steering wheel and pull the
lever. Then move the steering wheel to a comfortable
position and release the lever to lock the wheel in place.
Turn Signal/Multifunction Lever
The lever on the left side of the steering column
includes the following:
GTurn and Lane Change Signals. SeeTurn and
Lane-Change Signals on page 3-7.
53Headlamp High/Low-Beam Changer. See
Headlamp High/Low-Beam Changer on page 3-8.
Flash-to-Pass. SeeFlash-to-Pass on page 3-9.
NWindshield Wipers. SeeWindshield Wipers on
page 3-9.
LWindshield Washer. SeeWindshield Washer
on page 3-10.
ICruise Control. SeeCruise Control on
page 3-10.
For information on the headlamps, seeHeadlamps on
page 3-14.
Turn and Lane-Change Signals
The turn signal has two upward (for right) and
two downward (for left) positions. These positions
allow you to signal a turn or a lane change.
To signal a turn, move the lever all the way up or
down. When the turn is �nished, the lever will return
automatically.
To signal a lane change, just raise or lower the lever until
the arrow starts to �ash. Hold it there until you complete
your lane change. The lever will return by itself when you
release it.
3-7
Page 188 of 600

Windshield Washer
LQ(Washer Fluid):There is a paddle marked
with the windshield washer symbol at the top of the
multifunction lever. To spray washer �uid on the
windshield, push the paddle. The wipers will clear the
window and then either stop or return to your preset
speed.
{CAUTION:
In freezing weather, do not use your washer
until the windshield is warmed. Otherwise the
washer �uid can form ice on the windshield,
blocking your vision.
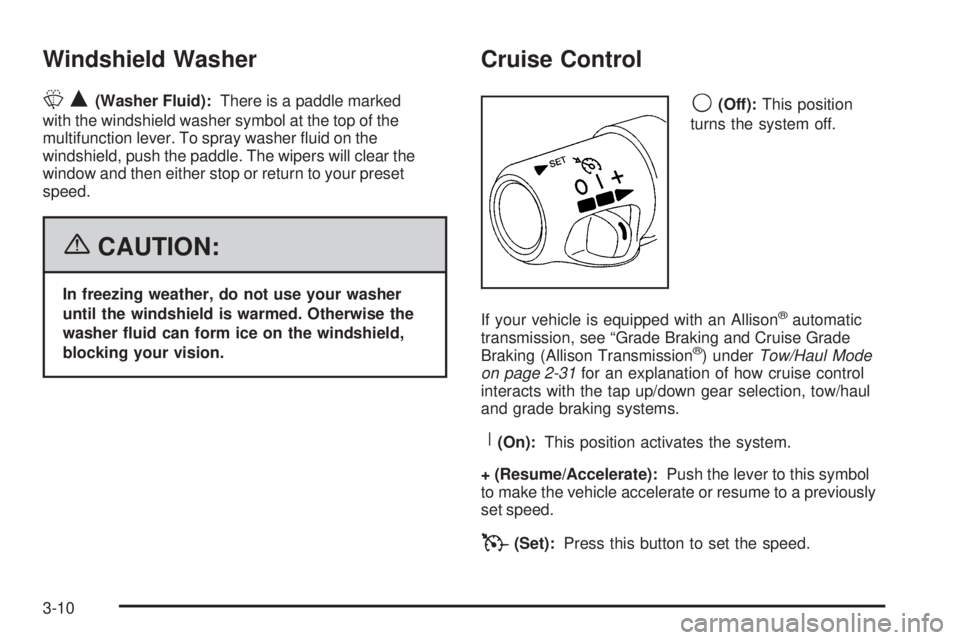
Cruise Control
9(Off):This position
turns the system off.
If your vehicle is equipped with an Allison
®automatic
transmission, see “Grade Braking and Cruise Grade
Braking (Allison Transmission
®) underTow/Haul Mode
on page 2-31for an explanation of how cruise control
interacts with the tap up/down gear selection, tow/haul
and grade braking systems.
R(On):This position activates the system.
+ (Resume/Accelerate):Push the lever to this symbol
to make the vehicle accelerate or resume to a previously
set speed.
T(Set):Press this button to set the speed.
3-10