Page 55 of 198
Downloaded from www.Manualslib.com manuals search engine LIGHTING CONTROL
Lighting control positions
OffA
Side and tail lampsB
HeadlampsC
Parking lampsD
Parking lamps
Push in and turn anticlockwise.
Autolamps
WARNING
The autolamps feature is anauxiliary system which is notintended to relieve the driver of hisresponsibility for the vehicle’s exteriorlighting.
When the switch is set to AUTO, thedipped beam headlamps will switchon and off automatically dependingon the ambient light.
Note: Main beam can be activatedonly when the autolamps feature hasturned on the headlamps.
If the headlamps switch offautomatically with main beamactivated, the next time theautolamps feature switches on theheadlamps, main beam will still be on.Dipped beam may be selected bypulling the multi-function levertowards the steering wheel.
Main/dipped beam
To switch over pull the lever towardsthe steering wheel.
53
LightingABCE72161 E72162 E72168
Page 56 of 198

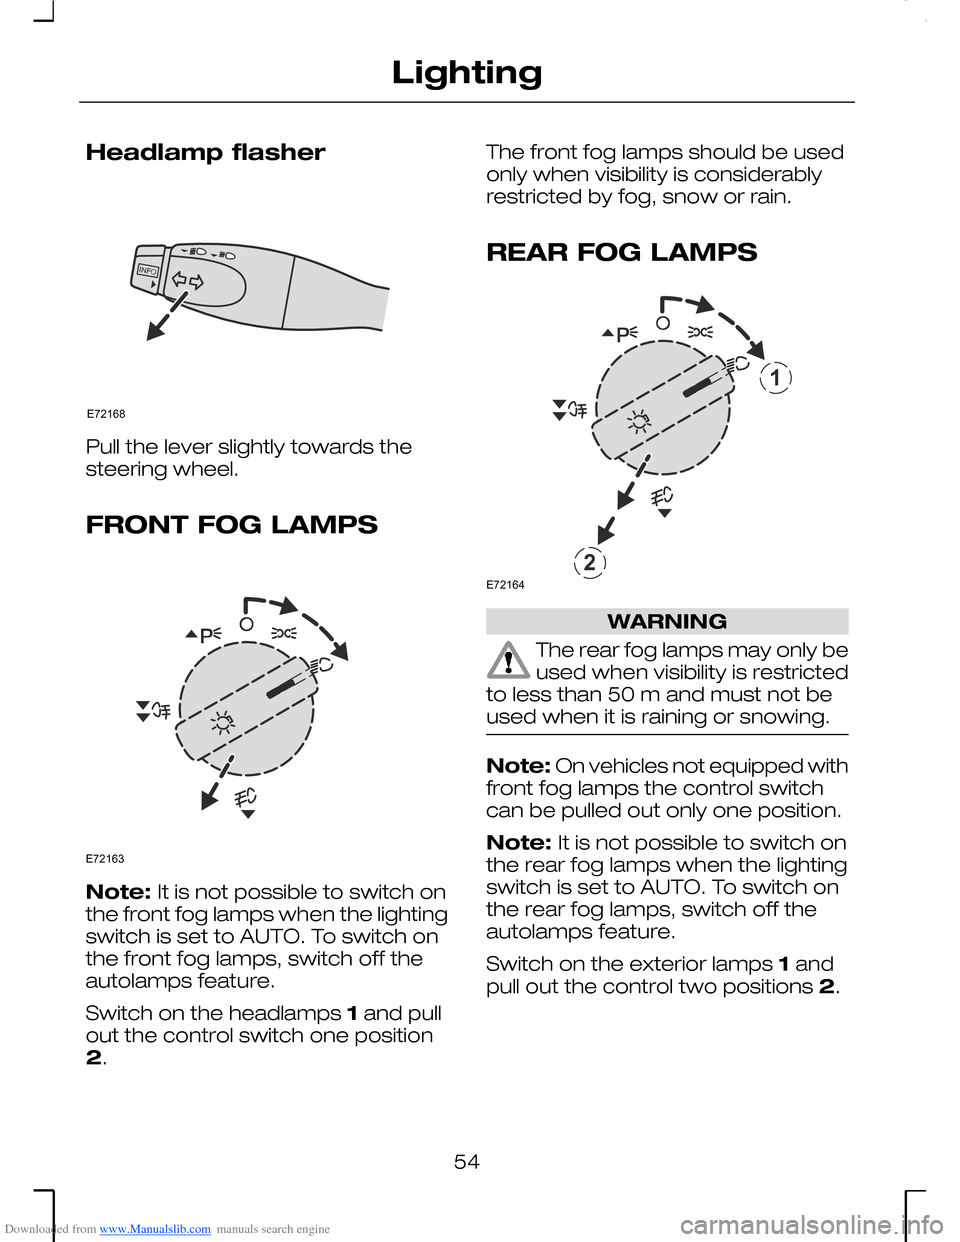
Downloaded from www.Manualslib.com manuals search engine Headlamp flasher
Pull the lever slightly towards thesteering wheel.
FRONT FOG LAMPS
Note: It is not possible to switch onthe front fog lamps when the lightingswitch is set to AUTO. To switch onthe front fog lamps, switch off theautolamps feature.
Switch on the headlamps 1 and pullout the control switch one position2.
The front fog lamps should be usedonly when visibility is considerablyrestricted by fog, snow or rain.
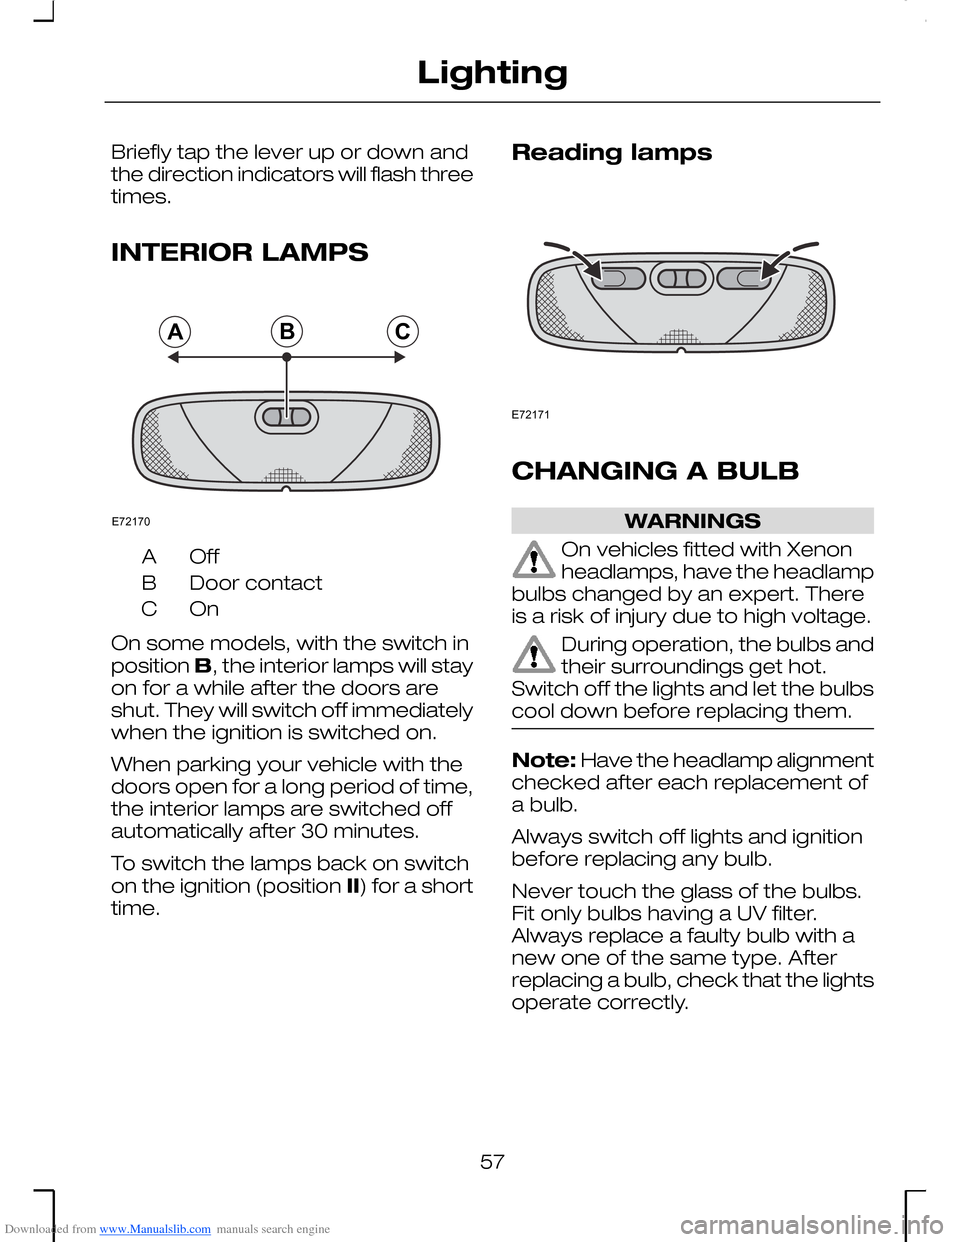
REAR FOG LAMPS
WARNING
The rear fog lamps may only beused when visibility is restrictedto less than 50 m and must not beused when it is raining or snowing.
Note: On vehicles not equipped withfront fog lamps the control switchcan be pulled out only one position.
Note: It is not possible to switch onthe rear fog lamps when the lightingswitch is set to AUTO. To switch onthe rear fog lamps, switch off theautolamps feature.
Switch on the exterior lamps 1 andpull out the control two positions 2.
54
LightingE72168 E72163 12E72164
Page 57 of 198
Downloaded from www.Manualslib.com manuals search engine ADJUSTING THE
HEADLAMPS
Vehicles with Xenonheadlamps
Vehicles with Xenon headlamps arefitted with automatic headlamplevelling.
The headlamps can be adjusted fordriving on the left or right hand sideof the road i.e. when travellingabroad. This adjustment should onlybe carried out by an expert.
HEADLAMP LEVELLING
Without headlamp levellingA
With headlamp levellingB
The level of the headlamp beams canbe adjusted according to the vehicleload. Turn the thumbwheeldownward to lower the beams, andupward to raise them.
55
LightingABE72165 E65990
Page 58 of 198
Downloaded from www.Manualslib.com manuals search engine Recommended headlamp levelling control positions
Control positionLoad
EstateSaloonLoad inluggagecompart-ment1
Persons
with self-level. susp.withoutself-level.susp.
Rear seatsFront seats
000--1-2
01212-31-2
02222max.131-2
123232max.1-1
1 See Technical specifications (page 173).
2Control position must be increased by 0.5 on vehicles with 2.0 l Duratorq-TDCi
or 2.5 l Duratec-VE engines and automatic transmission. Higher controlpositions (+1) may be necessary when towing a trailer.
HAZARD WARNING
FLASHERS
Press the switch to turn on or off. Thehazard warning flashers can also beoperated when the ignition is off.
DIRECTION INDICATORS
56
LightingE72166 E72167
Page 59 of 198

Downloaded from www.Manualslib.com manuals search engine Briefly tap the lever up or down andthe direction indicators will flash threetimes.
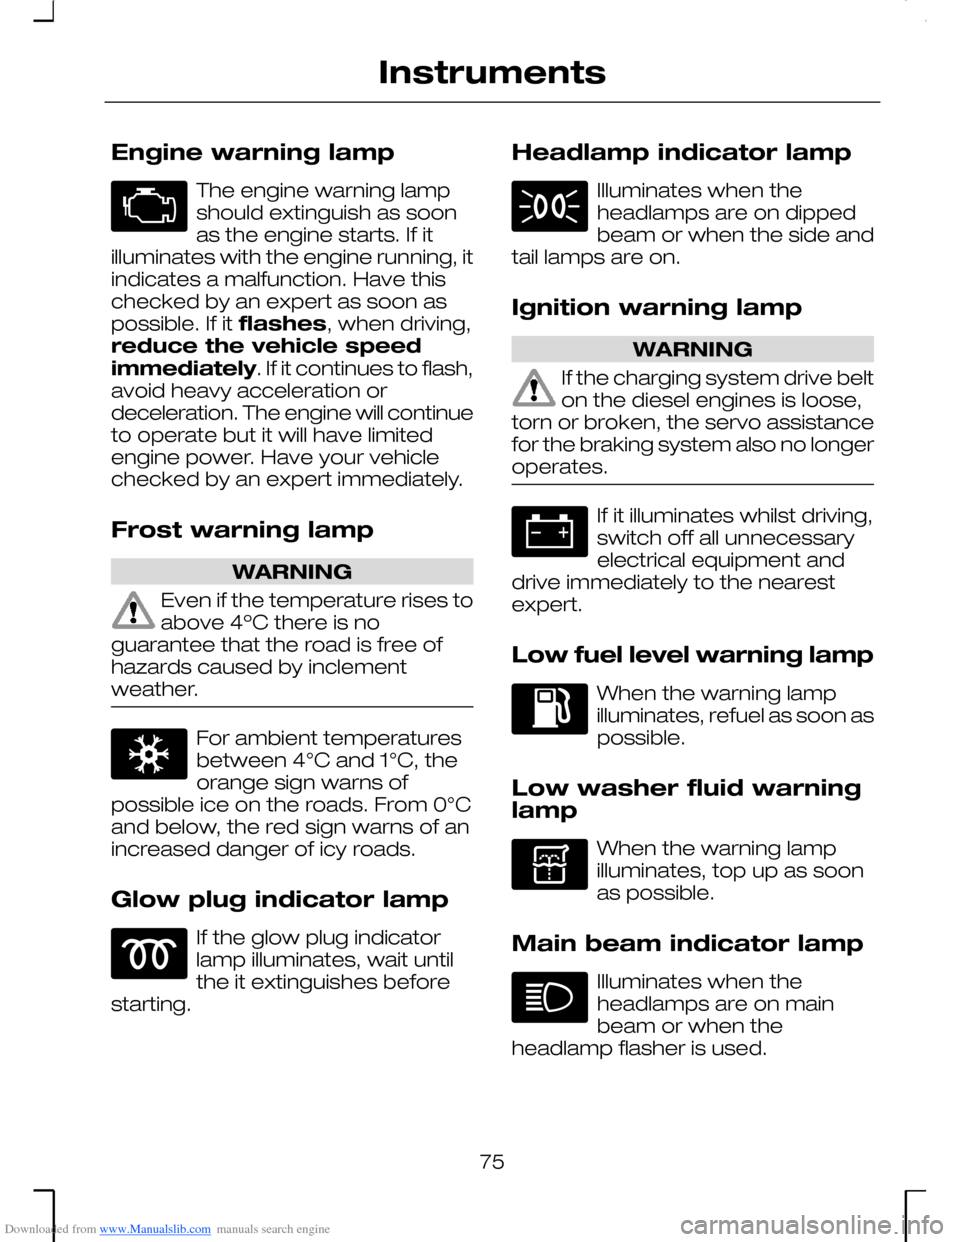
INTERIOR LAMPS
OffA
Door contactB
OnC
On some models, with the switch inposition B, the interior lamps will stayon for a while after the doors areshut. They will switch off immediatelywhen the ignition is switched on.
When parking your vehicle with thedoors open for a long period of time,the interior lamps are switched offautomatically after 30 minutes.
To switch the lamps back on switchon the ignition (position II) for a shorttime.
Reading lamps
CHANGING A BULB
WARNINGS
On vehicles fitted with Xenonheadlamps, have the headlampbulbs changed by an expert. Thereis a risk of injury due to high voltage.
During operation, the bulbs andtheir surroundings get hot.Switch off the lights and let the bulbscool down before replacing them.
Note: Have the headlamp alignmentchecked after each replacement ofa bulb.
Always switch off lights and ignitionbefore replacing any bulb.
Never touch the glass of the bulbs.Fit only bulbs having a UV filter.Always replace a faulty bulb with anew one of the same type. Afterreplacing a bulb, check that the lightsoperate correctly.
57
LightingABCE72170 E72171
Page 60 of 198
Downloaded from www.Manualslib.com manuals search engine Headlamps, side lamps,direction indicators
Note: It is necessary to remove theheadlamp assembly to remove anyof the bulbs.
Removing the headlampassembly
Open the bonnet.
Remove the rotary clip on both endsof the radiator grille and pull out theradiator grille.
Grasp one of the tabs and pull outthe retaining pin. Repeat with theother tab.
Carefully pull out the headlampassembly and disconnect the wiringconnector.
Front direction indicators
21 watt spherical bulb, orange
•Turn the bulb holder anticlockwiseand pull out.
•Turn the bulb under slightpressure anticlockwise andremove it.
•Replace the bulb.
When installing in the reverse order,pay attention to the guide tabs.
Side lamps
5 watt wedge base bulb
58
LightingE72536 E72537 E72538
Page 61 of 198
Downloaded from www.Manualslib.com manuals search engine •Turn the cover anticlockwise, andremove.
•Using a flat-bladed screwdriver,carefully prise out the socket.
•Pull out the bulb and replace it.
When installing in the reverse order,pay attention to the guide tabs.
Opening the headlampassembly
•Disconnect the wiring connector.
•Release the clips on the rear ofthe headlamp assembly andremove the cover.
When installing in the reverse order,make sure the clips engage properly.
Headlamps – dipped beam
H7, 55 watt halogen bulb
•Disconnect the wiring connector.
•Release the wire clip and pull outthe bulb.
•Replace the bulb.
Install in the reverse order.
Headlamps – main beam
H1, 55 watt halogen bulb
59
LightingE72539 E72540 E72541
Page 77 of 198

Downloaded from www.Manualslib.com manuals search engine Engine warning lamp
The engine warning lampshould extinguish as soonas the engine starts. If itilluminates with the engine running, itindicates a malfunction. Have thischecked by an expert as soon aspossible. If it flashes, when driving,reduce the vehicle speedimmediately. If it continues to flash,avoid heavy acceleration ordeceleration. The engine will continueto operate but it will have limitedengine power. Have your vehiclechecked by an expert immediately.
Frost warning lamp
WARNING
Even if the temperature rises toabove 4ºC there is noguarantee that the road is free ofhazards caused by inclementweather.
For ambient temperaturesbetween 4°C and 1°C, theorange sign warns ofpossible ice on the roads. From 0°Cand below, the red sign warns of anincreased danger of icy roads.
Glow plug indicator lamp
If the glow plug indicatorlamp illuminates, wait untilthe it extinguishes beforestarting.
Headlamp indicator lamp
Illuminates when theheadlamps are on dippedbeam or when the side andtail lamps are on.
Ignition warning lamp
WARNING
If the charging system drive belton the diesel engines is loose,torn or broken, the servo assistancefor the braking system also no longeroperates.
If it illuminates whilst driving,switch off all unnecessaryelectrical equipment anddrive immediately to the nearestexpert.
Low fuel level warning lamp
When the warning lampilluminates, refuel as soon aspossible.
Low washer fluid warninglamp
When the warning lampilluminates, top up as soonas possible.
Main beam indicator lamp
Illuminates when theheadlamps are on mainbeam or when theheadlamp flasher is used.
75
Instruments