2006 FORD F250 SUPER DUTY ECU
[x] Cancel search: ECUPage 124 of 312
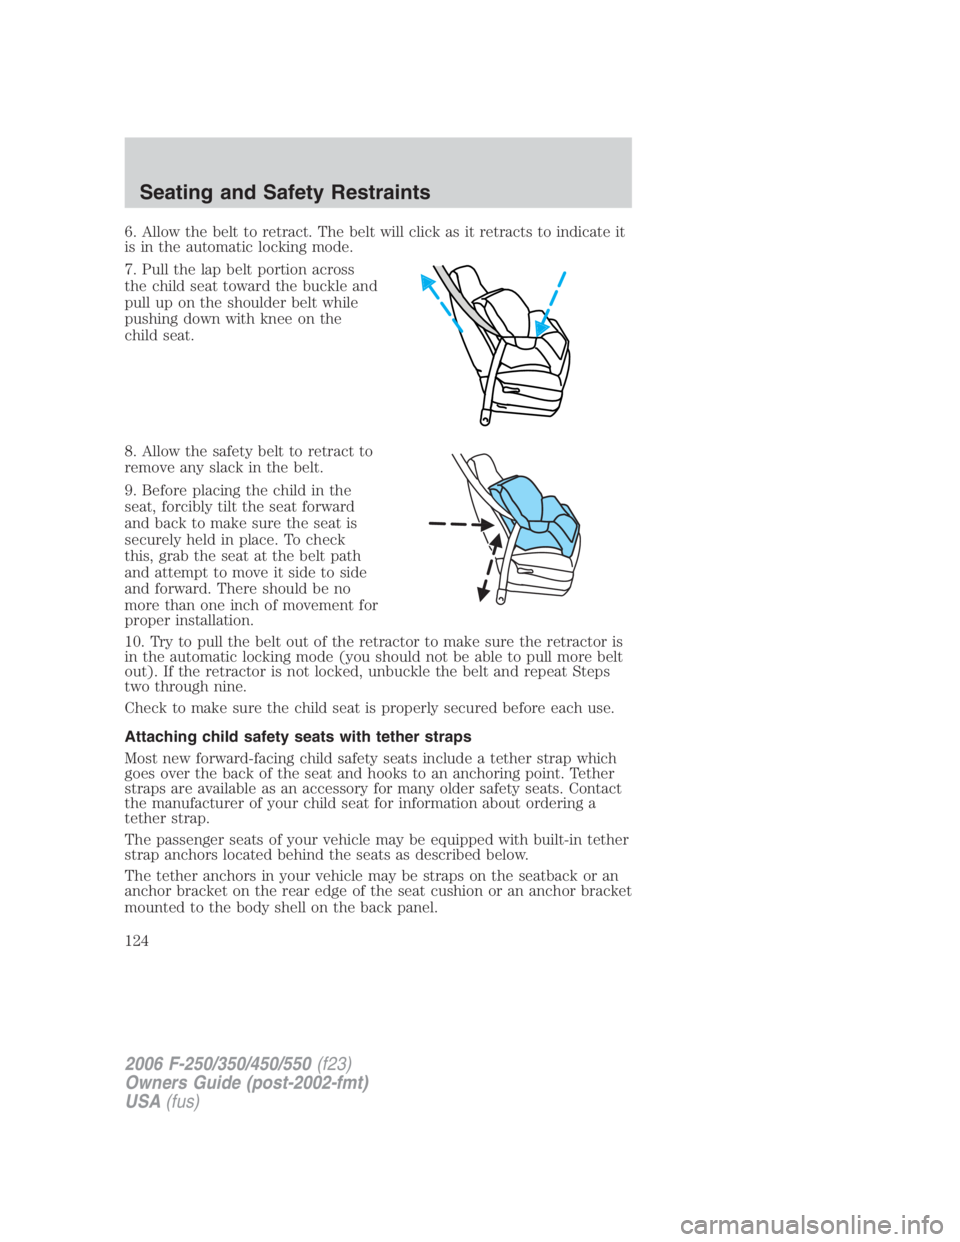
6. Allow the belt to retract. The belt will click as it retracts to indicate it
is in the automatic locking mode.
7. Pull the lap belt portion across
the child seat toward the buckle and
pull up on the shoulder belt while
pushing down with knee on the
child seat.
8. Allow the safety belt to retract to
remove any slack in the belt.
9. Before placing the child in the
seat, forcibly tilt the seat forward
and back to make sure the seat is
securely held in place. To check
this, grab the seat at the belt path
and attempt to move it side to side
and forward. There should be no
more than one inch of movement for
proper installation.
10. Try to pull the belt out of the retractor to make sure the retractor is
in the automatic locking mode (you should not be able to pull more belt
out). If the retractor is not locked, unbuckle the belt and repeat Steps
two through nine.
Check to make sure the child seat is properly secured before each use.
Attaching child safety seats with tether straps
Most new forward-facing child safety seats include a tether strap which
goes over the back of the seat and hooks to an anchoring point. Tether
straps are available as an accessory for many older safety seats. Contact
the manufacturer of your child seat for information about ordering a
tether strap.
The passenger seats of your vehicle may be equipped with built-in tether
strap anchors located behind the seats as described below.
The tether anchors in your vehicle may be straps on the seatback or an
anchor bracket on the rear edge of the seat cushion or an anchor bracket
mounted to the body shell on the back panel.
2006 F-250/350/450/550 (f23)
Owners Guide (post-2002-fmt)
USA (fus)Seating and Safety Restraints
124
Page 127 of 312
6. Refer to the Installing child safety seats in combination lap and
shoulder belt seating positions section of this chapter for further
instructions to secure the child safety seat.
7. Tighten the child safety seat tether strap according to the
manufacturer’s instructions.
If the safety seat is not anchored properly, the risk of a child
being injured in a collision greatly increases.
Tether strap attachment (rear SuperCab only)
There are three loops of webbing just above the back of the rear seat
(along the bottom edge of the rear window) in the SuperCab. These
loops are to be used as both routing loops and anchor loops for up to
three child safety seat tether straps.
Many tether straps cannot be tightened if the tether strap is hooked to
the loop directly behind the child seat. To provide a tight tether strap:
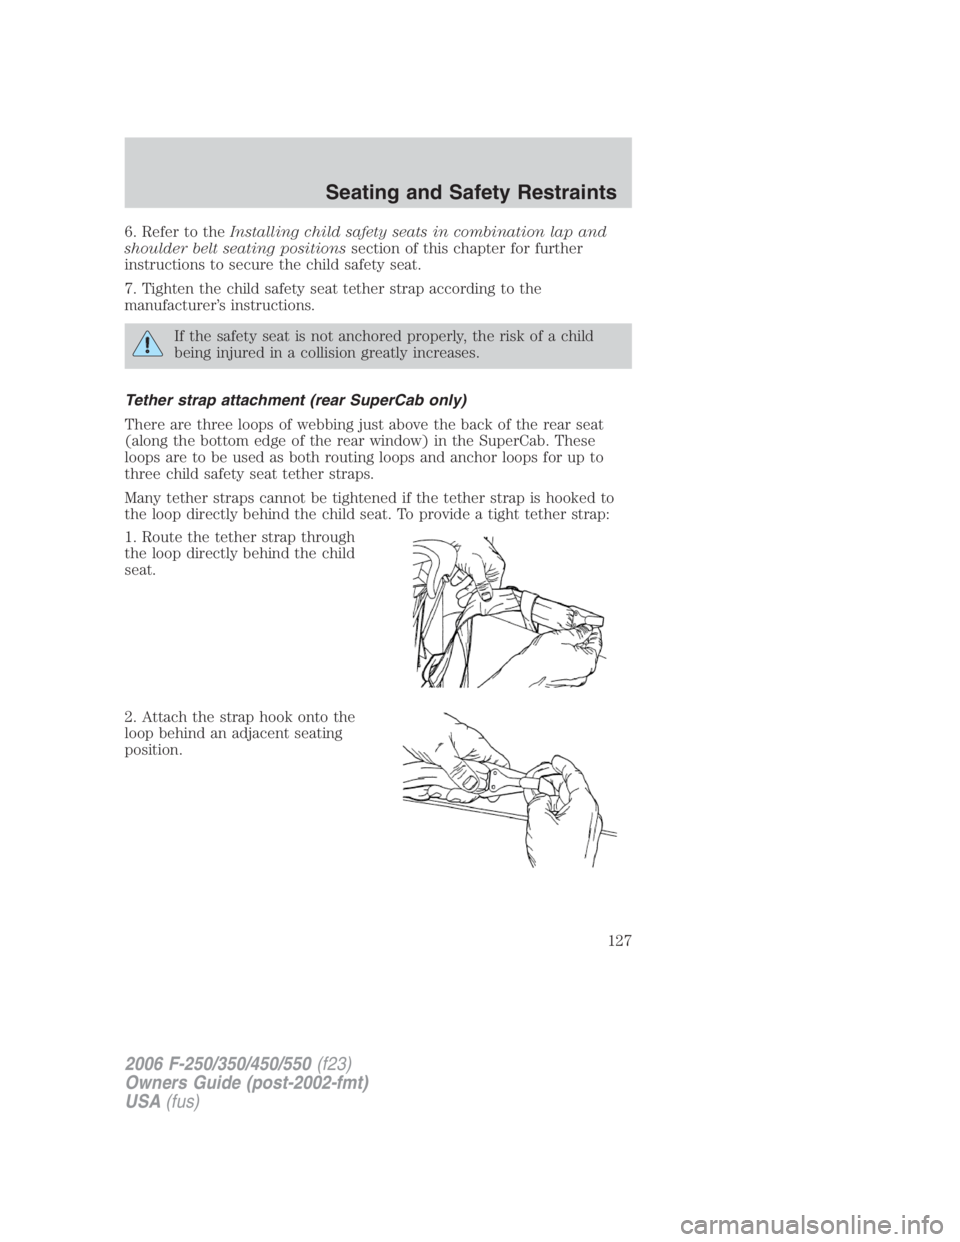
1. Route the tether strap through
the loop directly behind the child
seat.
2. Attach the strap hook onto the
loop behind an adjacent seating
position.
2006 F-250/350/450/550 (f23)
Owners Guide (post-2002-fmt)
USA (fus) Seating and Safety Restraints
127
Page 148 of 312
SNOW TIRES AND CHAINS
Snow tires must be the same size and grade as the tires you
currently have on your vehicle.
Note: If your vehicle is equipped with 20” tires, do not use snow chains
on the front tires.
The tires on your vehicle have all weather treads to provide traction in
rain and snow. However, in some climates, you may need to use snow
tires and chains. If you need to use chains, it is recommended that steel
wheels (of the same size and specifications) be used, as chains may chip
aluminum wheels.
Follow these guidelines when using snow tires and chains:
• Use only SAE Class S chains.
• Install chains securely, verifying that the chains do not touch any
wiring, brake lines or fuel lines.
• Drive cautiously. If you hear the chains rub or bang against your
vehicle, stop and re-tighten the chains. If this does not work, remove
the chains to prevent damage to your vehicle.
• If possible, avoid fully loading your vehicle.
• Remove the tire chains when they are no longer needed. Do not use
tire chains on dry roads.
• The suspension insulation and bumpers will help prevent vehicle
damage. Do not remove these components from your vehicle when
using snow tires and chains.
VEHICLE LOADING – WITH AND WITHOUT A TRAILER
This section will guide you in the proper loading of your vehicle and/or
trailer, to keep your loaded vehicle weight within its design rating
capability, with or without a trailer. Properly loading your vehicle will
provide maximum return of vehicle design performance. Before loading
your vehicle, familiarize yourself with the following terms for determining
your vehicle’s weight ratings, with or without a trailer, from the vehicle’s
Tire Label or Safety Compliance Certification Label:
Base Curb Weight – is the weight of the vehicle including a full tank of
fuel and all standard equipment. It does not include passengers, cargo, or
optional equipment.
2006 F-250/350/450/550 (f23)
Owners Guide (post-2002-fmt)
USA (fus)Tires, Wheels and Loading
148
Page 163 of 312

Driving while you tow
When towing a trailer:
• Do not drive faster than 70 mph (112 km/h) during the first 500 miles
(800 km) of trailer towing and don’t make full-throttle starts.
• Turn off the speed control. The speed control may shut off
automatically when you are towing on long, steep grades.
• Consult your local motor vehicle speed regulations for towing a trailer.
• To eliminate excessive transmission shifting, activate the Tow/Haul
feature. This will also assist in transmission cooling. (For additional
information, refer to the Understanding the positions of the 5–speed
automatic transmission section in this chapter.
• Anticipate stops and brake gradually.
• Do not exceed the GCWR rating or transmission damage may occur.
• Your vehicle may be equipped with a temporary or conventional spare
tire. If the spare tire is different in size (diameter and/or width), tread
type (All-Season or All-Terrain) or is from a different manufacturer
other than the road tires on your vehicle, your spare tire is considered
“temporary”. Consult information on the spare Tire Label or Safety
Compliance Certification Label for limitations when using.
Servicing after towing
If you tow a trailer for long distances, your vehicle will require more
frequent service intervals. Refer to your scheduled maintenance
information for more information.
Trailer towing safety tips
General
• Ensure that the trailer, safety chains and 7–pin electrical connectors
are securely fastened.
• Make sure the truck receiver, draw bar, and coupler are properly
connected and adjusted.
• Check rear view and side mirrors for proper visibility especially when
towing trailer wider than the truck.
• When towing, operate the vehicle at lower speeds than you would
when not towing a trailer. The likelihood of trailer sway is greater at
higher speeds.
2006 F-250/350/450/550 (f23)
Owners Guide (post-2002-fmt)
USA (fus) Tires, Wheels and Loading
163
Page 174 of 312
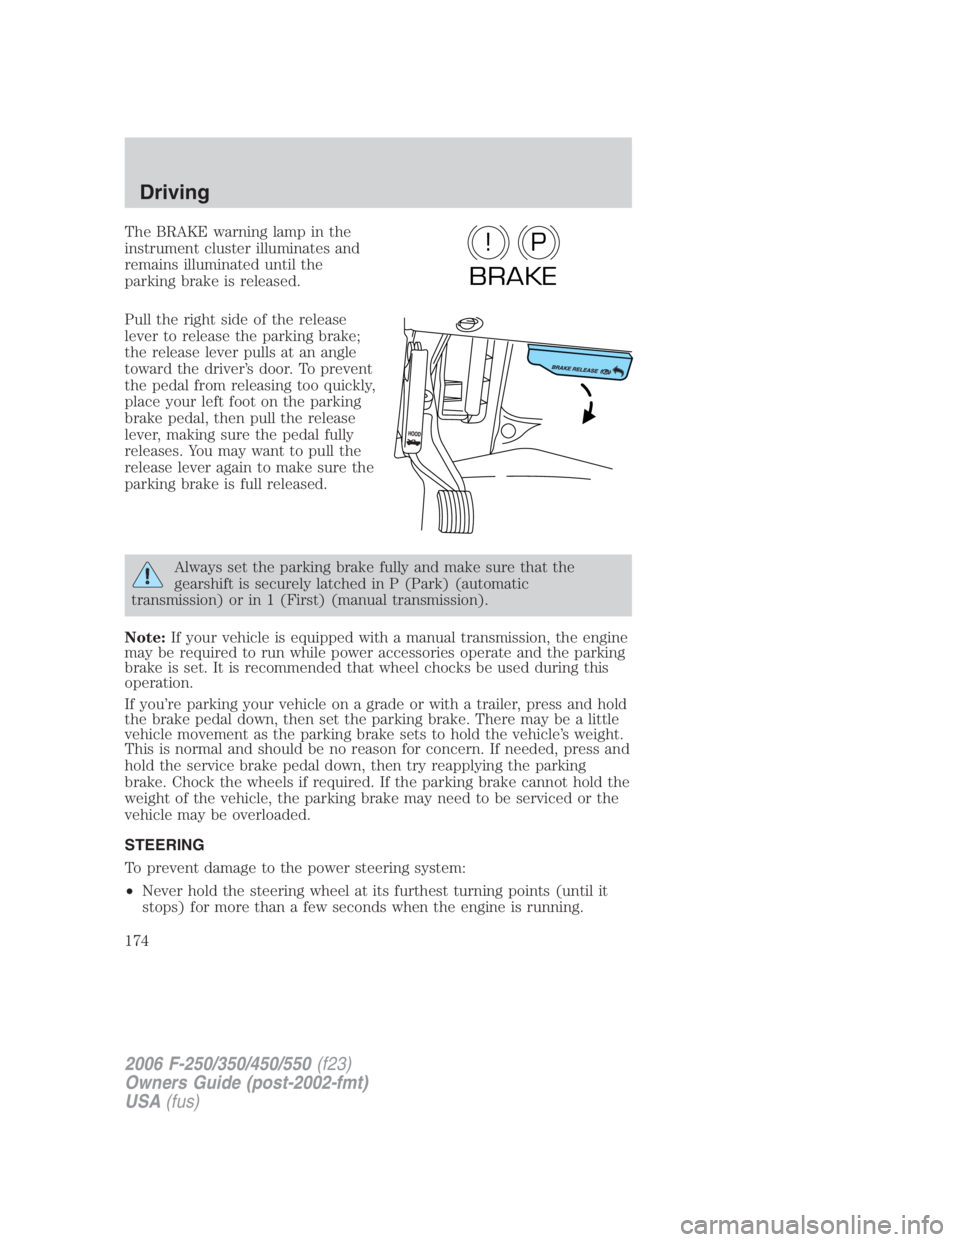
The BRAKE warning lamp in the
instrument cluster illuminates and
remains illuminated until the
parking brake is released.
Pull the right side of the release
lever to release the parking brake;
the release lever pulls at an angle
toward the driver’s door. To prevent
the pedal from releasing too quickly,
place your left foot on the parking
brake pedal, then pull the release
lever, making sure the pedal fully
releases. You may want to pull the
release lever again to make sure the
parking brake is full released.
Always set the parking brake fully and make sure that the
gearshift is securely latched in P (Park) (automatic
transmission) or in 1 (First) (manual transmission).
Note: If your vehicle is equipped with a manual transmission, the engine
may be required to run while power accessories operate and the parking
brake is set. It is recommended that wheel chocks be used during this
operation.
If you’re parking your vehicle on a grade or with a trailer, press and hold
the brake pedal down, then set the parking brake. There may be a little
vehicle movement as the parking brake sets to hold the vehicle’s weight.
This is normal and should be no reason for concern. If needed, press and
hold the service brake pedal down, then try reapplying the parking
brake. Chock the wheels if required. If the parking brake cannot hold the
weight of the vehicle, the parking brake may need to be serviced or the
vehicle may be overloaded.
STEERING
To prevent damage to the power steering system:
• Never hold the steering wheel at its furthest turning points (until it
stops) for more than a few seconds when the engine is running. P!
BRAKE
2006 F-250/350/450/550 (f23)
Owners Guide (post-2002-fmt)
USA (fus)Driving
174
Page 178 of 312
To put your vehicle in P (Park):
• Come to a complete stop
• Move the gearshift lever and securely latch it in P (Park)
Always set the parking brake fully and make sure the gearshift is
latched in P (Park). Turn the ignition to the LOCK position and
remove the key whenever you leave your vehicle.
R (Reverse)
With the gearshift lever in R (Reverse), the vehicle will move backward.
Always come to a complete stop before shifting into and out of R (Reverse).
N (Neutral)
With the gearshift lever in N (Neutral), the vehicle can be started and is
free to roll. Hold the brake pedal down while in this position.
D (Overdrive) with Tow/Haul OFF
D (Overdrive) with Tow/Haul OFF is the normal driving position for the
best fuel economy. The overdrive function allows automatic upshifts and
downshifts through gears one through five.
D (Overdrive) with Tow/Haul ON
The Tow/Haul feature improves transmission operation when towing a
trailer or a heavy load. All transmission gear ranges are available when
using Tow/Haul.
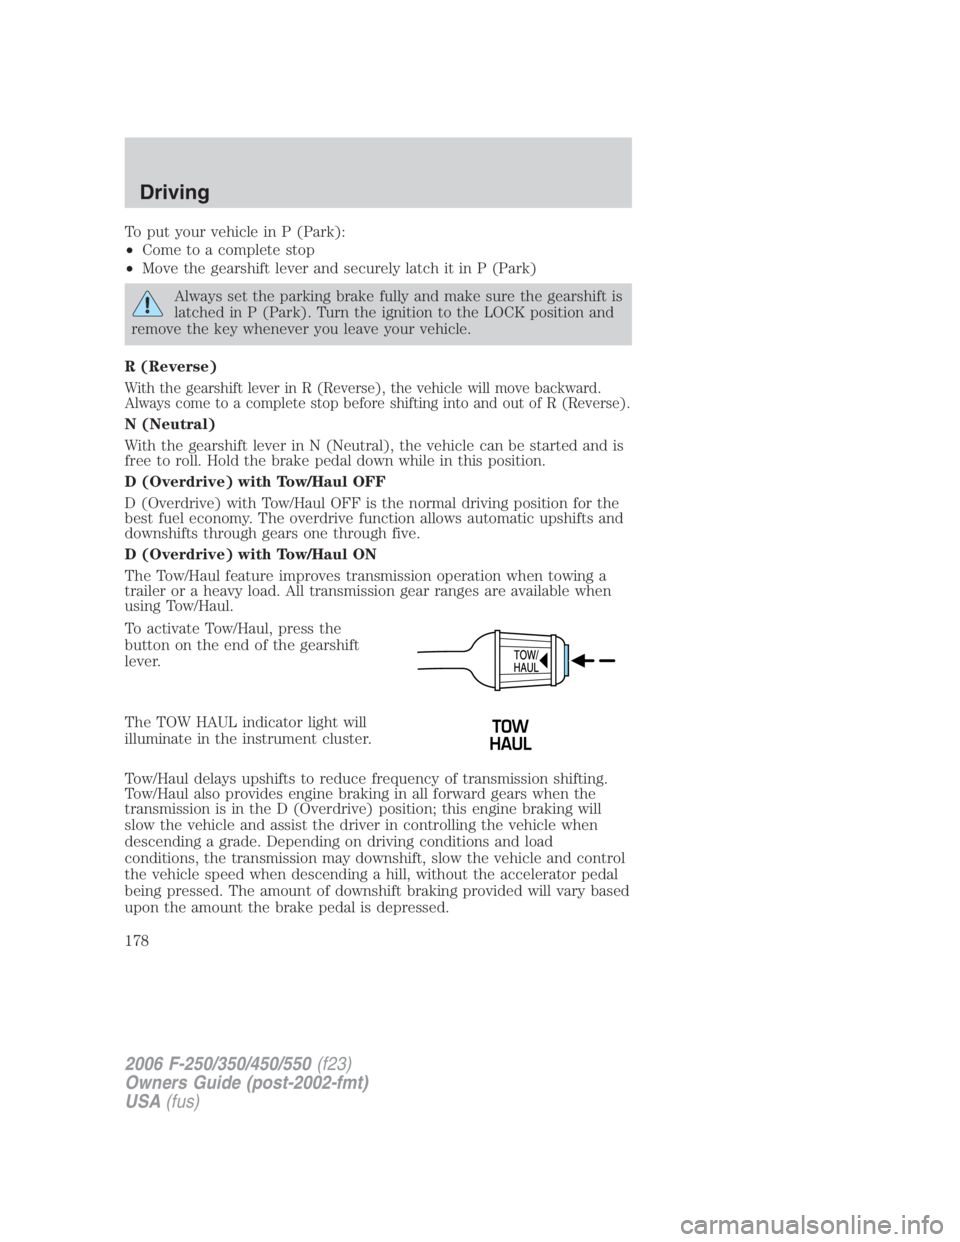
To activate Tow/Haul, press the
button on the end of the gearshift
lever.
The TOW HAUL indicator light will
illuminate in the instrument cluster.
Tow/Haul delays upshifts to reduce frequency of transmission shifting.
Tow/Haul also provides engine braking in all forward gears when the
transmission is in the D (Overdrive) position; this engine braking will
slow the vehicle and assist the driver in controlling the vehicle when
descending a grade. Depending on driving conditions and load
conditions, the transmission may downshift, slow the vehicle and control
the vehicle speed when descending a hill, without the accelerator pedal
being pressed. The amount of downshift braking provided will vary based
upon the amount the brake pedal is depressed.
2006 F-250/350/450/550 (f23)
Owners Guide (post-2002-fmt)
USA (fus)Driving
178
Page 209 of 312
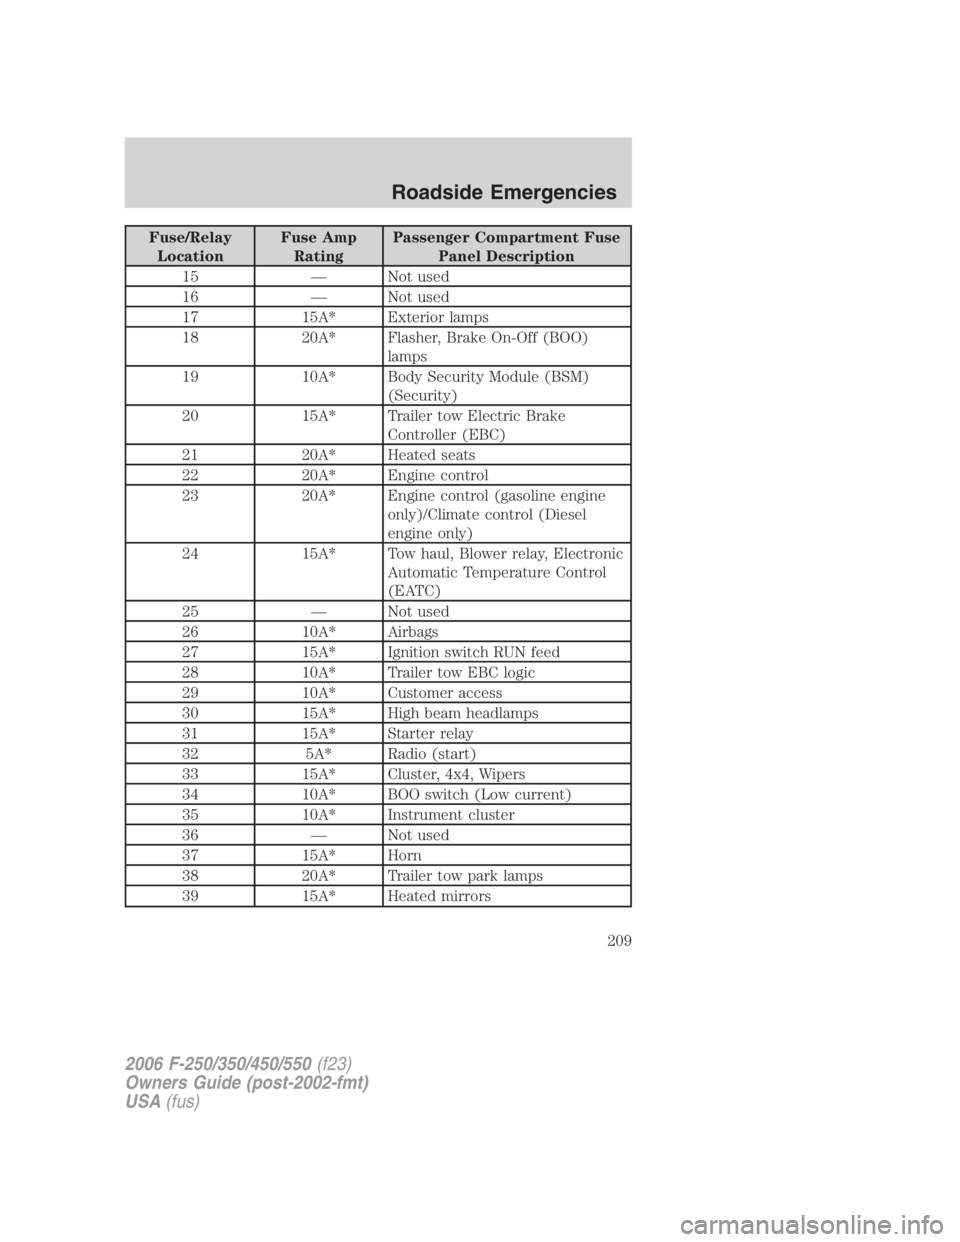
Fuse/Relay
Location Fuse Amp
Rating Passenger Compartment Fuse
Panel Description
15 — Not used
16 — Not used
17 15A* Exterior lamps
18 20A* Flasher, Brake On-Off (BOO)
lamps
19 10A* Body Security Module (BSM)
(Security)
20 15A* Trailer tow Electric Brake
Controller (EBC)
21 20A* Heated seats
22 20A* Engine control
23 20A* Engine control (gasoline engine
only)/Climate control (Diesel
engine only)
24 15A* Tow haul, Blower relay, Electronic
Automatic Temperature Control
(EATC)
25 — Not used
26 10A* Airbags
27 15A* Ignition switch RUN feed
28 10A* Trailer tow EBC logic
29 10A* Customer access
30 15A* High beam headlamps
31 15A* Starter relay
32 5A* Radio (start)
33 15A* Cluster, 4x4, Wipers
34 10A* BOO switch (Low current)
35 10A* Instrument cluster
36 — Not used
37 15A* Horn
38 20A* Trailer tow park lamps
39 15A* Heated mirrors
2006 F-250/350/450/550 (f23)
Owners Guide (post-2002-fmt)
USA (fus) Roadside Emergencies
209
Page 224 of 312
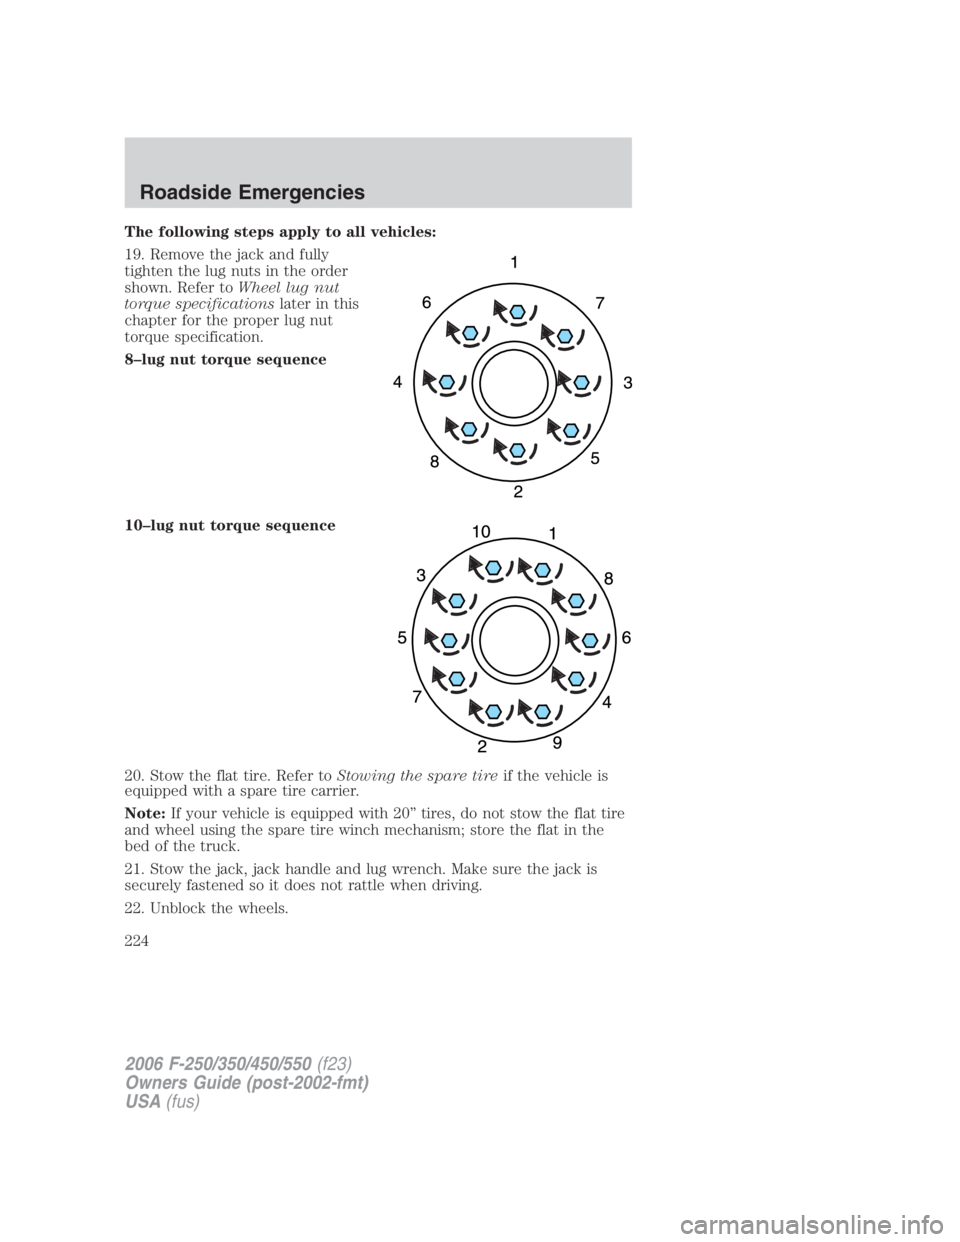
The following steps apply to all vehicles:
19. Remove the jack and fully
tighten the lug nuts in the order
shown. Refer to Wheel lug nut
torque specifications later in this
chapter for the proper lug nut
torque specification.
8–lug nut torque sequence
10–lug nut torque sequence
20. Stow the flat tire. Refer to Stowing the spare tire if the vehicle is
equipped with a spare tire carrier.
Note: If your vehicle is equipped with 20” tires, do not stow the flat tire
and wheel using the spare tire winch mechanism; store the flat in the
bed of the truck.
21. Stow the jack, jack handle and lug wrench. Make sure the jack is
securely fastened so it does not rattle when driving.
22. Unblock the wheels.
2006 F-250/350/450/550 (f23)
Owners Guide (post-2002-fmt)
USA (fus)Roadside Emergencies
224