Page 10 of 312
These are some of the symbols you may see on your vehicle.
Vehicle Symbol Glossary
Safety Alert See Owner’s Guide
Fasten Safety Belt Airbag-Front
Airbag-Side Child Seat
Child Seat Installation
Warning Child Seat Lower
Anchor
Child Seat Tether
Anchor Brake System
Anti-Lock Brake System Brake Fluid -
Non-Petroleum Based
Powertrain Malfunction Speed Control
Master Lighting Switch Hazard Warning Flasher
Fog Lamps-Front Fuse Compartment
Fuel Pump Reset Windshield Wash/Wipe
Windshield
Defrost/Demist Rear Window
Defrost/Demist
2006 F-250/350/450/550 (f23)
Owners Guide (post-2002-fmt)
USA (fus)Introduction
10
Page 11 of 312
Vehicle Symbol Glossary
Power Windows
Front/Rear Power Window Lockout
Child Safety Door
Lock/Unlock Interior Luggage
Compartment Release
Symbol
Panic Alarm Engine Oil
Engine Coolant Engine Coolant
Temperature
Do Not Open When Hot Battery
Avoid Smoking, Flames,
or Sparks Battery Acid
Explosive Gas Fan Warning
Power Steering Fluid Maintain Correct Fluid
Level MAX
MIN
Emission System Engine Air Filter
Passenger Compartment
Air Filter Jack
Check Fuel Cap Low Tire Pressure
Warning
2006 F-250/350/450/550 (f23)
Owners Guide (post-2002-fmt)
USA (fus) Introduction
11
Page 47 of 312

Replacing headlamp bulbs (aerodynamic)
1. Make sure that the headlamp control is in the OFF position and open
the hood.
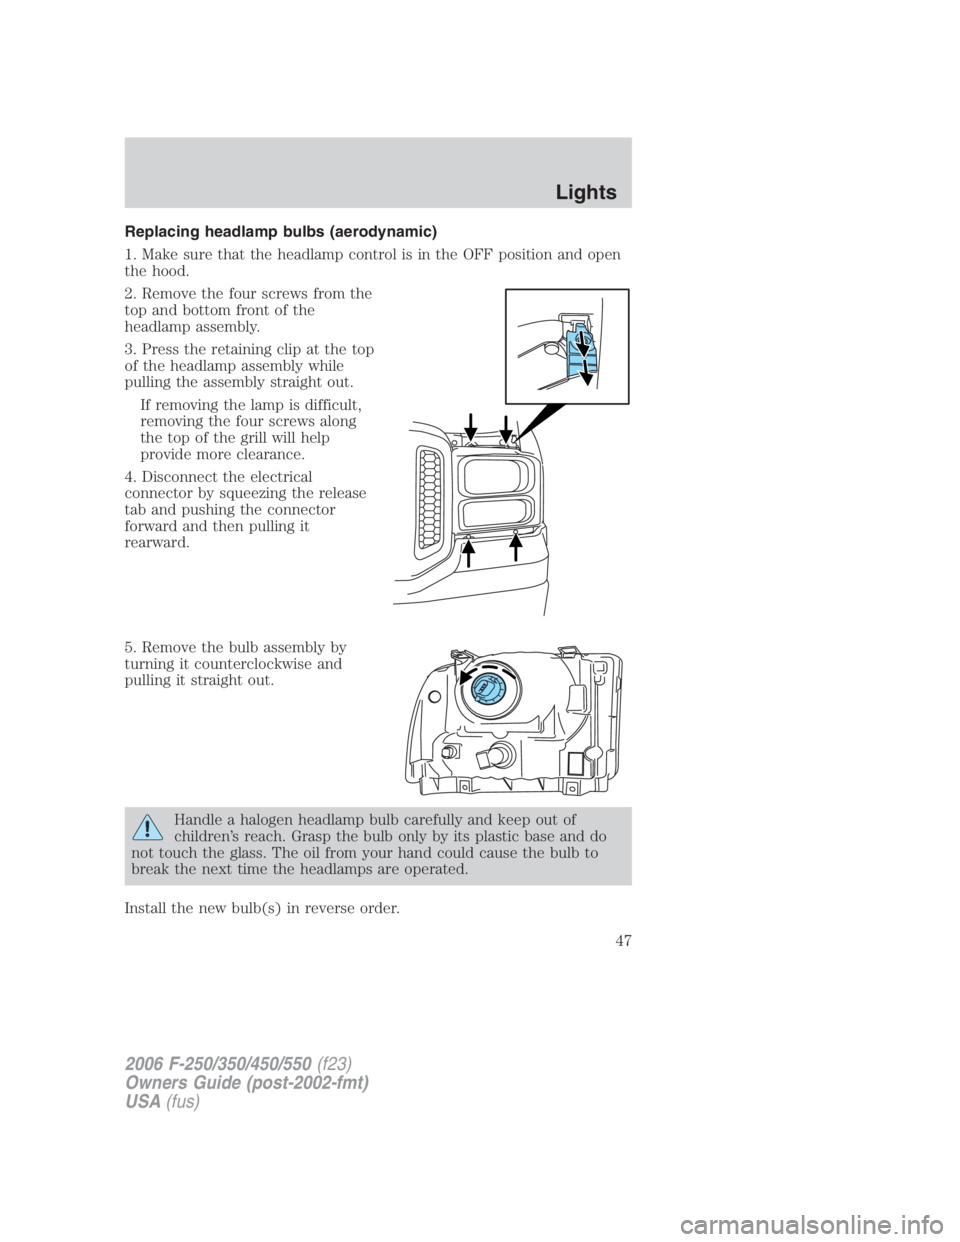
2. Remove the four screws from the
top and bottom front of the
headlamp assembly.
3. Press the retaining clip at the top
of the headlamp assembly while
pulling the assembly straight out.
If removing the lamp is difficult,
removing the four screws along
the top of the grill will help
provide more clearance.
4. Disconnect the electrical
connector by squeezing the release
tab and pushing the connector
forward and then pulling it
rearward.
5. Remove the bulb assembly by
turning it counterclockwise and
pulling it straight out.
Handle a halogen headlamp bulb carefully and keep out of
children’s reach. Grasp the bulb only by its plastic base and do
not touch the glass. The oil from your hand could cause the bulb to
break the next time the headlamps are operated.
Install the new bulb(s) in reverse order.
2006 F-250/350/450/550 (f23)
Owners Guide (post-2002-fmt)
USA (fus) Lights
47
Page 57 of 312
POWER WINDOWS (IF EQUIPPED)
Do not leave children unattended in the vehicle and do not let
children play with the power windows. They may seriously injure
themselves.
When closing the power windows, you should verify they are free
of obstructions and ensure that children and/or pets are not in
the proximity of the window openings.
Press and hold the bottom part of
the rocker switch to open the
window. Press and hold the top part
of the rocker switch to close the
window.
One touch down
Allows the driver’s window to open
fully without holding the control
down. Press completely down on
AUTO and release quickly. Press
again to stop.
Window lock (if equipped)
The window lock feature allows only
the driver to operate the power
windows.
To lock out all the window controls
except for the driver’s press the left
side of the control. Press the right
side to restore the window controls.
2006 F-250/350/450/550 (f23)
Owners Guide (post-2002-fmt)
USA (fus) Driver Controls
57
Page 81 of 312

CHILDPROOF DOOR LOCKS (IF EQUIPPED)
• When these locks are set, the
rear doors cannot be opened from
the inside.
• The rear doors can be opened
from the outside when the doors
are unlocked.
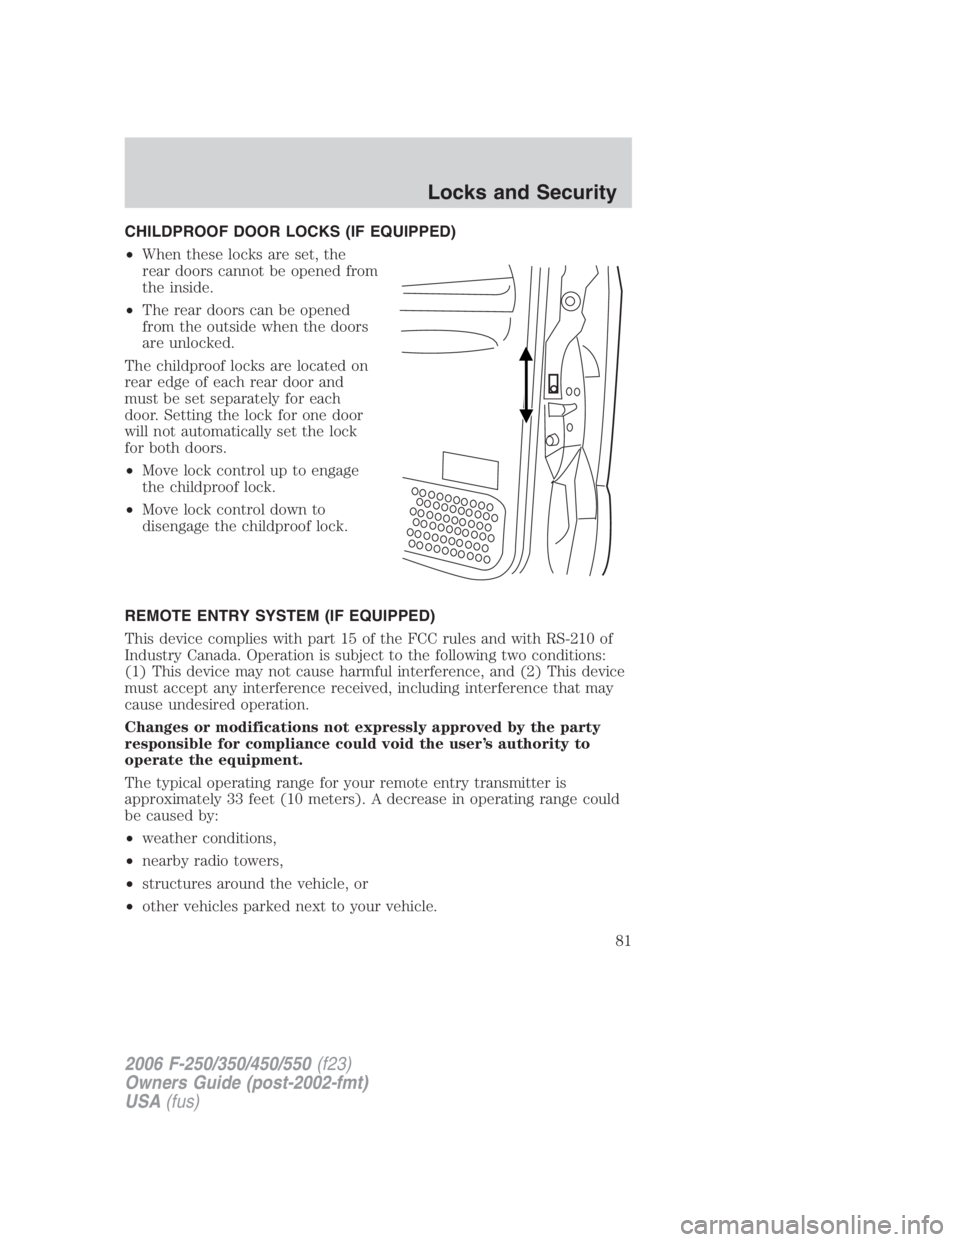
The childproof locks are located on
rear edge of each rear door and
must be set separately for each
door. Setting the lock for one door
will not automatically set the lock
for both doors.
• Move lock control up to engage
the childproof lock.
• Move lock control down to
disengage the childproof lock.
REMOTE ENTRY SYSTEM (IF EQUIPPED)
This device complies with part 15 of the FCC rules and with RS-210 of
Industry Canada. Operation is subject to the following two conditions:
(1) This device may not cause harmful interference, and (2) This device
must accept any interference received, including interference that may
cause undesired operation.
Changes or modifications not expressly approved by the party
responsible for compliance could void the user’s authority to
operate the equipment.
The typical operating range for your remote entry transmitter is
approximately 33 feet (10 meters). A decrease in operating range could
be caused by:
• weather conditions,
• nearby radio towers,
• structures around the vehicle, or
• other vehicles parked next to your vehicle.
2006 F-250/350/450/550 (f23)
Owners Guide (post-2002-fmt)
USA (fus) Locks and Security
81
Page 97 of 312
To gain access to the cupholders
and tray, pull down on the armrest.
To gain access to the 60/40 load
floor, store the cushion in the
upright locked position. Pull up on
the straps located at the sides of the
load floor, and rotate forward until
resting on the carpet.
SAFETY RESTRAINTS
Safety restraints precautions
Always drive and ride with your seatback upright and the lap
belt snug and low across the hips.
To reduce the risk of injury, make sure children sit in the back
seat where they can be properly restrained.
Never let a passenger hold a child on his or her lap while the
vehicle is moving. The passenger cannot protect the child from
injury in a collision.
All occupants of the vehicle, including the driver, should always
properly wear their safety belts, even when an air bag
supplemental restraint system (SRS) is provided.
2006 F-250/350/450/550 (f23)
Owners Guide (post-2002-fmt)
USA (fus) Seating and Safety Restraints
97
Page 99 of 312

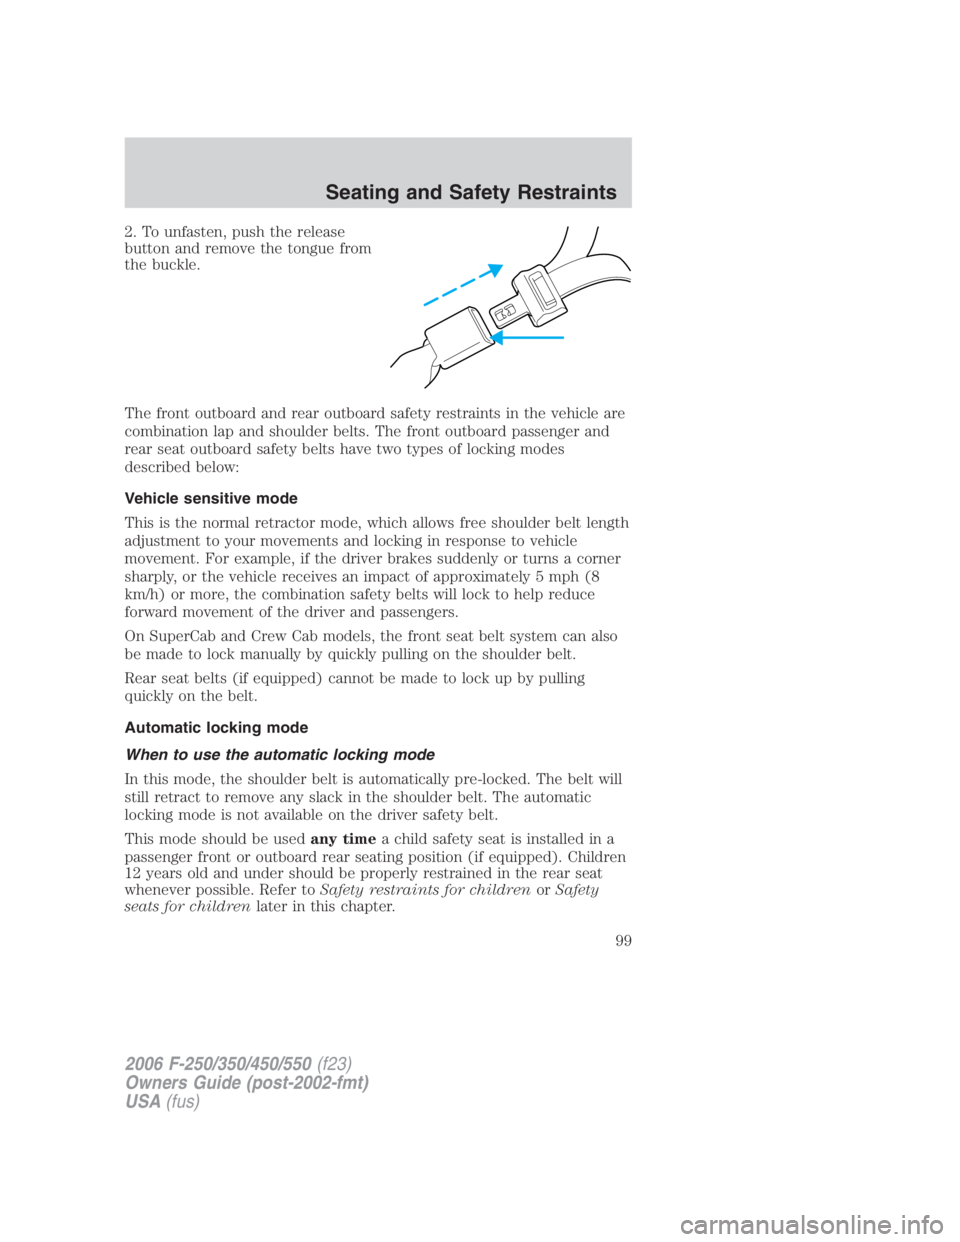
2. To unfasten, push the release
button and remove the tongue from
the buckle.
The front outboard and rear outboard safety restraints in the vehicle are
combination lap and shoulder belts. The front outboard passenger and
rear seat outboard safety belts have two types of locking modes
described below:
Vehicle sensitive mode
This is the normal retractor mode, which allows free shoulder belt length
adjustment to your movements and locking in response to vehicle
movement. For example, if the driver brakes suddenly or turns a corner
sharply, or the vehicle receives an impact of approximately 5 mph (8
km/h) or more, the combination safety belts will lock to help reduce
forward movement of the driver and passengers.
On SuperCab and Crew Cab models, the front seat belt system can also
be made to lock manually by quickly pulling on the shoulder belt.
Rear seat belts (if equipped) cannot be made to lock up by pulling
quickly on the belt.
Automatic locking mode
When to use the automatic locking mode
In this mode, the shoulder belt is automatically pre-locked. The belt will
still retract to remove any slack in the shoulder belt. The automatic
locking mode is not available on the driver safety belt.
This mode should be used any time a child safety seat is installed in a
passenger front or outboard rear seating position (if equipped). Children
12 years old and under should be properly restrained in the rear seat
whenever possible. Refer to Safety restraints for children or Safety
seats for children later in this chapter.
2006 F-250/350/450/550 (f23)
Owners Guide (post-2002-fmt)
USA (fus) Seating and Safety Restraints
99
Page 100 of 312
How to use the automatic locking mode
• Buckle the combination lap and
shoulder belt.
• Grasp the shoulder portion and
pull downward until the entire
belt is pulled out.
• Allow the belt to retract. As the belt retracts, you will hear a clicking
sound. This indicates the safety belt is now in the automatic locking
mode.
How to disengage the automatic locking mode
Disconnect the combination lap/shoulder belt and allow it to retract
completely to disengage the automatic locking mode and activate the
vehicle sensitive (emergency) locking mode.
After any vehicle collision, the front passenger and rear outboard
seat belt systems must be checked by your authorized dealer to
verify that the “automatic locking retractor” feature for child seats is
still functioning properly. In addition, all seat belts should be checked
for proper function.
2006 F-250/350/450/550 (f23)
Owners Guide (post-2002-fmt)
USA (fus)Seating and Safety Restraints
100