Page 236 of 312

In some states (in the U.S.) you must directly notify Ford in writing
before pursuing remedies under your state’s warranty laws. Ford is also
allowed a final repair attempt in some states.
In the United States, a warranty dispute must be submitted to the
Dispute Settlement Board before taking action under the Magnuson-Moss
Warranty Act, or to the extent allowed by state law, before pursuing
replacement or repurchase remedies provided by certain state laws. This
dispute handling procedure is not required prior to enforcing state
created rights or other rights which are independent of the
Magnuson-Moss Warranty Act or state replacement or repurchase laws.
IN CALIFORNIA (U.S. ONLY)
California Civil Code Section 1793.2(d) requires that, if a manufacturer
or its representative is unable to repair a motor vehicle to conform to the
vehicle’s applicable express warranty after a reasonable number of
attempts, the manufacturer shall be required to either replace the
vehicle with one substantially identical or repurchase the vehicle and
reimburse the buyer in an amount equal to the actual price paid or
payable by the consumer (less a reasonable allowance for consumer
use). The consumer has the right to choose whether to receive a refund
or replacement vehicle.
California Civil Code Section 1793.22(b) presumes that the manufacturer
has had a reasonable number of attempts to conform the vehicle to its
applicable express warranties if, within the first 18 months of ownership of
a new vehicle or the first 18,000 miles (29,000 km), whichever occurs first:
1. Two or more repair attempts are made on the same non-conformity
likely to cause death or serious bodily injury OR
2. Four or more repair attempts are made on the same nonconformity (a
defect or condition that substantially impairs the use, value or safety of
the vehicle) OR
3. The vehicle is out of service for repair of nonconformities for a total of
more than 30 calendar days (not necessarily all at one time)
In the case of 1 or 2 above, the consumer must also notify the
manufacturer of the need for the repair of the nonconformity at the
following address:
Ford Motor Company
16800 Executive Plaza Drive
Mail Drop 3NE-B
Dearborn, MI 48126
2006 F-250/350/450/550 (f23)
Owners Guide (post-2002-fmt)
USA (fus)Customer Assistance
236
Page 254 of 312

CHANGING THE WIPER BLADES
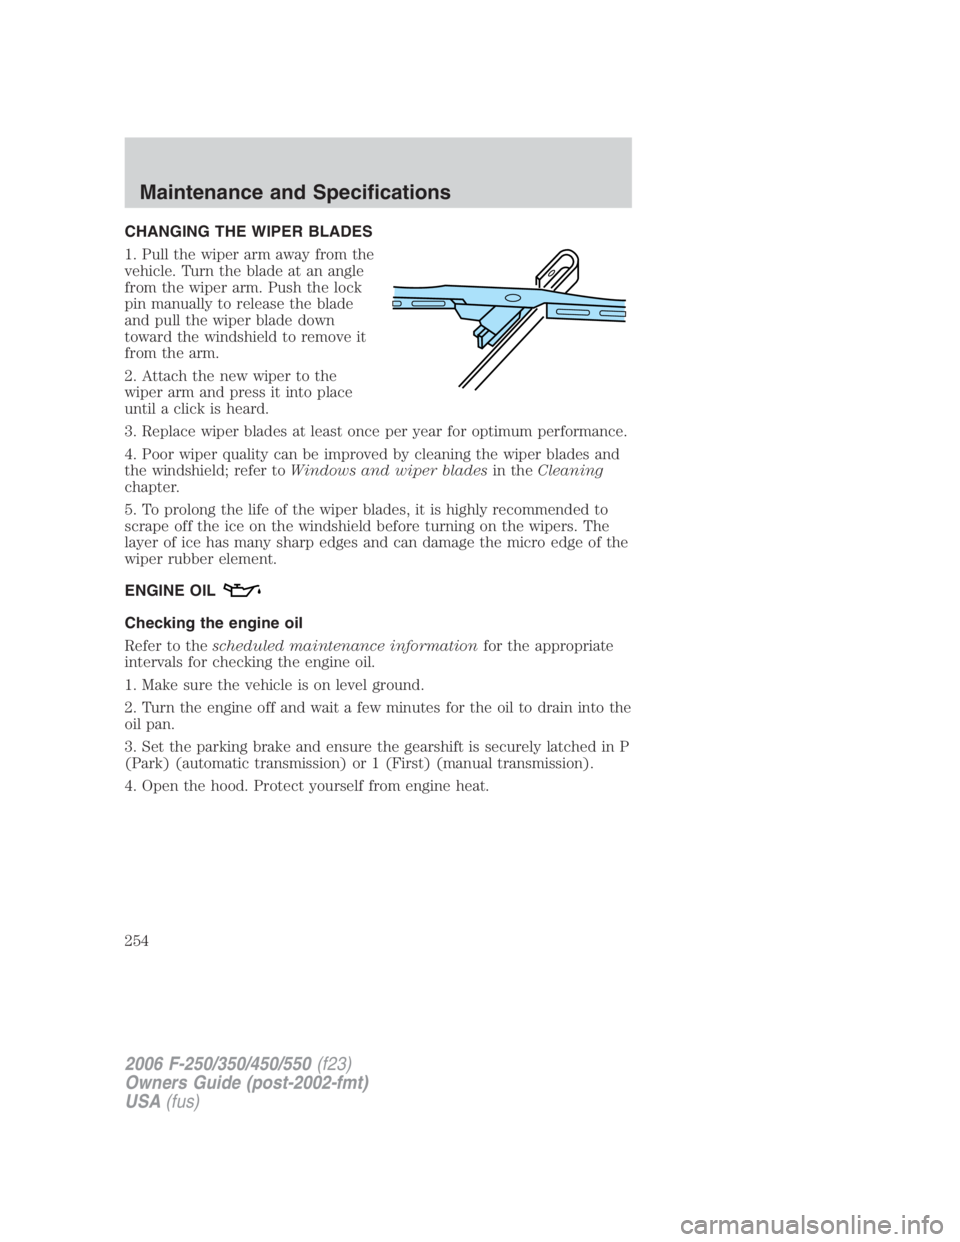
1. Pull the wiper arm away from the
vehicle. Turn the blade at an angle
from the wiper arm. Push the lock
pin manually to release the blade
and pull the wiper blade down
toward the windshield to remove it
from the arm.
2. Attach the new wiper to the
wiper arm and press it into place
until a click is heard.
3. Replace wiper blades at least once per year for optimum performance.
4. Poor wiper quality can be improved by cleaning the wiper blades and
the windshield; refer to Windows and wiper blades in the Cleaning
chapter.
5. To prolong the life of the wiper blades, it is highly recommended to
scrape off the ice on the windshield before turning on the wipers. The
layer of ice has many sharp edges and can damage the micro edge of the
wiper rubber element.
ENGINE OIL
Checking the engine oil
Refer to the scheduled maintenance information for the appropriate
intervals for checking the engine oil.
1. Make sure the vehicle is on level ground.
2. Turn the engine off and wait a few minutes for the oil to drain into the
oil pan.
3. Set the parking brake and ensure the gearshift is securely latched in P
(Park) (automatic transmission) or 1 (First) (manual transmission).
4. Open the hood. Protect yourself from engine heat.
2006 F-250/350/450/550 (f23)
Owners Guide (post-2002-fmt)
USA (fus)Maintenance and Specifications
254
Page 276 of 312

On board diagnostics (OBD-II)
Your vehicle is equipped with a computer that monitors the engine’s
emission control system. This system is commonly known as the On Board
Diagnostics System (OBD-II). This OBD-II system protects the environment
by ensuring that your vehicle continues to meet government emission
standards. The OBD-II system also assists the service technician in
properly servicing your vehicle. When the light illuminates, the
OBD-II system has detected a malfunction. Temporary malfunctions may
cause your light to illuminate. Examples are:
1. The vehicle has run out of fuel. (The engine may misfire or run poorly.)
2. Poor fuel quality or water in the fuel.
3. The fuel cap may not have been securely tightened.
These temporary malfunctions can be corrected by filling the fuel tank
with good quality fuel and/or properly tightening the fuel cap. After three
driving cycles without these or any other temporary malfunctions
present, the light should turn off. (A driving cycle consists of a
cold engine startup followed by mixed city/highway driving.) No
additional vehicle service is required.
If the light remains on, have your vehicle serviced at the first
available opportunity.
Readiness for Inspection/Maintenance (I/M) testing
In some localities, it may be a legal requirement to pass an I/M test of
the on-board diagnostics system. If your light is on, refer to the
description in the Warning lights and chimes section of the
Instrument Cluster chapter. Your vehicle may not pass the I/M test with
the light on.
If the vehicle’s powertrain system or its battery has just been serviced,
the on-board diagnostics system is reset to a “not ready for I/M test”
condition. To ready the on-board diagnostics system for I/M testing, a
minimum of 30 minutes of city and highway driving is necessary as
described below:
• First, at least 10 minutes of driving on an expressway or highway.
• Next, at least 20 minutes driving in stop-and-go, city-type traffic with
at least four idle periods.
2006 F-250/350/450/550 (f23)
Owners Guide (post-2002-fmt)
USA (fus)Maintenance and Specifications
276
Page 282 of 312
Checking and adding manual transmission fluid (if equipped)
1. Clean the filler plug.
2. Remove the filler plug and
inspect the fluid level.
3. Fluid level should be at the
bottom of the opening.
4. Add enough fluid through the
filler opening so that the fluid level
is at the bottom of the opening.
5. Install and tighten the fill plug
securely.
Use only fluid that meets Ford specifications. Refer to Lubricant
specifications in this chapter.
2006 F-250/350/450/550 (f23)
Owners Guide (post-2002-fmt)
USA (fus)Maintenance and Specifications
282
Page 284 of 312
Note: Do not start your engine with the air cleaner removed and do not
remove it while the engine is running.
Changing the air filter element
• 5.4L Engine
1. Release two retainer clamps.
2. Pull air filter tray assembly out
toward front of vehicle and lift air
filter element up and out of housing.
The air filter box needs to be free of any debris before installing a new
air filter.
3. Install a new air filter element
into the tray assembly.
4. Return air filter tray to original
position by pressing firmly on the
handle until all rearward movement
stops and secure the two clamps.
2006 F-250/350/450/550 (f23)
Owners Guide (post-2002-fmt)
USA (fus)Maintenance and Specifications
284
Page 285 of 312
• 6.8L Engine
1. Loosen the clamps that secures
the air filter cover in place.
2. Carefully separate the two halves of the air filter housing.
3. Remove the air filter element from the air filter housing.
4. Install a new air filter element.
5. Reassemble the two halves of the air filter housing, aligning the
notches and slots. Secure the clamps, making sure not to crimp the air
filter edges between the two halves of the air filter housing. This could
cause filter damage and allow unmetered air to enter the engine if not
properly seated.
2006 F-250/350/450/550 (f23)
Owners Guide (post-2002-fmt)
USA (fus) Maintenance and Specifications
285
Page 303 of 312
Tonneau covers
Wheels
Interior style
Electrochromatic compass/temperature interior mirrors
Floor mats
Speed control
Lifestyle
Bedliners and bedmats
Bed tents
Bike racks
Sport Liner �
Toolboxes
Towing mirrors
Trailer hitches, wiring harnesses and accessories
Peace of mind
First aid and highway safety kits
Full vehicle covers
Keyless entry
Locking gas cap
Mobile-Ease � hand-free communication system
Remote start
Vehicle security systems
For maximum vehicle performance, keep the following information in
mind when adding accessories or equipment to your vehicle:
• When adding accessories, equipment, passengers and luggage to your
vehicle, do not exceed the total weight capacity of the vehicle or of
the front or rear axle (GVWR or GAWR as indicated on the Safety
Compliance Certification Label). Consult your authorized dealer for
specific weight information.
2006 F-250/350/450/550 (f23)
Owners Guide (post-2002-fmt)
USA (fus) Accessories
303