Page 17 of 128
MULTI-FUNCTION LEVER
Windshield wiper:Rotate the end
of the control away from you to
increase the speed of the wipers;
rotate towards you to decrease the
speed of the wipers.
Windshield washer:Push the end
of the stalk:
•briefly: causes three swipes of the
wipers without washer fluid.
•a quick push and hold: the wipers
will swipe four times with washer fluid.
•a long push and hold: the wipers and washer fluid will be activated for
up to ten seconds.
TILT STEERING WHEEL (IF EQUIPPED)
To adjust the steering wheel:
1. Pull and hold the steering wheel
release control toward you.
2. Move the steering wheel up or
down until you find the desired
location.
3. Release the steering wheel
release control. This will lock the
steering wheel in position.
Never adjust the steering wheel when the vehicle is moving.
2006 Motorhome(mot)
Supplement
USA_English(fus)
Driver Controls
Driver Controls
17
Page 18 of 128
 located on the
gearshift. The TOW/HAUL indicator
light will illuminate in the
instrument cluster. The tra")
TRANSMISSION CONTROL
Tow/Haul feature
To activate, press the transmission
control switch (TCS) located on the
gearshift. The TOW/HAUL indicator
light will illuminate in the
instrument cluster. The transmission
will operate in all gears. Press the
transmission control switch again to deactivate Tow/Haul mode. When
you shut off and re-start your vehicle, the transmission will automatically
return to normal mode with Tow/Haul feature deactivated, refer to the
Drivingchapter for more information.
SPEED CONTROL (IF EQUIPPED)
With speed control set, you can maintain a speed of 30 mph (48 km/h)
or more without keeping your foot on the accelerator pedal. Speed
control does not work at speeds below 30 mph (48 km/h).
Do not use the speed control in heavy traffic or on roads that
are winding, slippery or unpaved.
Setting speed control
The controls for using your speed
control are located on the steering
wheel for your convenience.
1. Press the ON control and release
it.
2. Accelerate to the desired speed.
2006 Motorhome(mot)
Supplement
USA_English(fus)
Driver Controls
18
Page 19 of 128

3. Press the SET ACCEL control
and release it.
4. Take your foot off the accelerator
pedal.
Note:
•Vehicle speed may vary
momentarily when driving up and
down a steep hill.
•If the vehicle speed increases above the set speed on a downhill, you
may want to apply the brakes to reduce the speed.
•If the vehicle speed decreases more than 10 mph (16 km/h) below
your set speed on an uphill, your speed control will disengage.
Resuming a set speed
Press the RES (resume) control and
release it. This will automatically
return the vehicle to the previously
set speed. The RES control will not
work if the vehicle speed is not
faster than 30 mph (48 km/h).
Increasing speed while using speed control
There are two ways to set a higher
speed:
•Press and hold the SET ACCEL
control until you get to the
desired speed, then release the
control. You can also use the SET
ACCEL control to operate the
Tap-Up function. Press and
release this control to increase the vehicle set speed in increments by
1 mph (1.6 km/h).
•Use the accelerator pedal to get to the desired speed. When the
vehicle reaches that speed press and release the SET ACCEL control.
R
E
S
S
E
T
A
C
C
E
L
C
O
A
S
T
R
E
S
S
E
T
A
C
C
E
L
C
O
A
S
T
R
E
S
S
E
T
A
C
C
E
L
C
O
A
S
T
2006 Motorhome(mot)
Supplement
USA_English(fus)
Driver Controls
19
Page 20 of 128
Reducing speed while using speed control
There are two ways to reduce a set
speed:
•Press and hold the COAST
control until you get to the
desired speed, then release the
control. You can also use the
COAST control to operate the
Tap-Down function. Press and
release this control to decrease the vehicle set speed in increments by
1 mph (1.6 km/h).
•Depress the brake pedal until the
desired vehicle speed is reached,
press the SET ACCEL control.
Turning off speed control
There are two ways to turn off the
speed control:
•Depress the brake pedal. This will
not erase your vehicle’s
previously set speed.
•Press the speed control OFF
control.
Note:When you turn off the speed control or the ignition, your speed
control set speed memory is erased.
R
E
S
S
E
T
A
C
C
E
L
C
O
A
S
T
R
E
S
S
E
T
A
C
C
E
L
C
O
A
S
T
2006 Motorhome(mot)
Supplement
USA_English(fus)
Driver Controls
20
Page 21 of 128

INFORMATION ABOUT UNIFORM TIRE QUALITY GRADING
New vehicles are fitted with tires
that have a rating on them called
Tire Quality Grades. The Quality
grades can be found where
applicable on the tire sidewall
between tread shoulder and
maximum section width. For
example:
•Treadwear 200 Traction AA Temperature A
These Tire Quality Grades are determined by standards that the United
States Department of Transportation has set.
Tire Quality Grades apply to new pneumatic tires for use on passenger
cars. They do not apply to deep tread, winter-type snow tires,
space-saver or temporary use spare tires, tires with nominal rim
diameters of 10 to 12 inches or limited production tires as defined in
Title 49 Code of Federal Regulations Part 575.104(c)(2).
U.S. Department of Transportation-Tire quality grades:The U.S.
Department of Transportation requires Ford to give you the following
information about tire grades exactly as the government has written it.
Treadwear
The treadwear grade is a comparative rating based on the wear rate of
the tire when tested under controlled conditions on a specified
government test course. For example, a tire graded 150 would wear one
and one-half (1 1/2) times as well on the government course as a tire
graded 100. The relative performance of tires depends upon the actual
conditions of their use, however, and may depart significantly from the
norm due to variations in driving habits, service practices, and
differences in road characteristics and climate.
Traction AA A B C
The traction grades, from highest to lowest are AA, A, B, and C. The
grades represent the tire’s ability to stop on wet pavement as measured
under controlled conditions on specified government test surfaces of
asphalt and concrete. A tire marked C may have poor traction
performance.
2006 Motorhome(mot)
Supplement
USA_English(fus)
Tires, Wheels and Loading
Tires, Wheels and Loading
21
Page 22 of 128

The traction grade assigned to this tire is based on
straight-ahead braking traction tests, and does not include
acceleration, cornering, hydroplaning or peak traction characteristics.
Temperature A B C
The temperature grades are A (the highest), B and C, representing the
tire’s resistance to the generation of heat and its ability to dissipate heat
when tested under controlled conditions on a specified indoor laboratory
test wheel. Sustained high temperature can cause the material of the tire
to degenerate and reduce tire life, and excessive temperature can lead to
sudden tire failure. The grade C corresponds to a level of performance
which all passenger car tires must meet under the Federal Motor Vehicle
Safety Standard No. 109. Grades B and A represent higher levels of
performance on the laboratory test wheel than the minimum required by
law.
The temperature grade for this tire is established for a tire that
is properly inflated and not overloaded. Excessive speed,
underinflation, or excessive loading, either separately or in
combination, can cause heat buildup and possible tire failure.
TIRES
Tires are designed to give many thousands of miles of service, but they
must be maintained in order to get the maximum benefit from them.
Glossary of tire terminology
•Tire label:A label showing the OE (Original Equipment) tire sizes,
recommended inflation pressure and the maximum weight the vehicle
can carry.
•Tire Identification Number (TIN):A number on the sidewall of
each tire providing information about the tire brand and
manufacturing plant, tire size and date of manufacture.
•Inflation pressure:A measure of the amount of air in a tire.
•Standard load:A class of P-metric or Metric tires designed to carry a
maximum load at 35 psi [37 psi (2.5 bar) for Metric tires]. Increasing
the inflation pressure beyond this pressure will not increase the tire’s
load carrying capability.
•Extra load:A class of P-metric or Metric tires designed to carry a
heavier maximum load at 41 psi [43 psi (2.9 bar) for Metric tires].
2006 Motorhome(mot)
Supplement
USA_English(fus)
Tires, Wheels and Loading
22
Page 23 of 128

Increasing the inflation pressure beyond this pressure will not increase
the tire’s load carrying capability.
•kPa:Kilopascal, a metric unit of air pressure.
•PSI:Pounds per square inch, a standard unit of air pressure.
•Cold inflation pressure:The tire pressure when the vehicle has
been stationary and out of direct sunlight for an hour or more and
prior to the vehicle being driven for 1 mile (1.6 km).
•Recommended inflation pressure:The cold inflation pressure found
on the tire label. See the completed vehicle’s owner’s guide for the
location of the tire label.
•Bead area of the tire:Area of the tire next to the rim.
•Sidewall of the tire:Area between the bead area and the tread.
•Tread area of the tire:Area of the perimeter of the tire that
contacts the road when mounted on the vehicle.
•Rim:The metal support (wheel) for a tire or a tire and tube assembly
upon which the tire beads are seated.
INSPECTING AND INFLATING YOUR TIRES
Safe operation of your vehicle requires that your tires are properly
inflated. Remember that a tire can lose up to half of its air pressure
without appearing flat.
Every day before you drive, check
your tires. If one looks lower than
the others, use a tire gauge to check
pressure of all tires and adjust if
required.
At least once a month and before
long trips, inspect each tire and
check the tire pressure with a tire
gauge (including spare, if equipped).
Inflate all tires to the inflation
pressure recommended by Ford
Motor Company.
Inspecting your tires
Periodically inspect the tire treads for uneven or excessive wear and
remove stones, nails, glass or other objects that may be wedged in the
tread grooves. Check for holes or cuts that may permit air leakage from
the tire and make necessary repairs.
2006 Motorhome(mot)
Supplement
USA_English(fus)
Tires, Wheels and Loading
23
Page 24 of 128

Also inspect the tire sidewalls for cuts, bruises and other damage. If
internal damage to the tire is suspected, have the tire demounted and
inspected in case it needs to be repaired or replaced. For your safety,
tires that are damaged should not be used because they are more likely
to blow out or fail. Tires can be damaged during off-road use, so
inspection after off-road use is also recommended.
Inflating your tires
Use a tire gauge to check the tire inflation pressure, including the spare
(if equipped), at least monthly and before long trips. You are strongly
urged to buy a reliable tire pressure gauge, as automatic service station
gauges may be inaccurate. Ford recommends the use of a digital or dial
type tire pressure gauge rather than a stick type tire pressure gauge.
Use the recommended cold inflation pressure for optimum tire
performance and wear. Under-inflation or over-inflation may cause
uneven treadwear patterns.
Under-inflation is the most common cause of tire failures and
may result in severe tire cracking, tread separation or�blowout�,
with unexpected loss of vehicle control and increased risk of injury.
Under-inflation increases sidewall flexing and rolling resistance,
resulting in heat buildup and internal damage to the tire. It also may
result in unnecessary tire stress, irregular wear, loss of vehicle control
and accidents. A tire can lose up to half of its air pressure and not
appear to be flat!
Always inflate your tires to the Ford recommended inflation pressure
even if it is less than the maximum inflation pressure information found
on the tire. The Ford recommended tire inflation pressure is found on
the tire label or certification label. See the completed vehicle’s owner’s
guide for the location of the tire label or certification label. Failure to
follow the tire pressure recommendations can cause uneven treadwear
patterns and adversely affect the way your vehicle handles.
Maximum Permissible Inflation Pressureis the tire manufactures’
maximum permissible pressure and/or the pressure at which the
maximum load can be carried by the tire. This pressure is normally
higher than the manufacturer’s recommended cold inflation pressure
which can be found on either the tire label or certification label. See the
completed vehicle’s owner’s guide for the location of the tire label or
certification label. The cold inflation pressure should never be set lower
than the recommended pressure on the tire label or certification label.
2006 Motorhome(mot)
Supplement
USA_English(fus)
Tires, Wheels and Loading
24
 1
1 2
2 3
3 4
4 5
5 6
6 7
7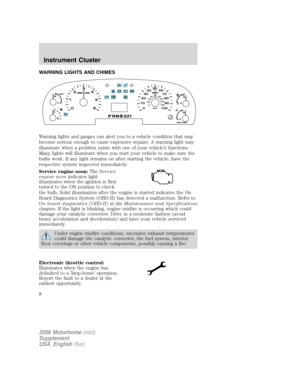 8
8 9
9 10
10 11
11 12
12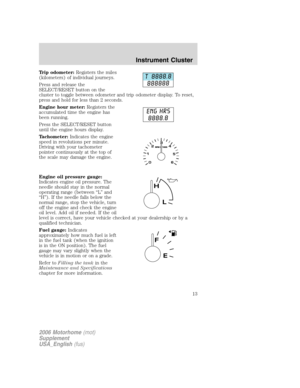 13
13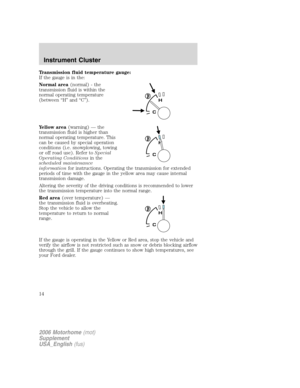 14
14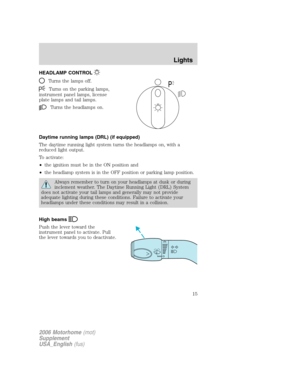 15
15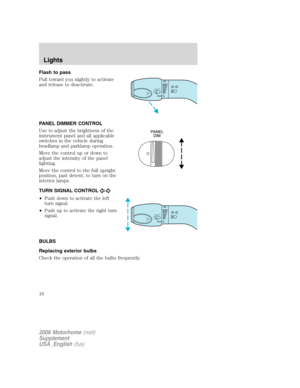 16
16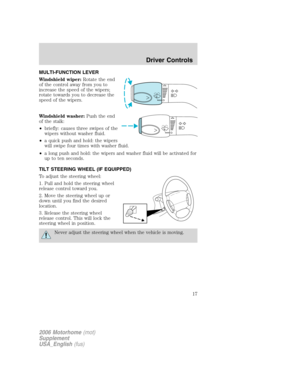 17
17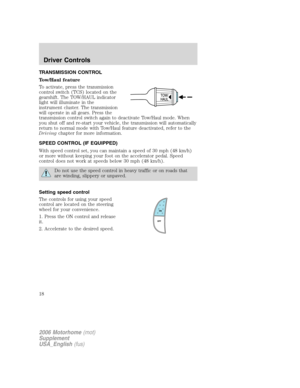 18
18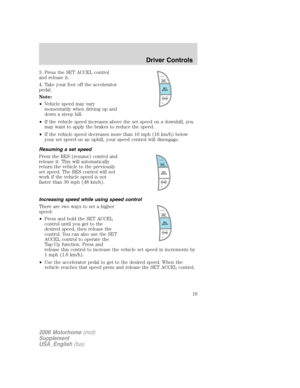 19
19 20
20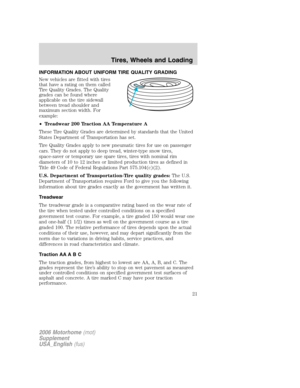 21
21 22
22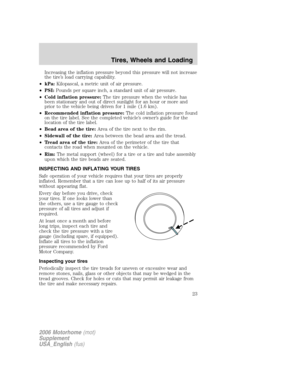 23
23 24
24 25
25 26
26 27
27 28
28 29
29 30
30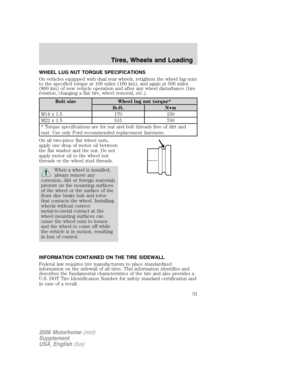 31
31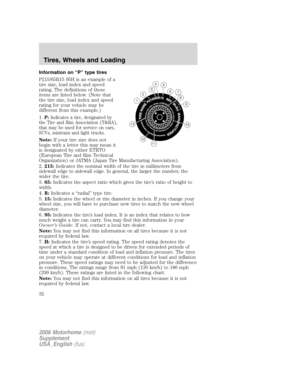 32
32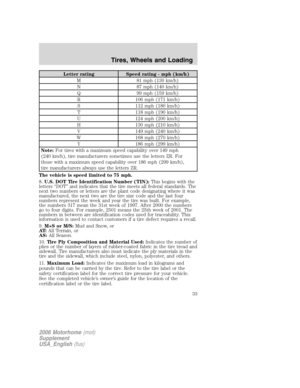 33
33 34
34 35
35 36
36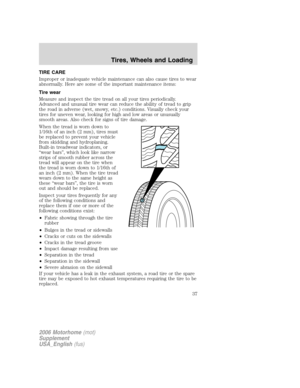 37
37 38
38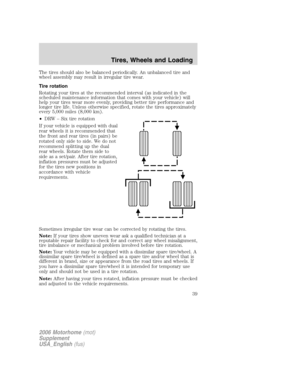 39
39 40
40 41
41 42
42 43
43 44
44 45
45 46
46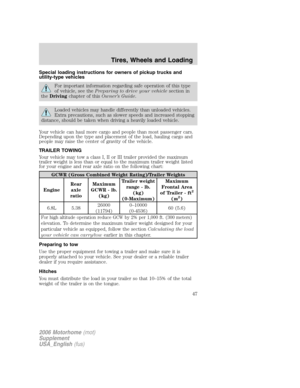 47
47 48
48 49
49 50
50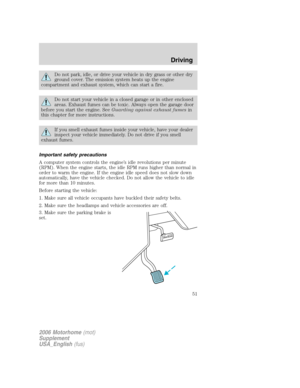 51
51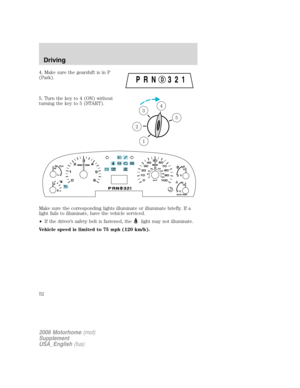 52
52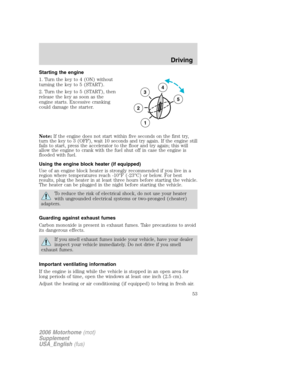 53
53 54
54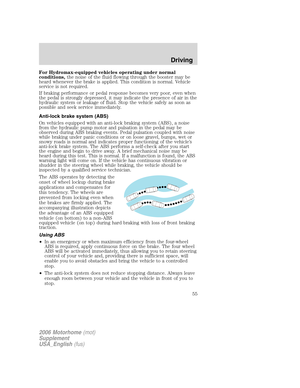 55
55 56
56 57
57 58
58 59
59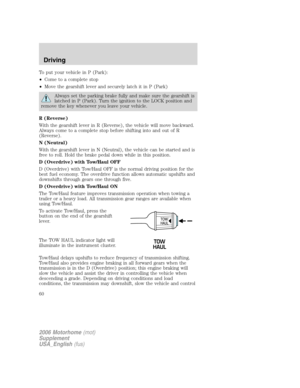 60
60 61
61 62
62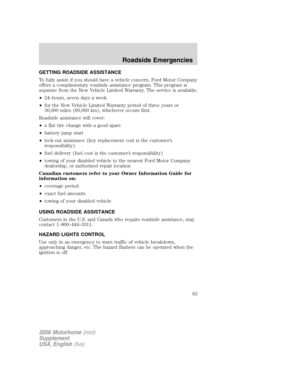 63
63 64
64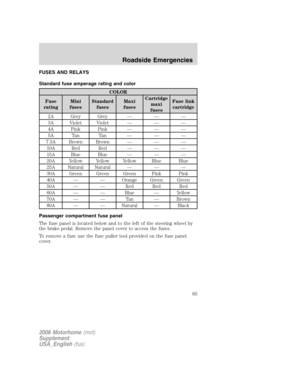 65
65 66
66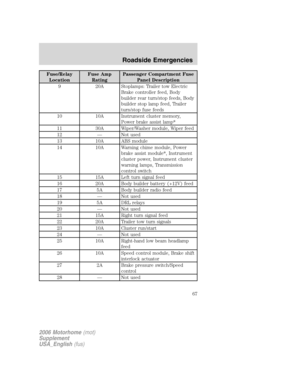 67
67 68
68 69
69 70
70 71
71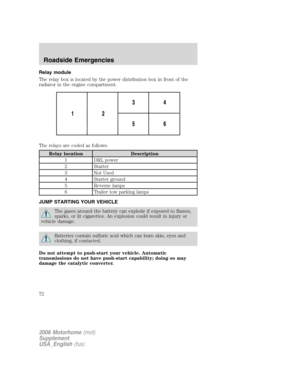 72
72 73
73 74
74 75
75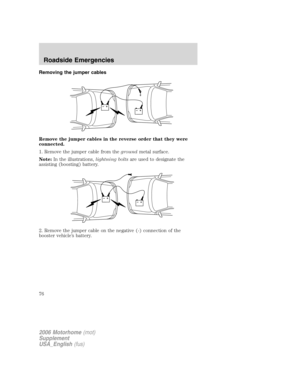 76
76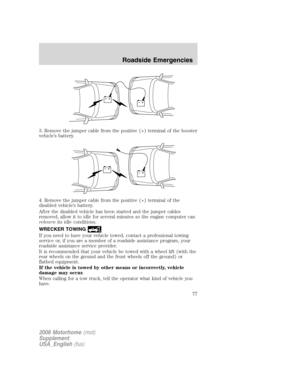 77
77 78
78 79
79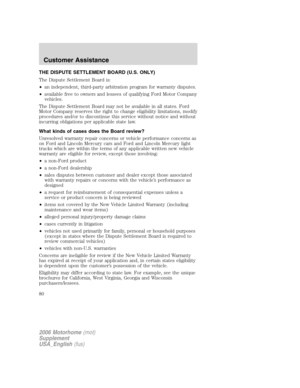 80
80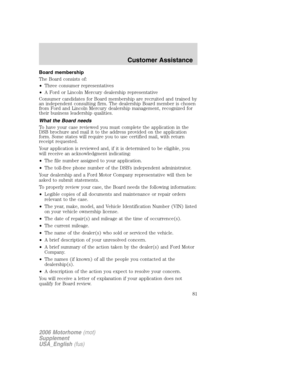 81
81 82
82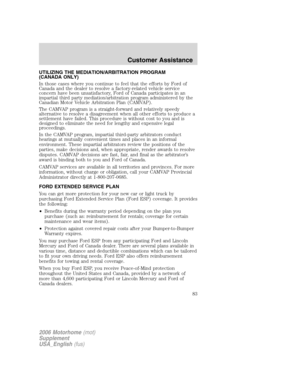 83
83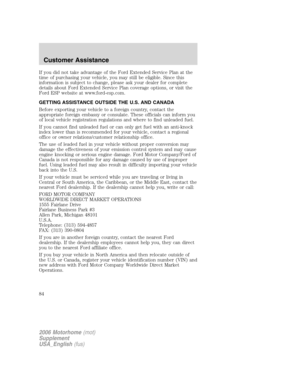 84
84 85
85 86
86 87
87 88
88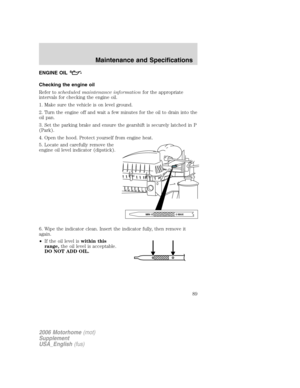 89
89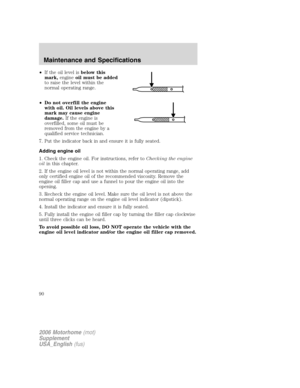 90
90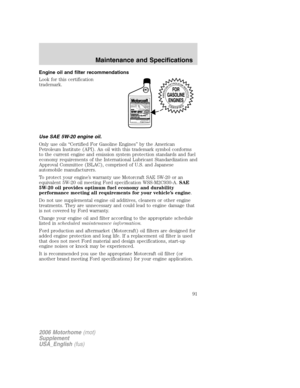 91
91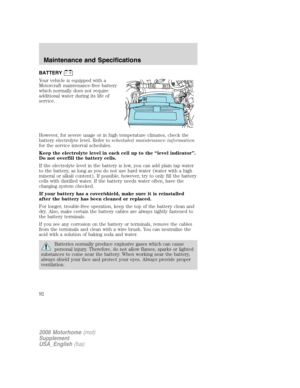 92
92 93
93 94
94 95
95 96
96 97
97 98
98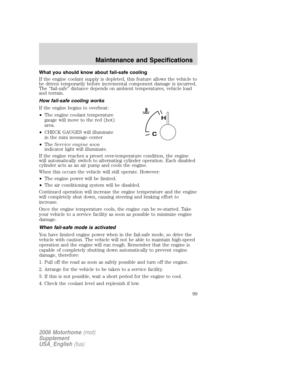 99
99 100
100 101
101 102
102 103
103 104
104 105
105 106
106 107
107 108
108 109
109 110
110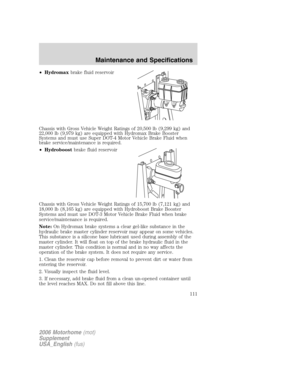 111
111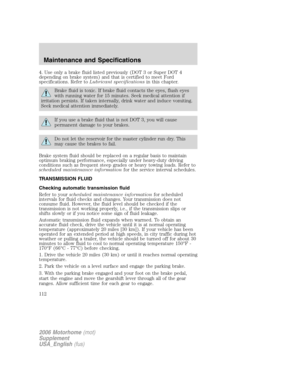 112
112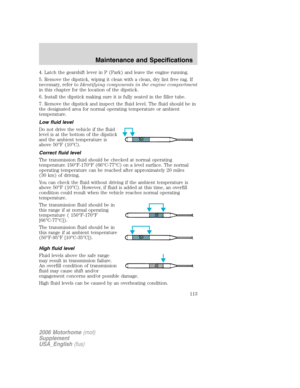 113
113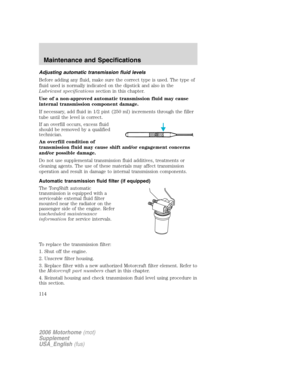 114
114 115
115 116
116 117
117 118
118 119
119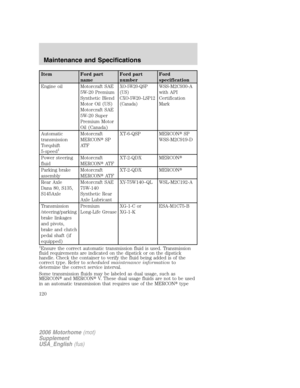 120
120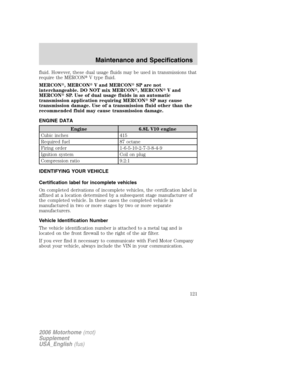 121
121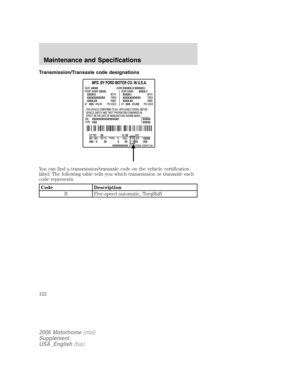 122
122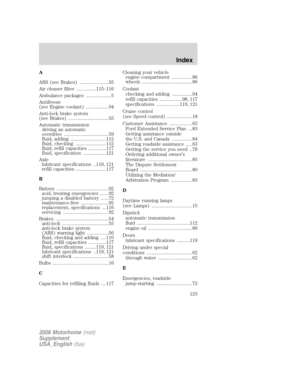 123
123 124
124 125
125 126
126 127
127
