2006 FORD EXPLORER transmission
[x] Cancel search: transmissionPage 2 of 328
Seating and Safety Restraints 114
Seating 114
Safety restraints 126
Airbags 141
Child restraints 155
Tires, Wheels and Loading 170
Tire Information 172
Tire Inflation 175
Tire Pressure Monitoring System (TPMS) 186
Vehicle loading 192
Trailer towing 199
Recreational towing 205
Driving 207
Starting 207
Brakes 210
Traction control/AdvanceTrac 212
Transmission operation 217
Roadside Emergencies 235
Getting roadside assistance 235
Hazard flasher switch 237
Fuel pump shut-off switch 237
Fuses and relays 238
Changing tires 246
Lug Nut Torque 255
Jump starting 256
Wrecker towing 261
Customer Assistance 262
Reporting safety defects (U.S. only) 268
Table of Contents
2
Page 16 of 328
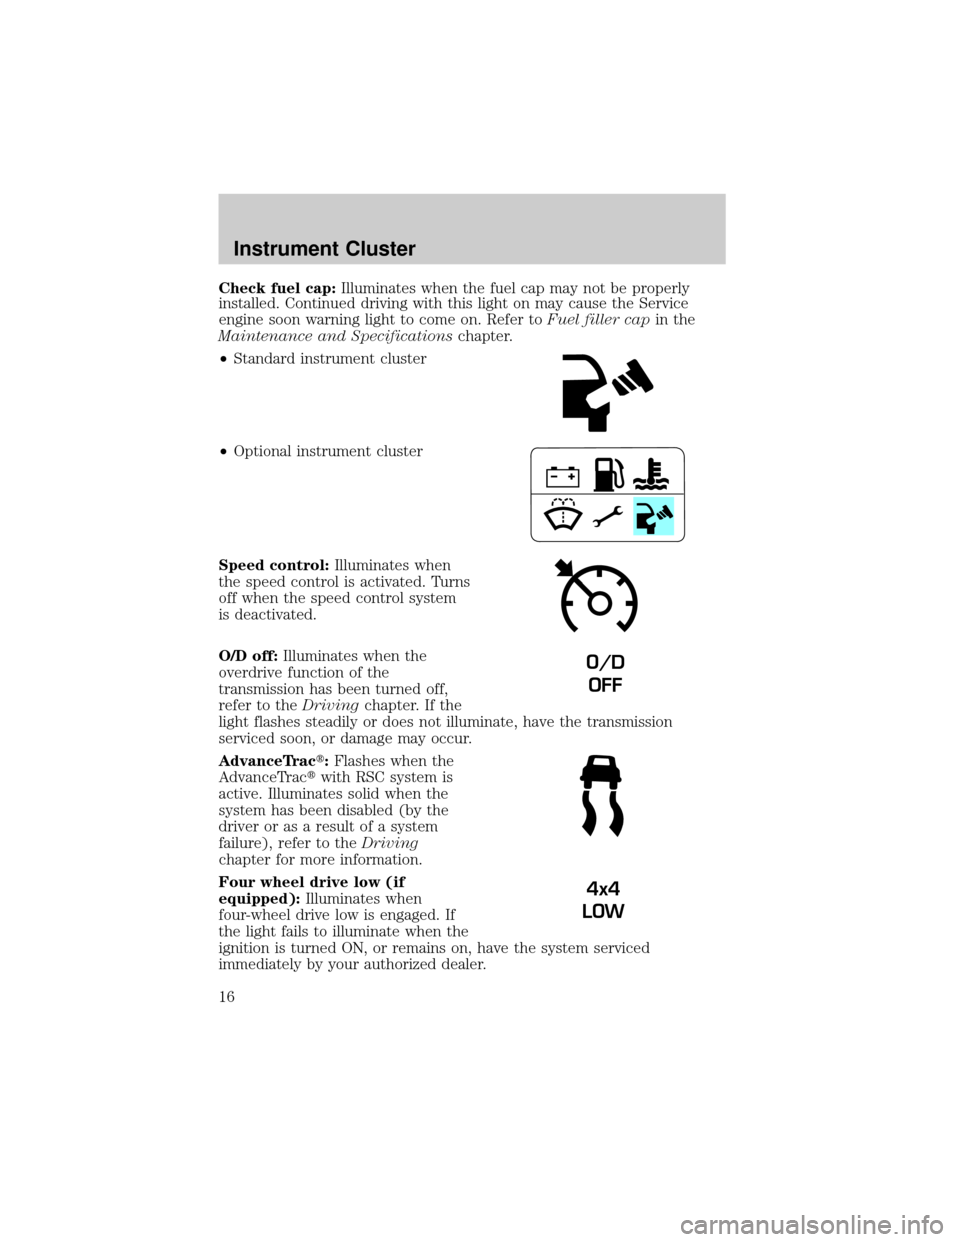
Check fuel cap:Illuminates when the fuel cap may not be properly
installed. Continued driving with this light on may cause the Service
engine soon warning light to come on. Refer toFuel filler capin the
Maintenance and Specificationschapter.
²Standard instrument cluster
²Optional instrument cluster
Speed control:Illuminates when
the speed control is activated. Turns
off when the speed control system
is deactivated.
O/D off:Illuminates when the
overdrive function of the
transmission has been turned off,
refer to theDrivingchapter. If the
light flashes steadily or does not illuminate, have the transmission
serviced soon, or damage may occur.
AdvanceTract:Flashes when the
AdvanceTractwith RSC system is
active. Illuminates solid when the
system has been disabled (by the
driver or as a result of a system
failure), refer to theDriving
chapter for more information.
Four wheel drive low (if
equipped):Illuminates when
four-wheel drive low is engaged. If
the light fails to illuminate when the
ignition is turned ON, or remains on, have the system serviced
immediately by your authorized dealer.
O/D
OFF
4x4
LOW
Instrument Cluster
16
Page 43 of 328
Push the headlamp control towards the instrument panel to deactivate
the foglamps.
Daytime running lamps (DRL) (if equipped)
To activate DRL:
²the ignition must be in the ON position and
²the headlamp control is in the
orposition
²the transmission is not in park.
Always remember to turn on your headlamps at dusk or during
inclement weather. The Daytime Running Light (DRL) System
does not activate your tail lamps and generally may not provide
adequate lighting during these conditions. Failure to activate your
headlamps under these conditions may result in a collision.
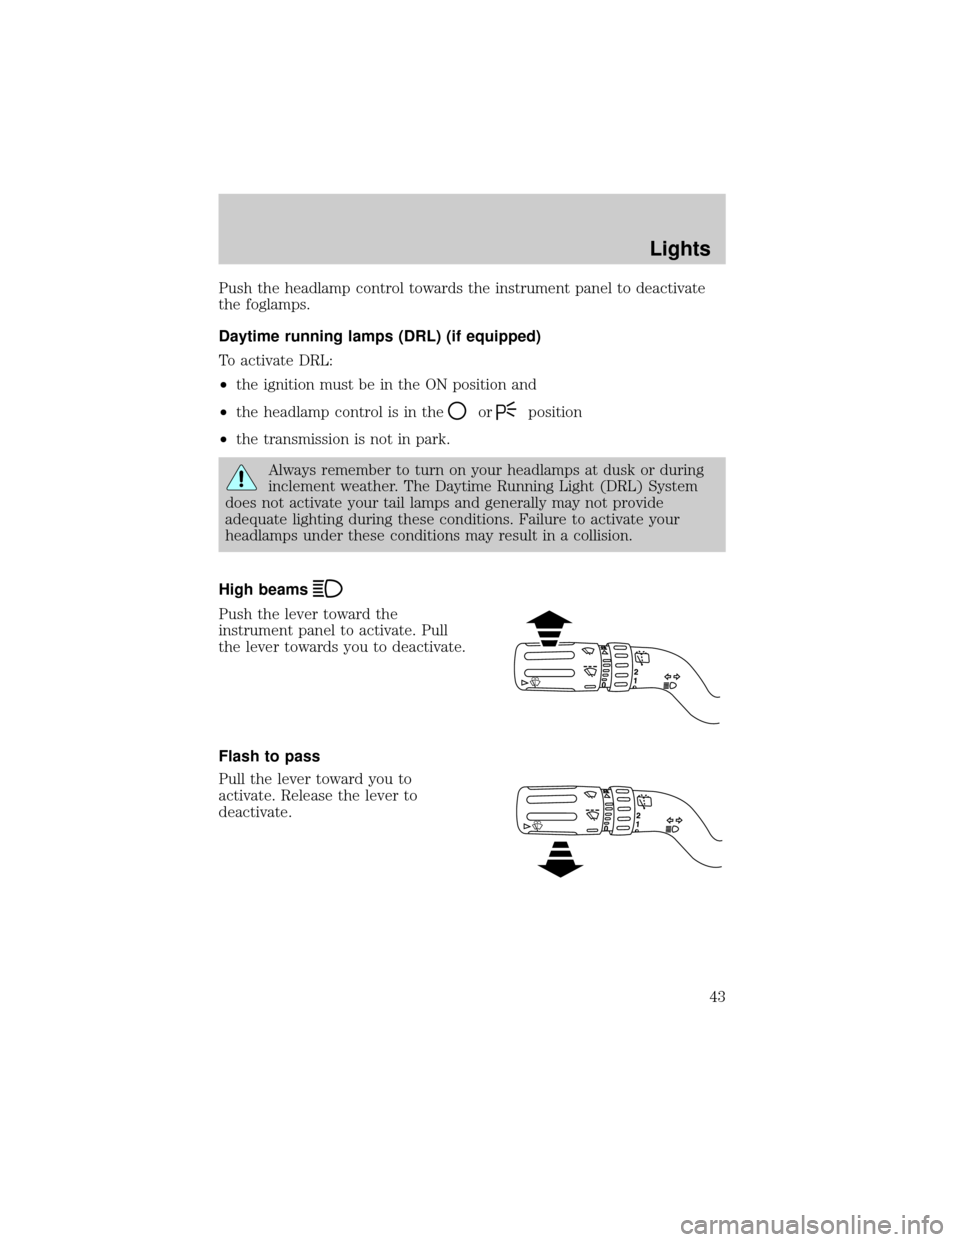
High beams
Push the lever toward the
instrument panel to activate. Pull
the lever towards you to deactivate.
Flash to pass
Pull the lever toward you to
activate. Release the lever to
deactivate.
Lights
43
Page 66 of 328
Retain the original transmitter for use in other vehicles as well as for
future programming procedures (i.e. new HomeLinktequipped vehicle
purchase). It is also suggested that upon the sale of the vehicle, the
programmed Homelinktbuttons be erased for security purposes, refer to
Programmingin this section.
Programming
Do not program HomeLinktwith the vehicle parked in the garage.
Note:Some vehicles may require the ignition switch to be turned to the
second (or ªACCº) position for programming and/or operation of the
HomeLinkt. It is also recommended that a new battery be placed in the
hand-held transmitter of the device being programmed to HomeLinktfor
quicker training and accurate transmission of the radio-frequency signal.
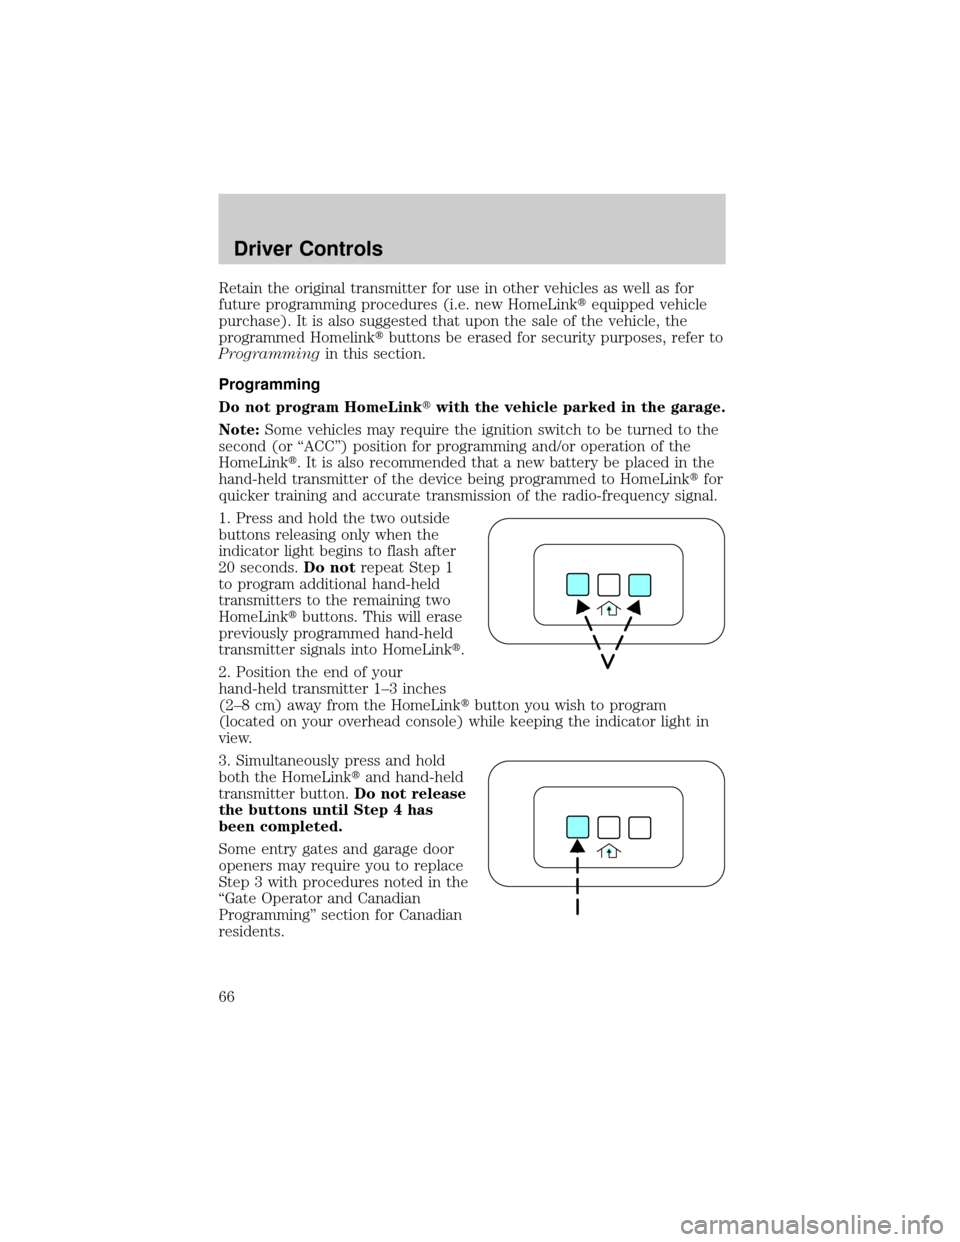
1. Press and hold the two outside
buttons releasing only when the
indicator light begins to flash after
20 seconds.Do notrepeat Step 1
to program additional hand-held
transmitters to the remaining two
HomeLinktbuttons. This will erase
previously programmed hand-held
transmitter signals into HomeLinkt.
2. Position the end of your
hand-held transmitter 1±3 inches
(2±8 cm) away from the HomeLinktbutton you wish to program
(located on your overhead console) while keeping the indicator light in
view.
3. Simultaneously press and hold
both the HomeLinktand hand-held
transmitter button.Do not release
the buttons until Step 4 has
been completed.
Some entry gates and garage door
openers may require you to replace
Step 3 with procedures noted in the
ªGate Operator and Canadian
Programmingº section for Canadian
residents.
Driver Controls
66
Page 79 of 328

PARK BRAKE ENGAGED.Displayed when the manual park brake is
set, the engine is running and the vehicle is driven more than 3 mph
(5 km). If the warning stays on after the park brake is released, contact
your authorized dealer as soon as possible.
CHECK BRAKE SYSTEM.Displayed when the braking system is not
operating properly. If the warning stays on or continues to come on,
contact your authorized dealer as soon as possible.
CHECK PARK AID.Displayed when the transmission is in R (Reverse)
and the Reverse Sensing System (Park Aid) is disabled. Refer toReverse
Sensing System (Park Aid)in this section to enable.
LOW TIRE PRESSURE.Displayed when one or more tires on your
vehicle have low tire pressure. Refer toInspecting and Inflating Your
Tiresin theTires, Wheels and Loadingchapter.
TIRE MONITOR FAULT.Displayed when the Tire Pressure Monitoring
System is malfunctioning. If the warning stays on or continues to come
on, have the system inspected by your authorized dealer.
TIRE SENSOR FAULT.Displayed when a tire pressure sensor is
malfunctioning, or your spare tire is in use. For more information on how
the system operates under these conditions, refer toUnderstanding
Your Tire Pressure Monitoring Systemin theTires, Wheels and
Loadingchapter. If the warning stays on or continues to come on, have
the system inspected by your authorized dealer.
BRAKE FLUID LEVEL LOW.Indicates the brake fluid level is low and
the brake system should be inspected immediately. Refer toBrake fluid
reservoirin theMaintenance and Specificationschapter.
CHECK HEADLAMP.Displayed when the headlamps are activated and
at least one bulb is burned out. Check the lamps as soon as possible and
have the burned out lamp replaced. Refer toReplacing headlamp bulbs
in theLightschapter.
CHECK HIGHBEAM LAMP.Displayed when the highbeam lamps are
activated and at least one bulb is burned out. Check the lamps as soon
as possible and have the burned out lamp replaced. Refer toReplacing
headlamp bulbsin theLightschapter.
CHECK TURN LAMP.Displayed when the turn lamps are activated and
at least one bulb is burned out. Check the lamps as soon as possible and
have the burned out lamp replaced. Refer toReplacing headlamp bulbs
in theLightschapter.
Driver Controls
79
Page 92 of 328

Warning display Status
Check park aid Warning returns only after the ignition
key is turned from OFF to ON.
Low tire pressure
Tire monitor fault
Tire sensor fault
Brake fluid level low
Check brake lamp
Check headlamp
Check highbeam
Check turn lamp
Washer fluid level low
Oil change required
Engine oil change soon
Liftgate/glass ajar Warning returns after the condition
has cleared then reoccures within the
same ignition ON-OFF cycle.
DOOR AJAR.Displayed when a door is not completely closed.
CHECK CHARGING SYSTEM.Displayed when the electrical system is
not maintaining proper voltage. If you are operating electrical accessories
when the engine is idling at a low speed, turn off as many of the
electrical loads as soon as possible. If the warning stays on or comes on
when the engine is operating at normal speeds, have the electrical
system checked as soon as possible.
FUEL LEVEL LOW.Displayed as an early reminder of a low fuel
condition.
PARK BRAKE ENGAGED.Displayed when the manual park brake is
set, the engine is running and the vehicle is driven more than 3 mph (5
km). If the warning stays on after the park brake is released, contact
your authorized dealer as soon as possible.
CHECK BRAKE SYSTEM.Displayed when the braking system is not
operating properly. If the warning stays on or continues to come on,
contact your authorized dealer as soon as possible.
CHECK PARK AID.Displayed when the transmission is in R (Reverse)
and the Reverse Sensing System (Park Aid) is disabled. Refer toReverse
Sensing System (Park Aid)in this section to enable.
Driver Controls
92
Page 125 of 328
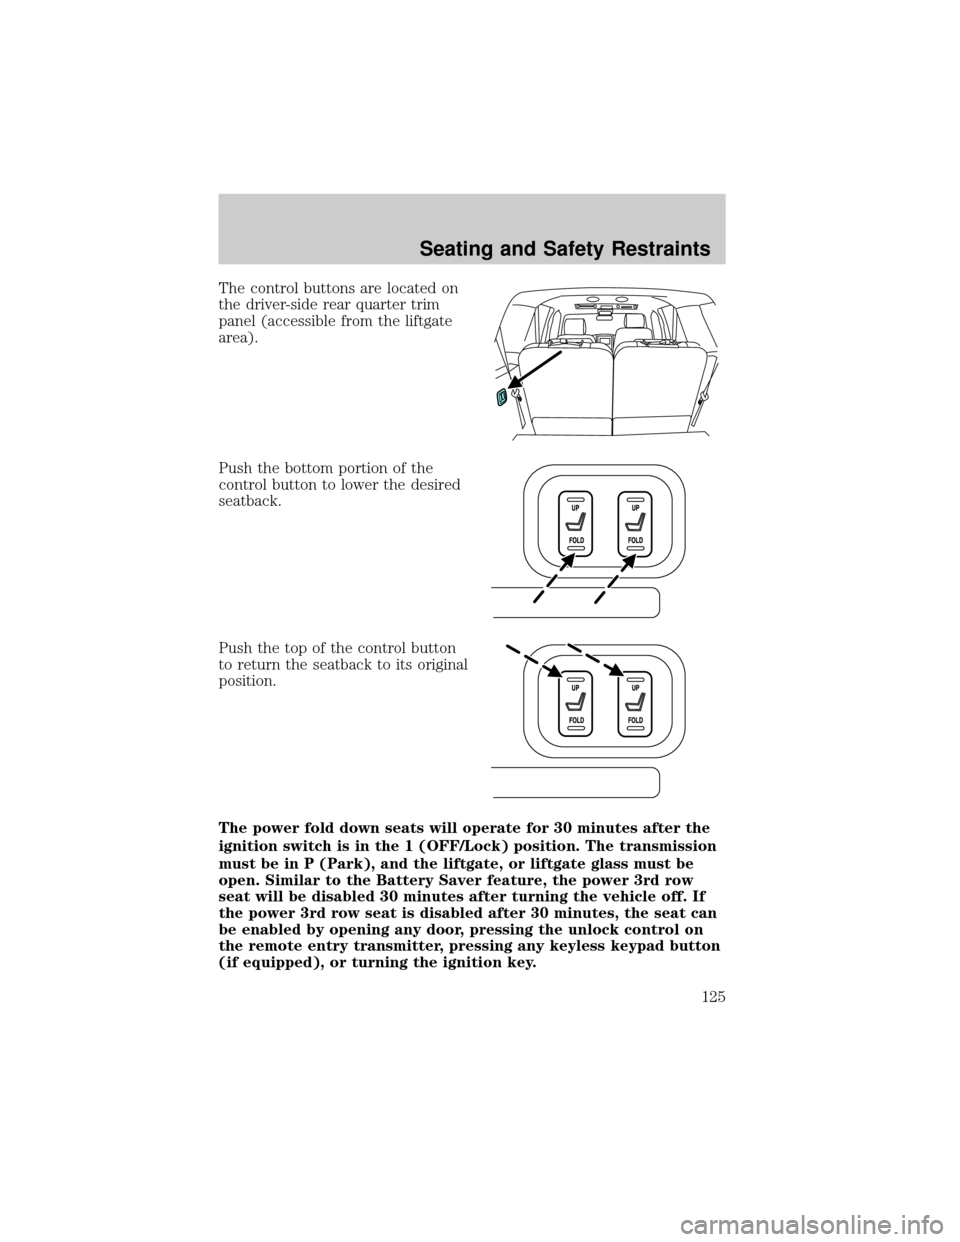
The control buttons are located on
the driver-side rear quarter trim
panel (accessible from the liftgate
area).
Push the bottom portion of the
control button to lower the desired
seatback.
Push the top of the control button
to return the seatback to its original
position.
The power fold down seats will operate for 30 minutes after the
ignition switch is in the 1 (OFF/Lock) position. The transmission
must be in P (Park), and the liftgate, or liftgate glass must be
open. Similar to the Battery Saver feature, the power 3rd row
seat will be disabled 30 minutes after turning the vehicle off. If
the power 3rd row seat is disabled after 30 minutes, the seat can
be enabled by opening any door, pressing the unlock control on
the remote entry transmitter, pressing any keyless keypad button
(if equipped), or turning the ignition key.
Seating and Safety Restraints
125
Page 139 of 328
Reasons given... Consider...
ªI'd rather be thrown clearº Not a good idea.Peoplewho areejected
are 40 times more likely to DIE.Safety
belts help prevent ejection, WE CAN'T
ªPICK OUR CRASHº.
Do not sit on top of a buckled safety belt to avoid the
BeltMinderychime. Sitting on the safety belt will increase the
risk of injury in an accident. To disable (one-time) or deactivate the
BeltMinderyfeature please follow the directions stated below.
One time disable
If at any time the driver/front passenger quickly buckles then unbuckles
the safety belt for that seating position, the BeltMinderyis disabled for
the current ignition cycle. The BeltMinderyfeature will enable during
the same ignition cycle if the occupant buckles and remains buckled for
approximately 30 seconds. Confirmation is not given for the one time
disable.
Deactivating/activating the BeltMinderYfeature
The driver and front passenger BeltMinderyare
deactivated/activated independently. When deactivating/activating
one seating position, do not buckle the other position as this will
terminate the process.
Read Steps1-4thoroughly before proceeding with the
deactivation/activation programming procedure.
Note: The driver and front passenger BeltMinderyfeatures must be
disabled/enabled separately. Both cannot be disable/enabled during the
same key cycle.
The driver and front passenger BeltMinderyfeatures can be
deactivated/activated by performing the following procedure:
Before following the procedure, make sure that:
²The parking brake is set
²The gearshift is in P (Park) (automatic transmission)
²The ignition switch is in the OFF position
²The driver and front passenger safety belts are unbuckled
Seating and Safety Restraints
139