2006 FORD EXPLORER ECO mode
[x] Cancel search: ECO modePage 22 of 328
Autoset:Allows you to set the strongest local radio stations without
losing your original manually set preset stations for AM/FM1/FM2. Press
MENU to access. Use
/to set.
When the six strongest stations are filled, the station stored in preset 1
will begin playing. If there are less than six strong stations, the system
will store the last one in the remaining presets. Use
/to turn
on/off.
Bass:Press
/to adjust the bass setting.
Treble:Press
/to adjust the treble setting.
Balance:Press
/to adjust the audio between the left and right
speakers.
Fade:Press
/to adjust the audio between the front and rear
speakers.
Speed sensitive volume:Radio volume automatically changes slightly
with vehicle speed to compensate for road and wind noise. Press MENU
to access and use
/to adjust. The recommended level is 1±3.
Level 0 (SPEED OFF) turns the feature off and level 7 is the maximum
setting.
Track/Folder Mode:Available only on MP3 discs in CD mode.
Press
/to toggle between Track and Folder mode.
In Track mode, press
SEEKto scroll through all tracks on the
current disc.
In Folder mode, press
SEEKto scroll through tracks within the
selected folder.
Compression:Brings soft and loud CD passages together for a more
consistent listening level when in CD mode. Press MENU until
compression status is displayed. Press
/to turn the feature on/off.
4.AUX:Press to toggle between
FES/DVD, AUX and Satellite Radio
modes (if equipped). If no auxiliary
sources are available, NO AUX AUDIO will be displayed.
Entertainment Systems
22
Page 26 of 328
4.MENU:Press to toggle through
the following modes:
Setting the clock:Press MENU until SET HOURS or SET MINUTES is
displayed. Press
/to adjust the hours/minutes.
Autoset:Allows you to set the strongest local radio stations without losing
your original manually set preset stations for AM/FM1/FM2 . Press MENU
to access. Use
/to set.
When the six strongest stations are filled, the station stored in preset 1 will
begin playing. If there are less than six strong stations, the system will
store the last one in the remaining presets. Use
/to turn on/off.
Bass:Press/to adjust the bass setting.
Treble:Press
/to adjust the treble setting.
Balance:Press
/to adjust the audio between the left and right
speakers.
Fade:Press
/to adjust the audio between the front and rear
speakers.
Speed sensitive volume:Radio volume automatically changes slightly
with vehicle speed to compensate for road and wind noise. Use
/
to adjust. Recommended level is 1±3. Level 0 (SPEED OFF) turns the
feature off and level 7 is the maximum setting.
Compression:Brings soft and loud CD passages together for a more
consistent listening level when in CD mode. Press MENU until
compression status is displayed. Press
/to turn the feature on/off.
Dolbytnoise reduction:Dolbytnoise reduction works in tape mode to
reduce hiss and static during playback. The Dolbytnoise reduction
system is manufactured under license from Dolby Laboratories Licensing
Corporation. Dolbytand the double-D symbol are registered trademarks
of DolbytLaboratories Licensing Corporation.
Track/Folder Mode:Available only on MP3 discs in CD mode.
Press
/to toggle between Track and Folder mode.
In Track mode, press
SEEKto scroll through all tracks on the
current disc.
In Folder mode, press
SEEKto scroll through tracks within the
selected folder.
Entertainment Systems
26
Page 30 of 328
RBDS (Radio Broadcast Digital Signal) ON/OFF:Press/to
turn RBDS ON or OFF.
Program Type:If RBDS is ON, press
/to find the desired program
type, then use
SEEKor SCAN to search for FM radio stations
broadcasting the desired program type.
SHOW RBDS Info:If RBDS is ON, this allows you to display the name
of the FM radio station or program type. Press
/to show program
type, station name or none.
RBDS:Allows you to search RBDS (Radio Broadcast Digital Signal)
equipped stations for the following music formats: Classical, Country,
Jazz, Oldies, R&B, Religious, Rock, Soft, Top 40 and Information
(Inform). RBDS is only available in FM mode.
Autoset:Allows you to set the strongest local radio stations without
losing your original manually set preset stations for AM/FM1/FM2 .
Use
/to turn on/off.
When the six strongest stations are filled, the station stored in preset 1
will begin playing. If there are less than six strong stations, the system
will store the last one in the remaining presets. Use
/to turn
on/off.
Bass:Press
/to adjust the bass setting.
Treble:Press
/to adjust the treble setting.
Balance:Press
/to adjust the audio between the left and right
speakers.
Fade:Press
/to adjust the audio between the front and rear
speakers.
Speed sensitive volume:Radio volume automatically changes slightly
with vehicle speed to compensate for road and wind noise. Use
/
to adjust. Recommended level is 1±3. Level 0 (SPEED OFF) turns the
feature off and level 7 is the maximum setting.
Occupancy mode:Use
/to select and optimize sound for ALL
SEATS, DRIVERS SEAT or REAR SEATS.
Entertainment Systems
30
Page 33 of 328

GENERAL AUDIO INFORMATION
Radio frequencies:AM and FM frequencies are established by the
Federal Communications Commission (FCC) and the Canadian Radio and
Telecommunications Commission (CRTC). Those frequencies are:
AM - 530, 540±1700, 1710 kHz
FM- 87.7, 87.9±107.7, 107.9 MHz
Radio reception factors:There are three factors that can affect radio
reception:
²Distance/strength: The further you travel from a station, the weaker
the signal and the weaker the reception.
²Terrain: Hills, mountains, tall buildings, power lines, electric fences,
traffic lights and thunderstorms can interfere with your reception.
²Station overload: When you pass a broadcast tower, a stronger signal
may overtake a weaker one and play while the weak station frequency
is displayed.
Cassette/player care:
Do:
²Use only cassettes that are 90 minutes long or less.
²Tighten very loose tapes by inserting a finger or pencil into the hole
and turning the hub.
²Remove loose labels before inserting tapes.
²Allow tapes which have been subjected to extreme heat, humidity or
cold to reach a moderate temperature before playing.
²Clean the cassette player head with a cassette cleaning cartridge after
10±12 hours of play to maintain good sound/operation.
Don't:
²Expose tapes to direct sunlight, extreme humidity, heat or cold.
²Leave tapes in the cassette player for a long time when not being
played.
CD/CD player care:
Do:
²Handle discs by their edges only. Never touch the playing surface.
²Inspect discs before playing. Clean only with an approved CD cleaner
and wipe from the center out.
Entertainment Systems
33
Page 35 of 328
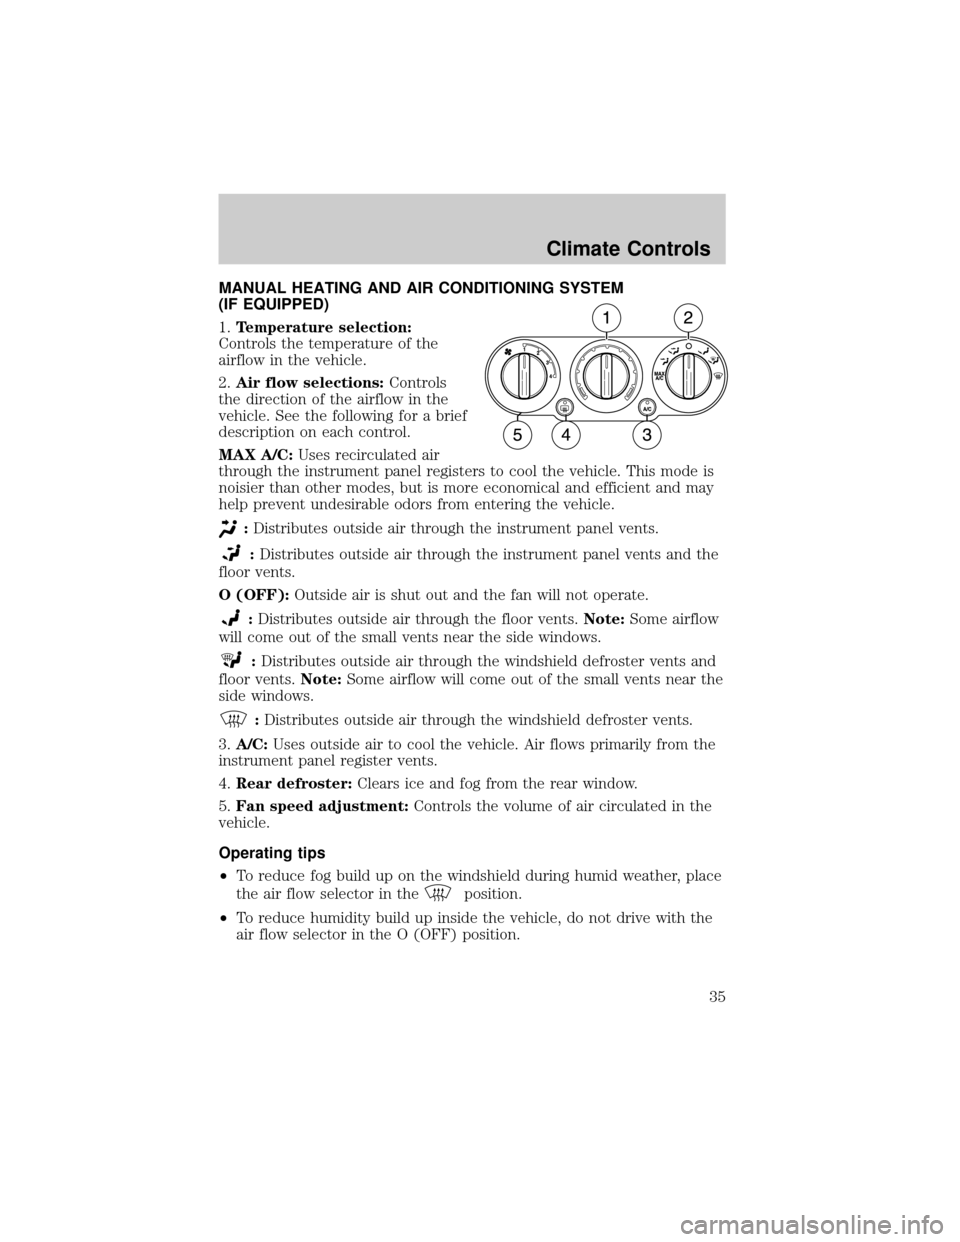
MANUAL HEATING AND AIR CONDITIONING SYSTEM
(IF EQUIPPED)
1.Temperature selection:
Controls the temperature of the
airflow in the vehicle.
2.Air flow selections:Controls
the direction of the airflow in the
vehicle. See the following for a brief
description on each control.
MAX A/C:Uses recirculated air
through the instrument panel registers to cool the vehicle. This mode is
noisier than other modes, but is more economical and efficient and may
help prevent undesirable odors from entering the vehicle.
:Distributes outside air through the instrument panel vents.
:Distributes outside air through the instrument panel vents and the
floor vents.
O (OFF):Outside air is shut out and the fan will not operate.
:Distributes outside air through the floor vents.Note:Some airflow
will come out of the small vents near the side windows.
:Distributes outside air through the windshield defroster vents and
floor vents.Note:Some airflow will come out of the small vents near the
side windows.
:Distributes outside air through the windshield defroster vents.
3.A/C:Uses outside air to cool the vehicle. Air flows primarily from the
instrument panel register vents.
4.Rear defroster:Clears ice and fog from the rear window.
5.Fan speed adjustment:Controls the volume of air circulated in the
vehicle.
Operating tips
²To reduce fog build up on the windshield during humid weather, place
the air flow selector in the
position.
²To reduce humidity build up inside the vehicle, do not drive with the
air flow selector in the O (OFF) position.
Climate Controls
35
Page 36 of 328
²Do not put objects under the front seats that will interfere with the
airflow to the rear seats.
²Remove any snow, ice or leaves from the air intake area at the base of
the windshield.
²To improve the A/C cool down when the vehicle interior is
significantly warmer than the outside temperature, drive with the
windows slightly open for 2±3 minutes after start up or until the
vehicle has been ªaired out.º
For maximum cooling performance in panel (
) mode:
²Select MAX A/C mode. MAX A/C uses recirculated air with A/C to
provide a cooler airflow.
²Move the temperature control to the coolest setting.
²Set the fan to the highest speed initially, then adjust in order to
maintain comfort.
To allow side window defogging and demisting while warming up the
vehicle cabin:
1. Select
.
2. Select A/C.
3. Set the temperature control to maintain comfort.
4. Set the fan speed to highest setting.
5. Direct the outer instrument panel vents towards the side windows. To
increase airflow to the outer instrument panel vents, close the vents
located in the middle of the instrument panel.
To allow windshield defogging and demisting while warming up vehicle:
1. Select
floor/defrost mode.
2. Set temperature control to maintain comfort.
3. Set fan to highest setting.
Do not place objects on top of the instrument panel as these
objects may become projectiles in a collision or sudden stop.
Climate Controls
36
Page 40 of 328
Do not place objects on top of the instrument panel as these
objects may become projectiles in a collision or sudden stop.
AUXILIARY SYSTEM (IF EQUIPPED)
Your vehicle may be equipped with an auxiliary climate system. These
auxiliary controls, located in the overhead console, allow the front
passengers to control airflow direction, temperature and fan level of the
rear compartment to quickly heat or cool the entire vehicle.
Front auxiliary controls:
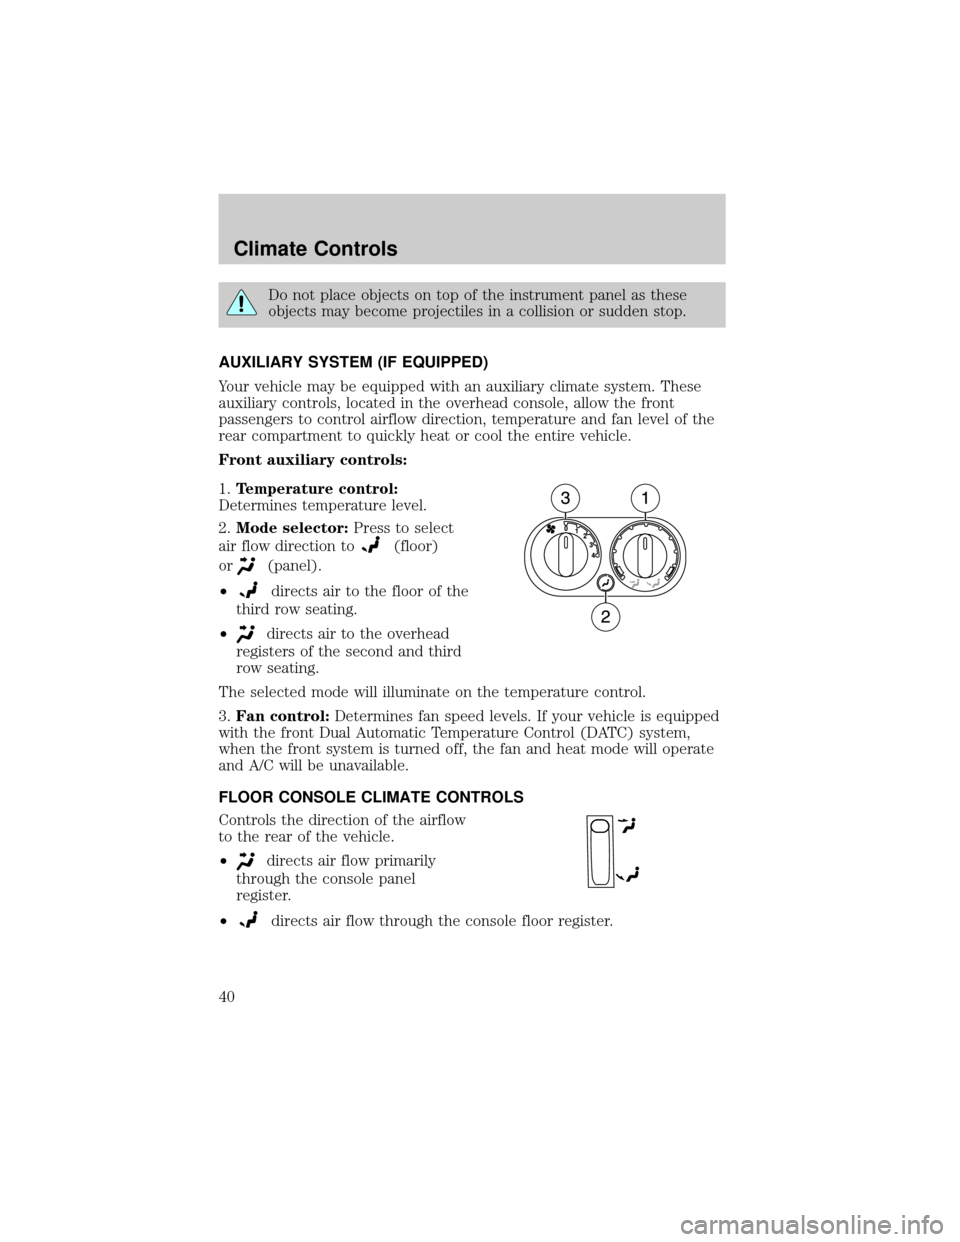
1.Temperature control:
Determines temperature level.
2.Mode selector:Press to select
air flow direction to
(floor)
or
(panel).
²
directs air to the floor of the
third row seating.
²
directs air to the overhead
registers of the second and third
row seating.
The selected mode will illuminate on the temperature control.
3.Fan control:Determines fan speed levels. If your vehicle is equipped
with the front Dual Automatic Temperature Control (DATC) system,
when the front system is turned off, the fan and heat mode will operate
and A/C will be unavailable.
FLOOR CONSOLE CLIMATE CONTROLS
Controls the direction of the airflow
to the rear of the vehicle.
²
directs air flow primarily
through the console panel
register.
²
directs air flow through the console floor register.
Climate Controls
40
Page 65 of 328
Bounce back override:To override bounce back, within 2 seconds after
reaching bounce back position, if the switch is held in the close position
the moon roof will close with a 20±25 percent increase of closing force
before it will bounce back again. If the switch is released before the
moon roof reaches fully closed position, the moon roof will stop. For
example: Bounce Back Override can be used to overcome the resistance
of ice on the moon roof or seals.
To vent:
²To tilt the moon roof into the vent position (when the glass panel is
closed), press and hold the front portion of the control.
²To close the moon roof from the vent position, press and hold the rear
portion of the control until the glass panel stops moving.
The moon roof has a sliding shade that can be opened or closed when
the glass panel is shut. To close the shade, pull it toward the front of the
vehicle.
Accessory delay:
With accessory delay, the window switches, audio system, and moon roof
(if equipped) may be used for up to 10 minutes after the ignition switch
is turned to the OFF position or until either front door is opened.
HOMELINKTWIRELESS CONTROL SYSTEM (IF EQUIPPED)
The HomeLinktWireless Control System, located on the overhead
console, provides a convenient way to replace up to three hand-held
transmitters with a single built-in device. This feature will learn the radio
frequency codes of most transmitters to operate garage doors, entry gate
operators, security systems, entry door locks, and home or office lighting.
When programming your HomeLinktWireless Control System to
a garage door or gate, be sure that people and objects are out of
the way to prevent potential harm or damage.
Do not use the HomeLinktWireless Control System with any garage
door opener that lacks safety stop and reverse features as required by
U.S. federal safety standards (this includes any garage door opener
model manufactured before April 1, 1982). A garage door which cannot
detect an object, signaling the door to stop and reverse, does not meet
current U.S. federal safety standards. For more information, contact
HomeLinktat:www.homelink.comor1±800±355±3515.
Driver Controls
65