2006 FORD EXPLORER remote control
[x] Cancel search: remote controlPage 105 of 328

To reprogram the remote entry
transmitters:
1. Ensure the vehicle is electronically unlocked.
2. Put the key in the ignition.
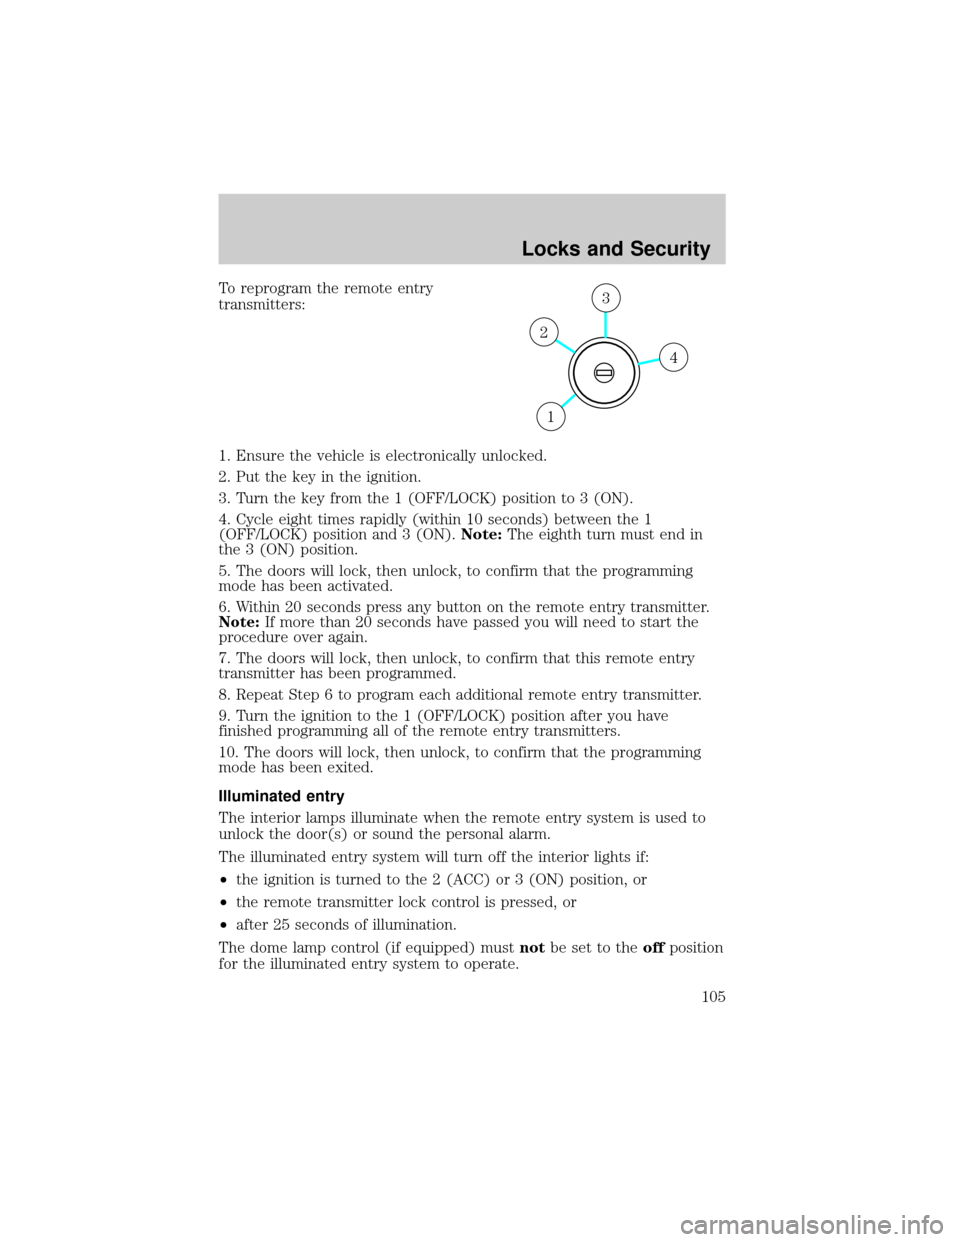
3. Turn the key from the 1 (OFF/LOCK) position to 3 (ON).
4. Cycle eight times rapidly (within 10 seconds) between the 1
(OFF/LOCK) position and 3 (ON).Note:The eighth turn must end in
the 3 (ON) position.
5. The doors will lock, then unlock, to confirm that the programming
mode has been activated.
6. Within 20 seconds press any button on the remote entry transmitter.
Note:If more than 20 seconds have passed you will need to start the
procedure over again.
7. The doors will lock, then unlock, to confirm that this remote entry
transmitter has been programmed.
8. Repeat Step 6 to program each additional remote entry transmitter.
9. Turn the ignition to the 1 (OFF/LOCK) position after you have
finished programming all of the remote entry transmitters.
10. The doors will lock, then unlock, to confirm that the programming
mode has been exited.
Illuminated entry
The interior lamps illuminate when the remote entry system is used to
unlock the door(s) or sound the personal alarm.
The illuminated entry system will turn off the interior lights if:
²the ignition is turned to the 2 (ACC) or 3 (ON) position, or
²the remote transmitter lock control is pressed, or
²after 25 seconds of illumination.
The dome lamp control (if equipped) mustnotbe set to theoffposition
for the illuminated entry system to operate.
4
3
2
1
Locks and Security
105
Page 107 of 328

Tips:
²Do not set a code that uses five of the same number.
²Do not use five numbers in sequential order.
²The factory set code will work even if you have set your own personal
code.
²If you program a code to a position that already contains a set code,
the previously-set code will be erased.
Erasing personal code
1. Enter the factory set 5±digit code.
2. Within five seconds, press the 1²2 on the keypad and release.
3. Press and hold the 1²2 for two seconds. This must be done within
five seconds of completing Step 2.
Allpersonal codes are now erased and only the factory set 5±digit code
will work.
Anti-scan feature
If the wrong code has been entered 7 times (35 consecutive button
presses), the keypad will go into an anti-scan mode. This mode disables
the keypad for one minute and the keypad lamp will flash.
The anti-scan feature will turn off after:
²one minute of keypad inactivity.
²pressing the UNLOCK
control on the remote entry transmitter.
²the ignition is turned to the 3 (ON) position.
Unlocking and locking the doors, liftgate and liftgate window using
keyless entry
To unlock the driver's door,enter the factory set 5-digit code or one
of the vehicle's personal codes. Each number must be pressed within five
seconds of each other. The interior lamps will illuminate.
To unlock all doors and liftgate,press the 3²4 control within five
seconds.
To open the liftgate window,press the 5²6 control within five
seconds.
To lock all doors, liftgate and liftgate window,press the 7²8 and
the 9²0 at the same time.Note:The driver's door must be closed. You
do notneed to enter the keypad code first.
Locks and Security
107
Page 111 of 328

6. Release the 3²4.
The user should receive a horn chirp to indicate the system has been
disabled or a chirp followed by a honk to indicate the system has been
enabled.
Message center procedure
For information on activating/deactivating the autounlock feature using
the vehicle's message center (if equipped), refer toMessage center
information in theDriver Controlschapter.
SECURILOCKYPASSIVE ANTI-THEFT SYSTEM
SecuriLockypassive anti-theft system is an engine immobilization
system. This system is designed to help prevent the engine from being
started unless acoded key programmed to your vehicleis used. The
use of the wrong type of coded key may lead to a ªno-startº condition.
Your vehicle comes with two coded keys; additional coded keys may be
purchased from your authorized dealer. The authorized dealer can
program your spare keys to your vehicle or you can program the keys
yourself. Refer toProgramming spare keysfor instructions on how to
program the coded key.
Note:The SecuriLockypassive anti-theft system is not compatible with
non-Ford aftermarket remote start systems. Use of these systems may
result in vehicle starting problems and a loss of security protection.
Note:Large metallic objects, electronic devices that are used to
purchase gasoline or similar items, or a second coded key on the same
key chain may cause vehicle starting issues. You need to prevent these
objects from touching the coded key while starting the engine. These
objects will not cause damage to the coded key, but may cause a
momentary issue if they are too close to the key when starting the
engine. If a problem occurs, turn the ignition off, remove all objects on
the key chain away from the coded key and restart the engine.
Anti-theft indicator
The anti-theft indicator is located on top of the instrument panel.
²When the ignition is in the 1 (OFF/LOCK) position, the indicator will
flash once every 2 seconds to indicate the SecuriLockysystem is
functioning as a theft deterrent.
²When the ignition is in the 3 (ON) position, the indicator will glow for
3 seconds to indicate normal system functionality.
If a problem occurs with the SecuriLockysystem, the indicator will flash
rapidly or glow steadily when the ignition is in the 3 (ON) position. If this
occurs, the vehicle should be taken to an authorized dealer for service.
Locks and Security
111
Page 118 of 328

Press the control to recline the
seatback forward or rearward.
Memory seats and adjustable pedals (if equipped)
This system allows automatic
positioning of the driver seat and
adjustable pedals to two
programmable positions.
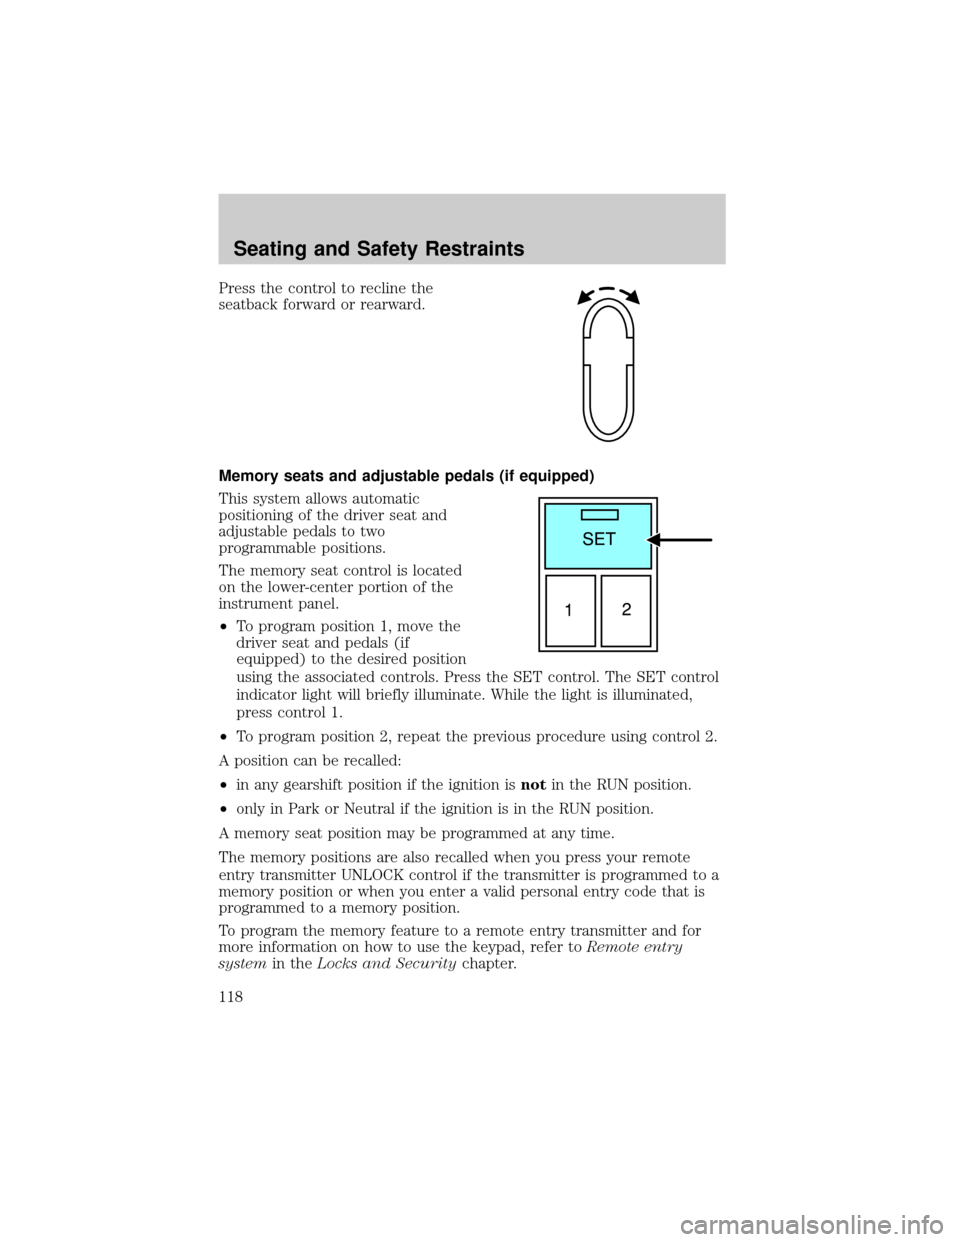
The memory seat control is located
on the lower-center portion of the
instrument panel.
²To program position 1, move the
driver seat and pedals (if
equipped) to the desired position
using the associated controls. Press the SET control. The SET control
indicator light will briefly illuminate. While the light is illuminated,
press control 1.
²To program position 2, repeat the previous procedure using control 2.
A position can be recalled:
²in any gearshift position if the ignition isnotin the RUN position.
²only in Park or Neutral if the ignition is in the RUN position.
A memory seat position may be programmed at any time.
The memory positions are also recalled when you press your remote
entry transmitter UNLOCK control if the transmitter is programmed to a
memory position or when you enter a valid personal entry code that is
programmed to a memory position.
To program the memory feature to a remote entry transmitter and for
more information on how to use the keypad, refer toRemote entry
systemin theLocks and Securitychapter.
Seating and Safety Restraints
118
Page 125 of 328

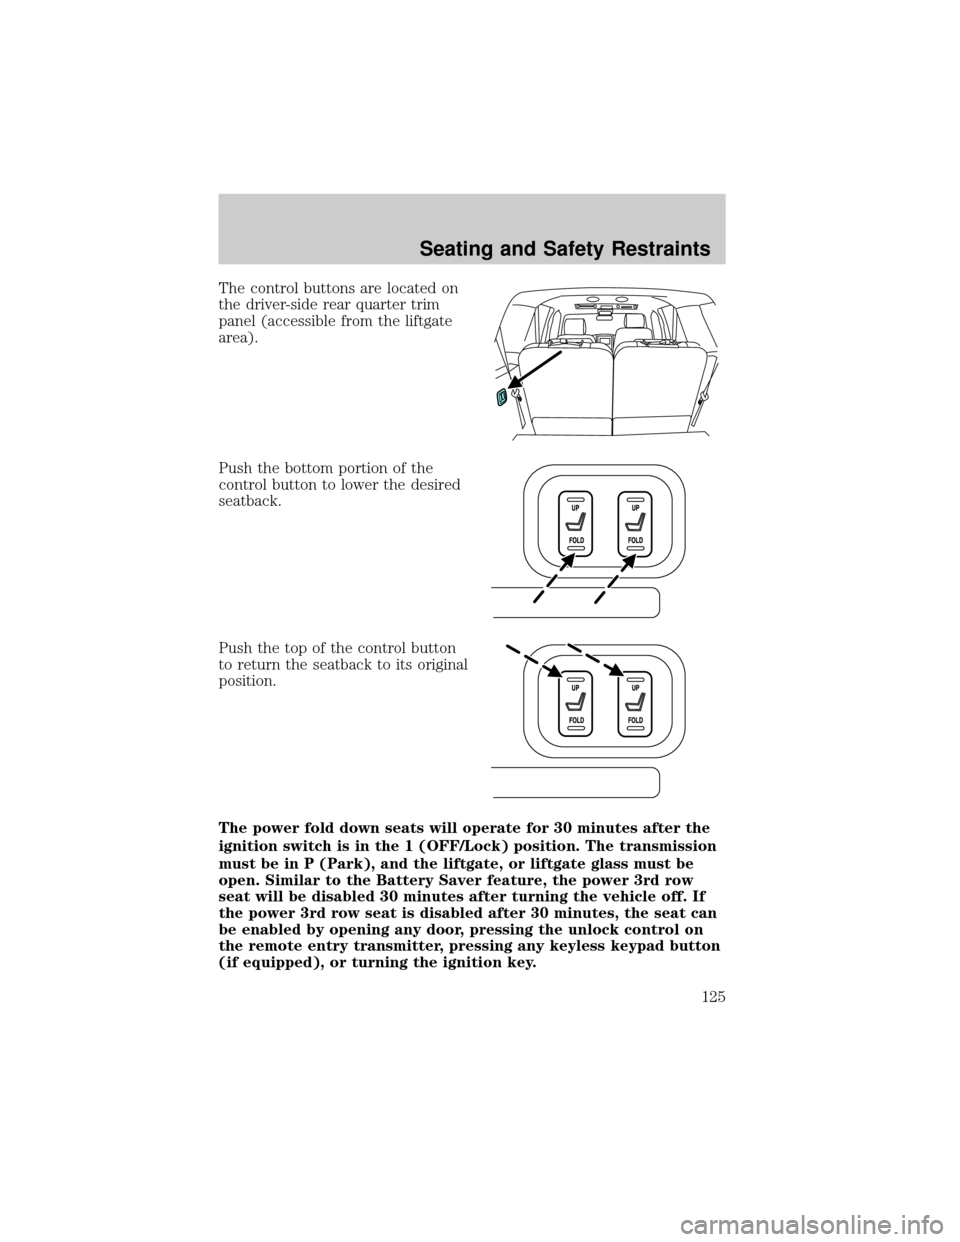
The control buttons are located on
the driver-side rear quarter trim
panel (accessible from the liftgate
area).
Push the bottom portion of the
control button to lower the desired
seatback.
Push the top of the control button
to return the seatback to its original
position.
The power fold down seats will operate for 30 minutes after the
ignition switch is in the 1 (OFF/Lock) position. The transmission
must be in P (Park), and the liftgate, or liftgate glass must be
open. Similar to the Battery Saver feature, the power 3rd row
seat will be disabled 30 minutes after turning the vehicle off. If
the power 3rd row seat is disabled after 30 minutes, the seat can
be enabled by opening any door, pressing the unlock control on
the remote entry transmitter, pressing any keyless keypad button
(if equipped), or turning the ignition key.
Seating and Safety Restraints
125
Page 324 of 328

Power mirrors .............................58
Power point .................................55
Power steering ..........................215
fluid, checking and adding ....304
fluid, refill capacity ................308
fluid, specifications .........310, 313
Power Windows ...........................57
Preparing to drive your
vehicle ........................................216
R
Radio ................................21, 25, 29
Rear window defroster ...............41
Relays ........................................238
Remote entry system ...............101
illuminated entry ....................105
opening the trunk ...................102
Reverse sensing system ...........224
Roadside assistance ..................235
Roof rack .....................................97
S
Safety Belt Maintenance ..........140
Safety belts
(see Safety restraints) ............126,
129±134
Safety Canopy ...........150, 152±153
Safety defects, reporting ..........268
Safety restraints ........126, 129±134
belt minder .............................136
extension assembly ................135
for adults .........................130±133
for children .....................155±156
Occupant Classification
Sensor ......................................127safety belt maintenance .........140
warning light and chime ........136
Safety seats for children ..........160
Safety Compliance
Certification Label ....................315
Seat belts
(see Safety restraints) .............126
Seats ..........................................114
child safety seats ....................160
front seats ...............................115
heated ......................................119
memory seat ...................102, 118
Setting the clock
AM/FM/In-dash 6 CD ................29
Snowplowing .................................8
Spark plugs,
specifications .....................307, 313
Special notice
ambulance conversions ..............8
utility-type vehicles ....................8
Specification chart,
lubricants ...........................310, 313
Speed control ..............................60
Starting your vehicle ........207, 209
jump starting ..........................256
Steering wheel
controls ......................................62
tilting .........................................53
T
Tilt steering wheel ......................53
Tire Pressure Monitoring
System (TPMS)
Driving .....................................230
Roadside Emergencies ...........246
Tires, Wheels and Loading ....186
Warning Displays ..........18, 77, 91
Index
324