Page 17 of 64
•MEDIA:This button illuminates
to show the status of the rear
zone entertainment.
•FULL ENABLED:When active,
the rear seat passengers can
select between auxiliary and DVD
mode.
•DISABLED:When active, all
features for the rear seat passengers are disabled. REAR ZONE OFF
will be displayed.
•HEADPHONES ON/OFF:Press to turn on/off the rear zone
entertainment system.
DVD (IF EQUIPPED)
Note:The following information is intended for anExploreror
Mountaineerequipped with an optional DVD player. If you have a
Freestyle, Five Hundred or Montego, please refer to the previous section.
Your vehicle may be equipped with a DVD player. The navigation system
can provide you interaction with the DVD system in the rear of the
vehicle. To access the DVD screen:
1. Ensure that the navigation system is ON.
2. Press MEDIA.
2006 Navigator(nav)
Supplement
USA(fus)
Audio features
17
Page 18 of 64
3. If your vehicle is equipped with a
DVD player, DVD will appear as a
tab selection in the media screen.
The DVD screen will allow you to
select from the following options:
•
(Reverse): Press for reverse play.
•
/(Play/Pause): Press to play or pause the DVD.
•
(Fast forward): Press for advance play.
•REAR AUX :Press to access rear auxiliary mode. There is an
external video/audio input for the rear seat passengers to connect to
an external DVD player, video games, etc.
•REAR ZONE:Press to access the Rear Zone Entertainment Screen.
This screen allows back seat passengers to select/listen to a different
audio/video sources than the front seat passengers. The only
restriction being the front and back seat passengers cannot both listen
to a different frequency band (AM/FM1/FM2).
SEEK:You may press SEEK on the bezel for the next (
) or previous
(
) chapter.
2006 Navigator(nav)
Supplement
USA(fus)
Audio features
18
Page 19 of 64
. To
make adjustments, ensure that the
correct headset (A or B) is
highlighted. The appropriate
controls will")
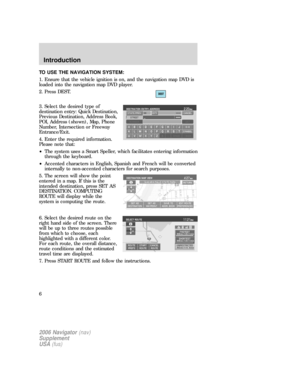
4. The screen will show you the
selected playing media of the
different headsets (A and B). To
make adjustments, ensure that the
correct headset (A or B) is
highlighted. The appropriate
controls will appear to allow you to
make adjustments to your current
playing media.
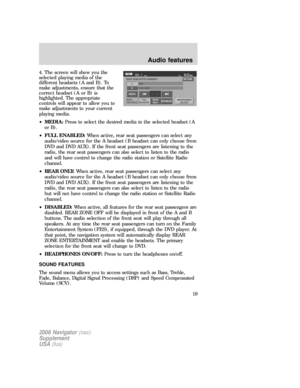
•MEDIA:Press to select the desired media in the selected headset (A
or B).
•FULL ENABLED:When active, rear seat passengers can select any
audio/video source for the A headset (B headset can only choose from
DVD and DVD AUX). If the front seat passengers are listening to the
radio, the rear seat passengers can also select to listen to the radio
and will have control to change the radio station or Satellite Radio
channel.
•REAR ONLY:When active, rear seat passengers can select any
audio/video source for the A headset (B headset can only choose from
DVD and DVD AUX). If the front seat passengers are listening to the
radio, the rear seat passengers can also select to listen to the radio
but will not have control to change the radio station or Satellite Radio
channel.
•DISABLED:When active, all features for the rear seat passengers are
disabled. REAR ZONE OFF will be displayed in front of the A and B
buttons. The audio selection of the front seat will play through all
speakers. At any time the rear seat passengers can turn on the Family
Entertainment System (FES), if equipped, through the DVD player. At
that point, the navigation system will automatically display REAR
ZONE ENTERTAINMENT and enable the headsets. The primary
selection for the front seat will change to DVD.
•HEADPHONES ON/OFF:Press to turn the headphones on/off.
SOUND FEATURES
The sound menu allows you to access settings such as Bass, Treble,
Fade, Balance, Digital Signal Processing (DSP) and Speed Compensated
Volume (SCV).
2006 Navigator(nav)
Supplement
USA(fus)
Audio features
19
Page 20 of 64
1. To access the sound features, press SOUND. The sound screen will
appear.
2. Press the appropriate tab to select from:
BASS/TREBLE:Press + to increase
or — to decrease the level of
bass/treble.
BALANCE/FADE:Press
/to
adjust the sound between the left
and right speakers (Balance)
and
/to adjust the sound to
the front and rear speakers (Fade).
2006 Navigator(nav)
Supplement
USA(fus)
Audio features
20
Page 21 of 64
DSP(Digital Signal Processing):
Press to optimize the sound quality
for ALL SEATS, DRIVER and REAR
seats. If THX equipped, optimization
is available for ALL SEATS, DRIVER
and FRONT.
SCV(Speed Compensated Volume):
Radio volume changes automatically
with vehicle speed to compensate
for road and wind noise. You may
turn the feature on/off, and select a
level of compensation between 1
and 7 by pressing the corresponding
button.
DEFAULT SETTING:Press to clear out any current settings and return
the system to the default settings.
Note:Please refer to yourOwner’s Guidefor further information.
2006 Navigator(nav)
Supplement
USA(fus)
Audio features
21
Page 22 of 64

DISPLAY
To access the display settings:
1. Ensure that the navigation system is ON.
2. Press MENU. The Menu screen will display.
3. Press DISPLAY. You may then select from the following options:
•AUTO DIM:Select to automatically dim the display brightness with
the vehicle backlighting (when headlights are turned on). Otherwise,
display brightness can be manually adjusted.
•STATUS BAR:Press to display only the Status Bar until the screen is
touched again. Refer toStatus Bar Descriptionin Basic Operation.
•DISPLAY OFF:Press to turn off the entire screen. Press the screen
or any hard button to turn the display on again.
•AUTO:Press to set the display to automatic mode. When headlights
are turned on, the system will automatically switch to the night
display screen. To adjust brightness or contrast, press + or — .
•D AY:Press to select the day screen. To adjust brightness or contrast,
press + or — .
•NIGHT:Press to select the night screen display. To adjust brightness
or contrast, press + or — .
•DEFAULT SETTING:Press to clear any current settings and return
to the system default.
2006 Navigator(nav)
Supplement
USA(fus)
System features
22
Page 23 of 64
•SAMPLE MAP:Shows you how the map will appear with the current
settings
DATE/TIME
To access the date/time settings:
1. Ensure that the navigation system is ON.
2. Press MENU. The Menu screen will display.
3. Press DATE / TIME. You may then select from the following options:
SHOW CLOCK / SHOW CALENDAR:Press to toggle between CLOCK
and CALENDAR screens. Under the CLOCK screen, the following
buttons will be available:
•CLOCK ON/OFF :Press ON to enable the clock display in the status
bar. Press OFF to disable the clock display in the status bar.
•TIME SET BUTTONS:Press + or – to adjust the hours and minutes.
•24 HOUR FORMAT:If enabled, the system will display military time.
If disabled, the user must select AM or PM.
•DAYLIGHT SAVINGS TIME:Automatically prompts you to adjust
the clock according to the daylight savings calendar.
•SHOW CALENDAR:Press to display the calendar screen.
2006 Navigator(nav)
Supplement
USA(fus)
System features
23
Page 24 of 64
The calendar screen will display the
current month. Press PREV to view
the previous month or NEXT to
view the next month. Under the
CALENDAR screen, the following
buttons are available:
•GO TO TODAY:Press to highlight the current date.
•SHOW CLOCK:Press to return to the clock screen.
FEEDBACK
To access the feedback screen:
1. Ensure that the navigation system is ON.
2. Press MENU. The Menu screen will display.
3. Press FEEDBACK. The feedback screen will appear. In this screen you
have the following options:
FEEDBACK:One must be selected at all times:
•ALL BUTTONS:Press to hear an audible beep every time any button
on the system is pressed.
•TOUCH SCREEN:Press to hear an audible beep when any touch
screen button is pressed.
2006 Navigator(nav)
Supplement
USA(fus)
System features
24


: Press for r")

:
Press to optimize the sound quality
for ALL SEATS, DRIVER and REAR
seats. If THX equipped, optimization
is available for ALL SEATS, DRIVER
and FRONT.
SCV(Speed Compensa")

