Page 105 of 360
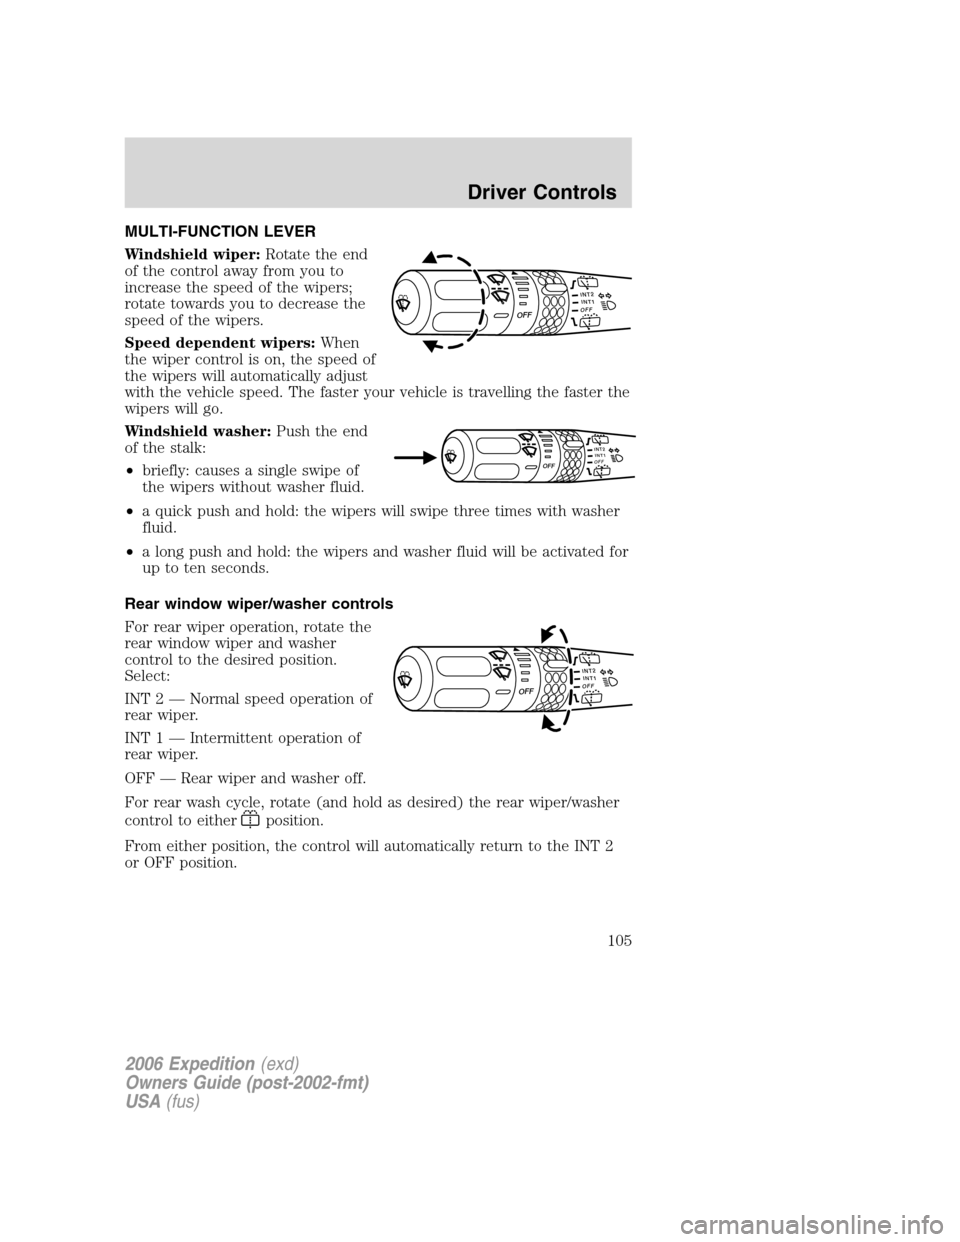
MULTI-FUNCTION LEVER
Windshield wiper:Rotate the end
of the control away from you to
increase the speed of the wipers;
rotate towards you to decrease the
speed of the wipers.
Speed dependent wipers:When
the wiper control is on, the speed of
the wipers will automatically adjust
with the vehicle speed. The faster your vehicle is travelling the faster the
wipers will go.
Windshield washer:Push the end
of the stalk:
•briefly: causes a single swipe of
the wipers without washer fluid.
•a quick push and hold: the wipers will swipe three times with washer
fluid.
•a long push and hold: the wipers and washer fluid will be activated for
up to ten seconds.
Rear window wiper/washer controls
For rear wiper operation, rotate the
rear window wiper and washer
control to the desired position.
Select:
INT 2 — Normal speed operation of
rear wiper.
INT 1 — Intermittent operation of
rear wiper.
OFF — Rear wiper and washer off.
For rear wash cycle, rotate (and hold as desired) the rear wiper/washer
control to either
position.
From either position, the control will automatically return to the INT 2
or OFF position.
INT2OFFOFFINT1
INT1I
N
T
2OFFOFF
INT2OFFOFFINT1
2006 Expedition(exd)
Owners Guide (post-2002-fmt)
USA(fus)
Driver Controls
105
Page 106 of 360
TILT STEERING
Push the lever down to unlock the
steering column. While the lever is
in the down position, tilt the
steering column to the desired
position.
While holding the steering wheel,
pull the lever up to its original
position to lock the steering column.
Never adjust the steering
column when the vehicle is
moving.
ILLUMINATED VISOR MIRROR (IF EQUIPPED)
Lift the mirror cover to turn on the
visor mirror lamp.
Slide on rod feature
(if equipped)
Rotate the visor towards the side
window and extend it rearward for
additional sunlight coverage.
Note:To stow the visor back into
the headliner, visor must be
retracted before moving it back
towards the windshield.
2006 Expedition(exd)
Owners Guide (post-2002-fmt)
USA(fus)
Driver Controls
106
Page 108 of 360
Power quarter rear windows (if equipped)
•Without a moon roof
•With a moon roof
Press the
portion of the VENT control to open the power rear
quarter windows.
Press the
portion of the VENT control to close the power rear
quarter windows.
Do not leave children unattended in the vehicle and do not let
children play with the power rear quarter windows. They may
seriously injure themselves.
When closing the power rear quarter windows, you should verify
that it is free of obstructions and ensure that children and/or
pets are not in the proximity of the window opening.
AUXILIARY POWER POINT (12VDC)
Power outlets are designed for accessory plugs only. Do not insert
any other object in the power outlet as this will damage the
outlet and blow the fuse. Do not hang any type of accessory or
accessory bracket from the plug. Improper use of the power
outlet can cause damage not covered by your warranty.
2006 Expedition(exd)
Owners Guide (post-2002-fmt)
USA(fus)
Driver Controls
108
Page 111 of 360
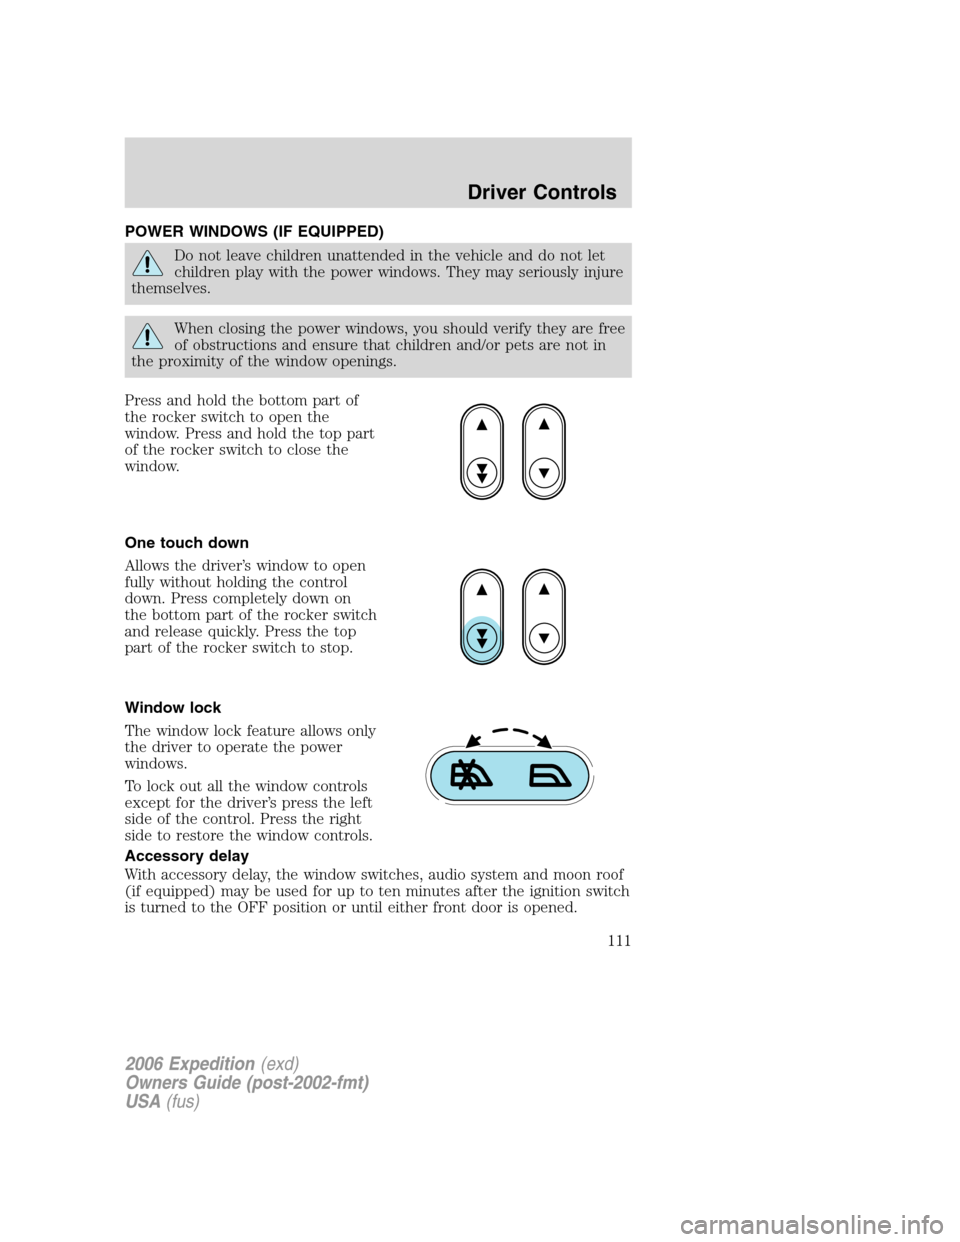
POWER WINDOWS (IF EQUIPPED)
Do not leave children unattended in the vehicle and do not let
children play with the power windows. They may seriously injure
themselves.
When closing the power windows, you should verify they are free
of obstructions and ensure that children and/or pets are not in
the proximity of the window openings.
Press and hold the bottom part of
the rocker switch to open the
window. Press and hold the top part
of the rocker switch to close the
window.
One touch down
Allows the driver’s window to open
fully without holding the control
down. Press completely down on
the bottom part of the rocker switch
and release quickly. Press the top
part of the rocker switch to stop.
Window lock
The window lock feature allows only
the driver to operate the power
windows.
To lock out all the window controls
except for the driver’s press the left
side of the control. Press the right
side to restore the window controls.
Accessory delay
With accessory delay, the window switches, audio system and moon roof
(if equipped) may be used for up to ten minutes after the ignition switch
is turned to the OFF position or until either front door is opened.
2006 Expedition(exd)
Owners Guide (post-2002-fmt)
USA(fus)
Driver Controls
111
Page 113 of 360
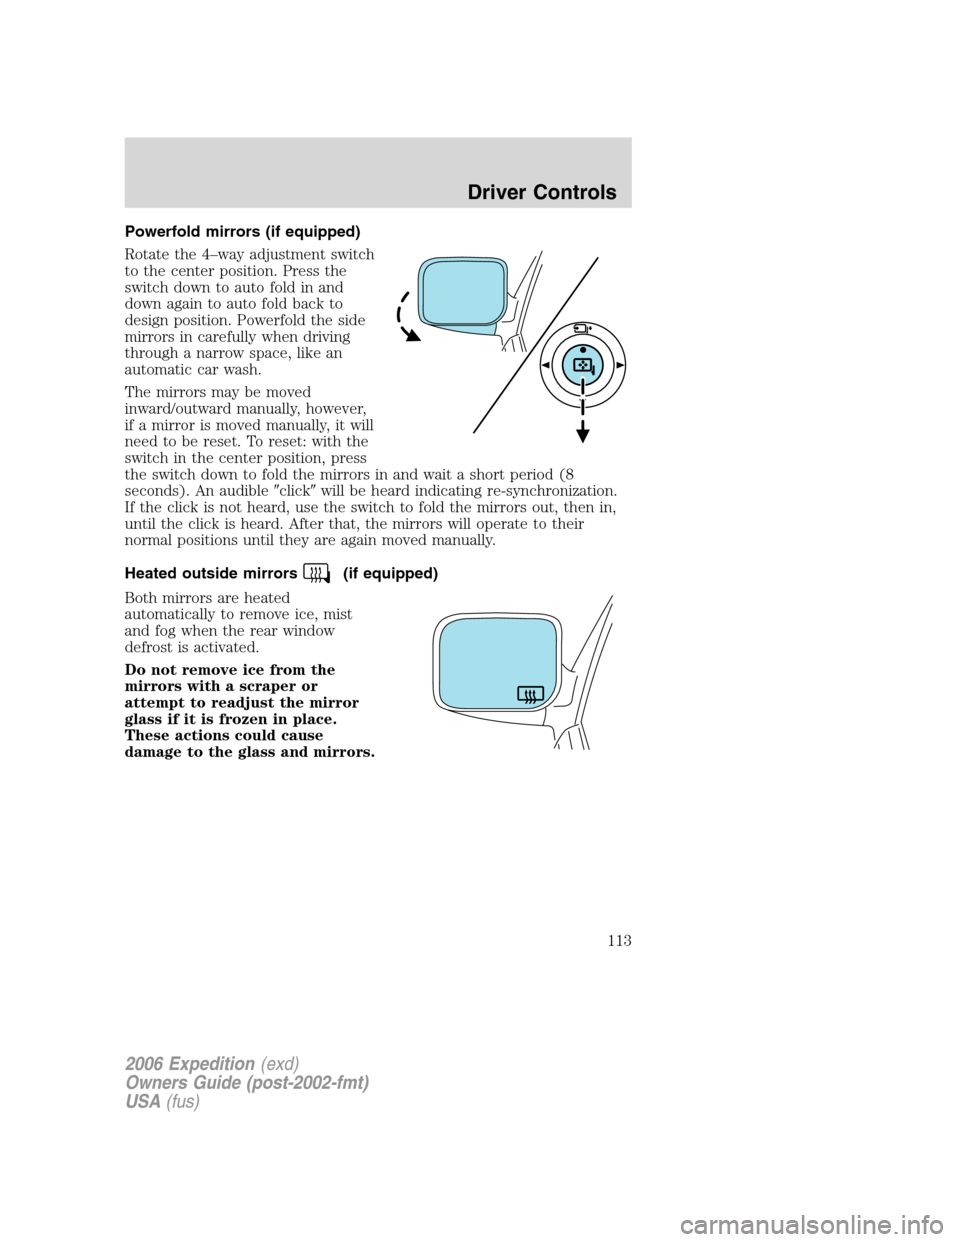
Powerfold mirrors (if equipped)
Rotate the 4–way adjustment switch
to the center position. Press the
switch down to auto fold in and
down again to auto fold back to
design position. Powerfold the side
mirrors in carefully when driving
through a narrow space, like an
automatic car wash.
The mirrors may be moved
inward/outward manually, however,
if a mirror is moved manually, it will
need to be reset. To reset: with the
switch in the center position, press
the switch down to fold the mirrors in and wait a short period (8
seconds). An audible�click�will be heard indicating re-synchronization.
If the click is not heard, use the switch to fold the mirrors out, then in,
until the click is heard. After that, the mirrors will operate to their
normal positions until they are again moved manually.
Heated outside mirrors
(if equipped)
Both mirrors are heated
automatically to remove ice, mist
and fog when the rear window
defrost is activated.
Do not remove ice from the
mirrors with a scraper or
attempt to readjust the mirror
glass if it is frozen in place.
These actions could cause
damage to the glass and mirrors.
2006 Expedition(exd)
Owners Guide (post-2002-fmt)
USA(fus)
Driver Controls
113
Page 124 of 360
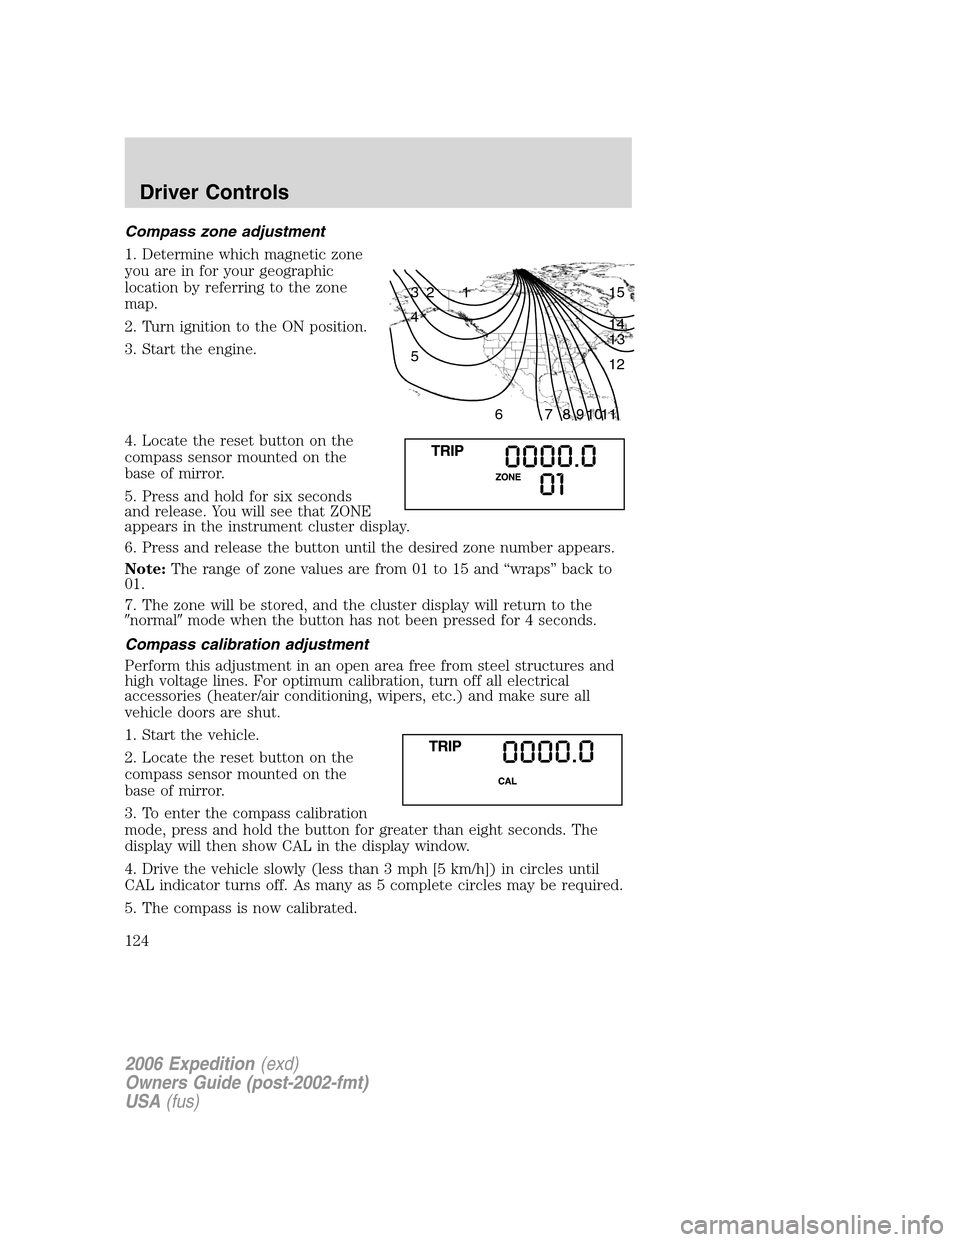
Compass zone adjustment
1. Determine which magnetic zone
you are in for your geographic
location by referring to the zone
map.
2. Turn ignition to the ON position.
3. Start the engine.
4. Locate the reset button on the
compass sensor mounted on the
base of mirror.
5. Press and hold for six seconds
and release. You will see that ZONE
appears in the instrument cluster display.
6. Press and release the button until the desired zone number appears.
Note:The range of zone values are from 01 to 15 and “wraps” back to
01.
7. The zone will be stored, and the cluster display will return to the
�normal�mode when the button has not been pressed for 4 seconds.
Compass calibration adjustment
Perform this adjustment in an open area free from steel structures and
high voltage lines. For optimum calibration, turn off all electrical
accessories (heater/air conditioning, wipers, etc.) and make sure all
vehicle doors are shut.
1. Start the vehicle.
2. Locate the reset button on the
compass sensor mounted on the
base of mirror.
3. To enter the compass calibration
mode, press and hold the button for greater than eight seconds. The
display will then show CAL in the display window.
4. Drive the vehicle slowly (less than 3 mph [5 km/h]) in circles until
CAL indicator turns off. As many as 5 complete circles may be required.
5. The compass is now calibrated.
1 2 3
4
5
6 7 8 9 101112 13 14 15
2006 Expedition(exd)
Owners Guide (post-2002-fmt)
USA(fus)
Driver Controls
124
Page 136 of 360
•Engine sensor
Contact your authorized dealer as soon as possible if these messages
occur on a regular basis.
POSITIVE RETENTION FLOOR MAT (IF EQUIPPED)
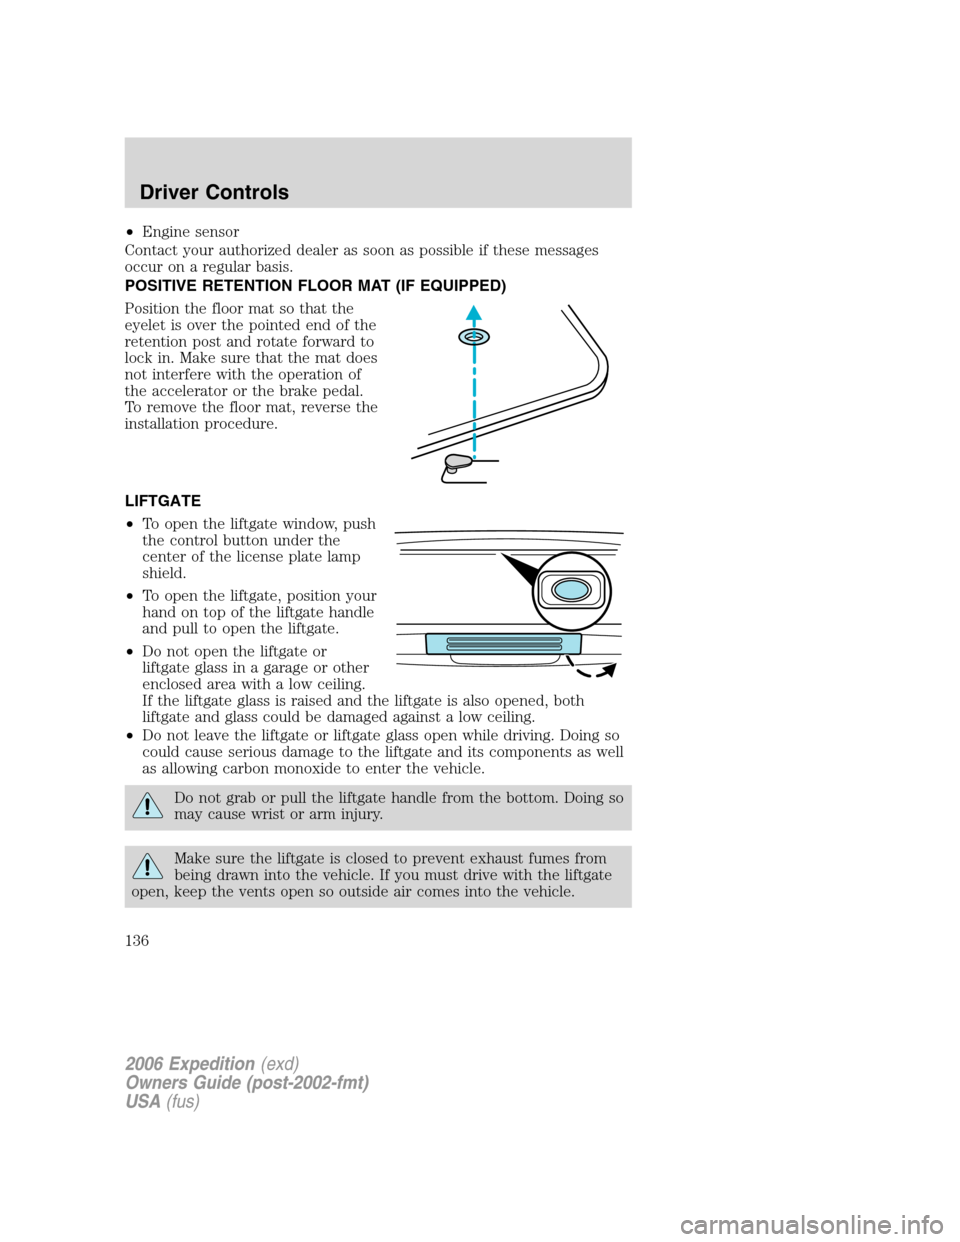
Position the floor mat so that the
eyelet is over the pointed end of the
retention post and rotate forward to
lock in. Make sure that the mat does
not interfere with the operation of
the accelerator or the brake pedal.
To remove the floor mat, reverse the
installation procedure.
LIFTGATE
•To open the liftgate window, push
the control button under the
center of the license plate lamp
shield.
•To open the liftgate, position your
hand on top of the liftgate handle
and pull to open the liftgate.
•Do not open the liftgate or
liftgate glass in a garage or other
enclosed area with a low ceiling.
If the liftgate glass is raised and the liftgate is also opened, both
liftgate and glass could be damaged against a low ceiling.
•Do not leave the liftgate or liftgate glass open while driving. Doing so
could cause serious damage to the liftgate and its components as well
as allowing carbon monoxide to enter the vehicle.
Do not grab or pull the liftgate handle from the bottom. Doing so
may cause wrist or arm injury.
Make sure the liftgate is closed to prevent exhaust fumes from
being drawn into the vehicle. If you must drive with the liftgate
open, keep the vents open so outside air comes into the vehicle.
2006 Expedition(exd)
Owners Guide (post-2002-fmt)
USA(fus)
Driver Controls
136
Page 139 of 360
CHILDPROOF DOOR LOCKS
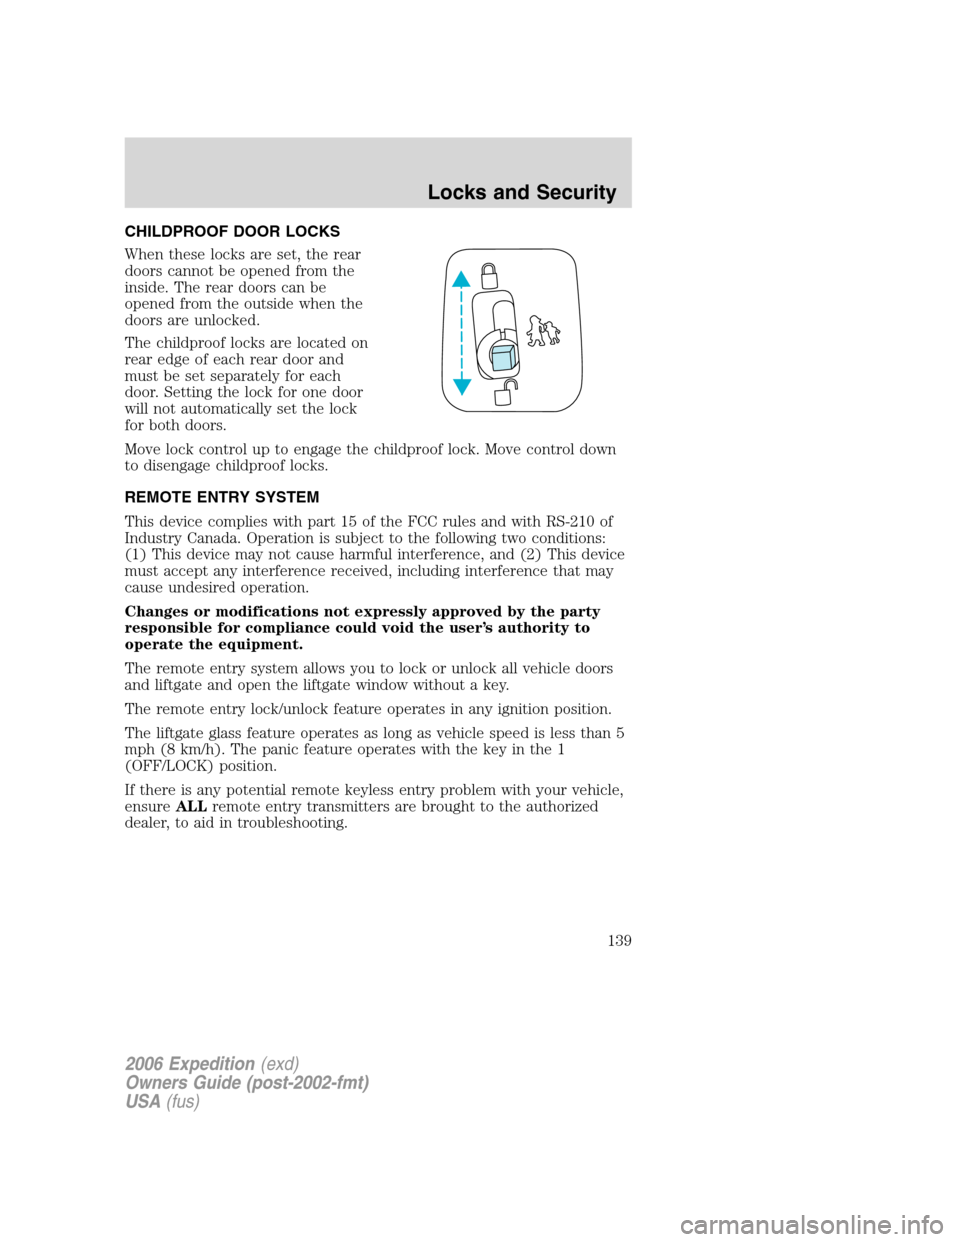
When these locks are set, the rear
doors cannot be opened from the
inside. The rear doors can be
opened from the outside when the
doors are unlocked.
The childproof locks are located on
rear edge of each rear door and
must be set separately for each
door. Setting the lock for one door
will not automatically set the lock
for both doors.
Move lock control up to engage the childproof lock. Move control down
to disengage childproof locks.
REMOTE ENTRY SYSTEM
This device complies with part 15 of the FCC rules and with RS-210 of
Industry Canada. Operation is subject to the following two conditions:
(1) This device may not cause harmful interference, and (2) This device
must accept any interference received, including interference that may
cause undesired operation.
Changes or modifications not expressly approved by the party
responsible for compliance could void the user’s authority to
operate the equipment.
The remote entry system allows you to lock or unlock all vehicle doors
and liftgate and open the liftgate window without a key.
The remote entry lock/unlock feature operates in any ignition position.
The liftgate glass feature operates as long as vehicle speed is less than 5
mph (8 km/h). The panic feature operates with the key in the 1
(OFF/LOCK) position.
If there is any potential remote keyless entry problem with your vehicle,
ensureALLremote entry transmitters are brought to the authorized
dealer, to aid in troubleshooting.
2006 Expedition(exd)
Owners Guide (post-2002-fmt)
USA(fus)
Locks and Security
139