Page 2 of 360
Seating and Safety Restraints 151
Seating 151
Safety restraints 166
Airbags 180
Child restraints 187
Tires, Wheels and Loading 201
Tire Information 203
Tire Inflation 205
Tire Pressure Monitoring System (TPMS) 217
Vehicle loading 221
Trailer towing 228
Recreational towing 234
Driving 235
Starting 235
Brakes 238
Air suspension 245
Transmission operation 248
Roadside Emergencies 265
Getting roadside assistance 265
Hazard flasher switch 266
Fuel pump shut-off switch 266
Fuses and relays 268
Changing tires 277
Lug Nut Torque 284
Jump starting 285
Wrecker towing 290
Customer Assistance 292
Reporting safety defects (U.S. only) 300
Cleaning 301
Table of Contents
2
2006 Expedition(exd)
Owners Guide (post-2002-fmt)
USA(fus)
Page 254 of 360

If equipped with the Control Trac 4x4 System, and 4L (4x4 LOW)
is selected while the vehicle is moving, the system will not
engage. This is normal and should be no reason for concern.
Before 4L (4x4 LOW) can be engaged, the vehicle must be
brought to a complete stop, the brake pedal depressed and the
transmission placed in N (Neutral).
The vehicle should not be operated in 4H (4x4 HIGH) or 4L (4x4 LOW)
on dry pavement. Doing so could result in difficult disengagement of the
transfer case, increased tire wear, decreased fuel economy and may
damage driveline components.
Your 4x4 features the heavy-duty Control Trac system which includes a
computer-operated transfer case. This unique system is interactive with
the road, continually monitoring and adjusting torque delivery to the
front and rear wheels to optimize vehicle control.
System indicator lights
The Control Trac system indicator lights illuminate only under the
following conditions. If these lights illuminate when driving in 2H or
A4WD, contact your authorized dealer as soon as possible.
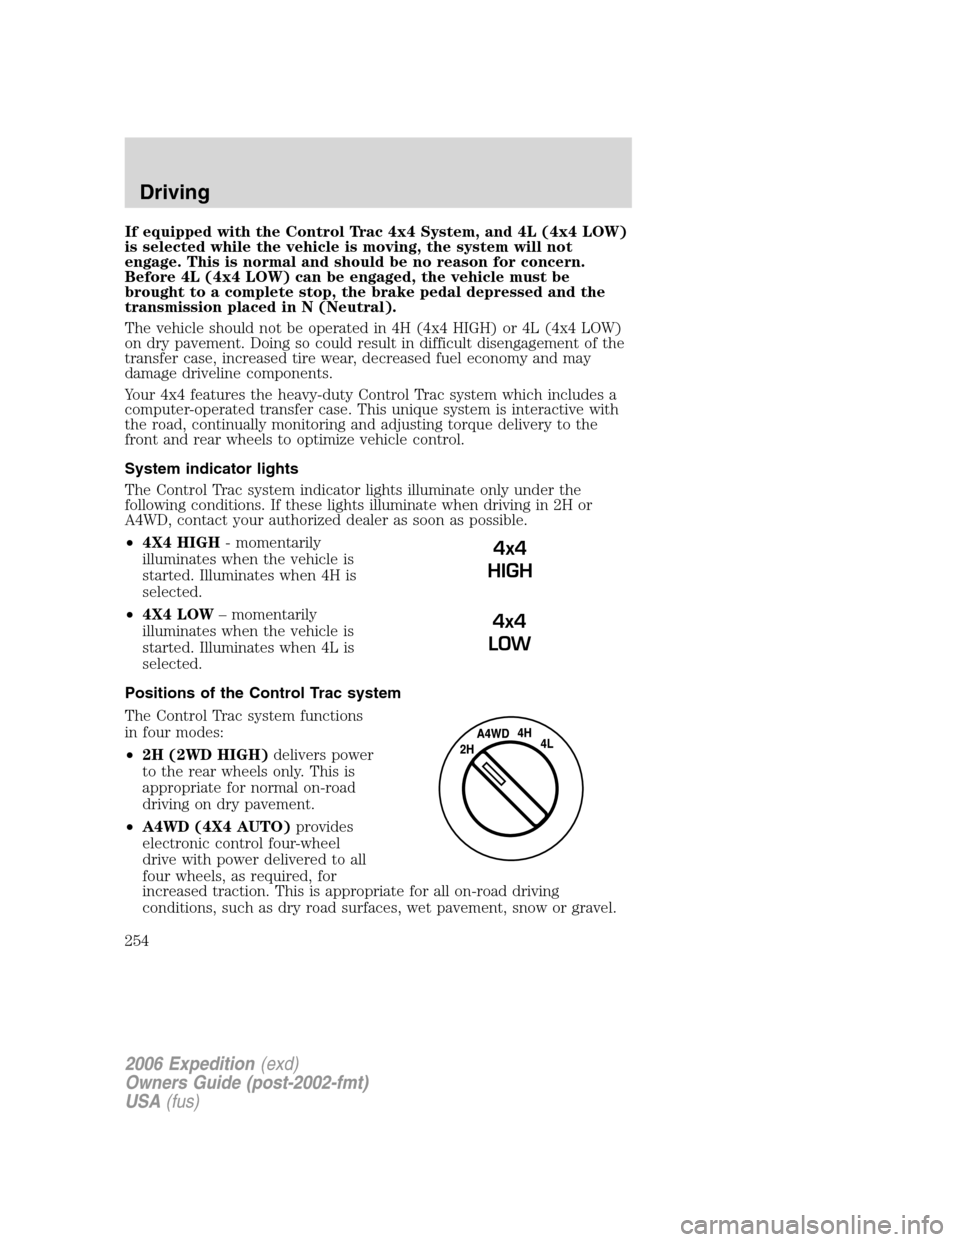
•4X4 HIGH- momentarily
illuminates when the vehicle is
started. Illuminates when 4H is
selected.
•4X4 LOW– momentarily
illuminates when the vehicle is
started. Illuminates when 4L is
selected.
Positions of the Control Trac system
The Control Trac system functions
in four modes:
•2H (2WD HIGH)delivers power
to the rear wheels only. This is
appropriate for normal on-road
driving on dry pavement.
•A4WD (4X4 AUTO)provides
electronic control four-wheel
drive with power delivered to all
four wheels, as required, for
increased traction. This is appropriate for all on-road driving
conditions, such as dry road surfaces, wet pavement, snow or gravel.
4x4
HIGH
4x4
LOW
2006 Expedition(exd)
Owners Guide (post-2002-fmt)
USA(fus)
Driving
254
Page 283 of 360

To lessen the risk of
personal injury, do not put
any part of your body under the
vehicle while changing a tire. Do
not start the engine when your
vehicle is on the jack. The jack is
only meant for changing the tire.
•Never use the front or rear
differential as a jacking point.
7. Remove the lug nuts with the lug wrench.
8. Replace the flat tire with the spare tire, making sure the valve stem is
facing outward. Reinstall the lug nuts until the wheel is snug against the
hub. Do not fully tighten the lug nuts until the wheel has been lowered.
9. Lower the wheel by turning the jack handle counterclockwise.
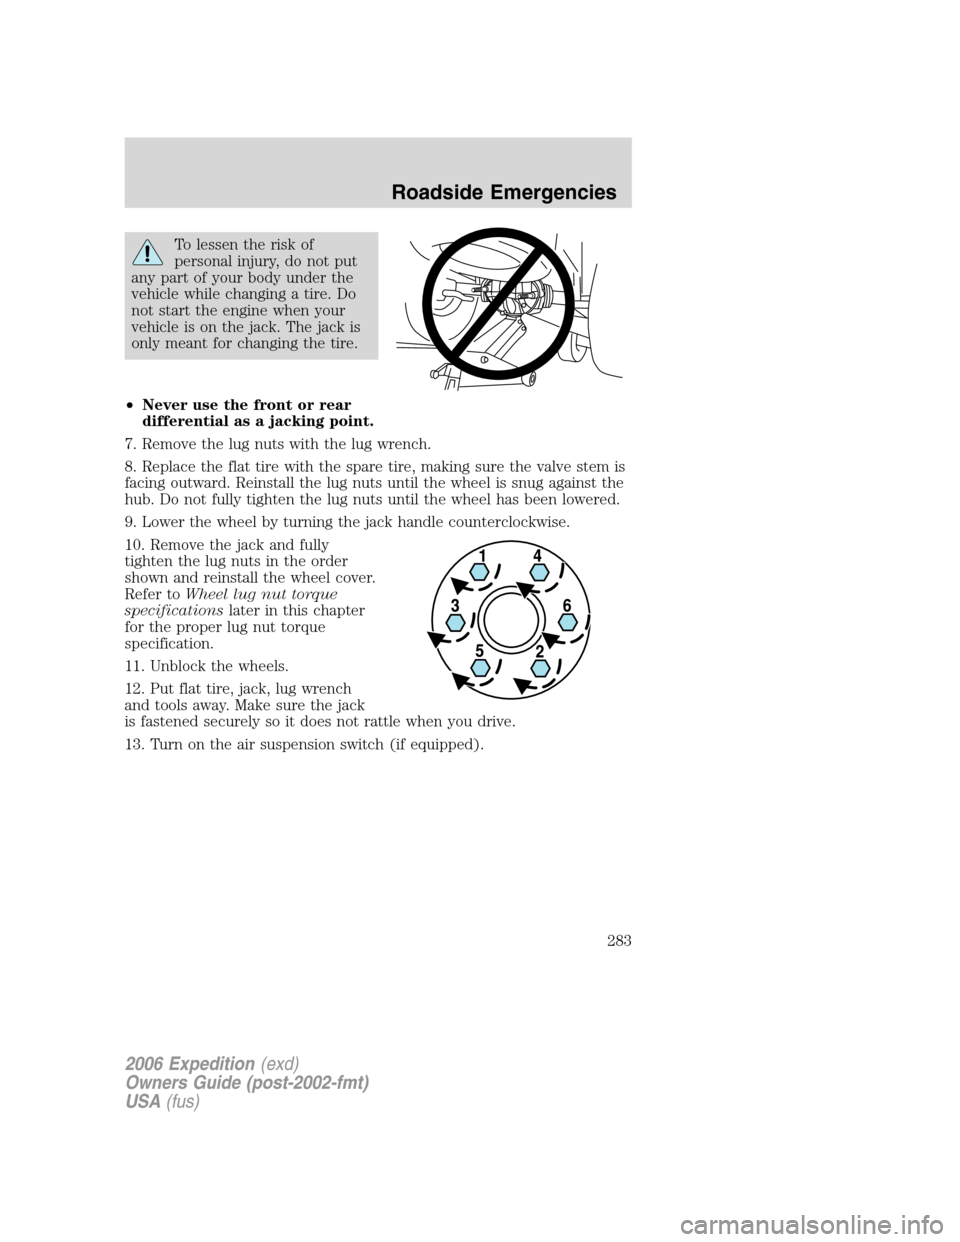
10. Remove the jack and fully
tighten the lug nuts in the order
shown and reinstall the wheel cover.
Refer toWheel lug nut torque
specificationslater in this chapter
for the proper lug nut torque
specification.
11. Unblock the wheels.
12. Put flat tire, jack, lug wrench
and tools away. Make sure the jack
is fastened securely so it does not rattle when you drive.
13. Turn on the air suspension switch (if equipped).
2006 Expedition(exd)
Owners Guide (post-2002-fmt)
USA(fus)
Roadside Emergencies
283
Page 284 of 360

Stowing the spare tire
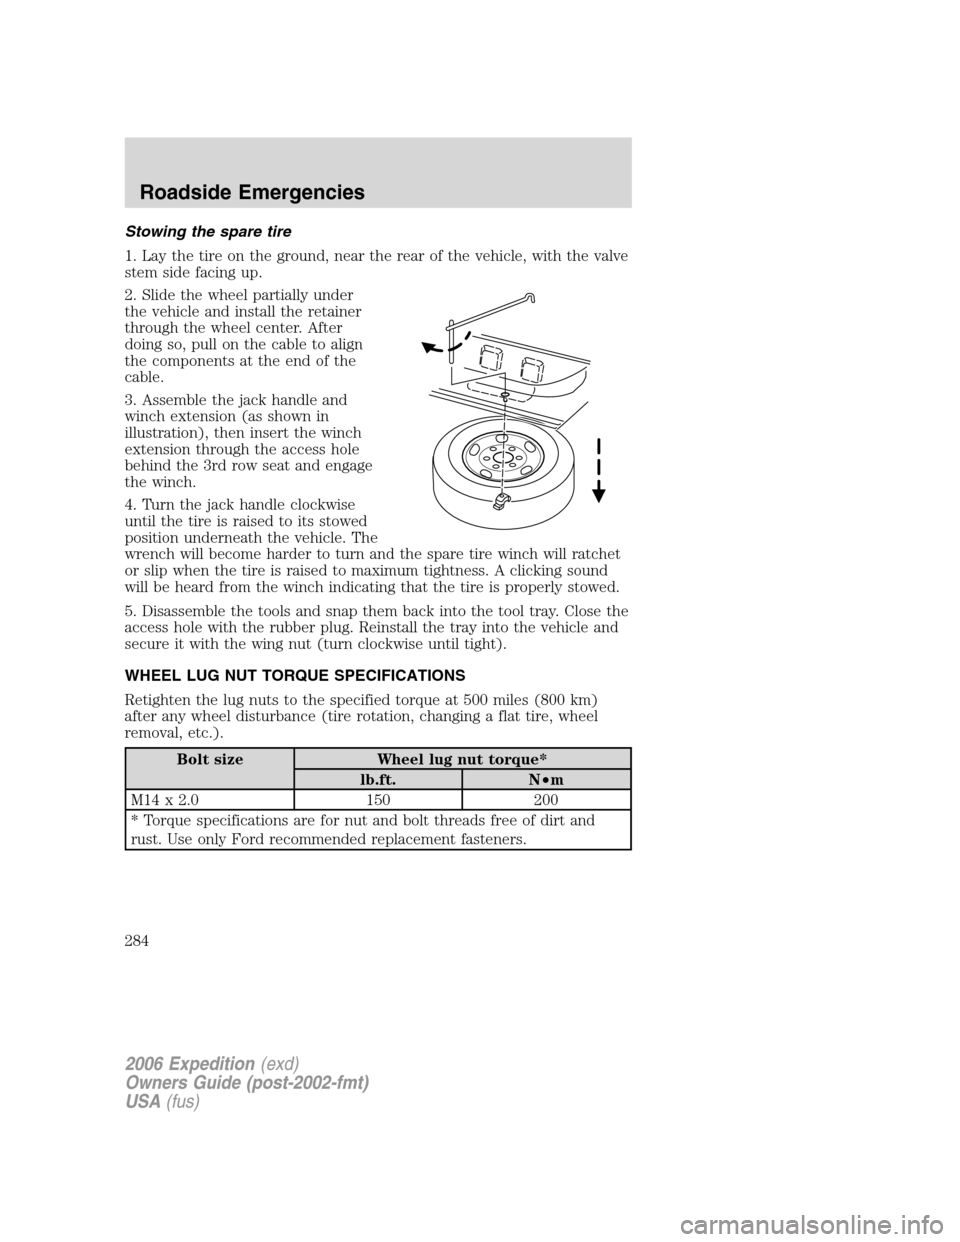
1. Lay the tire on the ground, near the rear of the vehicle, with the valve
stem side facing up.
2. Slide the wheel partially under
the vehicle and install the retainer
through the wheel center. After
doing so, pull on the cable to align
the components at the end of the
cable.
3. Assemble the jack handle and
winch extension (as shown in
illustration), then insert the winch
extension through the access hole
behind the 3rd row seat and engage
the winch.
4. Turn the jack handle clockwise
until the tire is raised to its stowed
position underneath the vehicle. The
wrench will become harder to turn and the spare tire winch will ratchet
or slip when the tire is raised to maximum tightness. A clicking sound
will be heard from the winch indicating that the tire is properly stowed.
5. Disassemble the tools and snap them back into the tool tray. Close the
access hole with the rubber plug. Reinstall the tray into the vehicle and
secure it with the wing nut (turn clockwise until tight).
WHEEL LUG NUT TORQUE SPECIFICATIONS
Retighten the lug nuts to the specified torque at 500 miles (800 km)
after any wheel disturbance (tire rotation, changing a flat tire, wheel
removal, etc.).
Bolt size Wheel lug nut torque*
lb.ft. N•m
M14 x 2.0 150 200
* Torque specifications are for nut and bolt threads free of dirt and
rust. Use only Ford recommended replacement fasteners.
2006 Expedition(exd)
Owners Guide (post-2002-fmt)
USA(fus)
Roadside Emergencies
284