2006 CHEVROLET TRAIL BLAZER ECO mode
[x] Cancel search: ECO modePage 124 of 534
Compass Calibration
Press and hold the on/off button down for nine seconds
to activate the compass calibration mode. CAL will
be displayed in the compass window on the mirror.
The compass can be calibrated by driving the vehicle in
circles at 5 mph (8 km/h) or less until the display
reads a direction.
Compass Variance
Compass variance is the difference between earth’s
magnetic north and true geographic north. The mirror
is set to zone eight upon leaving the factory. It will be
necessary to adjust the compass to compensate for
compass variance if you live outside zone eight. Under
certain circumstances, such as during a long distance
cross-country trip, it will be necessary to adjust for
compass variance. If not adjusted to account for
compass variance, your compass could give false
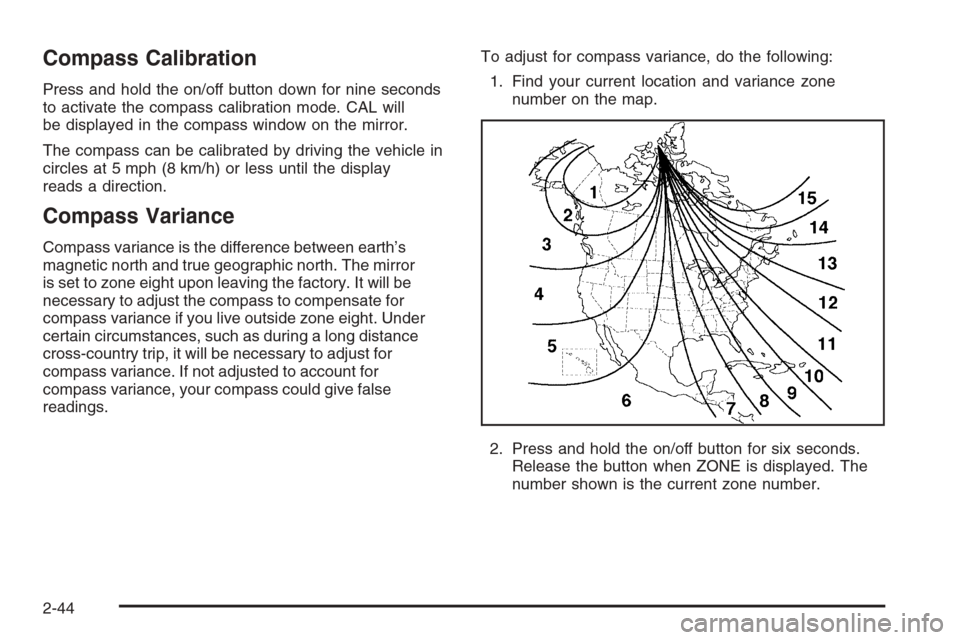
readings.To adjust for compass variance, do the following:
1. Find your current location and variance zone
number on the map.
2. Press and hold the on/off button for six seconds.
Release the button when ZONE is displayed. The
number shown is the current zone number.
2-44
Page 133 of 534
Universal Home Remote System
Operation
Do not use the Universal Home Remote with any
garage door opener that does not have the stop and
reverse feature. This includes any garage door opener
model manufactured before April 1, 1982. If you
have a newer garage door opener with rolling codes,
please be sure to follow Steps 6 through 8 to complete
the programming of your Universal Home Remote
Transmitter.
Read the instructions completely before attempting to
program the Universal Home Remote. Because of
the steps involved, it may be helpful to have another
person available to assist you in the programming steps.
Keep the original hand-held transmitter for use in
other vehicles as well as for future Universal Home
Remote programming. It is also recommended that upon
the sale of the vehicle, the programmed Universal
Home Remote buttons should be erased for security
purposes. See “Erasing Universal Home Remote
Buttons” later in this section or, for assistance, see
Customer Assistance Offices on page 7-4.Be sure that people and objects are clear of the garage
door or gate operator you are programming. When
programming a garage door, it is advised to park outside
of the garage.
It is recommended that a new battery be installed in
your hand-held transmitter for quicker and more
accurate transmission of the radio-frequency signal.
Programming Universal Home Remote
Follow these steps to program up to three channels:
1. Press and hold down the two outside Universal
Home Remote buttons, releasing only when the
Universal Home Remote indicator light begins
to �ash, after 20 seconds. Do not hold down the
buttons for longer than 30 seconds and do not
repeat this step to program a second and/or third
hand-held transmitter to the remaining two Universal
Home Remote buttons.
2. Position the end of your hand-held transmitter
about 1 to 3 inches (3 to 8 cm) away from the
Universal Home Remote buttons while keeping the
indicator light in view.
2-53
Page 135 of 534
Gate Operator and Canadian
Programming
Canadian radio-frequency laws require transmitter
signals to time out or quit after several seconds of
transmission. This may not be long enough for Universal
Home Remote to pick up the signal during programming.
Similarly, some U.S. gate operators are manufactured
to time out in the same manner.
If you live in Canada, or you are having difficulty
programming a gate operator or garage door opener
by using the “Programming Universal Home Remote”
procedures, regardless of where you live, replace Step 3
under “Programming Universal Home Remote” with
the following:
Continue to press and hold the Universal Home Remote
button while you press and release every two seconds
(cycle) the hand-held transmitter button until the
frequency signal has been successfully accepted by the
Universal Home Remote. The Universal Home Remote
indicator light will �ash slowly at �rst and then rapidly.
Proceed with Step 4 under “Programming Universal
Home Remote” to complete.
Using Universal Home Remote
Press and hold the appropriate Universal Home Remote
button for at least half of a second. The indicator light
will come on while the signal is being transmitted.
Erasing Universal Home Remote
Buttons
To erase programming from the three Universal Home
Remote buttons do the following:
1. Press and hold down the two outside buttons until
the indicator light begins to �ash, after 20 seconds.
Do not hold the two outside buttons for longer
than 30 seconds.
2. Release both buttons.
The Universal Home Remote is now in the training
(learning) mode and can be programmed at any time
beginning with Step 2 under “Programming Universal
Home Remote” shown earlier in this section.
Individual buttons cannot be erased, but they can be
reprogrammed. See “Reprogramming a Single Universal
Home Remote Button” following this section.
2-55
Page 153 of 534
Windshield Wipers
8(Mist):For a single wiping cycle, turn the band to
mist. Hold it there until the wipers start. Then let go.
The wipers will stop after one wipe. If you want
more wipes, hold the band on mist longer.
9(Off):To stop the wipers, move the band to off.
N(Windshield Wipers):Turn the band to control the
windshield wipers.
You can set the wiper speed for a long or short delay
between wipes. This can be very useful in light rain
or snow. Turn the band to choose the delay time. The
closer to the top of the lever, the shorter the delay.
For steady wiping at low speed, turn the band away from
you to the �rst solid band past the delay settings. For
high-speed wiping, turn the band further, to the second
solid band past the delay settings. To stop the wipers,
move the band to off.
Be sure to clear ice and snow from the wiper blades
before using them. If they’re frozen to the windshield,
carefully loosen or thaw them. If your blades do become
worn or damaged, get new blades or blade inserts.
Rainsense™ Wipers
Your vehicle may be equipped with
Rainsense™ windshield wipers. When active,
these wipers are able to detect moisture on the
windshield and automatically turn on the wipers.
The moisture sensor is located next to the inside
rearview mirror and is mounted on the windshield.
To turn on the Rainsense™ feature, the wipers must be
set to one of the �ve delay settings on the multifunction
lever. Each of the �ve settings adjusts the sensitivity
of the rainsensor. For more wipes, select the higher
settings; for fewer wipes, select the lower settings
located closer to off on the multifunction lever.
The rainsensor will automatically control the frequency
of the wipes from off to high speed according to the
weather conditions. The wipers can be left in a
rainsense mode even when it is not raining.
Notice:If you do not turn off the windshield
wipers when driving through an automatic car wash,
you could damage the wipers. Always turn off the
windshield wipers before entering an automatic
car wash.
3-9
Page 166 of 534
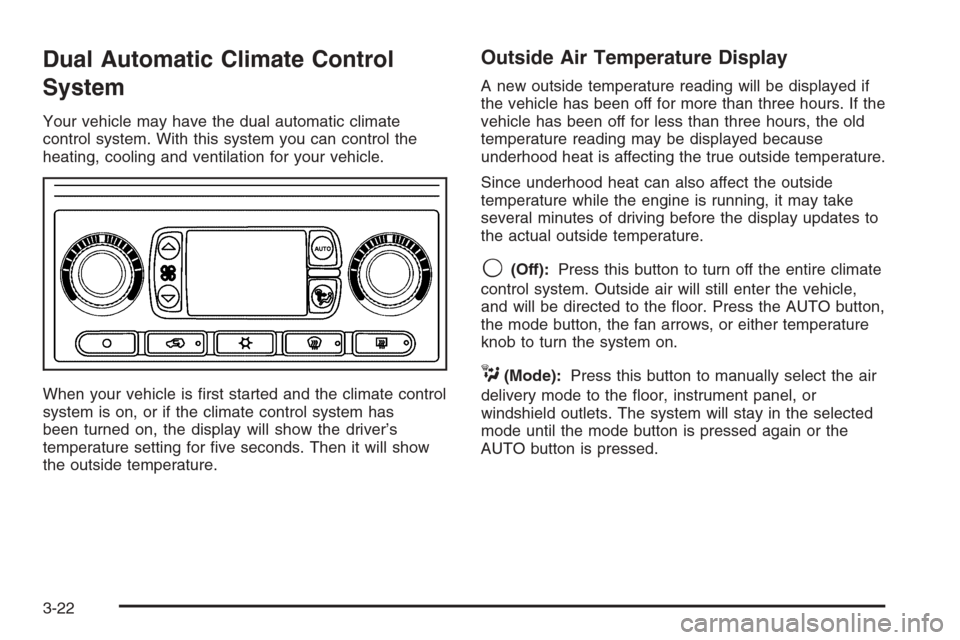
Dual Automatic Climate Control
System
Your vehicle may have the dual automatic climate
control system. With this system you can control the
heating, cooling and ventilation for your vehicle.
When your vehicle is �rst started and the climate control
system is on, or if the climate control system has
been turned on, the display will show the driver’s
temperature setting for �ve seconds. Then it will show
the outside temperature.
Outside Air Temperature Display
A new outside temperature reading will be displayed if
the vehicle has been off for more than three hours. If the
vehicle has been off for less than three hours, the old
temperature reading may be displayed because
underhood heat is affecting the true outside temperature.
Since underhood heat can also affect the outside
temperature while the engine is running, it may take
several minutes of driving before the display updates to
the actual outside temperature.
9(Off):Press this button to turn off the entire climate
control system. Outside air will still enter the vehicle,
and will be directed to the �oor. Press the AUTO button,
the mode button, the fan arrows, or either temperature
knob to turn the system on.
C(Mode):Press this button to manually select the air
delivery mode to the �oor, instrument panel, or
windshield outlets. The system will stay in the selected
mode until the mode button is pressed again or the
AUTO button is pressed.
3-22
Page 167 of 534
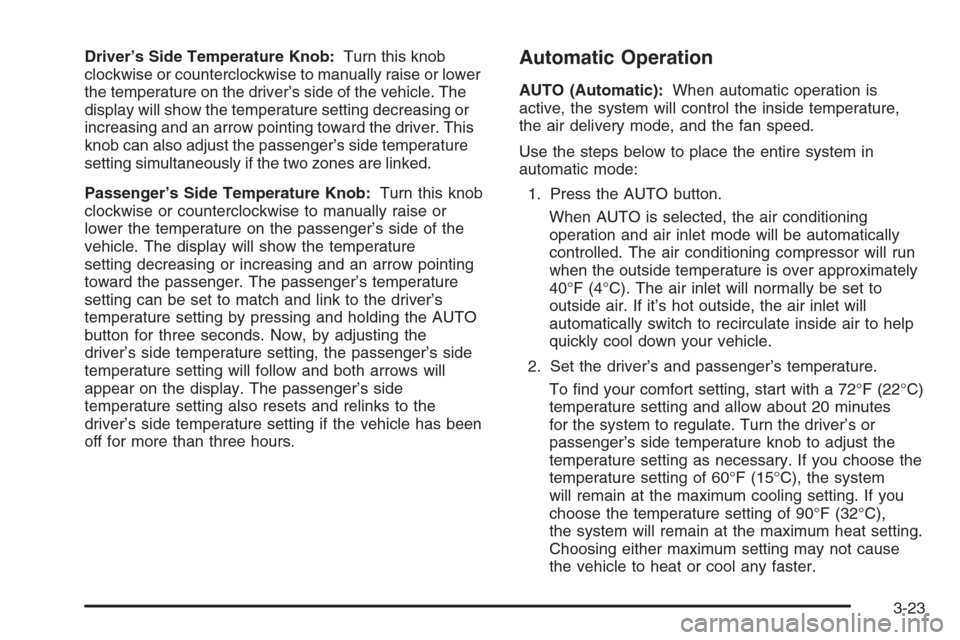
Driver’s Side Temperature Knob:Turn this knob
clockwise or counterclockwise to manually raise or lower
the temperature on the driver’s side of the vehicle. The
display will show the temperature setting decreasing or
increasing and an arrow pointing toward the driver. This
knob can also adjust the passenger’s side temperature
setting simultaneously if the two zones are linked.
Passenger’s Side Temperature Knob:Turn this knob
clockwise or counterclockwise to manually raise or
lower the temperature on the passenger’s side of the
vehicle. The display will show the temperature
setting decreasing or increasing and an arrow pointing
toward the passenger. The passenger’s temperature
setting can be set to match and link to the driver’s
temperature setting by pressing and holding the AUTO
button for three seconds. Now, by adjusting the
driver’s side temperature setting, the passenger’s side
temperature setting will follow and both arrows will
appear on the display. The passenger’s side
temperature setting also resets and relinks to the
driver’s side temperature setting if the vehicle has been
off for more than three hours.Automatic Operation
AUTO (Automatic):When automatic operation is
active, the system will control the inside temperature,
the air delivery mode, and the fan speed.
Use the steps below to place the entire system in
automatic mode:
1. Press the AUTO button.
When AUTO is selected, the air conditioning
operation and air inlet mode will be automatically
controlled. The air conditioning compressor will run
when the outside temperature is over approximately
40°F (4°C). The air inlet will normally be set to
outside air. If it’s hot outside, the air inlet will
automatically switch to recirculate inside air to help
quickly cool down your vehicle.
2. Set the driver’s and passenger’s temperature.
To �nd your comfort setting, start with a 72°F (22°C)
temperature setting and allow about 20 minutes
for the system to regulate. Turn the driver’s or
passenger’s side temperature knob to adjust the
temperature setting as necessary. If you choose the
temperature setting of 60°F (15°C), the system
will remain at the maximum cooling setting. If you
choose the temperature setting of 90°F (32°C),
the system will remain at the maximum heat setting.
Choosing either maximum setting may not cause
the vehicle to heat or cool any faster.
3-23
Page 168 of 534
Manual Operation
To change the current setting, select one of the
following:
w9x(Fan):This button allows you to manually
adjust the fan speed. Press the up arrow to increase fan
speed and the down arrow to decrease fan speed. The
display will change to show you the selected fan speed
and the driver’s side temperature setting for �ve seconds.
C(Mode):Press this button to manually change the
direction of the air�ow in your vehicle. Keep pressing the
button until the desired mode appears on the display.
The display will change to show you the selected
air delivery mode and the driver’s temperature setting
for �ve seconds.
H(Vent):This mode directs air to the instrument
panel outlets.
)(Bi-Level):This mode directs approximately half of
the air to the instrument panel outlets, then directs
the remaining air to the �oor outlets. A little air is
directed toward the windshield and the side window
outlets. Cooler air is directed to the upper outlets and
warmer air to the �oor outlets.
6(Floor):This mode directs most of the air to the
�oor outlets. Some air also comes out of the defroster
and side window outlets. The recirculation button
cannot be selected in �oor mode.
@(Recirculation):Press this button to turn
recirculation mode on or off. When this button is
pressed, an indicator light in the button will also come
on to let you know that it is activated. Recirculation
mode is used to recirculate the air inside of your vehicle.
Use this mode to help prevent outside odors and/or
dust from entering your vehicle or to help cool the air
inside of your vehicle more quickly. Recirculation
mode can be used with vent and bi-level modes, but it
cannot be used with �oor, defog or defrost modes.
See “Defogging and Defrosting” later in this section.
You may also notice that the air conditioning compressor
will run while in recirculation mode. This is normal
and will help to prevent fogging.
If the weather is cold and damp, the system may
cause the windows to fog while using recirculation
mode. If the windows do start to fog, select defog or
defrost mode.
Recirculation mode, if selected, will be cleared when the
engine is turned off.
3-24
Page 171 of 534
H(Panel):When panel mode is selected, the rear
system will distribute air from the four headliner outlets.
)(Bi-level):When bi-level mode is selected, the
rear system will distribute air from the four headliner
outlets, the second seat side �oor outlets, and the third
seat �oor outlet.
6(Floor):When �oor mode is selected, the rear
system will distribute air from the second seat side �oor
outlets and the third seat �oor outlet.
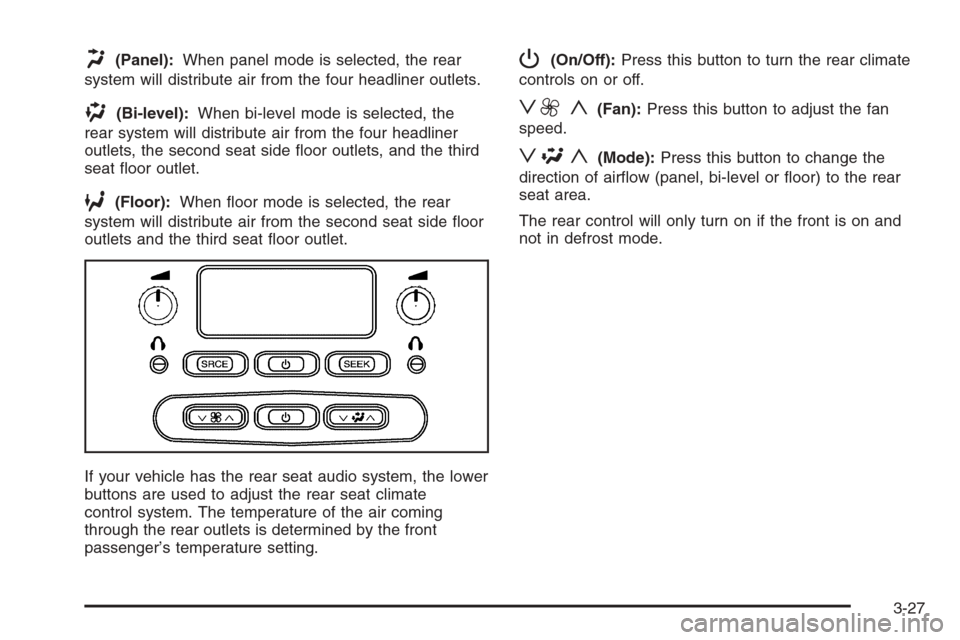
If your vehicle has the rear seat audio system, the lower
buttons are used to adjust the rear seat climate
control system. The temperature of the air coming
through the rear outlets is determined by the front
passenger’s temperature setting.
P(On/Off):Press this button to turn the rear climate
controls on or off.
z9 y(Fan):Press this button to adjust the fan
speed.
z\y(Mode):Press this button to change the
direction of air�ow (panel, bi-level or �oor) to the rear
seat area.
The rear control will only turn on if the front is on and
not in defrost mode.
3-27