Page 172 of 534
Extended Wheelbase
To operate the rear air conditioning system, the front air
conditioning system must be on. With the front air
conditioning system off, the rear system controls can
only be used to circulate air in the rear of the vehicle.
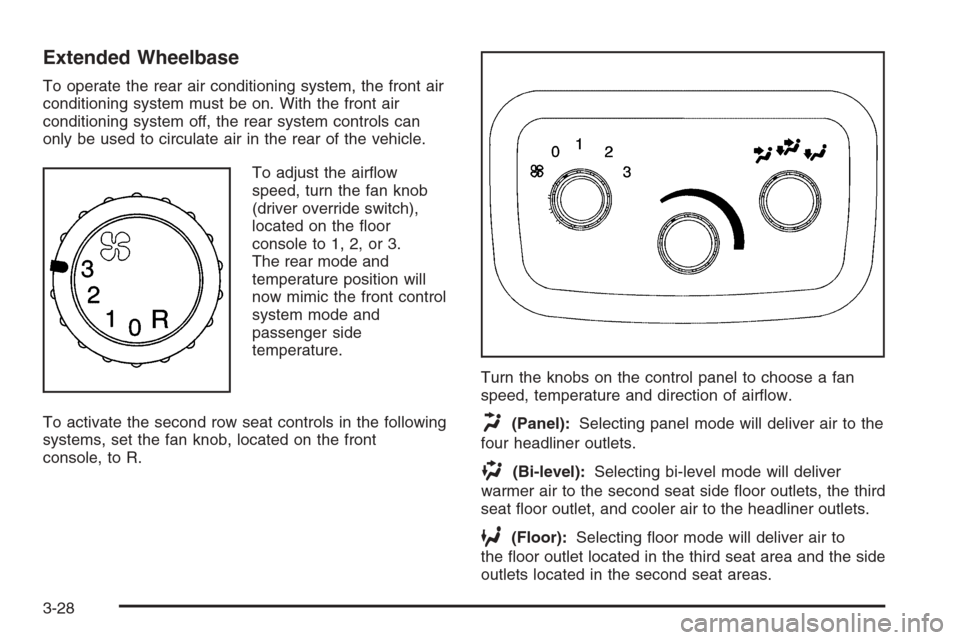
To adjust the air�ow
speed, turn the fan knob
(driver override switch),
located on the �oor
console to 1, 2, or 3.
The rear mode and
temperature position will
now mimic the front control
system mode and
passenger side
temperature.
To activate the second row seat controls in the following
systems, set the fan knob, located on the front
console, to R.Turn the knobs on the control panel to choose a fan
speed, temperature and direction of air�ow.
H(Panel):Selecting panel mode will deliver air to the
four headliner outlets.
)(Bi-level):Selecting bi-level mode will deliver
warmer air to the second seat side �oor outlets, the third
seat �oor outlet, and cooler air to the headliner outlets.
6(Floor):Selecting �oor mode will deliver air to
the �oor outlet located in the third seat area and the side
outlets located in the second seat areas.
3-28
Page 175 of 534
Instrument Panel Cluster
Your instrument panel cluster is designed to let you know at a glance how your vehicle is running. You will know
how fast you are going, about how much fuel you have used, and many other things you will need to know to drive
safely and economically.
United States Uplevel version shown, Canada, Base and SS Model similar
3-31
Page 184 of 534
Anti-Lock Brake System
Warning Light
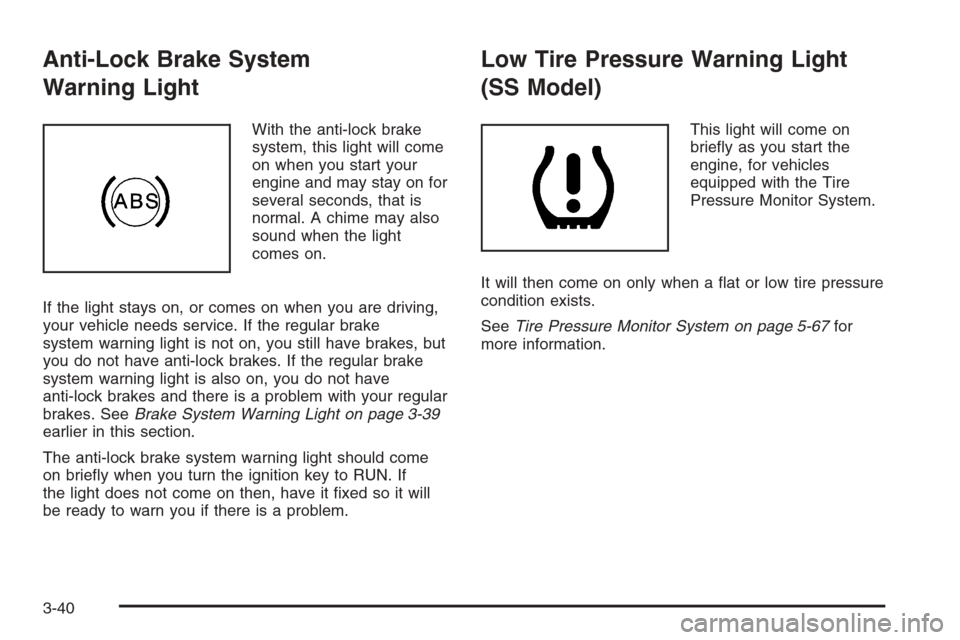
With the anti-lock brake
system, this light will come
on when you start your
engine and may stay on for
several seconds, that is
normal. A chime may also
sound when the light
comes on.
If the light stays on, or comes on when you are driving,
your vehicle needs service. If the regular brake
system warning light is not on, you still have brakes, but
you do not have anti-lock brakes. If the regular brake
system warning light is also on, you do not have
anti-lock brakes and there is a problem with your regular
brakes. SeeBrake System Warning Light on page 3-39
earlier in this section.
The anti-lock brake system warning light should come
on brie�y when you turn the ignition key to RUN. If
the light does not come on then, have it �xed so it will
be ready to warn you if there is a problem.
Low Tire Pressure Warning Light
(SS Model)
This light will come on
brie�y as you start the
engine, for vehicles
equipped with the Tire
Pressure Monitor System.
It will then come on only when a �at or low tire pressure
condition exists.
SeeTire Pressure Monitor System on page 5-67for
more information.
3-40
Page 190 of 534
Change Engine Oil Light
If equipped and this light
comes on, it means that
an oil change and
other maintenance
procedures are required
for your vehicle.
SeeScheduled Maintenance on page 6-4andEngine
Oil on page 5-18for more information.
Once the engine oil has been changed, the change
engine oil light must be reset. Until it is reset, the light
will be displayed when the engine is on.
Security Light
This light will come on
brie�y when you turn the
key toward START.
The light will stay on until the engine starts. If the light
�ashes, the Passlock
®system has entered a tamper
mode. If the vehicle fails to start, seePasslock®
on page 2-18.
If the light comes on continuously while driving and
stays on, there may be a problem with the Passlock
®
system. Your vehicle will not be protected by Passlock®,
and you should see your dealer.
Also, seeContent Theft-Deterrent on page 2-17for
additional information regarding the security light.
3-46
Page 196 of 534
You should take any message that appears on the
display seriously and remember that clearing the
message will only make the message disappear, not
correct the problem.
The DIC has different modes which can be accessed by
pressing the four DIC buttons located on the steering
wheel. These buttons are trip information, fuel
information, customization, and select. The button
functions are detailed in the following pages.
Trip Information Button
3
(Trip Information):Press the trip information
button to scroll through the ODOMETER, TRIP A,
TRIP B, TIRE PRESSURES for vehicles with a Tire
Pressure Monitor (TPM) system, and TIMER.
Odometer:Press the trip information button until
ODOMETER appears on the display. This mode shows
the total distance the vehicle has been driven in
either miles or kilometers. Pressing the reset stem
located on the instrument cluster with the vehicle off will
also display the odometer.Trip A:Press the trip information button until TRIP A
appears on the display. This mode shows the current
distance traveled since the last reset for TRIP A in either
miles or kilometers.
Trip B:Press the trip information button until TRIP B
appears on the display. This mode shows the current
distance traveled since the last reset for TRIP B in either
miles or kilometers.
To reset TRIP A or TRIP B information, press and hold
the select button for one second while in one of the
trip modes. This will reset the information for TRIP A or
TRIP B.
You can also reset the TRIP A or TRIP B while they are
displayed by pressing the reset stem on the cluster. If
you press and hold the reset stem or the select
button for four seconds, the display will show the
distance traveled since the last ignition cycle for TRIP A
or TRIP B.
3-52
Page 197 of 534
Tire Pressures:The tire pressure mode is available
only on vehicles with a Tire Pressure Monitor (TPM)
system. Press the trip information button until TIRE
PRESSURES appears on the display. This mode shows
the tire pressure in pounds per square inch (psi) or
kilopascals (kPa). Press the select button to scroll
through the following information:
LF TIRE shows the tire pressure for the front
driver’s side tire.
RF TIRE shows the tire pressure for the front
passenger’s side tire.
LR TIRE shows the tire pressure for the rear
driver’s side tire.
RR TIRE shows the tire pressure for the rear
passenger’s side tire.Timer:The DIC can be used as a timer. Press the
select button while TIMER is displayed to start the timer.
The display will show the amount of time that has
passed since the timer was last reset, not including time
the ignition is off. Time will continue to be counted as
long as the ignition is on, even if another display is being
shown on the DIC. The timer will record up to 99 hours,
59 minutes and 59 seconds (99:59:59) after which
the display will roll back to zero.
To stop the counting of time, press the select button
brie�y while TIMER is displayed.
To reset the timer to zero, press and hold the select
button while TIMER is displayed.Fuel Information Button
t
(Fuel Information):Press the fuel information
button to scroll through the range, fuel used, average
fuel economy, and the engine oil life system.
3-53
Page 198 of 534
Fuel Range:Press the fuel information button until
RANGE appears on the display. This mode shows the
remaining distance you can drive without refueling.
It is based on fuel economy and the fuel remaining in
the fuel tank. The display will show LOW if the fuel level
is low.
The fuel economy data used to determine fuel range is
an average of recent driving conditions. As your
driving conditions change, this data is gradually updated.
Fuel range cannot be reset.
Fuel Used:Press the fuel information button until
FUEL USED appears on the display. This mode shows
the number of gallons or liters of fuel used since the
last reset of this menu item. To reset the fuel used
information, press and hold the select button for
one second while FUEL USED is displayed.
Average Fuel Economy:Press the fuel information
button until AVG. ECON appears on the display.
This mode shows how many miles per gallon (MPG),
liters per 100 kilometers (L/100 km), or kilometers
per liter (km/L) your vehicle is getting based on current
and past driving conditions.Press and hold the select button for one second while
AVG. ECON is displayed to reset the average fuel
economy. Average fuel economy will then be calculated
starting from that point. If the average fuel economy
is not reset, it will be continually updated each time
you drive.
Engine Oil Life System:Press the fuel information
button until ENGINE OIL LIFE appears on the display.
The engine oil life system shows an estimate of the
oil’s remaining useful life. It will show 100% when the
system is reset after an oil change. It will alert you
to change your oil on a schedule consistent with your
driving conditions.
Always reset the engine oil life system after an oil
change. To reset the engine oil life system, seeEngine
Oil Life System on page 5-23.
In addition to the engine oil life system monitoring the
oil life, additional maintenance is recommended in
the Maintenance Schedule in this manual. SeeEngine
Oil on page 5-18andScheduled Maintenance on
page 6-4.
3-54
Page 204 of 534
STABILITRAK OFF
The STABILITRAK OFF message will be displayed
when you press the StabiliTrak®button for more than
�ve seconds or when stability control has been
automatically disabled. The StabiliTrak
®button is
located on the transmission shift handle. To limit wheel
spin and realize the full bene�ts of the stability
enhancement system, you should normally leave
StabiliTrak
®on. However, you should turn StabiliTrak®
off if your vehicle gets stuck in sand, mud, ice, or
snow and you want to rock your vehicle to attempt to
free it, or if you are driving in extreme off-road conditions
and require more wheel spin. SeeIf Your Vehicle is
Stuck in Sand, Mud, Ice, or Snow on page 4-46. To turn
the StabiliTrak
®system back on, press the StabiliTrak®
button again.
There are several conditions that can cause this
message to appear.
The message may be displayed if the brake system
warning light is on. SeeBrake System Warning
Light on page 3-39.
The message will be displayed if the vehicle is
shifted into 4LO.
The message will turn off as soon as the conditions that
caused the message to be displayed are no longer
present.
TIGHTEN FUEL CAP
If the vehicle’s fuel cap is not tightened properly, this
message may appear on the DIC and a chime will
sound. Fully reinstall the fuel cap. SeeFilling the Tank
on page 5-8. The diagnostic system can determine
if the fuel cap has been left off or improperly installed.
A loose or missing fuel cap will allow fuel to evaporate
into the atmosphere. The DIC message will remain
on until the message is cancelled with the return button
on the steering wheel. The DIC message will also be
cancelled if the ignition is turned off.
The DIC message and the Service Engine Soon light
may come on again during a second trip if the fuel cap is
still not tightened properly. SeeMalfunction Indicator
Lamp on page 3-42for more information.
TRACTION CONTROL OFF
The TRACTION CONTROL OFF message will be
displayed when you momentarily press the StabiliTrak®
button located on the transmission shift handle. In
this mode, stability control and the brake-traction control
are functional. Engine speed management will be
modi�ed and the driven wheels can spin more freely.
For more details on this mode, seeStabiliTrak
®System
on page 4-9.
3-60