2006 CHEVROLET MALIBU ECU
[x] Cancel search: ECUPage 124 of 442
Universal Home Remote
System
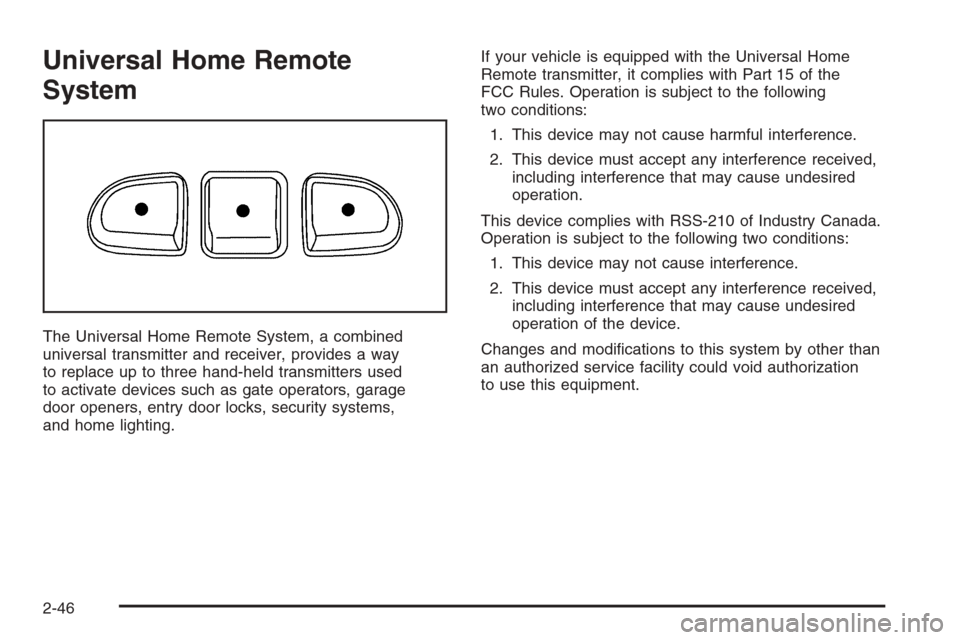
The Universal Home Remote System, a combined
universal transmitter and receiver, provides a way
to replace up to three hand-held transmitters used
to activate devices such as gate operators, garage
door openers, entry door locks, security systems,
and home lighting.If your vehicle is equipped with the Universal Home
Remote transmitter, it complies with Part 15 of the
FCC Rules. Operation is subject to the following
two conditions:
1. This device may not cause harmful interference.
2. This device must accept any interference received,
including interference that may cause undesired
operation.
This device complies with RSS-210 of Industry Canada.
Operation is subject to the following two conditions:
1. This device may not cause interference.
2. This device must accept any interference received,
including interference that may cause undesired
operation of the device.
Changes and modi�cations to this system by other than
an authorized service facility could void authorization
to use this equipment.
2-46
Page 125 of 442
Universal Home Remote System
Operation
Do not use the Universal Home Remote with any garage
door opener that does not have the stop and reverse
feature. This includes any garage door opener model
manufactured before April 1, 1982. If you have a newer
garage door opener with rolling codes, please be sure to
follow Steps 6 through 8 to complete the programming of
your Universal Home Remote Transmitter.
Read the instructions completely before attempting to
program the Universal Home Remote. Because of
the steps involved, it may be helpful to have another
person available to assist you in the programming steps.
Keep the original hand-held transmitter for use in
other vehicles as well as for future Universal Home
Remote programming. It is also recommended that
upon the sale of the vehicle, the programmed Universal
Home Remote buttons should be erased for security
purposes. See “Erasing Universal Home Remote
Buttons” later in this section or, for assistance, see
Customer Assistance Offices on page 7-4.
Be sure that people and objects are clear of the garage
door or gate operator you are programming. When
programming a garage door, it is advised to park outside
of the garage.It is recommended that a new battery be installed in
your hand-held transmitter for quicker and more
accurate transmission of the radio-frequency signal.Programming Universal Home Remote
Follow these steps to program up to three channels:
1. Press and hold down the two outside Universal
Home Remote buttons, releasing only when the
Universal Home Remote indicator light begins
to �ash, after 20 seconds. Do not hold down the
buttons for longer than 30 seconds and do not
repeat this step to program a second and/or
third hand-held transmitter to the remaining
two Universal Home Remote buttons.
2. Position the end of your hand-held transmitter
about 1 to 3 inches (3 to 8 cm) away from the
Universal Home Remote buttons while keeping
the indicator light in view.
3. Simultaneously press and hold both the desired
Universal Home Remote button and the hand-held
transmitter button. Do not release the buttons
until Step 4 has been completed.
Some entry gates and garage door openers
may require you to substitute Step 3 with the
procedure noted in “Gate Operator and Canadian
Programming” later in this section.
2-47
Page 128 of 442
Reprogramming a Single Universal
Home Remote Button
To program a device to Universal Home Remote using
a Universal Home Remote button previously trained,
follow these steps:
1. Press and hold the desired Universal Home
Remote button. Do not release the button.
2. The indicator light will begin to �ash after
20 seconds. While still holding the Universal
Home Remote button, proceed with Step 2 under
“Programming Universal Home Remote” shown
earlier in this section.
For additional information on Universal Home Remote,
seeCustomer Assistance Offices on page 7-4.
Storage Areas
Glove Box
To open, pull the handle down and pull the glove box
door down until it stops and is fully open.
Cupholder(s)
There is one cupholder located at the rear of the shift
lever and one is to the side of the shift lever.
Pull down the door on the back of the center console to
use the rear seat cupholders.
Center Console Storage Area
There is a storage compartment in the center console
area. To open the lower compartment, pull up on
the release at the front edge of the armrest. Your vehicle
may have an accessory power outlet inside of the
storage area. SeeAccessory Power Outlet(s) on
page 3-21for more information.
Map Pocket
Your vehicle may have storage pockets located on the
front edge of the seats, the door panels or the back
of the front seats.
2-50
Page 129 of 442
Rear Compartment Storage
Panel/Cover (MAXX)
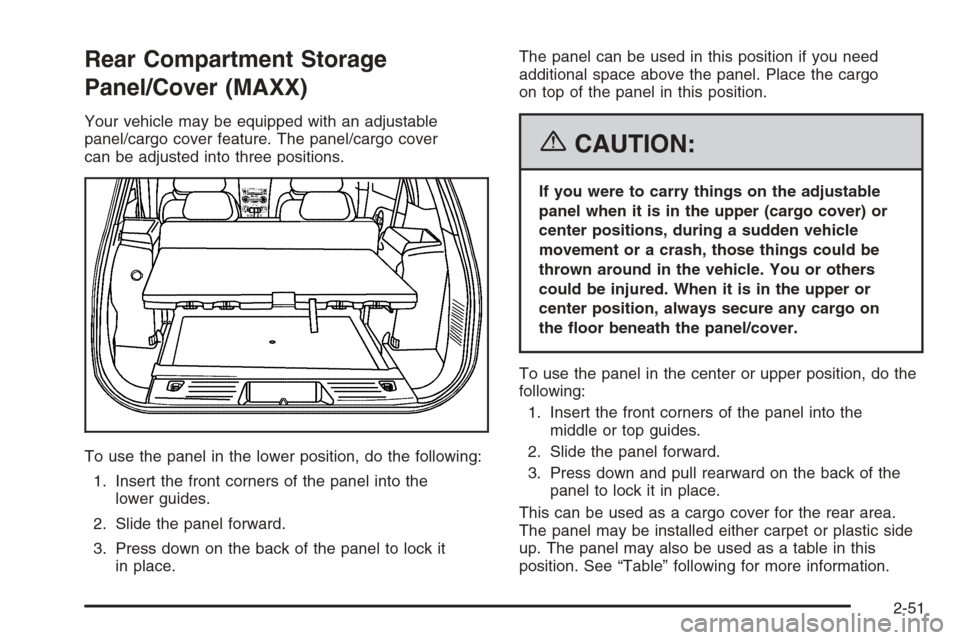
Your vehicle may be equipped with an adjustable
panel/cargo cover feature. The panel/cargo cover
can be adjusted into three positions.
To use the panel in the lower position, do the following:
1. Insert the front corners of the panel into the
lower guides.
2. Slide the panel forward.
3. Press down on the back of the panel to lock it
in place.The panel can be used in this position if you need
additional space above the panel. Place the cargo
on top of the panel in this position.
{CAUTION:
If you were to carry things on the adjustable
panel when it is in the upper (cargo cover) or
center positions, during a sudden vehicle
movement or a crash, those things could be
thrown around in the vehicle. You or others
could be injured. When it is in the upper or
center position, always secure any cargo on
the �oor beneath the panel/cover.
To use the panel in the center or upper position, do the
following:
1. Insert the front corners of the panel into the
middle or top guides.
2. Slide the panel forward.
3. Press down and pull rearward on the back of the
panel to lock it in place.
This can be used as a cargo cover for the rear area.
The panel may be installed either carpet or plastic side
up. The panel may also be used as a table in this
position. See “Table” following for more information.
2-51
Page 130 of 442
Table (MAXX)
Your vehicle will be equipped with an adjustable panel
that also functions as a table. The maximum load
for the table is 100 lbs distributed (45 kg).
To set up the table, do the following:
1. With the adjustable panel in the upper position
extend it out, with the plastic side up. The panel
will only extend in the upper position.
2. Turn the knob to release the leg from the plastic
side of the table and rotate leg outward.
3. Set the table leg onto the liftgate lock striker at
the rear edge of the vehicle.
Make sure to place the table leg securely onto the
liftgate lock striker.Notice:Driving with the panel extended into the
table position could damage your vehicle. Always
have the panel in the stored position while you
are driving.
Notice:Placing hot items on the surface of the
table could damage it. Always be sure that the items
that are placed on the surface of the table are of
moderate temperature.
Hooks are located on the table to hang items.
Convenience Net
You may have a convenience net in the rear of your
vehicle to help keep small loads, like grocery bags, in
place during sharp turns or quick stops and starts.
The net is not designed for larger, heavier items.
You can unhook the net so that it will lie �at when
you’re not using it.
2-52
Page 134 of 442
Traction Control System (TCS) Warning
Light........................................................3-38
Traction Control System Active Light...............3-38
Enhanced Traction System Warning Light.........3-39
Enhanced Traction System Active Light............3-39
Engine Coolant Temperature Warning Light......3-40
Engine Coolant Temperature Gage..................3-40
Malfunction Indicator Lamp.............................3-41
Oil Pressure Light.........................................3-44
Security Light...............................................3-45
Cruise Control Light......................................3-45
Highbeam On Light.......................................3-45
Fuel Gage...................................................3-46
Driver Information Center (DIC).......................3-47
DIC Operation and Displays...........................3-47
DIC Warnings and Messages.........................3-50
DIC Vehicle Personalization............................3-52Audio System(s).............................................3-54
Setting the Time for Radios without Radio
Data Systems (RDS)..................................3-55
Setting the Time for Radios with Radio Data
Systems (RDS).........................................3-55
Radio with CD (Base Level)...........................3-56
Radio with CD (Up Level)..............................3-61
Radio with Six-Disc CD.................................3-71
Rear Seat Entertainment System....................3-86
Rear Seat Audio (RSA)
(Without Entertainment System).................3-101
Rear Seat Audio (RSA)
(With Entertainment System).....................3-103
Theft-Deterrent Feature................................3-105
Audio Steering Wheel Controls
(Three Spoke).........................................3-105
Audio Steering Wheel Controls
(Four Spoke)...........................................3-106
Radio Reception.........................................3-106
Care of Your CDs and DVDs........................3-107
Care of the CD and DVD Player...................3-107
Fixed Mast Antenna (MAXX Only).................3-108
Backglass Antenna (Sedan Only)..................3-108
XM™ Satellite Radio Antenna System............3-108
Section 3 Instrument Panel
3-2
Page 177 of 442
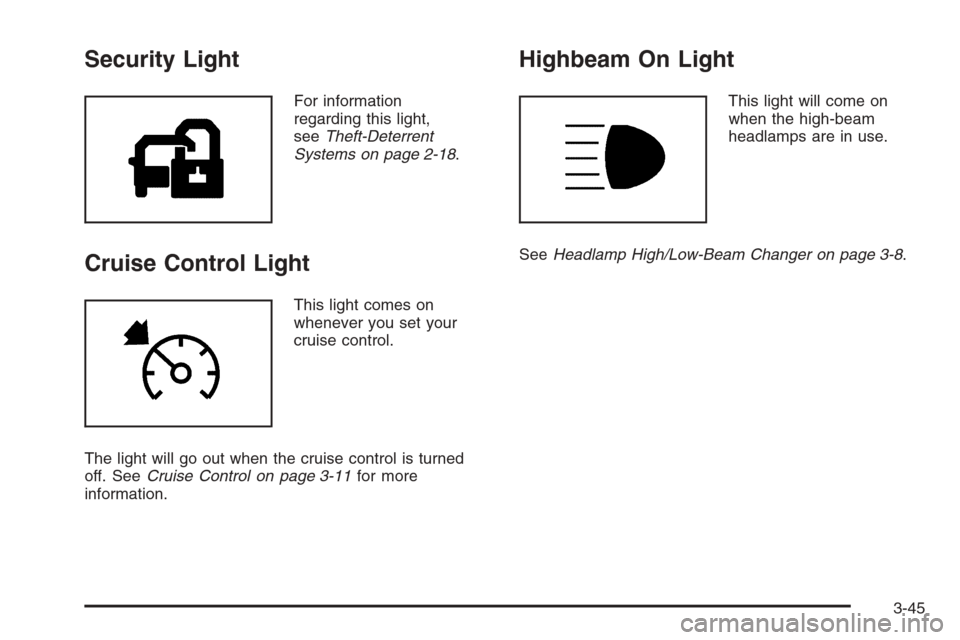
Security Light
For information
regarding this light,
seeTheft-Deterrent
Systems on page 2-18.
Cruise Control Light
This light comes on
whenever you set your
cruise control.
The light will go out when the cruise control is turned
off. SeeCruise Control on page 3-11for more
information.
Highbeam On Light
This light will come on
when the high-beam
headlamps are in use.
SeeHeadlamp High/Low-Beam Changer on page 3-8.
3-45
Page 200 of 442
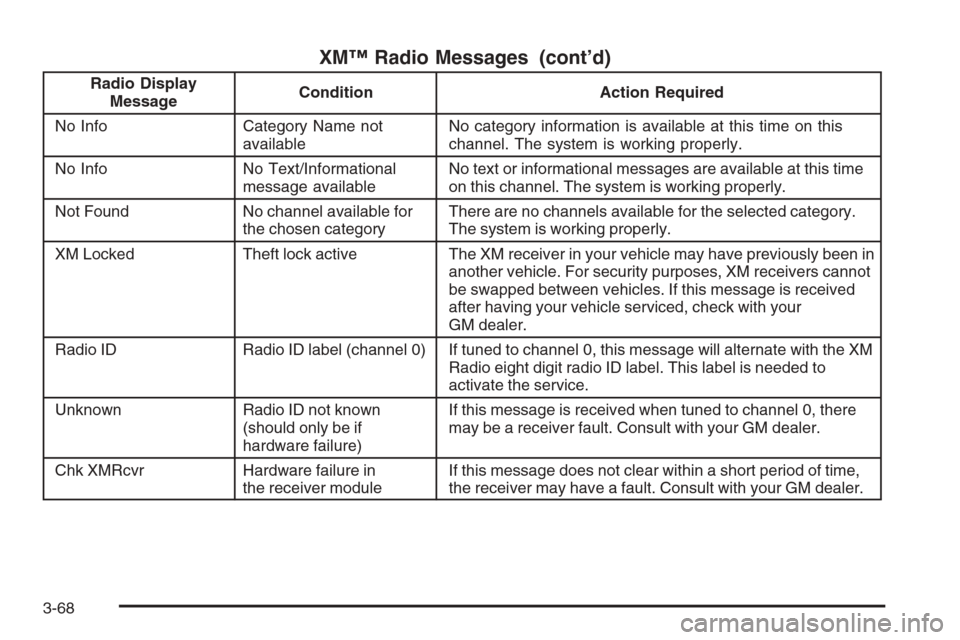
XM™ Radio Messages (cont’d)
Radio Display
MessageCondition Action Required
No Info Category Name not
availableNo category information is available at this time on this
channel. The system is working properly.
No Info No Text/Informational
message availableNo text or informational messages are available at this time
on this channel. The system is working properly.
Not Found No channel available for
the chosen categoryThere are no channels available for the selected category.
The system is working properly.
XM Locked Theft lock active The XM receiver in your vehicle may have previously been in
another vehicle. For security purposes, XM receivers cannot
be swapped between vehicles. If this message is received
after having your vehicle serviced, check with your
GM dealer.
Radio ID Radio ID label (channel 0) If tuned to channel 0, this message will alternate with the XM
Radio eight digit radio ID label. This label is needed to
activate the service.
Unknown Radio ID not known
(should only be if
hardware failure)If this message is received when tuned to channel 0, there
may be a receiver fault. Consult with your GM dealer.
Chk XMRcvr Hardware failure in
the receiver moduleIf this message does not clear within a short period of time,
the receiver may have a fault. Consult with your GM dealer.
3-68