2006 CHEVROLET CORVETTE phone
[x] Cancel search: phonePage 59 of 426

Adding Equipment to Your
Airbag-Equipped Vehicle
Q:Is there anything I might add to the front or
sides of the vehicle that could keep the
airbags from working properly?
A:Yes. If you add things that change your vehicle’s
frame, bumper system, height, front end or side
sheet metal, they may keep the airbag system
from working properly. Also, the airbag system may
not work properly if you relocate any of the airbag
sensors. If you have any questions about this,
you should contact Customer Assistance before
you modify your vehicle. The phone numbers
and addresses for Customer Assistance are in
Step Two of the Customer Satisfaction Procedure
in this manual. SeeCustomer Satisfaction
Procedure on page 7-2.
Q:Because I have a disability, I have to get my
vehicle modi�ed. How can I �nd out whether
this will affect my advanced airbag system?
A:Changing or moving any parts of the front seats,
safety belts, the airbag sensing and diagnostic
module, steering wheel, instrument panel, the inside
review mirror, or airbag wiring can affect the
operation of the airbag system. If you have
questions, call Customer Assistance. The phone
numbers and addresses for Customer Assistance
are in Step Two of the Customer Satisfaction
Procedure in this manual. SeeCustomer Satisfaction
Procedure on page 7-2.
1-53
Page 67 of 426

If you ever notice a decrease in the keyless access
transmitter range, try doing one of the following:
Check the distance. You may be too far from your
vehicle. You may need to stand closer during
rainy or snowy weather.
Check the location. Other vehicles or objects may
be blocking the signal. Take a few steps to the
left or right, hold the transmitter higher, and
try again.
Check to determine if battery replacement is
necessary. See “Battery Replacement” under
Keyless Access System Operation on page 2-5.
Check to make sure that an electronic device such
as a cellular phone or lap top computer is not
causing interference.
If you are still having trouble, see your dealer or a
quali�ed technician for service.
Keyless Access System Operation
Your vehicle has a keyless access system that allows you
to lock and unlock your doors, unlock your hatch/trunk lid
and disarm or arm your theft-deterrent system. The range
distance is as much as 100 feet (30 m) away.
Your vehicle
comes standard
with two transmitters,
and up to four can
be matched to your
vehicle. See “Matching
Transmitter(s) to Your
Vehicle” later in this
section.
Q(Lock):Press this button to lock the doors. The
light on the door will �ash once. If this button is pressed
two times, the doors will lock, the light will �ash and
the horn will sound.
2-5
Page 85 of 426

Retained Accessory Power (RAP)
With RAP, your power windows and the audio system
will continue to work for up to 10 minutes after the
engine is turned off or until either door is opened. If a
door is opened, the power windows and audio system
will shut off.
Starting the Engine
Move the shift lever to PARK (P) or NEUTRAL (N) for
an automatic transmission. For a manual transmission
the vehicle can be started in NEUTRAL or any other
gear as long as the clutch is depressed. To restart
a manual when you are already moving, use the
NEUTRAL position only. To restart an automatic when
you are already moving, use NEUTRAL (N).
The keyless access transmitter must be inside the
vehicle for the ignition to work.
Cell phone chargers may interfere with the operation of
the Keyless Access System. Battery chargers should
not be plugged in when starting or turning off the engine.
Notice:Do not try to shift to PARK (P) if your
vehicle is moving. If you do, you could damage the
transmission. Shift to PARK (P) only when your
vehicle is stopped.To start you vehicle, do the following:
1. For an automatic transmission, with your foot on the
brake pedal, press the START button located on the
instrument panel. For a manual transmission, while
pressing in the clutch, press the START button.
If there is not a keyless access transmitter in the
vehicle or if there is something causing interference
with it, the DIC will display NO FOB DETECTED.
SeeDIC Warnings and Messages on page 3-53for
more information.
2. When the engine begins cranking, let go of the
button. The idle speed will decrease as your
engine gets warm.
If the battery in the keyless access transmitter
is weak, the DIC will display FOB BATTERY LOW.
You can still drive the vehicle. See “Battery
Replacement” underKeyless Access System
Operation on page 2-5for more information.
3. If the engine does not start and no DIC message is
displayed, wait 15 seconds before trying again.
Notice:Your engine is designed to work with the
electronics in your vehicle. If you add electrical
parts or accessories, you could change the way the
engine operates. Before adding electrical equipment,
check with your dealer. If you do not, your engine
might not perform properly. Any resulting damage
would not be covered by your vehicle’s warranty.
2-23
Page 108 of 426
Directions & Connections®Plan
All Safe & Sound Plan Services
Driving Directions
RideAssist
Information and Convenience Services
OnStar®Hands-Free Calling
OnStar®Hands-Free Calling allows OnStar®subscribers
to make and receive calls using voice commands at
the touch of a button. Hands-Free Calling is fully
integrated into the vehicle, and may be used with
Pre-Paid Minute Packages or linked to a cell phone
through OnStar
®Shared Minutes Plan. To �nd out more,
refer to the OnStar®Owner’s Guide in the vehicle’s
glove box, visit www.onstar.com or www.onstar.ca, or
speak with an OnStar
®advisor by pressing the OnStar®
button or calling 1-888-4-ONSTAR (1-888-466-7827).
OnStar®Virtual Advisor
Your vehicle may have Virtual Advisor. It is a feature of
OnStar®Hands-Free Calling that uses your minutes
to access weather, local traffic reports, and stock quotes.
By pressing the phone button and giving a few simple
voice commands, you can browse through the
various topics. Customize your information pro�le at
www.myonstar.com. See the OnStar
®Owner’s Guide for
more information.
Universal Home Remote
System
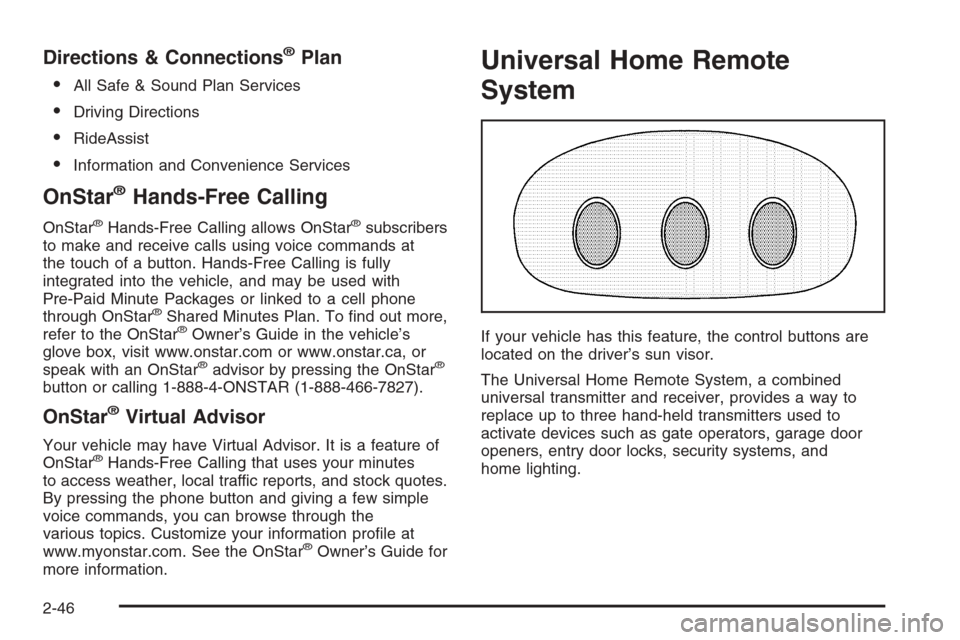
If your vehicle has this feature, the control buttons are
located on the driver’s sun visor.
The Universal Home Remote System, a combined
universal transmitter and receiver, provides a way to
replace up to three hand-held transmitters used to
activate devices such as gate operators, garage door
openers, entry door locks, security systems, and
home lighting.
2-46
Page 160 of 426
To clean the HUD, spray household glass cleaner on a
soft, clean cloth. Wipe the HUD lens gently, then dry
it. Do not spray cleaner directly on the lens because the
cleaner could leak into the unit.
If the ignition is on and you can’t see the HUD image,
check to see if:
Something is covering the HUD unit.
The HUD dimmer control is adjusted properly.
The HUD image is adjusted to the proper height.
Ambient light is low, in the direction your vehicle is
facing.
A fuse is blown. SeeFuses and Circuit Breakers on
page 5-93.
Keep in mind that your windshield is part of the HUD
system. SeeWindshield Replacement on page 5-54.
Accessory Power Outlet(s)
The accessory power outlet can be used to connect
electrical equipment such as a cellular phone or
CB radio.
The accessory power outlet is located inside the center
console storage compartment, on the forward left side.
To use the outlet, remove the tethered cap. When not
using it, always cover the outlet with the protective cap.Notice:Leaving electrical equipment on for
extended periods will drain the battery. Always turn
off electrical equipment when not in use and do
not plug in equipment that exceeds the maximum
amperage rating.
Certain electrical accessories may not be compatible
with the accessory power outlet and could result
in blown vehicle or adapter fuses. If you experience a
problem, see your dealer for additional information
on accessory power outlets.
Notice:Adding any electrical equipment to your
vehicle may damage it or keep other components
from working as they should. The repairs would
not be covered by your warranty. Do not use
equipment exceeding maximum amperage rating of
20 amperes. Check with your dealer before adding
electrical equipment.
When adding electrical equipment, be sure to follow the
installation instructions included with the equipment.
We recommend that you see a quali�ed technician or
your dealer for the proper installation of your equipment.
Notice:Improper use of the power outlet can cause
damage not covered by your warranty. Do not hang
any type of accessory or accessory bracket from the
plug because the power outlets are designed for
accessory power plugs only.
3-24
Page 195 of 426
NO FOBS DETECTED:This message is displayed if
the vehicle does not detect the presence of a keyless
access transmitter when you have attempted to start the
vehicle or a vehicle door has just closed. The following
conditions may cause this message to appear:
Driver-added equipment plugged into the accessory
power outlet on the center console is causing
interference. Examples of these devices are cell
phones and cell phone chargers, two-way radios,
power inverters, or similar items. Try moving the
keyless access transmitter away from these devices
when starting the vehicle. In addition, PDA devices
and remote garage and gate openers may also
generate Electromagnetic Interference (EMI) that
may interfere with the keyless access transmitter.
Do not carry the keyless access transmitter in the
same pocket or bag as these devices.
The vehicle is experiencing Electromagnetic
Interference (EMI). Some locations, such as airports,
automatic toll booths, and some gas stations, have
EMI �elds which may interfere with your keyless
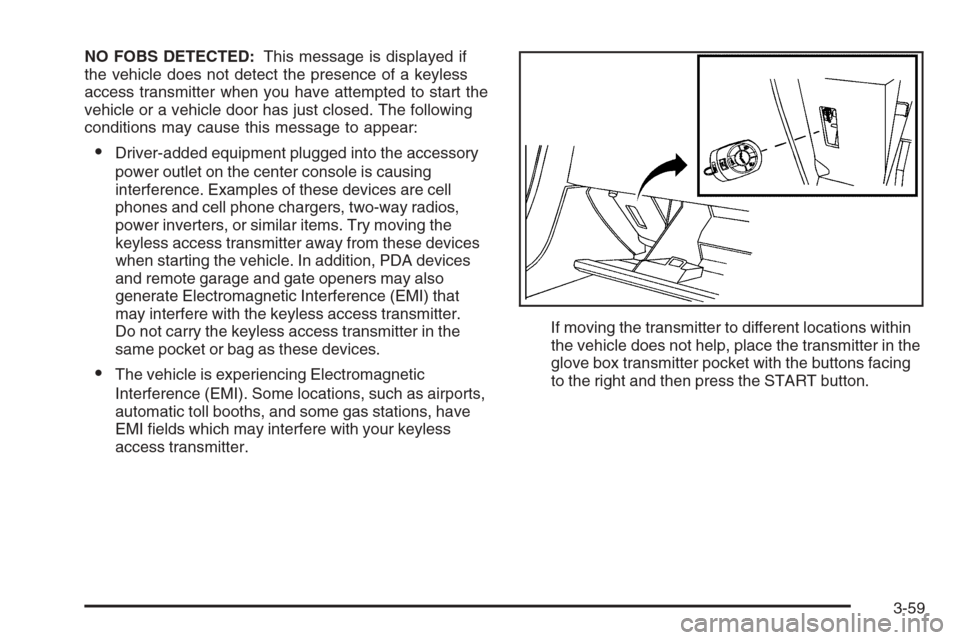
access transmitter.If moving the transmitter to different locations within
the vehicle does not help, place the transmitter in the
glove box transmitter pocket with the buttons facing
to the right and then press the START button.
3-59
Page 214 of 426
Here are some ways in which you can help avoid
distraction while driving.
While your vehicle is parked:
Familiarize yourself with all of its controls.
Familiarize yourself with its operation.
Set up your audio system by presetting your
favorite radio stations, setting the tone, and
adjusting the speakers. Then, when driving
conditions permit, you can tune to your favorite
radio stations using the presets and steering wheel
controls if the vehicle has them.
Notice:Before adding any sound equipment to
your vehicle, such as an audio system, CD player,
CB radio, mobile telephone, or two-way radio, make
sure that it can be added by checking with your
dealer. Also, check federal rules covering mobile
radio and telephone units. If sound equipment can
be added, it is very important to do it properly.
Added sound equipment may interfere with
the operation of your vehicle’s engine, radio, or
other systems, and even damage them. Your
vehicle’s systems may interfere with the operation
of sound equipment that has been added.Notice:The chime signals related to safety belts,
parking brake, and other functions of your vehicle
operate through the radio/entertainment system.
If that equipment is replaced or additional equipment
is added to your vehicle, the chimes may not
work. Make sure that replacement or additional
equipment is compatible with your vehicle before
installing it. SeeAccessories and Modifications
on page 5-3.
Your vehicle may have a feature called Retained
Accessory Power (RAP). With RAP, the audio system
can be played even after the ignition is turned off.
SeeRetained Accessory Power (RAP) on page 2-23
for more information.
Setting the Time
With the ignition on and the radio off, press the H or the
M button to enter clock mode. Press and hold H until
the correct hour appears on the display. Press and
hold M until the correct minute appears on the display.
To change the time default setting from 12 hour to
24 hour, press either the H or the M button for
two seconds to enter the clock mode. Press the tune
knob to select between the 12 or 24 hour display format.
The clock mode will automatically time out with the
changed display format set as the current default setting.
3-78
Page 220 of 426
SCAN:Scan the stations within a category by
performing the following:
1. Press the CAT button. The last selected category
will appear on the display.
2. Turn the tune knob to select the category.
3. Once the desired category is displayed, press and
hold either SCAN arrow until you hear a beep and
SCAN CATEGORY appears on the display.
The radio will begin scanning the stations in the
category.
4. Press either SCAN arrow to stop scanning.
If both category and TRAF are on, the radio will scan
for stations with the selected category and traffic
announcements.
BAND (Alternate Frequency):Alternate frequency
allows the radio to switch to a stronger station with
the same category. To turn alternate frequency
on, press and hold BAND for four seconds. AF ON
will appear on the display. The radio may switch
to stations with a stronger frequency.
To turn alternate frequency off, press and hold BAND
again for four seconds. AF OFF will appear on the
display. The radio will not switch to other stations.
This function does not apply for XM™ Satellite Radio
Service.RDS Messages
ALERT!:Alert warns of local or national emergencies.
When an alert announcement comes on the current
radio station, ALERT! will appear on the display. You will
hear the announcement, even if the volume is low or
a CD is playing. If a CD is playing, play will stop during
the announcement. Alert announcements cannot be
turned off.
ALERT! will not be affected by tests of the emergency
broadcast system. This feature is not supported by
all RDS stations.
4(Information):If the current station has a message,
INFO will appear on the display. Press this button to
see the message. The message may display the artist,
song title, call in phone numbers, etc.
If the entire message is not displayed, parts of the
message will appear every three seconds. To scroll
through the message, press and release this button.
A new group of words will appear on the display after
every press of the button. Once the complete message
has been displayed, INFO will disappear from the display
until another new message is received. The last message
can be displayed by pressing this button. You can view
the last message until a new message is received or a
different station is tuned to.
3-84