2006 CHEVROLET CORVETTE mirror
[x] Cancel search: mirrorPage 1 of 426

Seats and Restraint Systems........................... 1-1
Front Seats
............................................... 1-2
Safety Belts
.............................................. 1-8
Child Restraints
.......................................1-22
Airbag System
.........................................1-40
Restraint System Check
............................1-54
Features and Controls..................................... 2-1
Keys
........................................................ 2-3
Doors and Locks
......................................2-10
Windows
.................................................2-16
Theft-Deterrent Systems
............................2-19
Starting and Operating Your Vehicle
...........2-21
Mirrors
....................................................2-38
OnStar
®System
......................................2-45
Universal Home Remote System
................2-46
Storage Areas
.........................................2-51
Roof Panel
..............................................2-55
Convertible Top
.......................................2-60
Vehicle Personalization
.............................2-72
Instrument Panel............................................. 3-1
Instrument Panel Overview
.......................... 3-4
Climate Controls
......................................3-25
Warning Lights, Gages, and Indicators
........3-32Driver Information Center (DIC)
..................3-48
Audio System(s)
.......................................3-77
Driving Your Vehicle....................................... 4-1
Your Driving, the Road, and Your Vehicle
..... 4-2
Towing
...................................................4-38
Service and Appearance Care.......................... 5-1
Service
..................................................... 5-3
Fuel
......................................................... 5-4
Checking Things Under the Hood
...............5-10
Rear Axle
...............................................5-51
Bulb Replacement
....................................5-52
Windshield Replacement
...........................5-54
Windshield Wiper Blade Replacement
.........5-55
Tires
......................................................5-57
Appearance Care
.....................................5-82
Vehicle Identi�cation
.................................5-92
Electrical System
......................................5-92
Capacities and Speci�cations
...................5-101
Maintenance Schedule..................................... 6-1
Maintenance Schedule
................................ 6-2
Customer Assistance and Information.............. 7-1
Customer Assistance and Information
........... 7-2
Reporting Safety Defects
...........................7-13
Index................................................................ 1
2006 Chevrolet Corvette Owner ManualM
Page 45 of 426
7. If your child restraint manufacturer recommends
using a top tether and your vehicle is a Z06 model,
attach and tighten the top tether to the top tether
anchor. Refer to the instructions that came with the
child restraint and toLower Anchors and Tethers for
Children (LATCH) (Z06 Models Only) on page 1-31
orLower Anchors and Tethers for Children (LATCH)
(Coupe and Convertible Models Only) on page 1-35.
8. Push and pull the child restraint in different
directions to be sure it is secure.
9. If the airbag is off, the off indicator in the inside
rearview mirror will be lit and stay lit when the
vehicle is started.If a child restraint has been installed and the on
indicator is lit, turn the vehicle off. Remove the child
restraint from the vehicle and reinstall the child restraint.
If after reinstalling the child restraint and restarting
the vehicle, the on indicator is still lit, check to make
sure that the vehicle’s seatback is not pressing the child
restraint into the seat cushion. If this happens, slightly
recline the vehicle’s seatback and adjust the seat
cushion if possible.
If the on indicator is still lit, do not secure a child
restraint in this vehicle and check with your dealer.
To remove the child restraint, if the top tether is attached
to the top tether anchor, disconnect it. Unbuckle the
vehicle’s safety belt and let it go back all the way.
The safety belt will move freely again and be ready to
work for an adult or larger child passenger.
1-39
Page 54 of 426
Passenger Sensing System
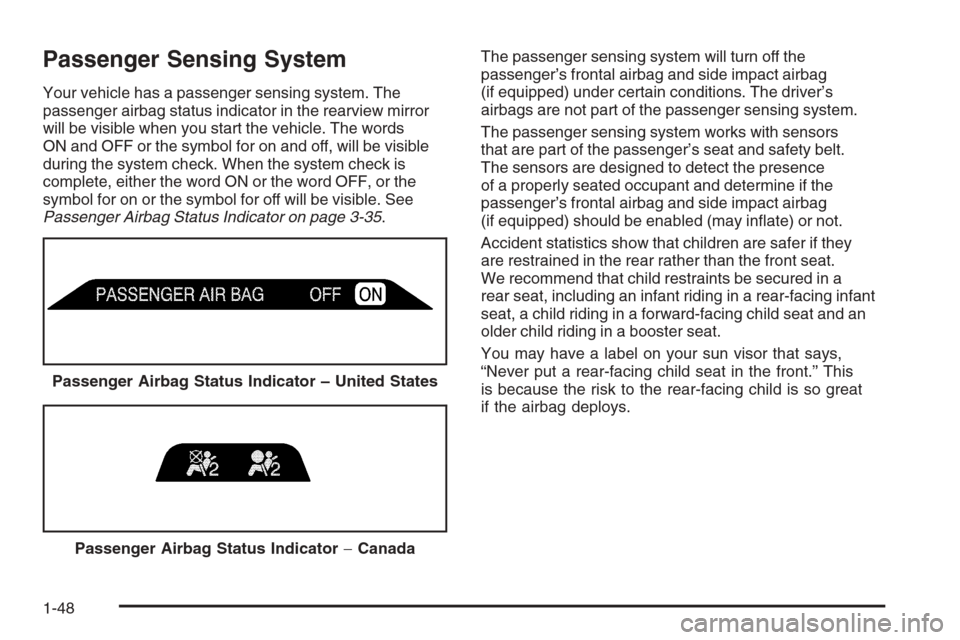
Your vehicle has a passenger sensing system. The
passenger airbag status indicator in the rearview mirror
will be visible when you start the vehicle. The words
ON and OFF or the symbol for on and off, will be visible
during the system check. When the system check is
complete, either the word ON or the word OFF, or the
symbol for on or the symbol for off will be visible. See
Passenger Airbag Status Indicator on page 3-35.The passenger sensing system will turn off the
passenger’s frontal airbag and side impact airbag
(if equipped) under certain conditions. The driver’s
airbags are not part of the passenger sensing system.
The passenger sensing system works with sensors
that are part of the passenger’s seat and safety belt.
The sensors are designed to detect the presence
of a properly seated occupant and determine if the
passenger’s frontal airbag and side impact airbag
(if equipped) should be enabled (may in�ate) or not.
Accident statistics show that children are safer if they
are restrained in the rear rather than the front seat.
We recommend that child restraints be secured in a
rear seat, including an infant riding in a rear-facing infant
seat, a child riding in a forward-facing child seat and an
older child riding in a booster seat.
You may have a label on your sun visor that says,
“Never put a rear-facing child seat in the front.” This
is because the risk to the rear-facing child is so great
if the airbag deploys. Passenger Airbag Status Indicator – United States
Passenger Airbag Status Indicator−Canada
1-48
Page 59 of 426

Adding Equipment to Your
Airbag-Equipped Vehicle
Q:Is there anything I might add to the front or
sides of the vehicle that could keep the
airbags from working properly?
A:Yes. If you add things that change your vehicle’s
frame, bumper system, height, front end or side
sheet metal, they may keep the airbag system
from working properly. Also, the airbag system may
not work properly if you relocate any of the airbag
sensors. If you have any questions about this,
you should contact Customer Assistance before
you modify your vehicle. The phone numbers
and addresses for Customer Assistance are in
Step Two of the Customer Satisfaction Procedure
in this manual. SeeCustomer Satisfaction
Procedure on page 7-2.
Q:Because I have a disability, I have to get my
vehicle modi�ed. How can I �nd out whether
this will affect my advanced airbag system?
A:Changing or moving any parts of the front seats,
safety belts, the airbag sensing and diagnostic
module, steering wheel, instrument panel, the inside
review mirror, or airbag wiring can affect the
operation of the airbag system. If you have
questions, call Customer Assistance. The phone
numbers and addresses for Customer Assistance
are in Step Two of the Customer Satisfaction
Procedure in this manual. SeeCustomer Satisfaction
Procedure on page 7-2.
1-53
Page 63 of 426

Keys...............................................................2-3
Keyless Access System...................................2-4
Keyless Access System Operation....................2-5
Doors and Locks............................................2-10
Door Locks..................................................2-10
Power Door Locks........................................2-12
Automatic Door Lock.....................................2-12
Programmable Automatic Door Unlock.............2-13
Lockout Protection........................................2-13
Hatch/Trunk.................................................2-14
Windows........................................................2-16
Power Windows............................................2-17
Sun Visors...................................................2-19
Theft-Deterrent Systems..................................2-19
Theft-Deterrent System..................................2-19
Starting and Operating Your Vehicle................2-21
New Vehicle Break-In....................................2-21
Front Air Dam..............................................2-21
Ignition Positions..........................................2-22
Retained Accessory Power (RAP)...................2-23
Starting the Engine.......................................2-23
Engine Coolant Heater..................................2-24Automatic Transmission Operation...................2-26
Manual Transmission Operation......................2-30
Parking Brake..............................................2-33
Shifting Into Park (P)
(Automatic Transmission)............................2-33
Shifting Out of Park (P)
(Automatic Transmission)............................2-35
Parking Your Vehicle
(Manual Transmission)...............................2-35
Parking Over Things That Burn.......................2-36
Engine Exhaust............................................2-36
Running the Engine While Parked...................2-37
Mirrors...........................................................2-38
Manual Rearview Mirror.................................2-38
Automatic Dimming Rearview Mirror with
OnStar
®and Compass...............................2-38
Automatic Dimming Rearview Mirror with
Compass.................................................2-41
Outside Power Heated Mirrors........................2-43
Outside Automatic Dimming Mirror..................2-44
Outside Convex Mirror...................................2-44
OnStar
®System.............................................2-45
Section 2 Features and Controls
2-1
Page 81 of 426
Sun Visors
To block out glare, you can swing down the visors. You
can also swing them to the side.
Lighted Visor Vanity Mirrors
Pull down the sun visor and lift the cover to expose the
lighted vanity mirror. When the cover is lifted, the
lamps will come on automatically, even if the ignition
is off.
Theft-Deterrent Systems
Vehicle theft is big business, especially in some cities.
Although your vehicle has a number of theft-deterrent
features, we know that nothing we put on it can make it
impossible to steal.
Theft-Deterrent System
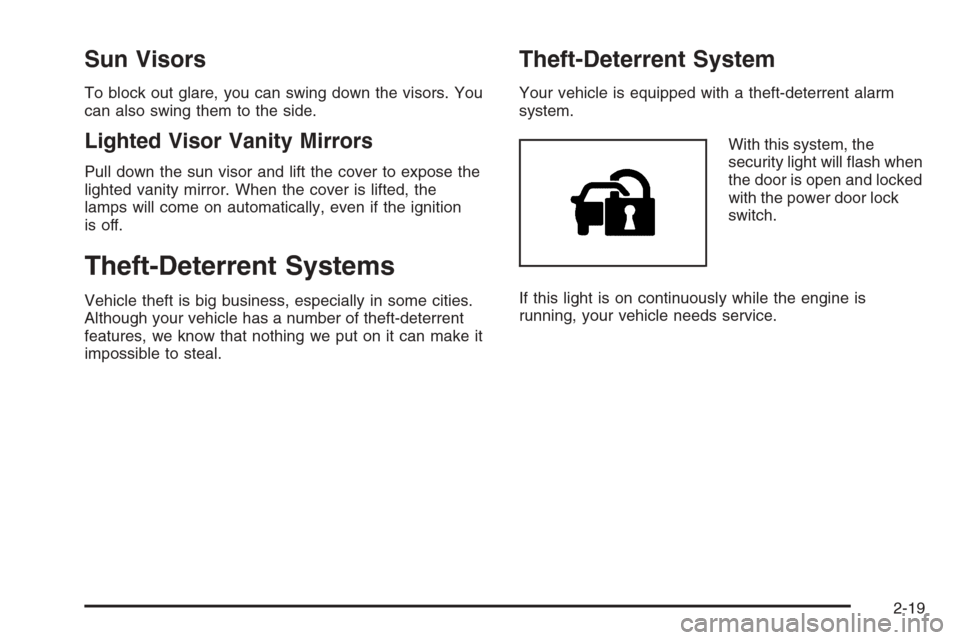
Your vehicle is equipped with a theft-deterrent alarm
system.
With this system, the
security light will �ash when
the door is open and locked
with the power door lock
switch.
If this light is on continuously while the engine is
running, your vehicle needs service.
2-19
Page 100 of 426
Mirrors
Manual Rearview Mirror
When you are sitting in a comfortable driving position,
adjust the mirror so you can see clearly behind your
vehicle. Grip the mirror in the center to move it up or
down and side to side. The day/night control, located at
the bottom of the mirror, lessens glare from the
headlamps behind your vehicle when in the night
position. Turn the control to the right for the night
position and to the left for the day position.
Two buttons under the rearview mirror control map
lamps. Push each button to turn each map lamp on
or off.
Automatic Dimming Rearview Mirror
with OnStar
®and Compass
The vehicle may have an automatic dimming rearview
mirror with OnStar®, a compass and map lamps.
Three OnStar®buttons are at the bottom of the mirror.
SeeOnStar®System on page 2-45for more
information the services OnStar®provides.
Mirror Operation
The mirror automatically changes to reduce glare from
headlamps behind you. A time delay feature prevents
rapid changing from the day to night positions while
driving under lights and through traffic.
P(On/Off):The automatic dimming feature is
automatically activated when the vehicle is started.
The automatic dimming feature is turned on or off by
pressing this button located on the lower part of
the mirror. Press and hold the button for up to
three seconds to turn this feature on or off.
T(Indicator Light):This light will turn on when the
automatic dimming feature is active.
2-38
Page 101 of 426
Map Lamps
The mirror has map lamps located at the bottom of the
mirror. To manually turn the lamps on or off, press the
button next to each lamp.
Compass Operation
The mirror has an eight-point compass display in the
bottom of the mirror face.
When the ignition and the compass feature are on, the
compass will show two character boxes for approximately
two seconds. After two seconds, the mirror will display
the current compass heading. For example, NE is
displayed for north-east.
Compass Calibration
If after two seconds the display does not show a
compass heading, there may be a strong magnetic �eld
interfering with the compass. Such interference may
be caused by a magnetic antenna mount, note
pad holder or similar object. If the letter C appears in
the compass window, the compass needs calibration.
The mirror compass can be calibrated by driving
the vehicle in circles at 5 mph (8 km/h) or less until
the display reads a direction.
The compass can be placed in calibration mode by
pressing and holding the left map light button until
a C appears on the compass display.
2-39