2006 CHEVROLET CORVETTE mirror
[x] Cancel search: mirrorPage 135 of 426
To recall a memory position, do one of the following:
If you have an automatic transmission vehicle,
press and release the desired button 1 or 2 while
the vehicle is in PARK (P).
A single beep will sound and the memory position
will be recalled after a brief delay.
If the vehicle is not in PARK (P), three beeps will
sound and the memory position will not be recalled.
If you have a manual transmission vehicle, press and
release the desired button 1 or 2. If the vehicle is on,
the parking brake needs to be set to recall the
memory position.
A single beep will sound and the memory position
will be recalled after a brief delay.
If the vehicle is on and the parking brake is not set,
three beeps will sound and the memory position will
not be recalled.If your vehicle has the Auto Memory Recall feature and
it is turned on in the Driver Information Center (DIC),
the seat, mirrors, and telescopic steering column
position will automatically adjust to their programmed
positions when the engine is started. See “Auto Memory
Recall” underDIC Vehicle Personalization on page 3-68
for more information.
To stop recall movement of the memory feature at any
time, press one of the power seat controls, power mirror
control buttons, memory buttons, or the telescopic
steering column switch.
2-73
Page 156 of 426
Reading Lamps
Your inside rearview mirror includes two reading lamps.
The lamps will go on when a door is opened. When
the doors are closed, each lamp can be turned on
individually by pressing the switch for that lamp.
An ambient light is located in the passenger sun visor
clip. This light stays on while driving to keep the
cabin from being too dark.
Battery Run-Down Protection
Your vehicle has a feature to help prevent you from
draining the battery in case the underhood lamp, vanity
mirror lamps, cargo lamps, reading lamps, console
or glove box lamps are accidentally left on. If you leave
any of these lamps on, they will automatically time-out
after about 20 minutes. To reset it, all of the above
lamps must be turned off or the ignition key on.
Head-Up Display (HUD)
{CAUTION:
If the HUD image is too bright, or too high in
your �eld of view, it may take you more time
to see things you need to see when it is dark
outside. Be sure to keep the HUD image dim
and placed low in your �eld of view.
If your vehicle is equipped with the Head-Up Display
(HUD), you can see some of the driver information that
appears on your instrument panel cluster.
The information may be displayed in English or metric
units and appears as an image focused out toward
the front of your vehicle. The HUD consists of the
following information:
Speedometer
Turn Signal Indicators
High-Beam Indicator Symbol
Tachometer
3-20
Page 166 of 426
Rear Window Defogger
The rear window defogger uses a warming grid to
remove fog or frost from the rear window.
The rear window defogger will only work when the
engine is running.
=(Rear Window Defogger):Press this button to
turn the rear window defogger on. Be sure to clear
as much snow from the rear window as possible. An
indicator light in the button will come on to let you know
that the rear window defogger is activated.
The rear window defogger will turn off about 10 minutes
after the button is pressed when traveling less than
30 mph (48 km/h). If turned on again, the defogger
will only run for about �ve minutes before turning off.
The defogger can also be turned off by pressing
the button again or by turning off the engine.
Your vehicle has heated outside rearview mirrors.
The mirrors will heat to help clear fog or frost from the
surface of the mirrors when the rear window defog
button is pressed.If your vehicle is equipped with the power convertible
top, the rear window defogger and heated mirrors
are automatically disabled when the power convertible
top is moving or down.
Notice:Do not use anything sharp on the inside
of the rear window. If you do, you could cut or
damage the warming grid, and the repairs would
not be covered by your warranty. Do not attach
a temporary vehicle license, tape, a decal or
anything similar to the defogger grid.
Outlet Adjustment
Use the tab located on the air outlets to change the
direction of the air�ow.
Operation Tips
Clear away any ice, snow or leaves from the air
inlets at the base of the windshield that may
block the �ow of air into your vehicle.
Use of non-GM approved hood de�ectors may
adversely affect the performance of the system.
Keep the area around the base of the instrument
panel console and air path under the seats clear
of objects to help circulate the air inside of
your vehicle more effectively.
3-30
Page 171 of 426
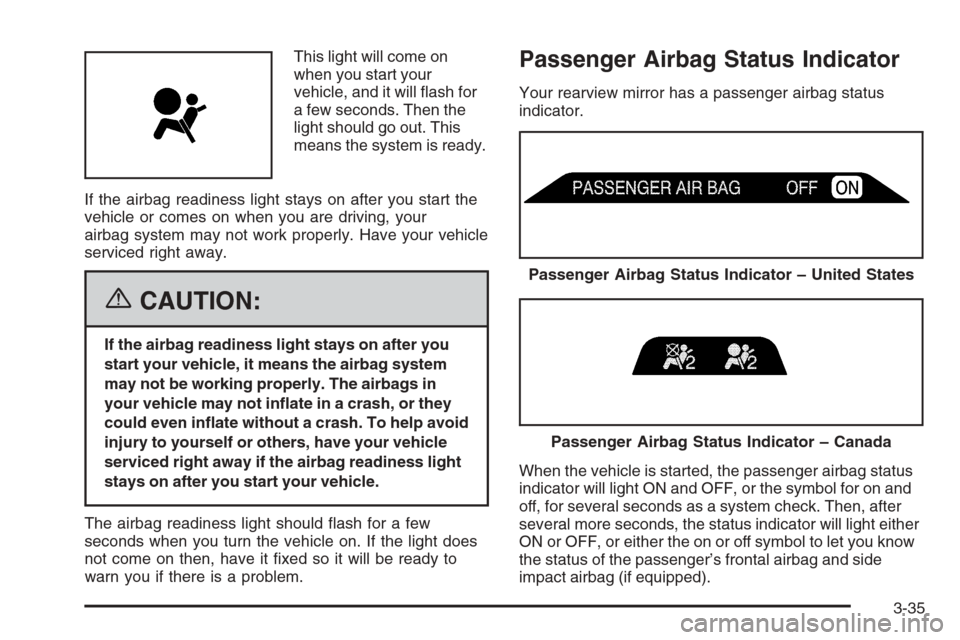
This light will come on
when you start your
vehicle, and it will �ash for
a few seconds. Then the
light should go out. This
means the system is ready.
If the airbag readiness light stays on after you start the
vehicle or comes on when you are driving, your
airbag system may not work properly. Have your vehicle
serviced right away.
{CAUTION:
If the airbag readiness light stays on after you
start your vehicle, it means the airbag system
may not be working properly. The airbags in
your vehicle may not in�ate in a crash, or they
could even in�ate without a crash. To help avoid
injury to yourself or others, have your vehicle
serviced right away if the airbag readiness light
stays on after you start your vehicle.
The airbag readiness light should �ash for a few
seconds when you turn the vehicle on. If the light does
not come on then, have it �xed so it will be ready to
warn you if there is a problem.
Passenger Airbag Status Indicator
Your rearview mirror has a passenger airbag status
indicator.
When the vehicle is started, the passenger airbag status
indicator will light ON and OFF, or the symbol for on and
off, for several seconds as a system check. Then, after
several more seconds, the status indicator will light either
ON or OFF, or either the on or off symbol to let you know
the status of the passenger’s frontal airbag and side
impact airbag (if equipped).
Passenger Airbag Status Indicator – United States
Passenger Airbag Status Indicator – Canada
3-35
Page 205 of 426
Entering the Personal Options Menu
To enter the personal options menu, use the
following steps:
1. If you have an automatic transmission vehicle, turn
the vehicle on with the shift lever in PARK (P).
If you have a manual transmission vehicle, turn the
vehicle on with the parking brake set.
2. Press the OPTION button and you will enter the
PERSONAL OPTIONS menu.
The DIC will display the current driver
number (1 or 2) for a few seconds and then will
display instructions on which buttons to use
for setting the personalizations. The RESET button
is used to select a setting for a particular feature.
The OPTION button is used to move to the
next feature.
3. Press the OPTION button while the instruction
screen is displayed to enter the �rst personalization
menu item.
4. Once you have cycled through all of the personal
options, pressing the OPTION button a �nal time
exits the personal options menu. In addition, if
no button is pressed within 45 seconds, the DIC will
exit the personal options menu.
Personal Options
The following options are available for programming:
Display Units:This option allows you to choose
the measurement units.
Press the OPTION button until DISPLAY UNITS
appears on the display, then press the RESET button to
scroll through the following modes:
ENGLISH (default)
METRIC
If you choose ENGLISH, all information will be displayed
in English units.
If you choose METRIC, all information will be displayed
in metric units.
When the mode you want is selected, press the
OPTION button to set your choice and advance to the
next personal option.
Auto Memory Recall (Automatic Transmission
only):If your automatic transmission vehicle has the
memory package, you may have this option. This option
allows the driver’s seat, the telescopic steering
column, if equipped, and the outside rearview mirrors to
automatically move to the current driver’s set position
when the engine starts.
3-69
Page 206 of 426
Press the OPTION button until AUTO MEMORY
RECALL appears on the display, then press the RESET
button to scroll through the following modes:
YES
NO (default)
If you choose YES, the driver’s seat, the outside
rearview mirrors and the telescopic steering column, if
equipped, positions are recalled when you turn the
ignition on.
If you choose NO, this option will turn off.
When the mode you want is selected, press the
OPTION button to set your choice and advance to the
next personal option.
Auto Exit Recall:If your vehicle has the memory
package, you may have this option. This option allows
the driver’s seat and telescopic steering column, if
equipped, to automatically move to the current driver’s
exit position when one of the following occurs:
The vehicle is turned off or in Retained Accessory
Power (RAP) or accessory mode and the driver’s
door is opened.
The vehicle is turned off or in RAP and the unlock
button on the keyless access transmitter is
pressed.In order for the Auto Exit Recall feature to work on an
automatic transmission vehicle, the vehicle must be
in PARK (P). On a manual transmission vehicle,
the parking brake must be set.
Press the OPTION button until AUTO EXIT RECALL
appears on the display, then press the RESET button to
scroll through the following modes:
YES
NO (default)
If you choose YES, when you turn the ignition off and
open the driver’s door or press the unlock button on the
keyless access transmitter, the seat and the telescopic
steering wheel, if equipped, will return to their stored exit
positions for an easy exit or an easy entrance when
returning to the vehicle.
The seat and steering wheel will only return to the
stored driving position if you press the appropriate
memory button or activate the auto memory recall
feature.
If you choose NO, this option will turn off.
When the mode you want is selected, press the
OPTION button to set your choice and advance to the
next personal option.
3-70
Page 237 of 426
Care of the CD Player
The use of CD lens cleaners for CD players is not
advised, due to the risk of contaminating the internal
lens of the CD optics with lubricants.
Diversity Antenna System
The AM-FM antenna is a hidden self tuning system. It
optimizes the AM and FM signals relative to the vehicle’s
position and radio station source. No maintenance or
adjustments are needed.
XM™ Satellite Radio Antenna
System (Roof or Trunk Mounted)
The XM™ Satellite Radio antenna is located on the roof
or on the trunk lid of your vehicle. Keep this antenna
clear of snow and ice build up for clear radio reception.
XM™ Satellite Radio Antenna
System (Diversity System)
Your vehicle may have the XM™ Satellite Radio
antennas that are located in the outside rear view
mirrors. These antennas are hidden from view and are
not accessible.
Chime Level Adjustment
The radio is used to adjust the vehicle’s chime level.
To change the volume level of the chime, press and hold
pushbutton 6 with the ignition on and the radio power off.
The volume level will change from the normal level to
loud, and LOUD will appear on the radio display. To
change back to the default or normal setting, press and
hold pushbutton 6 again. The volume level will change
from the loud level to normal, and NORMAL will appear
on the radio display. Only one chime will be heard when
changing from the normal to the loud setting. Each time
the chime volume is changed, three chimes will sound as
an example of the new volume selected. Removing the
radio and not replacing it with a factory radio or chime
module will disable vehicle chimes.
3-101
Page 255 of 426
Check your mirrors, glance over your shoulder,
and start your left lane change signal before moving
out of the right lane to pass. When you are far
enough ahead of the passed vehicle to see its front in
your inside mirror, activate your right lane change
signal and move back into the right lane. Remember
that your passenger side outside mirror is convex.
The vehicle you just passed may seem to be farther
away from you than it really is.
Try not to pass more than one vehicle at a time on
two-lane roads. Reconsider before passing the next
vehicle.
Do not overtake a slowly moving vehicle too rapidly.
Even though the brake lamps are not �ashing, it may
be slowing down or starting to turn.
If you are being passed, make it easy for the
following driver to get ahead of you. Perhaps
you can ease a little to the right.
Loss of Control
Let us review what driving experts say about what
happens when the three control systems — brakes,
steering, and acceleration — do not have enough
friction where the tires meet the road to do what the
driver has asked.In any emergency, do not give up. Keep trying to
steer and constantly seek an escape route or area
of less danger.
Skidding
In a skid, a driver can lose control of the vehicle.
Defensive drivers avoid most skids by taking reasonable
care suited to existing conditions, and by not overdriving
those conditions. But skids are always possible.
The three types of skids correspond to your vehicle’s
three control systems. In the braking skid, your wheels
are not rolling. In the steering or cornering skid, too much
speed or steering in a curve causes tires to slip and lose
cornering force. And in the acceleration skid, too much
throttle causes the driving wheels to spin.
A cornering skid is best handled by easing your foot off
the accelerator pedal.
Remember: Any traction control system helps avoid only
the acceleration skid. If your traction control system is
off, then an acceleration skid is also best handled
by easing your foot off the accelerator pedal.
If your vehicle starts to slide, ease your foot off the
accelerator pedal and quickly steer the way you want
the vehicle to go. If you start steering quickly enough,
your vehicle may straighten out. Always be ready
for a second skid if it occurs.
4-17