2006 BMW M3 COUPE width
[x] Cancel search: widthPage 45 of 170
45
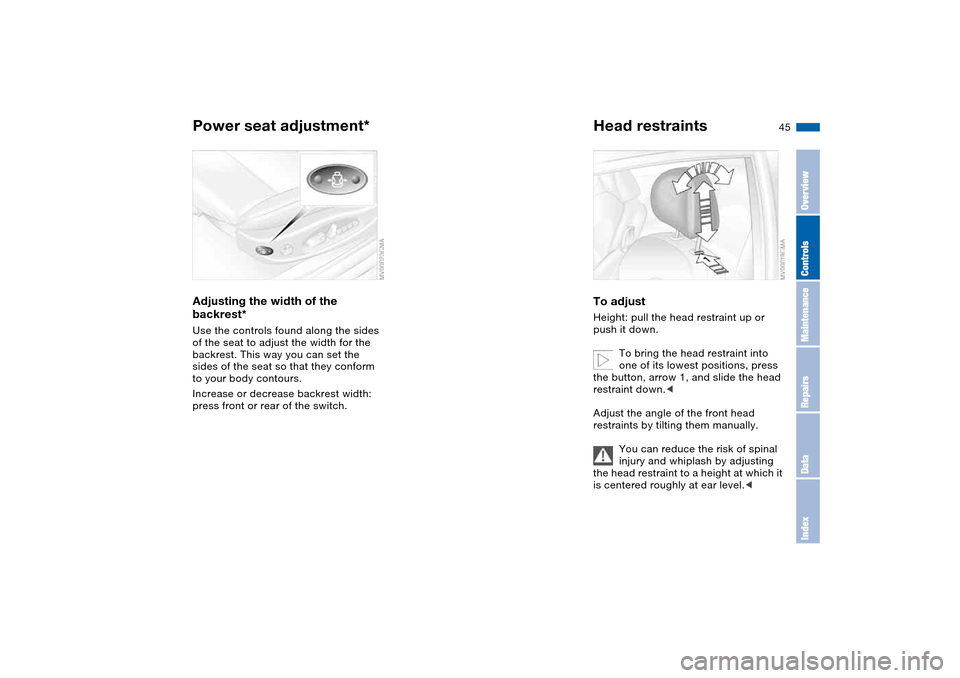
Adjusting the width of the
backrest*Use the controls found along the sides
of the seat to adjust the width for the
backrest. This way you can set the
sides of the seat so that they conform
to your body contours.
Increase or decrease backrest width:
press front or rear of the switch.
Head restraintsTo adjustHeight: pull the head restraint up or
push it down.
To bring the head restraint into
one of its lowest positions, press
the button, arrow 1, and slide the head
restraint down.<
Adjust the angle of the front head
restraints by tilting them manually.
You can reduce the risk of spinal
injury and whiplash by adjusting
the head restraint to a height at which it
is centered roughly at ear level.<
Power seat adjustment*
OverviewControlsMaintenanceRepairsDataIndex
Page 48 of 170
48
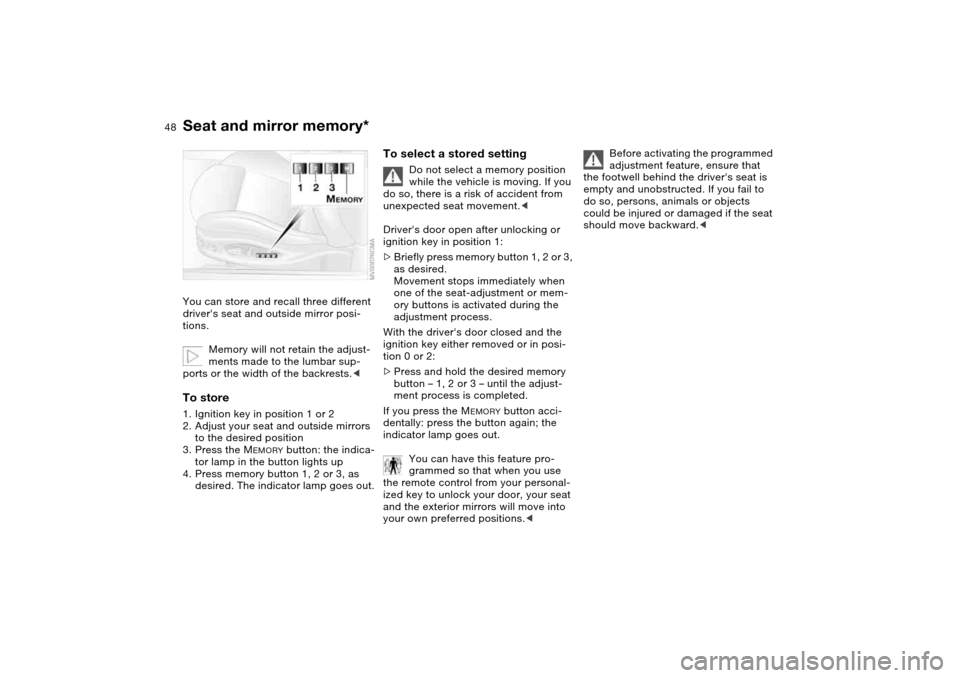
Seat and mirror memory*You can store and recall three different
driver's seat and outside mirror posi-
tions.
Memory will not retain the adjust-
ments made to the lumbar sup-
ports or the width of the backrests.
to the desired position
3. Press the M
EMORY
button: the indica-
tor lamp in the button lights up
4. Press memory button 1, 2 or 3, as
desired. The indicator lamp goes out.
To select a stored setting
Do not select a memory position
while the vehicle is moving. If you
do so, there is a risk of accident from
unexpected seat movement.<
Driver's door open after unlocking or
ignition key in position 1:
>Briefly press memory button 1, 2 or 3,
as desired.
Movement stops immediately when
one of the seat-adjustment or mem-
ory buttons is activated during the
adjustment process.
With the driver's door closed and the
ignition key either removed or in posi-
tion 0 or 2:
>Press and hold the desired memory
button – 1, 2 or 3 – until the adjust-
ment process is completed.
If you press the M
EMORY
button acci-
dentally: press the button again; the
indicator lamp goes out.
You can have this feature pro-
grammed so that when you use
the remote control from your personal-
ized key to unlock your door, your seat
and the exterior mirrors will move into
your own preferred positions.<
Before activating the programmed
adjustment feature, ensure that
the footwell behind the driver's seat is
empty and unobstructed. If you fail to
do so, persons, animals or objects
could be injured or damaged if the seat
should move backward.<
Page 55 of 170
55
Transporting children safelyCommercially available child-restraint
systems are designed to be secured
with a lap belt or with the lap belt por-
tion of a combination lap/shoulder belt.
Improperly or inadequately installed
restraint systems can increase the risk
of injury to children. Always read and
follow the instructions that come with
the system.Correct location for installingIn your BMW, all seats equipped with a
three-point safety belt – except for the
driver's seat – are suitable for installing
universal child-restraint systems of all
age classes and which have been
approved for the age group in question. Before installing any child-
restraint device or child seat,
please read the following:
Never install a rearward-facing child-
restraint system in the front passenger
seat of this vehicle.
Your vehicle is equipped with an airbag
supplemental restraint system for the
front passenger. Because the backrest
on any rearward-facing child-restraint
system – of the kind designed for
infants under 1 year and 20 lbs/9 kg –
would be within the airbag's deploy-
ment range, you should never mount
such a device in the front passenger
seat, since the impact of the airbag
against the child restraint's backrest
could lead to serious or fatal injuries.
If it is necessary for a child – not an
infant – to ride in the front seat, certain
precautions should be taken. First,
move the passenger seat as far away
from the instrument panel as possible.
This important precaution is intended to
maximize the distance between the air-
bag and the child. Older children
should be tightly secured with the
safety belt after they have outgrown a
booster seat that is appropriate for their
age, height, and weight.
Younger children should be secured in
an appropriate forward-facing child-
restraint system that has first been
properly secured with a safety belt.
Never install a rearward-facing child-
restraint system in the front passenger
seat.
We strongly urge you to carefully read
and comply with the instructions for
installation and use provided by the
child restraint's manufacturer when-
ever you use such a device.
The width adjustment of the front pas-
senger seat must be set at full width.
Do not call up any seat memory posi-
tions after the child seat has been
installed; there is otherwise a risk of
injury.
Do not attempt to modify child-restraint
systems. If you do this, the protection
provided by these systems could be
impaired.
Be sure that all occupants – of all ages –
remain properly and securely restrained
at all times.<
OverviewControlsMaintenanceRepairsDataIndex
Page 68 of 170

68
Shifting gears with shift paddles on
steering wheel:
>To upshift, briefly pull the right pad-
dle +
>To downshift, briefly pull the left pad-
dle –.
Shift paddles with various widths
matched to the shape of your
hand are available from your BMW cen-
ter.<
Shifting gears with selector lever:
>To upshift, pull the selector lever
backward in the + direction
>To downshift, push the selector lever
in the – direction.
No automatic upshifting is carried out in
the sequential mode.
You accelerate from higher gears, e.g.
during passing, by manually downshift-
ing.
In the following situations the
SMG Drivelogic in the sequential mode
assists you:
>Upshifts and downshifts are only exe-
cuted at appropriate combinations of
engine rpm and vehicle speed. For
instance, downshifts that would
result in excessive engine speed are
not executed
>During a stop the gearbox is auto-
matically downshifted into the first
gear so that, e.g. before a traffic light,
it is only necessary to accelerate to
continue driving
>As speed diminishes, the gearbox
downshifts automatically, without you
taking any action, just before the
vehicle slows to below each gear's
minimum speed.D – Automated modeEach time the engine is started, the
automated mode is activated as soon
as you move the selector lever into the
forward driving position.
In the automated mode all forward
gears are shifted automatically.To switch from sequential to automated
mode: tap the selector lever to the right
toward D. Watch the display in the
instrument cluster, refer to page 67.
For rapid acceleration, e.g. during
passing, depress the accelerator pedal
completely – kickdown. The gearbox
now downshifts depending on the
selected driving program.
Even in the automated mode, you can
help specify the shifting point: if a gear-
dependent minimum speed is
exceeded, you can upshift by slowly
reducing pressure on the accelerator
pedal. In the process, the respective
driving situation is detected by sensors
and taken into account.
Sequential M gearbox with Drivelogic*
Page 109 of 170
109
General driving notesHot exhaust system
High temperatures occur with
every vehicle equipped with a cat-
alytic converter. Heat shields are
installed adjacent to some sections of
the exhaust system. Never remove
these shields; do not apply undercoat-
ing to their surfaces. When driving,
standing at idle and parking the vehicle,
take care to avoid contact between the
hot exhaust system and flammable
materials, e.g. hay, leaves, grass, etc.
Such contact could lead to a fire,
resulting in serious personal injury and
property damage.<
When the vehicle is parkedCondensation forms in the automatic
climate control system during opera-
tion, which then exits under the vehicle.
Traces of condensed water of this kind
are thus normal.Before driving through a car washFold in the exterior mirrors manually
because they could otherwise be dam-
aged due to the width of the vehicle.
Hydroplaning
When driving on wet or slushy
roads, reduce road speed. If you
do not, a wedge of water can form
between tire and road surface. This
phenomenon is referred to as hydro-
planing, and can lead to partial or com-
plete loss of traction, vehicle control
and braking effectiveness.<
The risk of hydroplaning increases as
the tread depth of the tires decreases,
refer also to Tire tread on page 116.
Driving through water
Do not drive through water on the
road if it is deeper than 1 ft/30 cm,
and then only at walking speed. Other-
wise, the vehicle's engine, the electrical
systems and the transmission may be
damaged.<
Braking safelyYour BMW is equipped with ABS as a
standard feature. If you are in a situa-
tion which requires full braking, it is
best to brake using maximum brake
pressure: panic stop. Since the vehicle
maintains steering responsiveness, you
can avoid possible obstacles with a
minimum of steering effort.
Pulsation at the brake pedal combines
with sounds from the hydraulic circuits
to indicate to the driver that ABS is in
its active mode.
Do not rest your foot on the brake
pedal while driving. Otherwise,
even light but consistent pedal pres-
sure can lead to high temperatures,
brake wear and possibly even brake
failure.<
Wet roads:
If the roads are wet or if there is heavy
rain, it is advisable to gently press the
brakes for a brief moment every few
miles/kilometers. Watch traffic condi-
tions to ensure that this maneuver does
not endanger other road users. The
heat generated in this process helps
dry the pads and rotors. Immediate
braking force is then available if neces-
sary.
OverviewControlsMaintenanceRepairsDataIndex
Page 114 of 170
114
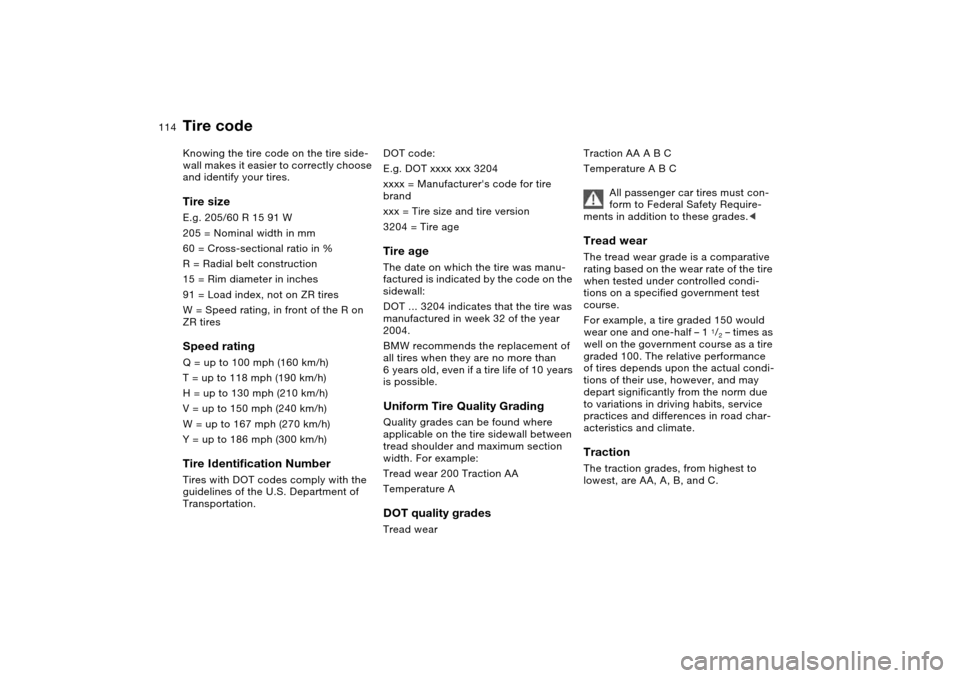
Tire codeKnowing the tire code on the tire side-
wall makes it easier to correctly choose
and identify your tires.Tire sizeE.g. 205/60 R 15 91 W
205 = Nominal width in mm
60 = Cross-sectional ratio in %
R = Radial belt construction
15 = Rim diameter in inches
91 = Load index, not on ZR tires
W = Speed rating, in front of the R on
ZR tiresSpeed ratingQ = up to 100 mph (160 km/h)
T = up to 118 mph (190 km/h)
H = up to 130 mph (210 km/h)
V = up to 150 mph (240 km/h)
W = up to 167 mph (270 km/h)
Y = up to 186 mph (300 km/h)Tire Identification NumberTires with DOT codes comply with the
guidelines of the U.S. Department of
Transportation.DOT code:
E.g. DOT xxxx xxx 3204
xxxx = Manufacturer's code for tire
brand
xxx = Tire size and tire version
3204 = Tire age
Tire ageThe date on which the tire was manu-
factured is indicated by the code on the
sidewall:
DOT … 3204 indicates that the tire was
manufactured in week 32 of the year
2004.
BMW recommends the replacement of
all tires when they are no more than
6 years old, even if a tire life of 10 years
is possible.Uniform Tire Quality GradingQuality grades can be found where
applicable on the tire sidewall between
tread shoulder and maximum section
width. For example:
Tread wear 200 Traction AA
Temperature ADOT quality gradesTread wearTraction AA A B C
Temperature A B C
All passenger car tires must con-
form to Federal Safety Require-
ments in addition to these grades.<
Tread wearThe tread wear grade is a comparative
rating based on the wear rate of the tire
when tested under controlled condi-
tions on a specified government test
course.
For example, a tire graded 150 would
wear one and one-half – 1
1/2 – times as
well on the government course as a tire
graded 100. The relative performance
of tires depends upon the actual condi-
tions of their use, however, and may
depart significantly from the norm due
to variations in driving habits, service
practices and differences in road char-
acteristics and climate.
TractionThe traction grades, from highest to
lowest, are AA, A, B, and C.
Page 156 of 170
Everything from A to ZA
ABS Antilock Brake
System 111
indicator lamp 19
Accessories, refer to For
your own safety 6
Accident, refer to Emer-
gency call 142
Activated-charcoal filter 94
Adaptive brake lamp, refer
to Brake force display 86
Adding brake fluid 125
Additional sources of infor-
mation 4
Air conditioning mode
automatic climate
control 92
Air distribution
automatic climate
control 92
individual 92
Air outlets, refer to Ventila-
tion 90
Air pressure, refer to Tire
inflation pressure 112
Air recirculation, refer to
Recirculated-air mode 93
Air supply
automatic climate
control 92
Air, drying, refer to Air con-
ditioning mode 92Airbags 52
deactivating 52
indicator lamp 18, 54
safe seating position 42
Airing out, refer to Ventila-
tion 90
AKI, refer to Fuel specifica-
tions 25
Alarm system 37
avoiding unintentional
alarms 38
All-season tires, refer to
Winter tires 116
Alternative oil types 123
Antifreeze 124
coolant 124
washer fluid 122
Antilock Brake System
(ABS) 111
indicator lamp 19
Anti-theft system 28
Anti-theft warning system,
refer to Alarm system 37
Approved axle loads, refer
to Weights 152
Approved gross weight,
refer to Weights 152
Armrest
front 96
rear 97Artificial leather, refer to the
Caring for your vehicle
brochure
Ashtray
front 98
rear 98
Assistant systems, refer to
Dynamic Stability Control
(DSC) 82
AUC Automatic recircu-
lated-air control 93
AUTO program 92
Automatic
cruise control 73
headlamp control 87
Automatic air distribution,
refer to AUTO program 92
Automatic air supply, refer
to AUTO program 92
Automatic car wash, refer to
the Caring for your vehicle
brochure
Automatic climate control 90
Automatic curb monitor 49
Automatic dimming, interior
rearview mirror 50
Automatic recirculated-air
control (AUC) 93
Automatic windshield
washer, refer to Rain sen-
sor 72Average fuel
consumption 80
Average speed 80
Avoiding unintentional
alarms 38
Axle loads, refer to
Weights 152
B
Backrest
adjusting 43
unlocking 46
width adjustment 45
Backrest, refer to Seat
adjustment 44
Backup lamps 65
bulb replacement 135
Bandages, refer to First-aid
kit 23
Bar, for towing 145
Battery 140
charge 140
disposal 141
indicator lamp 18
jump-starting 143
remote control 28, 29
Battery charge current 18
Belts, refer to Safety
belts 46
Beverage holders 96, 97
Page 163 of 170

Everything from A to Z
163
Power socket, cigarette
lighter 98
Pressure monitoring, tires
Flat Tire Monitor 83
Pressure, tires 112
inflating with M Mobility
system 139
Proposition 65 warning 6
Puncture
M Mobility system 137
R
Radio remote control key,
refer to Master key with
remote control 28
Radio, refer to the Owner's
Manual for Radio
Rain sensor 72
Range 80
Reading lamps
front 89
rear 89
Rear armrest, refer to Rear
center armrest 97
Rear backrest, folding 100
Rear center 3-point safety
belt 100
Rear lamps
bulb replacement 135
indicator lamp, defective
lamp 77Rear window heating
automatic climate
control 93
Rear-entry assist 46
Rearview mirror 50
Receiving assistance 142
Recirculated-air mode
automatic climate
control 93
Recirculating the air, refer to
Recirculated-air mode 93
Reclining seat, refer to Seat
adjustment 44
Refueling 24
fuel filler door 24
Releasing
hood 119
Remaining distance to ser-
vice 77
Remaining distance, refer to
Range 80
Remote control 29
luggage compartment
lid 30
malfunction 30
Replacing lamps, refer to
Lamps and bulbs 133
Reporting safety defects 7
Restraint systems
for children 55
Restraint systems, refer to
Safety belts 46Reverse gear
manual transmission 65
Roof load capacity 152
Roof-mounted luggage
rack 105
Rope, refer to Towing
and tow-starting the vehi-
cle 145
S
Safe seating position 42
airbags 42
safety belt 42
Safety belt
safe seating position 42
Safety belt height adjust-
ment 47
Safety belts 46
height adjustment 47
warning lamp 18
Safety feature
glass sunroof 40
power windows 39
Safety systems, refer to
Antilock Brake
System 111
Dynamic Stability Control
(DSC) 82
Screwdriver, refer to
Onboard tool kit 132Seat adjustment
backrest width adjust-
ment 45
BMW sports seat 44
height 43
lumbar support 44
manual 43
power 44
Seat belt tensioner, refer to
Safety belts 46
Seat heating 49
Seat memory, refer to Seat
and mirror memory 48
Seat positions, storing 48
Seats 43
Securing cargo 104
Securing child-restraint sys-
tem 57
Securing the vehicle
from inside 33
from outside 29, 32
Selector lever
sequential M gearbox with
Drivelogic 66
Selector lever positions
sequential M gearbox with
Drivelogic 66
Sequential M gearbox with
Drivelogic 66
indicator lamp 19, 70
tow-starting 146
OverviewControlsMaintenanceRepairsDataIndex