2006 BMW M3 COUPE sunroof
[x] Cancel search: sunroofPage 8 of 170

Contents
Notes
About this Owner's Manual4
Additional sources of
information4
Symbols used4
Your individual vehicle5
Status at time of printing5
For your own safety6
Service and warranty7
Reporting safety defects7
Overview
Cockpit14
Instrument cluster16
Indicator and warning lamps18
Buttons* in steering wheel22
Hazard warning triangle*23
First-aid kit*23
Refueling24
Fuel specifications25
Controls and features
Opening and closing:
Keys28
Central locking system28
Opening and closing – via the
remote control29
Opening and closing – via the
door lock32
Opening and closing – from the
inside33
Luggage compartment lid34
Luggage compartment36
Alarm system*37
Electric power windows39
Glass sunroof, electric*40
To adjust:
Safe seating position42
Seats43
Manual seat adjustment43
Power seat adjustment*44
Head restraints45
Entering the rear46
Safety belts46
Seat and mirror memory*48
Seat heating*49
Mirrors50
Steering wheel51
Passenger safety systems:
Airbags52
Transporting children safely55
Vehicle Memory, Key
Memory59
Page 30 of 170

30
Convenience opening modePress the button briefly and then keep it
pressed. The windows and the glass
sunroof open.To lock and securePress button.
As a confirmation that the vehi-
cle's locks have engaged
securely, the hazard warning flashers
light up once.<
You can have this confirmation
signal deactivated.
With this function, you can also search
for your vehicle when parked in an
underground garage, for instance.
To deactivate the tilt alarm* and
interior motion sensors*Press button a second time immedi-
ately after locking.
For additional information: page 38.To open the luggage
compartment lidPress button briefly.
The lid will open slightly, no matter
whether it was locked or unlocked.
If the vehicle was previously
locked, the luggage compartment
is also locked again after it is closed.
Before and after a trip, be sure that the
luggage compartment lid has not been
opened unintentionally.
triggered in the event of danger, if the
system is armed.
To switch off the alarmPress button.External systemsMalfunctions:
Local radio waves can impede the func-
tioning of the remote control.
If this occurs, open and close the vehi-
cle using a master key in the door lock.For US owners onlyThe transmitter and receiver units com-
ply with part 15 of the FCC Federal
Communications Commission regula-
tions. Operation is governed by the fol-
lowing:
FCC ID:
>X8EWS
>LX8FZVS
>LX8FZVE
Compliance statement:
This device complies with part 15 of the
FCC Rules. Operation is subject to the
following two conditions:
>This device may not cause harmful
interference, and
Opening and closing – via the remote control
Page 32 of 170

32
Opening and closing – via the door lockOne turn of the key in the driver's door
lock unlocks the driver's door only.
Turning the key a second time unlocks
the passenger's door, the luggage
compartment lid and the fuel filler door.
As a confirmation that the vehi-
cle's locks have engaged
securely, the hazard warning flashers
light up once.<
You can have this confirmation
signal deactivated.
>To open: with the door closed, hold
the key in the Unlock position
>To fasten: with the door closed, hold
the key in the Lock position.
Whenever closing the windows or
sliding/tilt sunroof you should
always monitor their path and progress
to ensure that no one is injured. Releas-
ing the key stops the operation.
turning the key in the lock all the way to
the left or right.
Page 38 of 170

38
Indicator lamp displays>The indicator lamp below the interior
rearview mirror flashes continuously:
the system is armed
>The indicator lamp flashes after lock-
ing: doors or luggage compartment
lid are not completely closed. Even if
you do not close the alerted area, the
remaining areas are deadlocked, and
the indicator lamp flashes continu-
ously after 10 seconds. However, the
interior motion sensor is not activated
>The indicator lamp goes out after
unlocking: no manipulation or
attempted intrusions have been
detected in the period since the sys-
tem was armed
>The indicator lamp flashes for 10 sec-
onds after unlocking: an attempted
entry has been detected in the period
since the system was armed.
Following triggering of an alarm, the
indicator lamp will flash continuously.Tilt alarm and interior motion
sensorsTilt alarm sensor:
The inclination of the vehicle is moni-
tored. The alarm system reacts, e.g. to
attempts to steal the wheels or tow the
vehicle.
Interior motion sensor:
In order for the interior motion sensor to
function properly, the windows and the
glass sunroof must be completely
closed.Avoiding unintentional alarmsThe tilt alarm sensor and the interior
motion sensor can be deactivated at
the same time. In this way you can
avoid unintentional alarms, e.g. in the
following situations:
>In duplex garages
>When the vehicle is being trans-
ported on a car-carrying train
>If animals are to be left in the vehicle.
To deactivate the tilt alarm and
interior motion sensors>Press the button on the remote con-
trol twice.
The indicator lamp lights up briefly and
then flashes continuously. The tilt alarm
sensor and the interior motion sensor
are deactivated until the vehicle is again
unlocked and locked.
You can have the tilt alarm sensor
and the interior motion sensor
permanently deactivated.<
The tilt alarm sensor and the inte-
rior motion sensor are inadvert-
ently deactivated when convenience
closing of windows and the glass sun-
roof are interrupted within the first
10 seconds and then started again. If
this has happened, the vehicle must be
unlocked and locked again.<
Alarm system*
Page 40 of 170

40
Glass sunroof, electric*
Watch the glass sunroof while it is
closing, to avoid any injuries.
When leaving the vehicle, always take
the ignition key with you and close the
doors, since children could otherwise
operate the sunroof and injure them-
selves.<
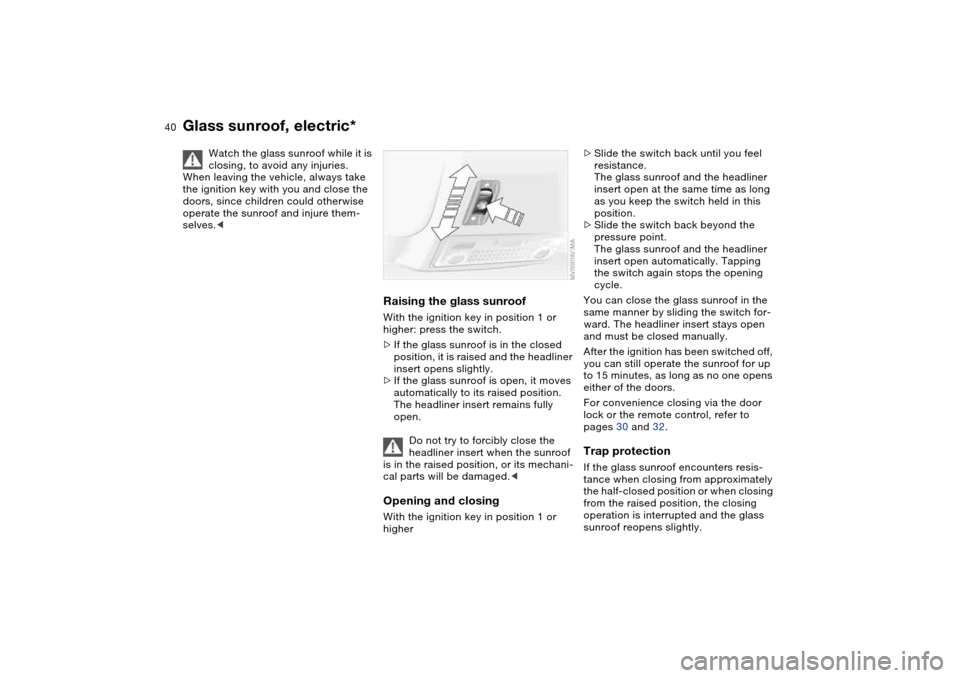
Raising the glass sunroofWith the ignition key in position 1 or
higher: press the switch.
>If the glass sunroof is in the closed
position, it is raised and the headliner
insert opens slightly.
>If the glass sunroof is open, it moves
automatically to its raised position.
The headliner insert remains fully
open.
Do not try to forcibly close the
headliner insert when the sunroof
is in the raised position, or its mechani-
cal parts will be damaged.
>Slide the switch back until you feel
resistance.
The glass sunroof and the headliner
insert open at the same time as long
as you keep the switch held in this
position.
>Slide the switch back beyond the
pressure point.
The glass sunroof and the headliner
insert open automatically. Tapping
the switch again stops the opening
cycle.
You can close the glass sunroof in the
same manner by sliding the switch for-
ward. The headliner insert stays open
and must be closed manually.
After the ignition has been switched off,
you can still operate the sunroof for up
to 15 minutes, as long as no one opens
either of the doors.
For convenience closing via the door
lock or the remote control, refer to
pages 30 and 32.Trap protectionIf the glass sunroof encounters resis-
tance when closing from approximately
the half-closed position or when closing
from the raised position, the closing
operation is interrupted and the glass
sunroof reopens slightly.
Page 41 of 170

41
Despite trap protection, always
make sure that the sunroof can
close without obstruction, otherwise in
some cases, e.g. with thin objects, it is
not guaranteed that the closing opera-
tion will be interrupted.
Trap protection is restricted when the
switch is pressed and held beyond the
pressure point. The sunroof opens only
slightly. If the switch is pressed and
held beyond the pressure point again
within approx. 2 seconds, trap protec-
tion is overridden.<
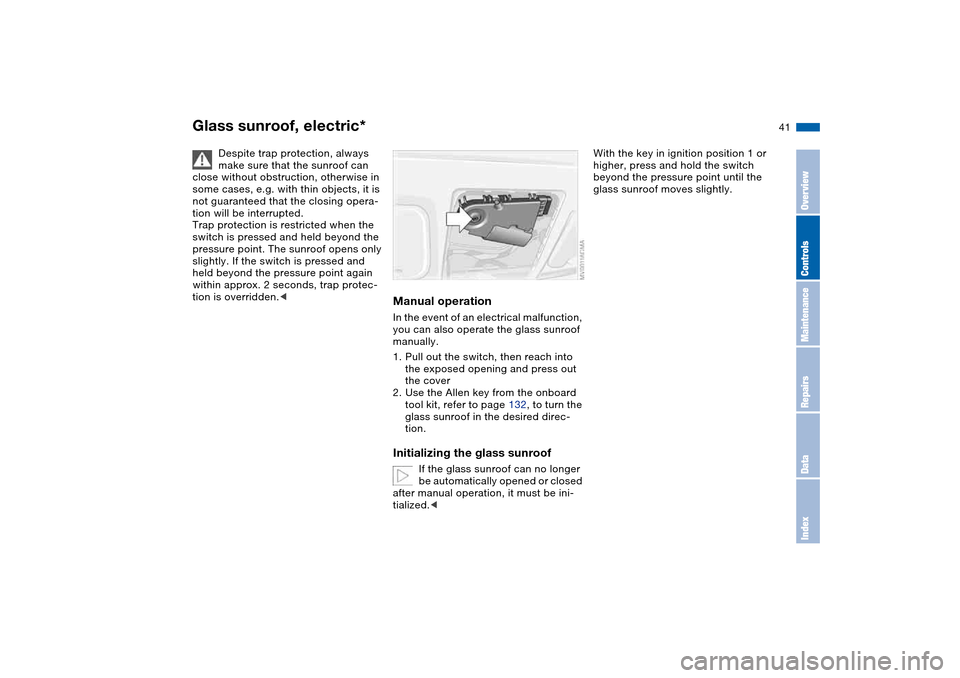
Manual operationIn the event of an electrical malfunction,
you can also operate the glass sunroof
manually.
1. Pull out the switch, then reach into
the exposed opening and press out
the cover
2. Use the Allen key from the onboard
tool kit, refer to page 132, to turn the
glass sunroof in the desired direc-
tion.Initializing the glass sunroof
If the glass sunroof can no longer
be automatically opened or closed
after manual operation, it must be ini-
tialized.<
With the key in ignition position 1 or
higher, press and hold the switch
beyond the pressure point until the
glass sunroof moves slightly.
Glass sunroof, electric*
OverviewControlsMaintenanceRepairsDataIndex
Page 105 of 170

105
Roof-mounted luggage rack*A special roof-rack system is available
as an optional extra for your BMW.
Please observe the precautions
included with the installation instruc-
tions.AnchoragesAccess to the mounting points:
To fold up the covers, please use the
tool provided with the roof-rack system.Loading and driving notesBecause roof racks raise the center of
gravity of the vehicle when loaded, they
exercise a major effect on its handling
and steering response.
When loading, be sure to remember not
to exceed the approved roof weight or
the approved gross vehicle weight or
the axle loads. You will find the specifi-
cations under Technical data on
page 152.
Make sure that the load is not too bulky,
and attempt to distribute it evenly.
Always load the heaviest pieces first so
that they are at the bottom. Be sure that
adequate clearance is maintained for
raising the glass sunroof, and that
objects do not project into the opening
path of the luggage compartment lid.
Secure the roof-mounted luggage cor-
rectly and securely to prevent it from
shifting or being lost during driving.
Drive smoothly and avoid sudden
acceleration or braking. Do not corner
at high speeds.
OverviewControlsMaintenanceRepairsDataIndex
Page 158 of 170

Everything from A to ZCoin box 96
Cold start, refer to Starting
the engine 62
Compact disc operation,
refer to the Owner's Man-
ual for Radio/Onboard
Computer
Compartments 96
Compression ratio, refer to
Engine data 150
Computer 79
Condensation, refer to Air
conditioning mode 92
Configuring settings, refer to
Vehicle Memory, Key
Memory 59
Connecting a vacuum
cleaner, refer to Power
socket 98
Consumption, refer to Aver-
age fuel consumption 80
Control elements, refer to
Cockpit 14
Convenience operation
from outside 32
glass sunroof 30
windows 30
Coolant 124
indicator lamp 19, 76
level 124
temperature gauge 76Coolant water, refer to Cool-
ant 124
Cooling, refer to Tempera-
ture 92
Copyright 4
Cornering Brake Control
(CBC) 111
warning lamp 19
Cruise control 73
indicator lamp 20
Cup holders, see Beverage
holders 96, 97
Curb weight, refer to
Weights 152
Cylinders, refer to Engine
data 150
D
Dashboard, refer to
Cockpit 14
Data
capacities 153
dimensions 151
engine 150
weights 152
Daytime driving lamps 87
DBC Dynamic Brake
Control 111
warning lamp 19
Deep water, refer to Driving
through water 109Defrost position, refer to
Defrosting windows 92
Defrosting and demisting
windows
automatic climate
control 92
Defrosting windows 92
Defrosting windshield, refer
to Defrosting windows 92
Demisting windows
automatic climate
control 92
Differential
breaking in 108
Digital clock 78
Dimensions 151
Dipstick, engine oil 122
Displacement, refer to
Engine data 150
Display lighting, refer to
Instrument lighting 88
Displays, refer to Instrument
cluster 16
Disposal
oil 123
vehicle battery 141
Distance warning, refer to
Park Distance Control
(PDC) 81
Divided rear backrest 100
Door key 28
Door lock 32Doors
emergency operation 32
Draft-free ventilation 93
Drivelogic 69
Driving light, refer to Parking
lamps/Low beams 87
Driving notes 109
Driving through water, deep
water 109
Dry air, refer to Air condi-
tioning mode 92
DSC Dynamic Stability Con-
trol 82
indicator lamp 19, 82
Dynamic Brake Control
(DBC) 111
warning lamp 19
Dynamic Stability Control
(DSC) 19, 82
Dynamic Stability Control
DSC
M Track mode 82
E
Easy entry, refer to Entering
the rear 46
Electric glass sunroof 40
Electric power windows 39
Electrical accessories, fail-
ure 141