2006 BMW 650I COUPE light
[x] Cancel search: lightPage 97 of 236
Lamps
96
Lamps
Parking lamps/low beams
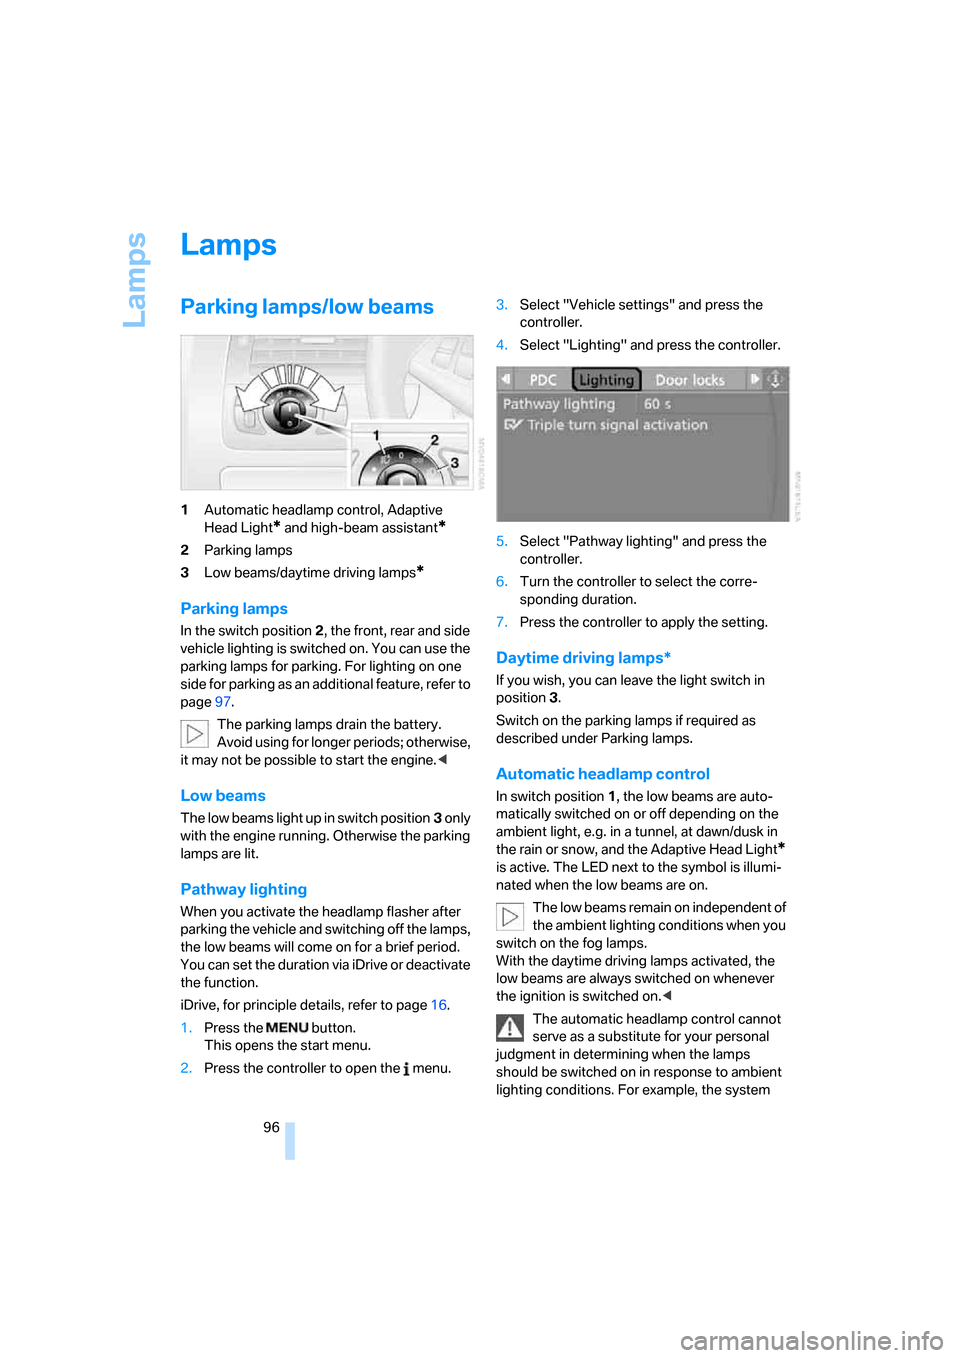
1Automatic headlamp control, Adaptive
Head Light
* and high-beam assistant*
2Parking lamps
3Low beams/daytime driving lamps
*
Parking lamps
In the switch position2, the front, rear and side
vehicle lighting is switched on. You can use the
parking lamps for parking. For lighting on one
side for parking as an additional feature, refer to
page97.
The parking lamps drain the battery.
Avoid using for longer periods; otherwise,
it may not be possible to start the engine.<
Low beams
The low beams light up in switch position3 only
with the engine running. Otherwise the parking
lamps are lit.
Pathway lighting
When you activate the headlamp flasher after
parking the vehicle and switching off the lamps,
the low beams will come on for a brief period.
You can set the duration via iDrive or deactivate
the function.
iDrive, for principle details, refer to page16.
1.Press the button.
This opens the start menu.
2.Press the controller to open the menu.3.Select "Vehicle settings" and press the
controller.
4.Select "Lighting" and press the controller.
5.Select "Pathway lighting" and press the
controller.
6.Turn the controller to select the corre-
sponding duration.
7.Press the controller to apply the setting.
Daytime driving lamps*
If you wish, you can leave the light switch in
position3.
Switch on the parking lamps if required as
described under Parking lamps.
Automatic headlamp control
In switch position1, the low beams are auto-
matically switched on or off depending on the
ambient light, e.g. in a tunnel, at dawn/dusk in
the rain or snow, and the Adaptive Head Light
*
is active. The LED next to the symbol is illumi-
nated when the low beams are on.
The low beams remain on independent of
the ambient lighting conditions when you
switch on the fog lamps.
With the daytime driving lamps activated, the
low beams are always switched on whenever
the ignition is switched on.<
The automatic headlamp control cannot
serve as a substitute for your personal
judgment in determining when the lamps
should be switched on in response to ambient
lighting conditions. For example, the system
Page 98 of 236
Controls
97Reference
At a glance
Driving tips
Communications
Navigation
Entertainment
Mobility
cannot detect fog. To avoid safety risks, you
should always switch on the lamps manually
under these conditions.<
Adaptive Head Light*
The concept
Adaptive Head Light is a variable headlamp
control system that enables better illumination
of the road surface. Depending on the steering
angle and other parameters, the light from the
headlamp follows the course of the road.
Activating Adaptive Head Light
In switch position1, the Adaptive Head Light is
active and the automatic headlamp control is
switched on.
To avoid blinding oncoming traffic, the Adaptive
Head Light is not active when driving in reverse
and points toward the passenger side when the
vehicle is stopped.
Malfunction
The LED next to the symbol for automatic head-
lamp control flashes. The Adaptive Head Light
is malfunctioning or has failed. Have the system
checked as soon as possible.
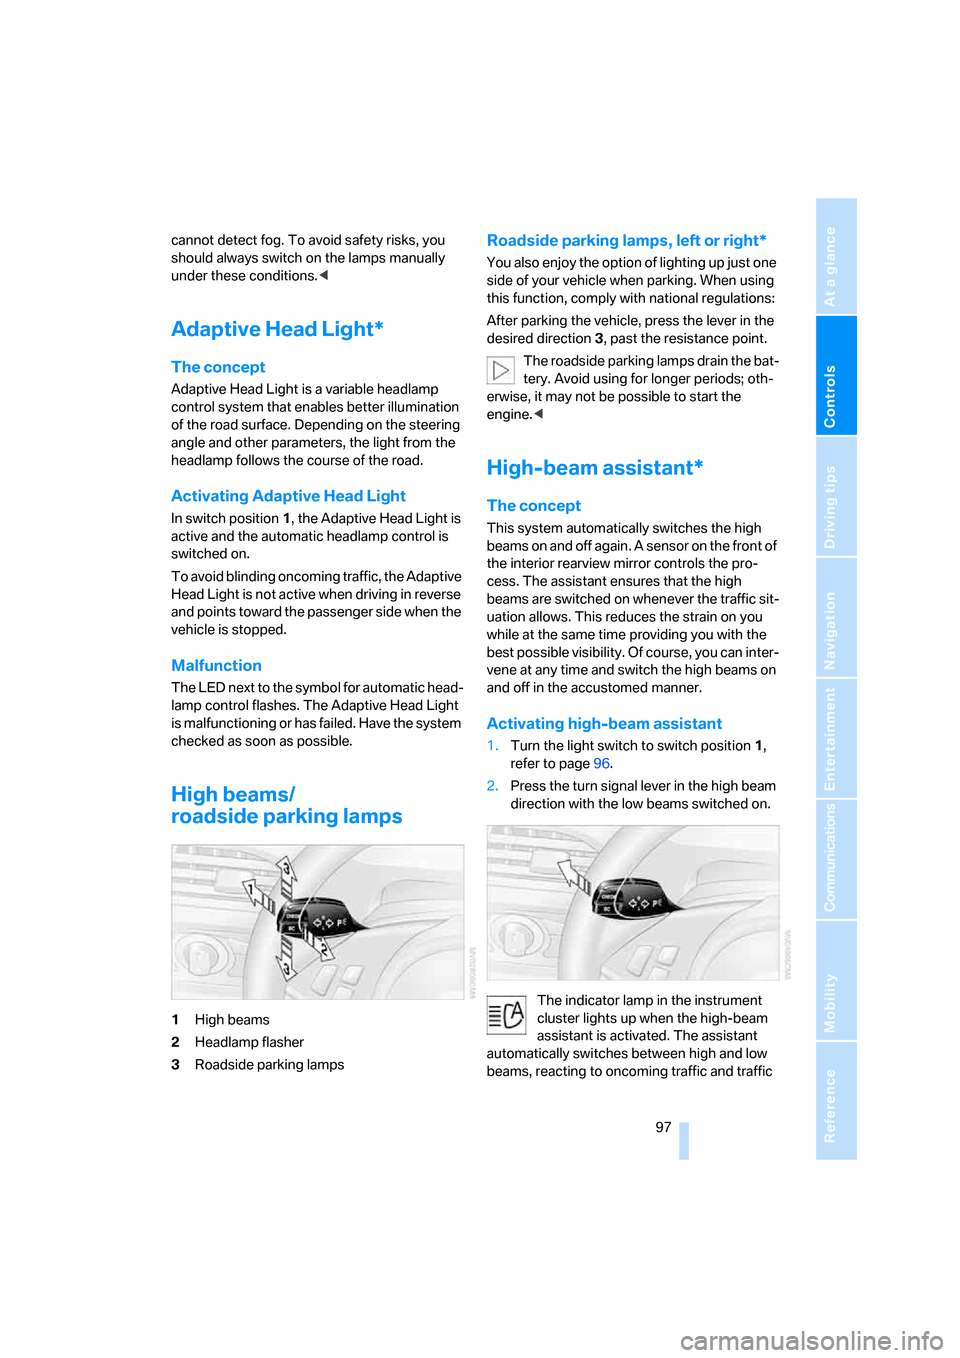
High beams/
roadside parking lamps
1High beams
2Headlamp flasher
3Roadside parking lamps
Roadside parking lamps, left or right*
You also enjoy the option of lighting up just one
side of your vehicle when parking. When using
this function, comply with national regulations:
After parking the vehicle, press the lever in the
desired direction3, past the resistance point.
The roadside parking lamps drain the bat-
tery. Avoid using for longer periods; oth-
erwise, it may not be possible to start the
engine.<
High-beam assistant*
The concept
This system automatically switches the high
beams on and off again. A sensor on the front of
the interior rearview mirror controls the pro-
cess. The assistant ensures that the high
beams are switched on whenever the traffic sit-
uation allows. This reduces the strain on you
while at the same time providing you with the
best possible visibility. Of course, you can inter-
vene at any time and switch the high beams on
and off in the accustomed manner.
Activating high-beam assistant
1.Turn the light switch to switch position1,
refer to page96.
2.Press the turn signal lever in the high beam
direction with the low beams switched on.
The indicator lamp in the instrument
cluster lights up when the high-beam
assistant is activated. The assistant
automatically switches between high and low
beams, reacting to oncoming traffic and traffic
Page 99 of 236
Lamps
98 ahead and to well-lit areas such as towns and
cities.
Manually switching between high and
low beams
You can intervene at any time if you wish or the
situation requires.
>If the high-beam assistant has switched on
the high beams, but you want to use the low
beams, simply switch to the low beams with
the turn signal lever. This also deactivates
the high-beam assistant.
To reactivate the system, briefly press the
turn signal lever in the high beam direction
again.
>If the high-beam assistant has switched on
the low beams, but you want to use the high
beams, switch to the high beams in the
accustomed manner. The system is deacti-
vated in the process and you must switch to
the low beams manually.
To reactivate the system, briefly press the
turn signal lever in the high beam direction
again.
>You use the headlamp flasher in the usual
way when the low beams are on.
System limits
The high-beam assistant cannot replace
personal decisions about the benefits of
using high beams. In situations that require
them, you should switch to the low beams man-
ually to avoid a safety risk.<
In the following sample situations, the system
either does not function or functions only in a
limited way and a personal reaction may be
required:
>Under extremely unfavorable weather con-
ditions, such as heavy fog or precipitation
>To make out poorly-lit road users such as
pedestrians, cyclists, people on horseback,
horse-drawn vehicles, train or ship traffic
close to the road and wild animals crossing
the road>In tight curves, on steep hilltops or in
depressions, with cross traffic or partially
concealed oncoming traffic on the freeway
>In poorly lit places and with highly reflective
signs
>In the low speed range
>When the windshield is fogged up, dirty or
covered with stickers, decals, etc. in the
area of the interior rearview mirror
>When the sensor is dirty. Clean the sensor
on the front side of the interior rearview mir-
ror with a cloth moistened with a small
amount of glass cleaner.
Front fog lamps
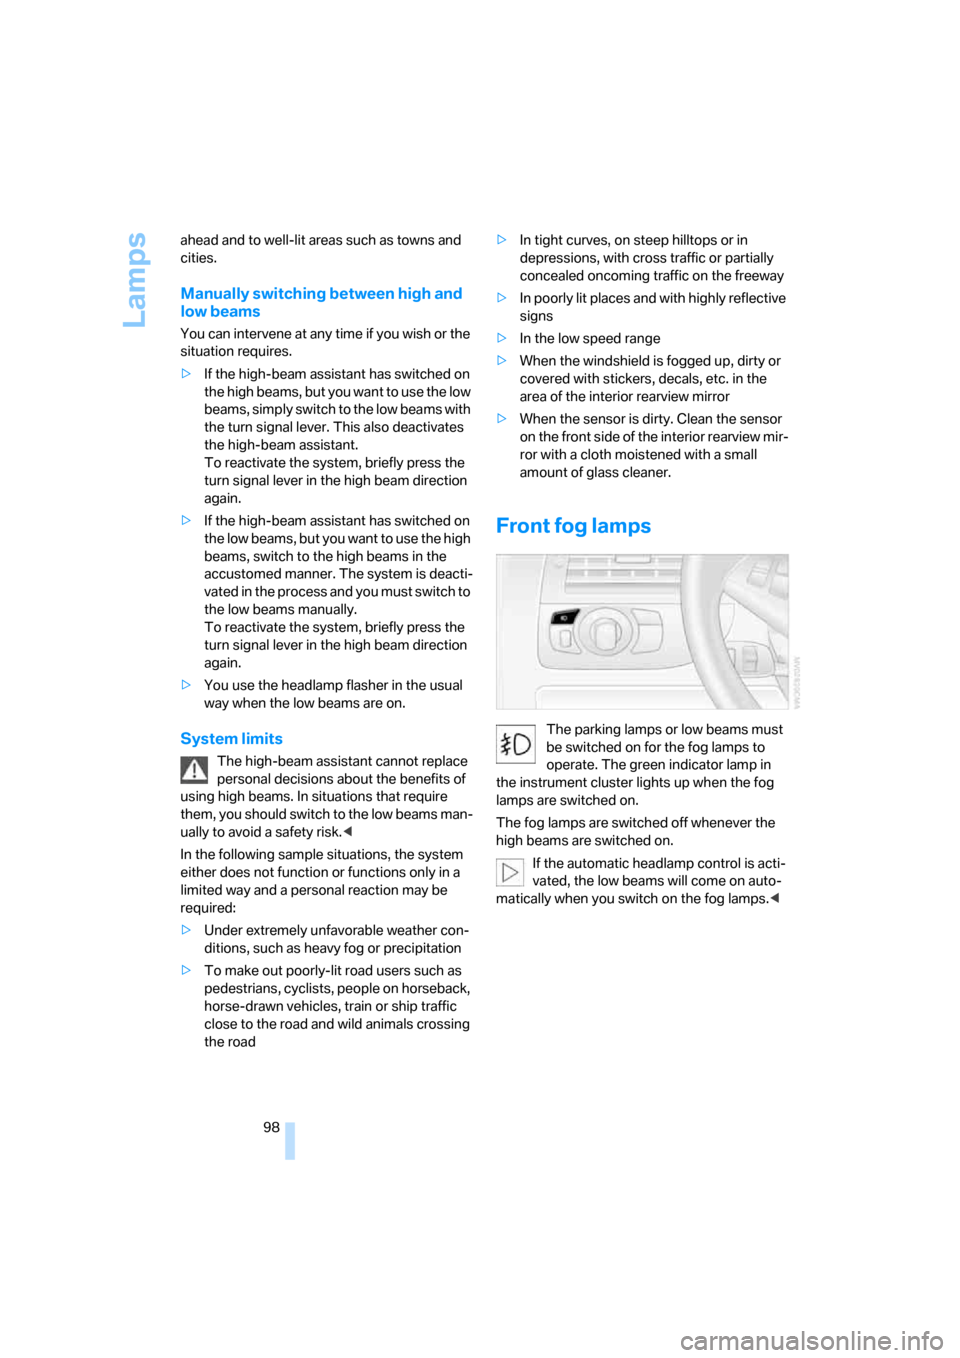
The parking lamps or low beams must
be switched on for the fog lamps to
operate. The green indicator lamp in
the instrument cluster lights up when the fog
lamps are switched on.
The fog lamps are switched off whenever the
high beams are switched on.
If the automatic headlamp control is acti-
vated, the low beams will come on auto-
matically when you switch on the fog lamps.<
Page 100 of 236
Controls
99Reference
At a glance
Driving tips
Communications
Navigation
Entertainment
Mobility
Instrument lighting
The lighting intensity can be adjusted with the
knurled wheel.
Interior lamps
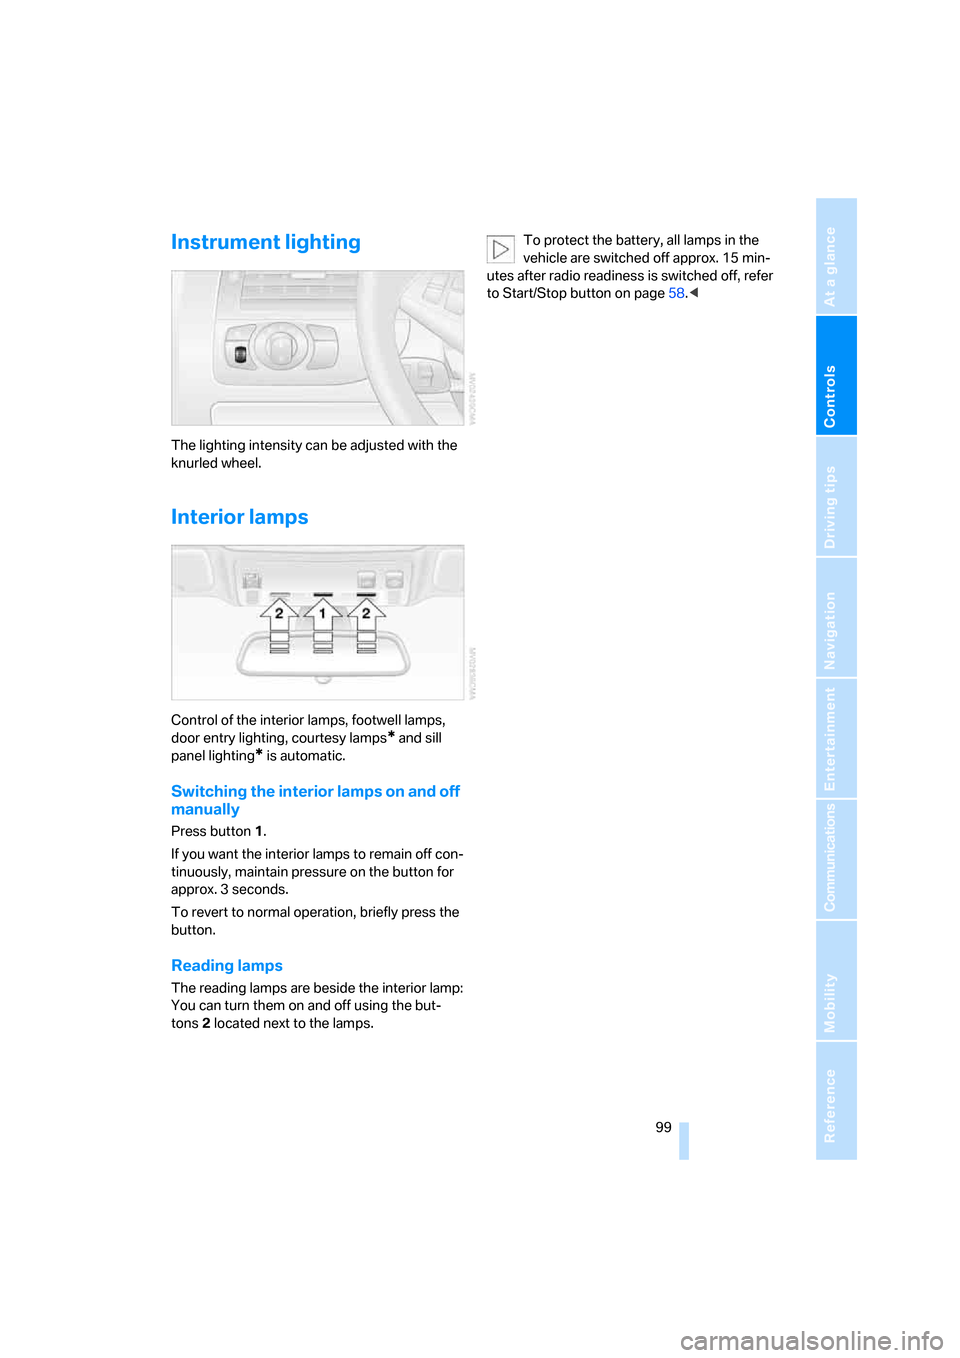
Control of the interior lamps, footwell lamps,
door entry lighting, courtesy lamps
* and sill
panel lighting
* is automatic.
Switching the interior lamps on and off
manually
Press button 1.
If you want the interior lamps to remain off con-
tinuously, maintain pressure on the button for
approx. 3 seconds.
To revert to normal operation, briefly press the
button.
Reading lamps
The reading lamps are beside the interior lamp:
You can turn them on and off using the but-
tons2 located next to the lamps.To protect the battery, all lamps in the
vehicle are switched off approx. 15 min-
utes after radio readiness is switched off, refer
to Start/Stop button on page58.<
Page 104 of 236
Controls
103Reference
At a glance
Driving tips
Communications
Navigation
Entertainment
Mobility
Maximum cooling
Maximally cooled air is obtained as
quickly as possible from an outside
temperature above 327/06 and
with the engine running.
The automatic climate control changes over to
the lowest temperature and switches into the
recirculated-air mode. The maximum air quan-
tity only flows out of the vents for the upper
body. It is therefore necessary for these vents to
be open for maximum cooling.
AUC Automatic recirculated-air
control/recirculated-air mode
You can respond to unpleasant
odors or pollutants in the immedi-
ate environment by temporarily
suspending the supply of outside air. The sys-
tem then recirculates the air currently within the
vehicle. In AUC mode, a sensor detects pollut-
ants in the outside air and controls the shut-off
automatically.
Press the button repeatedly to run through the
following control sequence:
>LED off: outside air flows into the vehicle
continuously.
>Right LED on, AUC mode: the system
detects pollutants in the outside air and
responds by blocking the supply of outside
air when required.
>Left LED on, recirculated-air mode: the
supply of outside air into the vehicle is shut
off continuously.
If condensation starts to form on the
inside window surfaces during operation
in the recirculated-air mode, you should switch
it off while also increasing the air volume as
required.
The recirculated-air mode should not be used
over a longer period of time, as the air quality
inside the vehicle deteriorates continuously.<
Residual heat
The heat stored in the engine is
used to heat the passenger com-
partment, e.g. while stopped at a
school to pick up a child.
The function can be switched on when the fol-
lowing conditions are met:
>up to 15 minutes after switching off the
engine
>engine at operating temperature
>sufficient battery voltage
>outside temperature below 777/256
The LED lights up when the function is
switched on.
With the ignition switch at radio readiness or
higher the interior temperature, the air volume
and the air distribution can be set.
Switching off automatic climate control
The air volume, the heater and the
cooling function are all switched
off.
You can restart the automatic cli-
mate control by pressing any of its buttons
except the REST button.
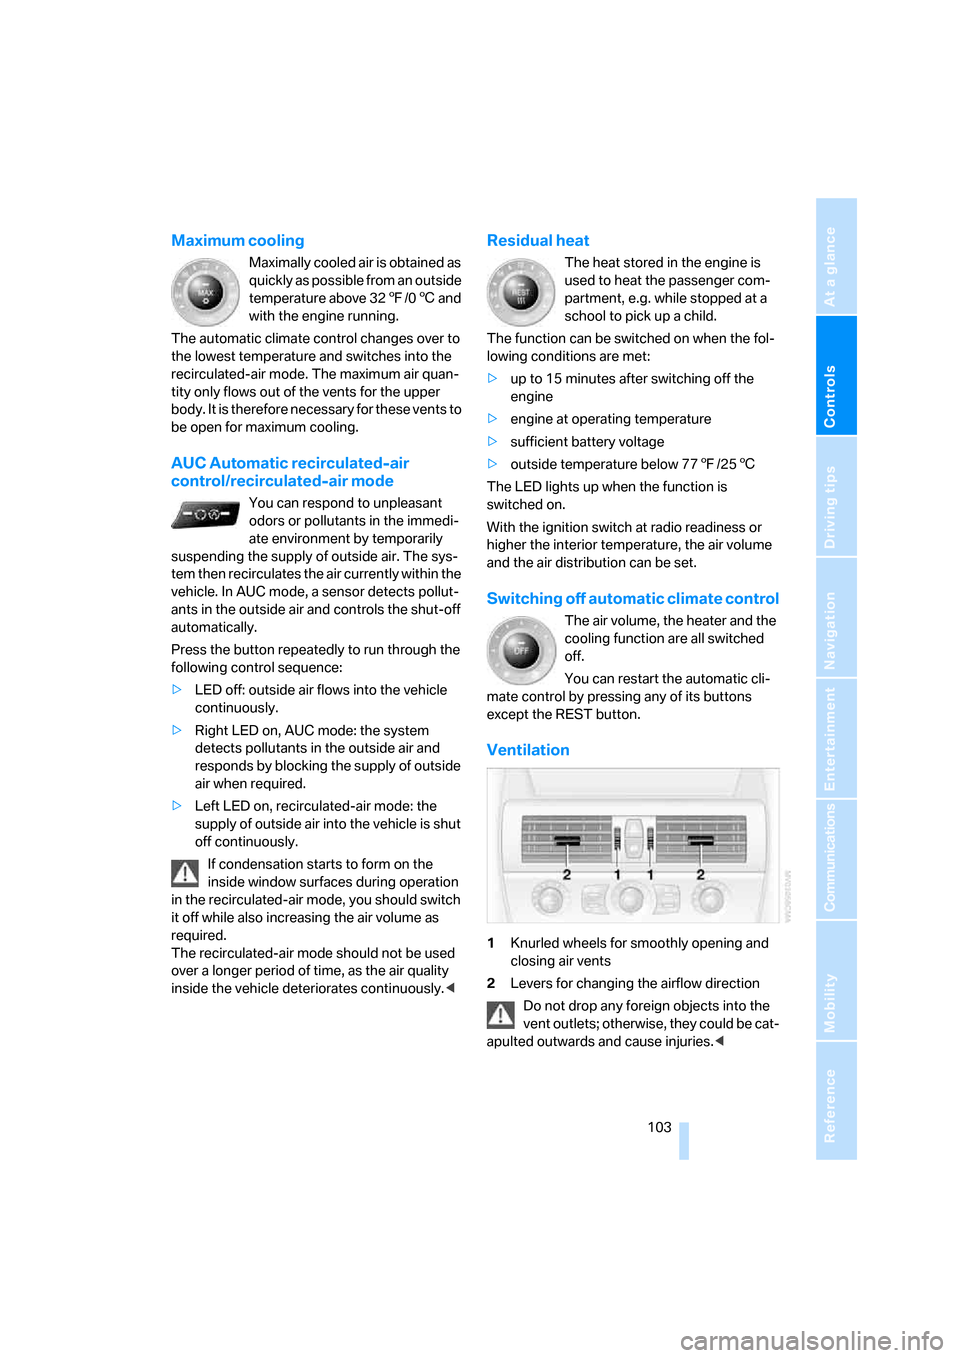
Ventilation
1Knurled wheels for smoothly opening and
closing air vents
2Levers for changing the airflow direction
Do not drop any foreign objects into the
vent outlets; otherwise, they could be cat-
apulted outwards and cause injuries.<
Page 106 of 236
Controls
105Reference
At a glance
Driving tips
Communications
Navigation
Entertainment
Mobility
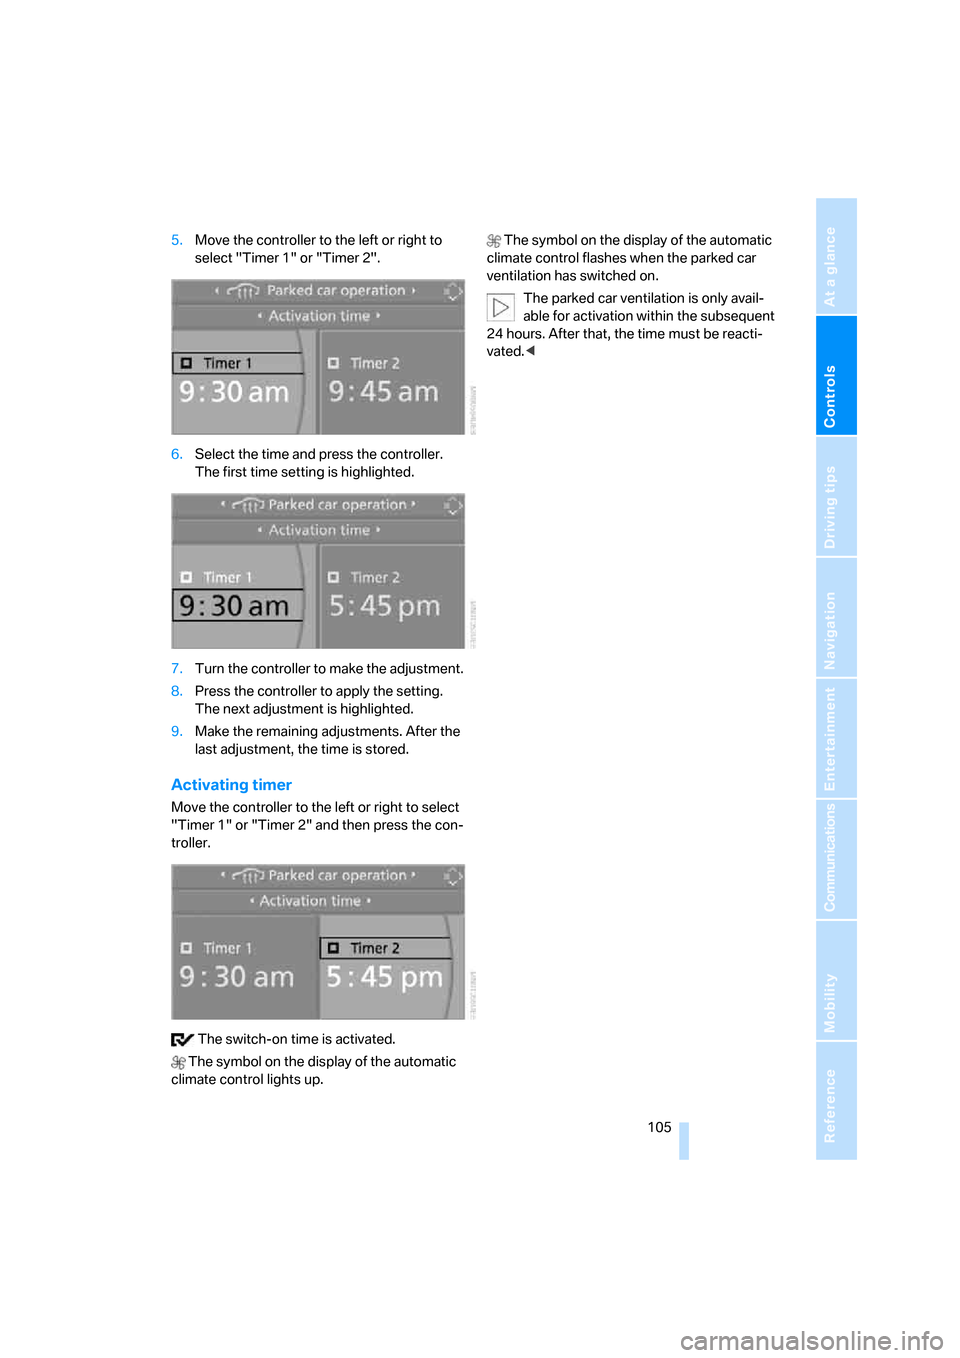
5.Move the controller to the left or right to
select "Timer 1" or "Timer 2".
6.Select the time and press the controller.
The first time setting is highlighted.
7.Turn the controller to make the adjustment.
8.Press the controller to apply the setting.
The next adjustment is highlighted.
9.Make the remaining adjustments. After the
last adjustment, the time is stored.
Activating timer
Move the controller to the left or right to select
"Timer 1" or "Timer 2" and then press the con-
troller.
The switch-on time is activated.
The symbol on the display of the automatic
climate control lights up. The symbol on the display of the automatic
climate control flashes when the parked car
ventilation has switched on.
The parked car ventilation is only avail-
able for activation within the subsequent
24 hours. After that, the time must be reacti-
vated.<
Page 108 of 236
Controls
107Reference
At a glance
Driving tips
Communications
Navigation
Entertainment
Mobility
The corresponding memory button 1 is now
programmed with the signal of the original
hand-held transmitter.
You can operate the system when the engine is
running or when the ignition is switched on.
If the device can not be used after
repeated programming, check whether
the original hand-held transmitter uses an alter-
nating-code system. To do so, either read the
instructions for the original hand-held transmit-
ter or hold down the programmed memory
button1 of the integrated universal remote
control. If the LED 2 on the integrated universal
remote control flashes rapidly for a short time
and then remains lit for approx. 2 seconds, this
indicates that the original hand-held transmitter
uses an alternating-code system. In the case of
an alternating-code system, program the mem-
ory buttons1 as described at Alternating-code
transmitters.<
Alternating-code hand-held
transmitters
To program the integrated universal remote
control, consult the operating instructions for
the equipment to be set. You will find informa-
tion there on the possibilities for synchroniza-
tion.
When programming hand-held transmitters
that employ an alternating code, please observe
the following supplementary instructions:
P r o g ra m m in g w i ll b e ea s i er w it h t h e a i d o f
a second person.<
1.Park your vehicle within the range of the
remote-controlled equipment.
2.Program the integrated universal remote
control as described above in Fixed-code
hand-held transmitters.
3.Locate the button on the receiver of the
device to be set, e.g. on the drive unit.
4.Press the button on the receiver of the
equipment to be set. After step 4, you have
approx. 30 seconds for step 5.
5.Press the programmed memory button1
of the integrated universal remote control
three times.The corresponding memory button 1 is now
programmed with the signal of the original
hand-held transmitter.
Deleting stored programs
Press both outer buttons 1 for approx. 20 sec-
onds, maintaining pressure until the LED2
starts to flash: all stored programs are deleted.
Programs cannot be deleted individually.
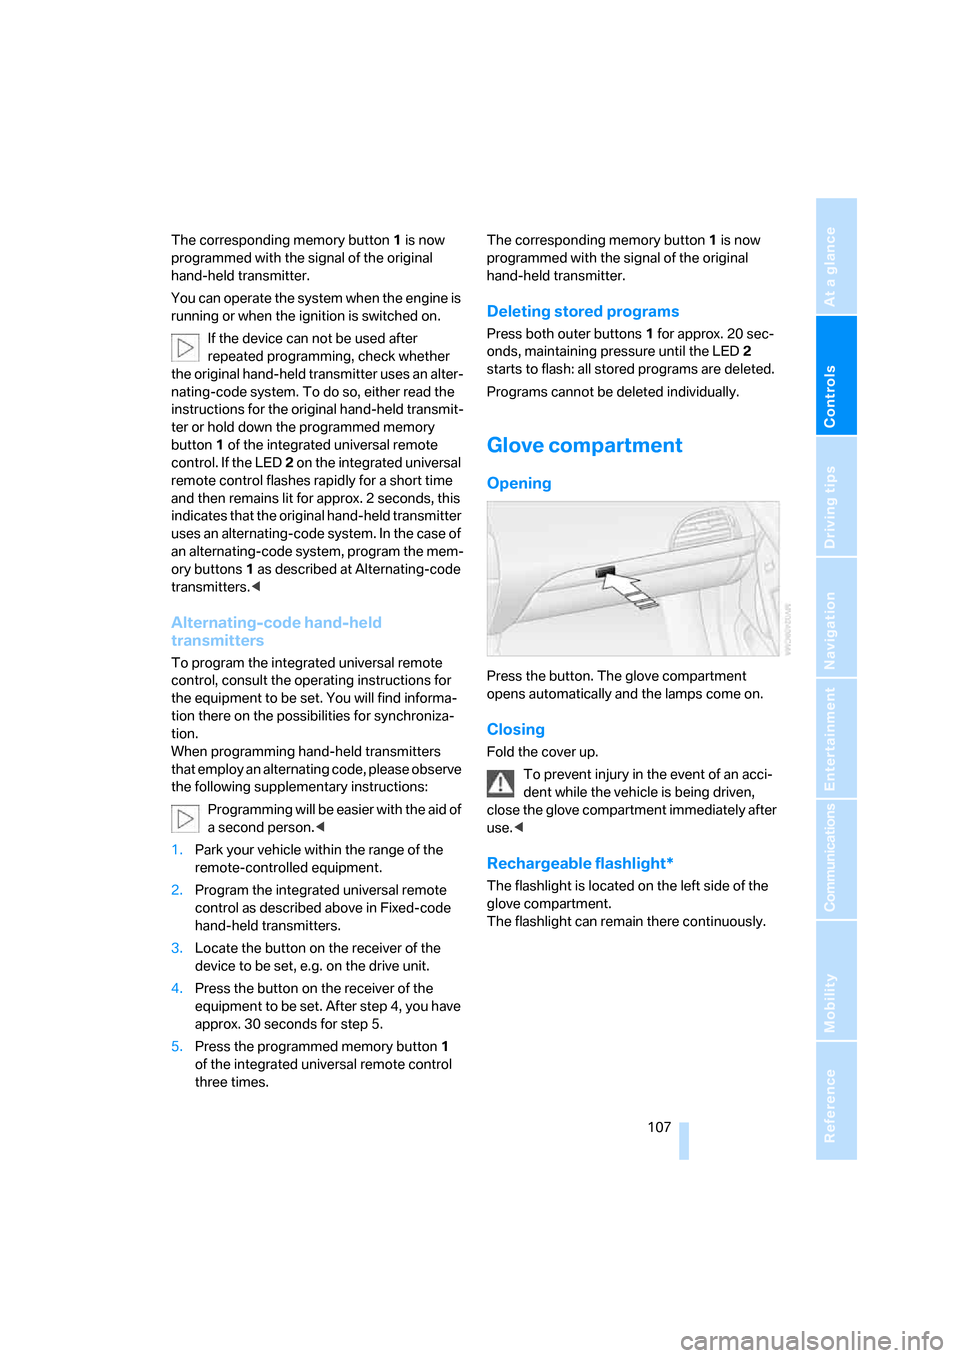
Glove compartment
Opening
Press the button. The glove compartment
opens automatically and the lamps come on.
Closing
Fold the cover up.
To prevent injury in the event of an acci-
dent while the vehicle is being driven,
close the glove compartment immediately after
use.<
Rechargeable flashlight*
The flashlight is located on the left side of the
glove compartment.
The flashlight can remain there continuously.
Page 109 of 236
Practical interior accessories
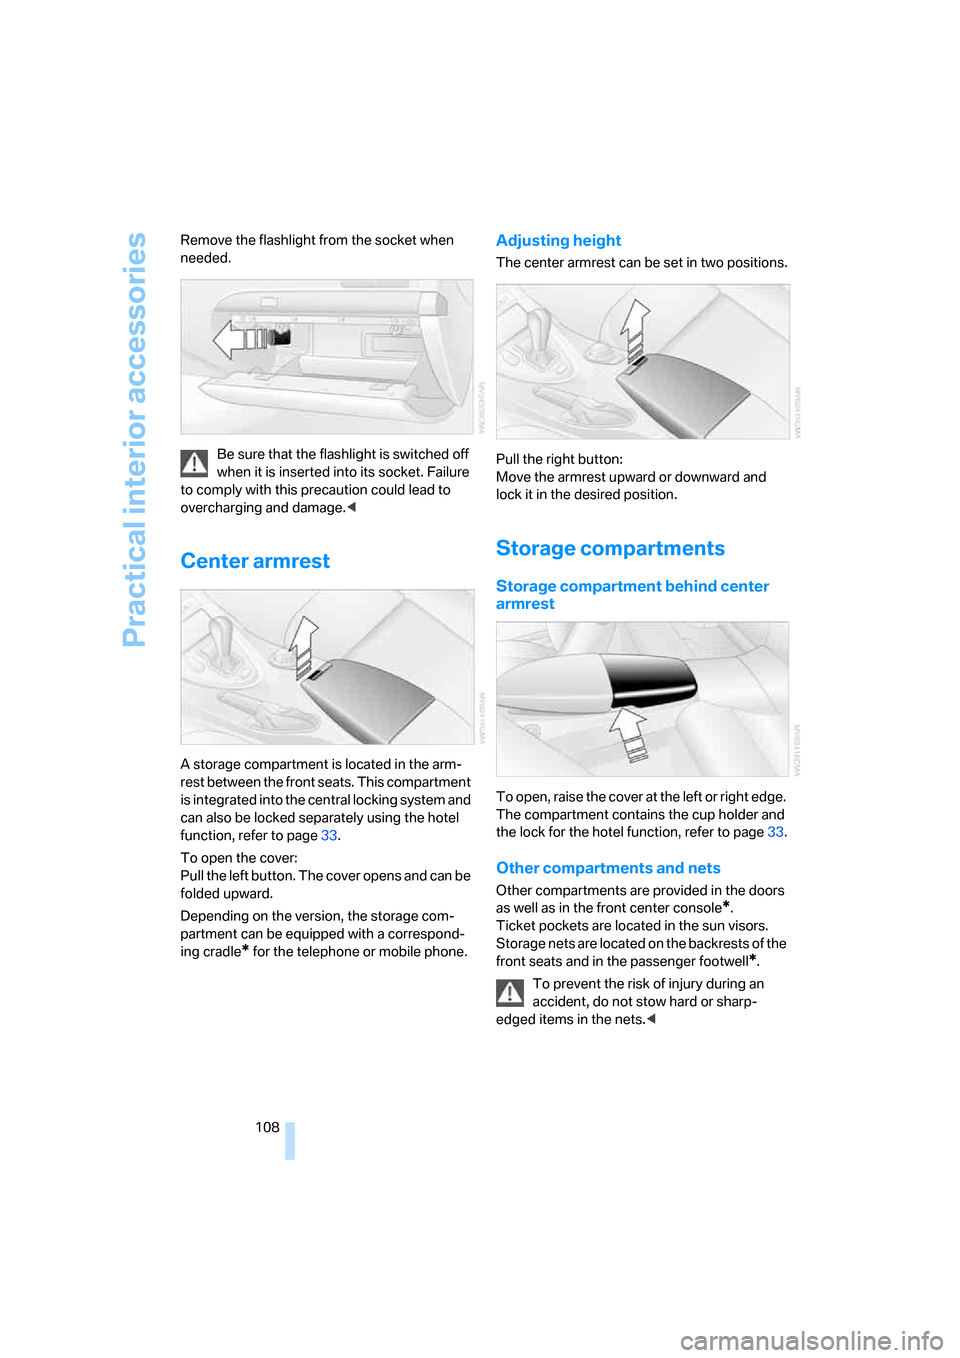
108 Remove the flashlight from the socket when
needed.
Be sure that the flashlight is switched off
when it is inserted into its socket. Failure
to comply with this precaution could lead to
overcharging and damage.<
Center armrest
A storage compartment is located in the arm-
rest between the front seats. This compartment
is integrated into the central locking system and
can also be locked separately using the hotel
function, refer to page33.
To open the cover:
Pull the left button. The cover opens and can be
folded upward.
Depending on the version, the storage com-
partment can be equipped with a correspond-
ing cradle
* for the telephone or mobile phone.
Adjusting height
The center armrest can be set in two positions.
Pull the right button:
Move the armrest upward or downward and
lock it in the desired position.
Storage compartments
Storage compartment behind center
armrest
To open, raise the cover at the left or right edge.
The compartment contains the cup holder
and
the lock for the hotel function, refer to page33.
Other compartments and nets
Other compartments are provided in the doors
as well as in the front center console
*.
Ticket pockets are located in the sun visors.
Storage nets are located on the backrests of the
front seats and in the passenger footwell
*.
To prevent the risk of injury during an
accident, do not stow hard or sharp-
edged items in the nets.<