2006 BMW 650I COUPE&CONVERTIBLE reset
[x] Cancel search: resetPage 13 of 242

Cockpit
12
Instrument cluster
1Indicator lamps for turn signals
2Speedometer
3Indicator and warning lamps13
4Displays for active cruise control
*70
5Tachometer74
6Engine oil thermometer75
7Display for
>Time/date74
>Outside temperature74
>Indicator and warning lamps79
>Speed for cruise control67
>Desired speed for active cruise
control
*708Displays for
>Odometer and trip odometer74
>Computer75
>Date and remaining distance to be
driven for service requirements77
>Automatic transmission
with Steptronic
*62
>SMG Sequential Manual
Transmission
*61
>Dynamic Driving Control64
>High-beam assistant
*102
> Check Control message present79
9Fuel gauge75
10Resetting trip odometer74
Page 75 of 242

Everything under control
74
Everything under control
Odometer, outside
temperature display, clock
1Time, outside temperature, and date
2Odometer and trip odometer
3Press button:
>with ignition switched on, trip odometer
is reset
>briefly display the time, outside temper-
ature and odometer with the ignition
switched off
With the ignition lock at radio readiness or
higher the outside temperature and the time are
displayed.
To request the date:
Press the CHECK button on the turn signal
lever, refer to page79.
To set time and date, refer to page82.
You can set the unit of measure 7 or 6 on the
Control Display, refer to Units of measure on
page84.
Outside temperature warning
If the display drops to +377/+36, a signal
sounds and a warning lamp lights up. A mes-
sage appears on the Control Display. There is
an increased danger of ice.
Ice can form even at temperatures above
+377/+36. Drive carefully, especially
on bridges and shaded roadways; otherwise,
your risk of accident increases.<
Tachometer
The white-striped advance warning field,
arrow1, changes depending on the engine
temperature. The segments disappear in
sequence as the engine warms to its normal
operating temperature.
Avoid allowing the engine speed to rise as far as
the advance warning field whenever possible.
It is absolutely crucial to avoid engine speeds in
the red warning field, arrow2.
In this range, the fuel supply is interrupted to
protect the engine.
Coolant temperature
Should the coolant and therefore the engine
become too hot, a warning lamp lights up. In
addition, a message appears on the Control
Display.
Checking coolant level, refer to page197.
Page 76 of 242
Controls
75Reference
At a glance
Driving tips
Communications
Navigation
Entertainment
Mobility
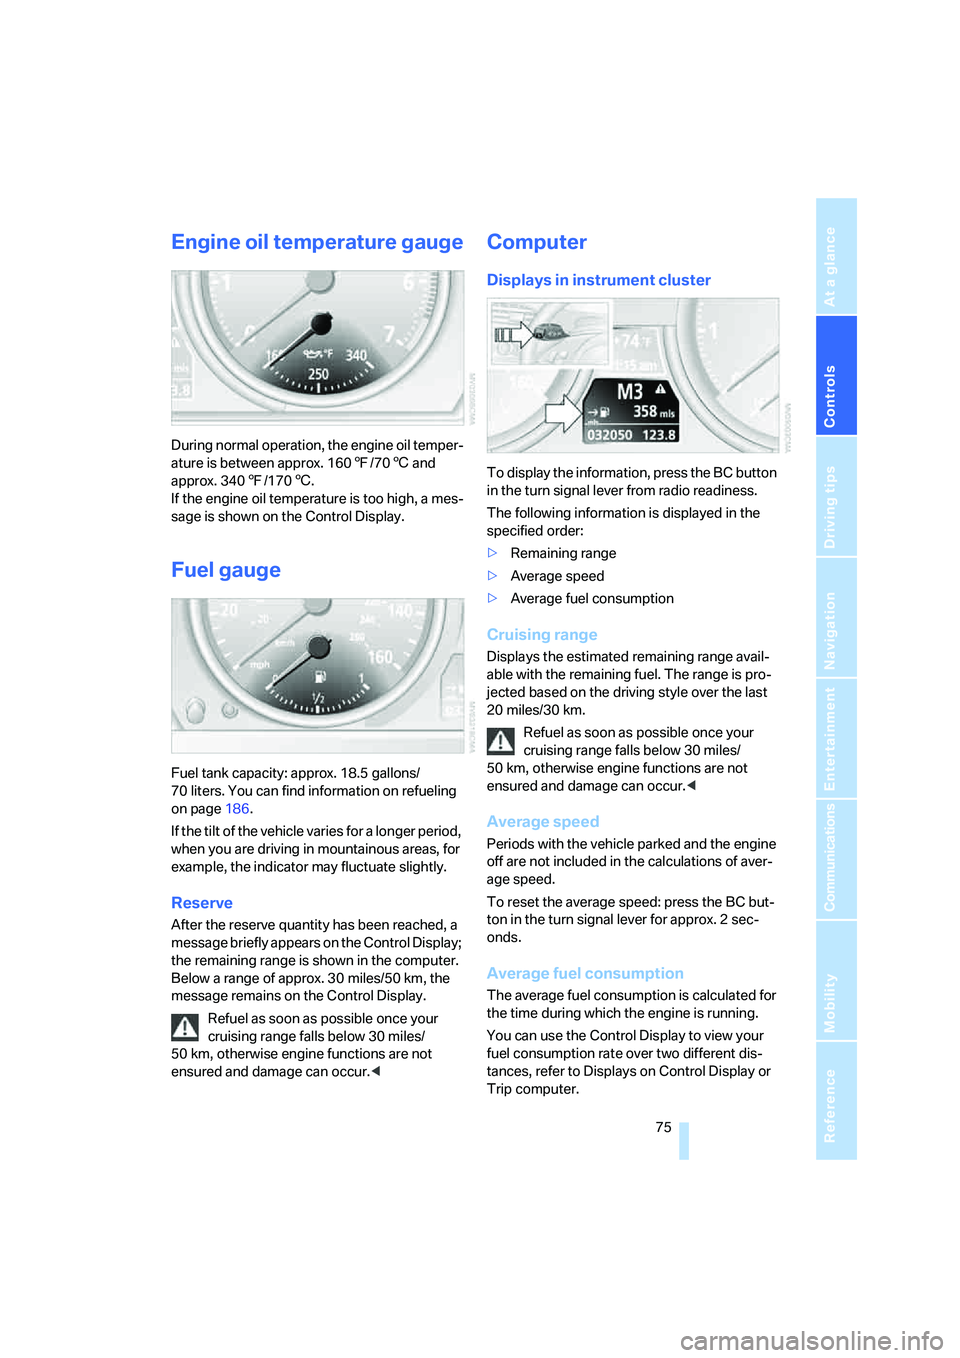
Engine oil temperature gauge
During normal operation, the engine oil temper-
ature is between approx. 1607/706 and
approx. 3407/1706.
If the engine oil temperature is too high, a mes-
sage is shown on the Control Display.
Fuel gauge
Fuel tank capacity: approx. 18.5 gallons/
70 liters. You can find information on refueling
on page186.
If the tilt of the vehicle varies for a longer period,
when you are driving in mountainous areas, for
example, the indicator may fluctuate slightly.
Reserve
After the reserve quantity has been reached, a
message briefly appears on the Control Display;
the remaining range is shown in the computer.
Below a range of approx. 30 miles/50 km, the
message remains on the Control Display.
Refuel as soon as possible once your
cruising range falls below 30 miles/
50 km, otherwise engine functions are not
ensured and damage can occur.<
Computer
Displays in instrument cluster
To display the information, press the BC button
in the turn signal lever from radio readiness.
The following information is displayed in the
specified order:
>Remaining range
>Average speed
>Average fuel consumption
Cruising range
Displays the estimated remaining range avail-
able with the remaining fuel. The range is pro-
jected based on the driving style over the last
20 miles/30 km.
Refuel as soon as possible once your
cruising range falls below 30 miles/
50 km, otherwise engine functions are not
ensured and damage can occur.<
Average speed
Periods with the vehicle parked and the engine
off are not included in the calculations of aver-
age speed.
To reset the average speed: press the BC but-
ton in the turn signal lever for approx. 2 sec-
onds.
Average fuel consumption
The average fuel consumption is calculated for
the time during which the engine is running.
You can use the Control Display to view your
fuel consumption rate over two different dis-
tances, refer to Displays on Control Display or
Trip computer.
Page 77 of 242
Everything under control
76 To reset the average fuel consumption: press
the BC button in the turn signal lever for approx.
2seconds.
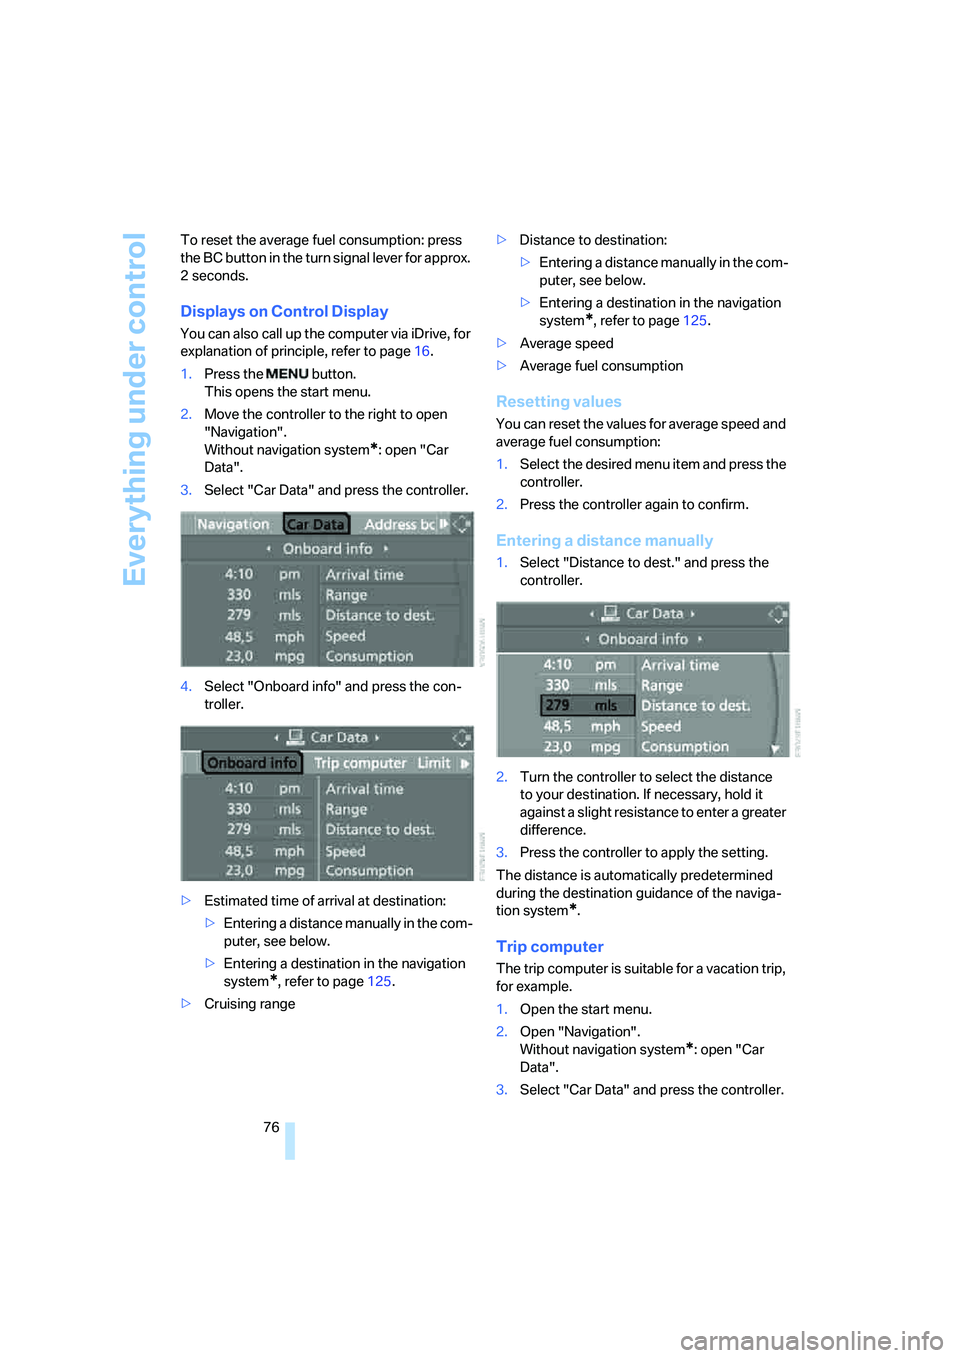
Displays on Control Display
You can also call up the computer via iDrive, for
explanation of principle, refer to page16.
1.Press the button.
This opens the start menu.
2.Move the controller to the right to open
"Navigation".
Without navigation system
*: open "Car
Data".
3.Select "Car Data" and press the controller.
4.Select "Onboard info" and press the con-
troller.
>Estimated time of arrival at destination:
>Entering a distance manually in the com-
puter, see below.
>Entering a destination in the navigation
system
*, refer to page125.
>Cruising range>Distance to destination:
>Entering a distance manually in the com-
puter, see below.
>Entering a destination in the navigation
system
*, refer to page125.
>Average speed
>Average fuel consumption
Resetting values
You can reset the values for average speed and
average fuel consumption:
1.Select the desired menu item and press the
controller.
2.Press the controller again to confirm.
Entering a distance manually
1.Select "Distance to dest." and press the
controller.
2.Turn the controller to select the distance
to your destination. If necessary, hold it
against a slight resistance to enter a greater
difference.
3.Press the controller to apply the setting.
The distance is automatically predetermined
during the destination guidance of the naviga-
tion system
*.
Trip computer
The trip computer is suitable for a vacation trip,
for example.
1.Open the start menu.
2.Open "Navigation".
Without navigation system
*: open "Car
Data".
3.Select "Car Data" and press the controller.
Page 78 of 242
Controls
77Reference
At a glance
Driving tips
Communications
Navigation
Entertainment
Mobility
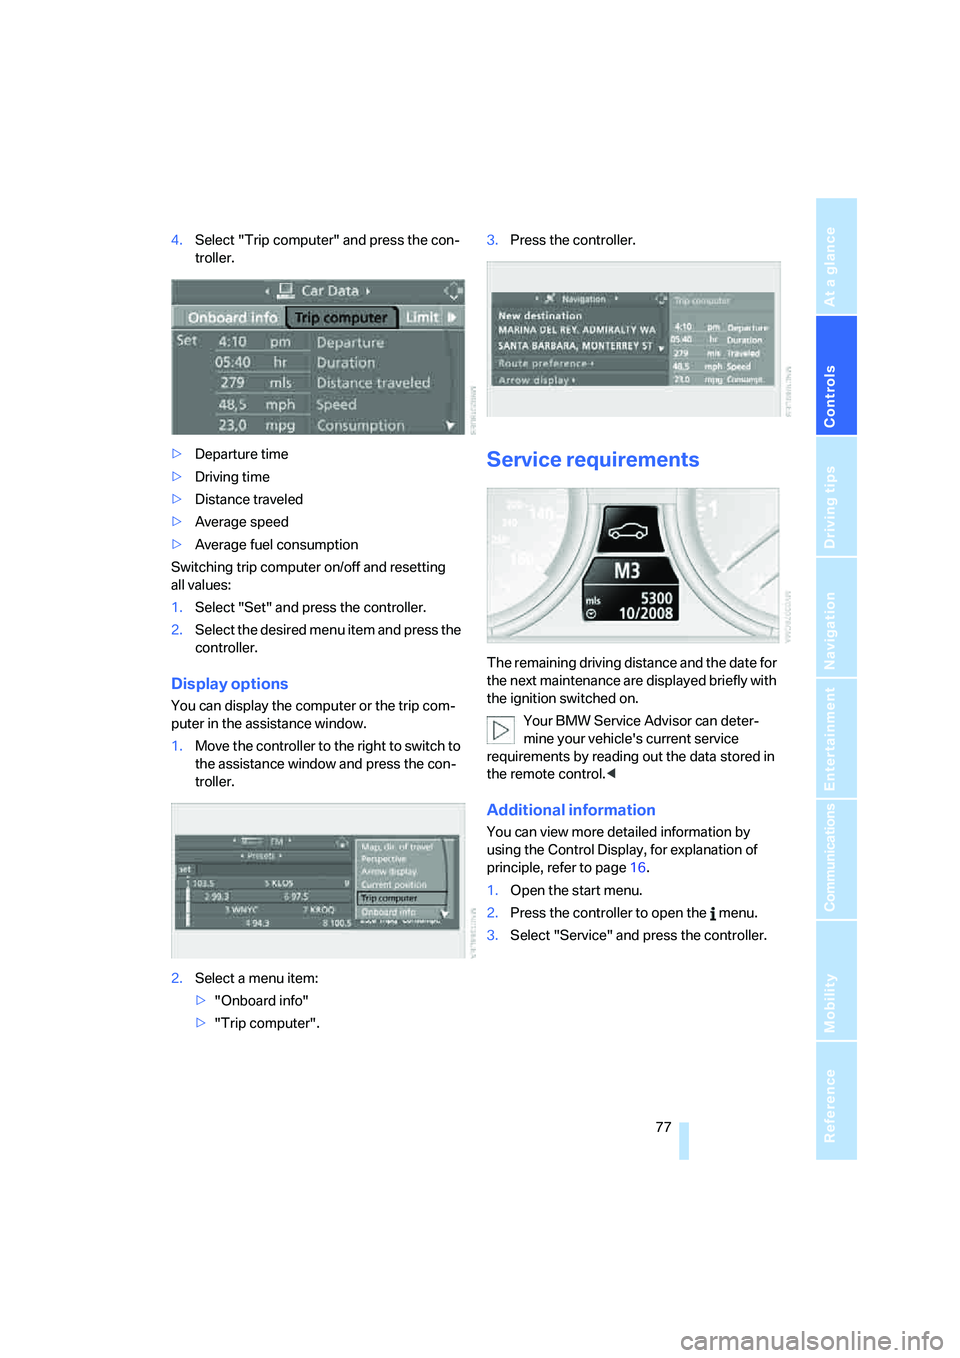
4.Select "Trip computer" and press the con-
troller.
>Departure time
>Driving time
>Distance traveled
>Average speed
>Average fuel consumption
Switching trip computer on/off and resetting
all values:
1.Select "Set" and press the controller.
2.Select the desired menu item and press the
controller.
Display options
You can display the computer or the trip com-
puter in the assistance window.
1.Move the controller to the right to switch to
the assistance window and press the con-
troller.
2.Select a menu item:
>"Onboard info"
>"Trip computer".3.Press the controller.
Service requirements
The remaining driving distance and the date for
the next maintenance are displayed briefly with
the ignition switched on.
Your BMW Service Advisor can deter-
mine your vehicle's current service
requirements by reading out the data stored in
the remote control.<
Additional information
You can view more detailed information by
using the Control Display, for explanation of
principle, refer to page16.
1.Open the start menu.
2.Press the controller to open the menu.
3.Select "Service" and press the controller.
Page 82 of 242
Controls
81Reference
At a glance
Driving tips
Communications
Navigation
Entertainment
Mobility
Displays after completion of trip
Malfunction reports generated during the trip
are shown consecutively when you switch off
the ignition.
Before the display disappears, you can display
the messages once again. Press the CHECK
button for approx. 2 seconds. If several mes-
sages are present, you can press the CHECK
button repeatedly.
The display:
>turns off automatically after a brief period
>can be turned off at any time by pressing
the CHECK button again for approx. 2 sec-
onds
Speed limit
You can enter a speed and a Check Control
message indicates when you have reached
this speed. This enables you, for example, to
receive warnings if you exceed a speed limit in
an urban area.
You are only warned of reaching this speed a
second time if your vehicle speed falls below it
again by at least 3 mph/5 km/h.
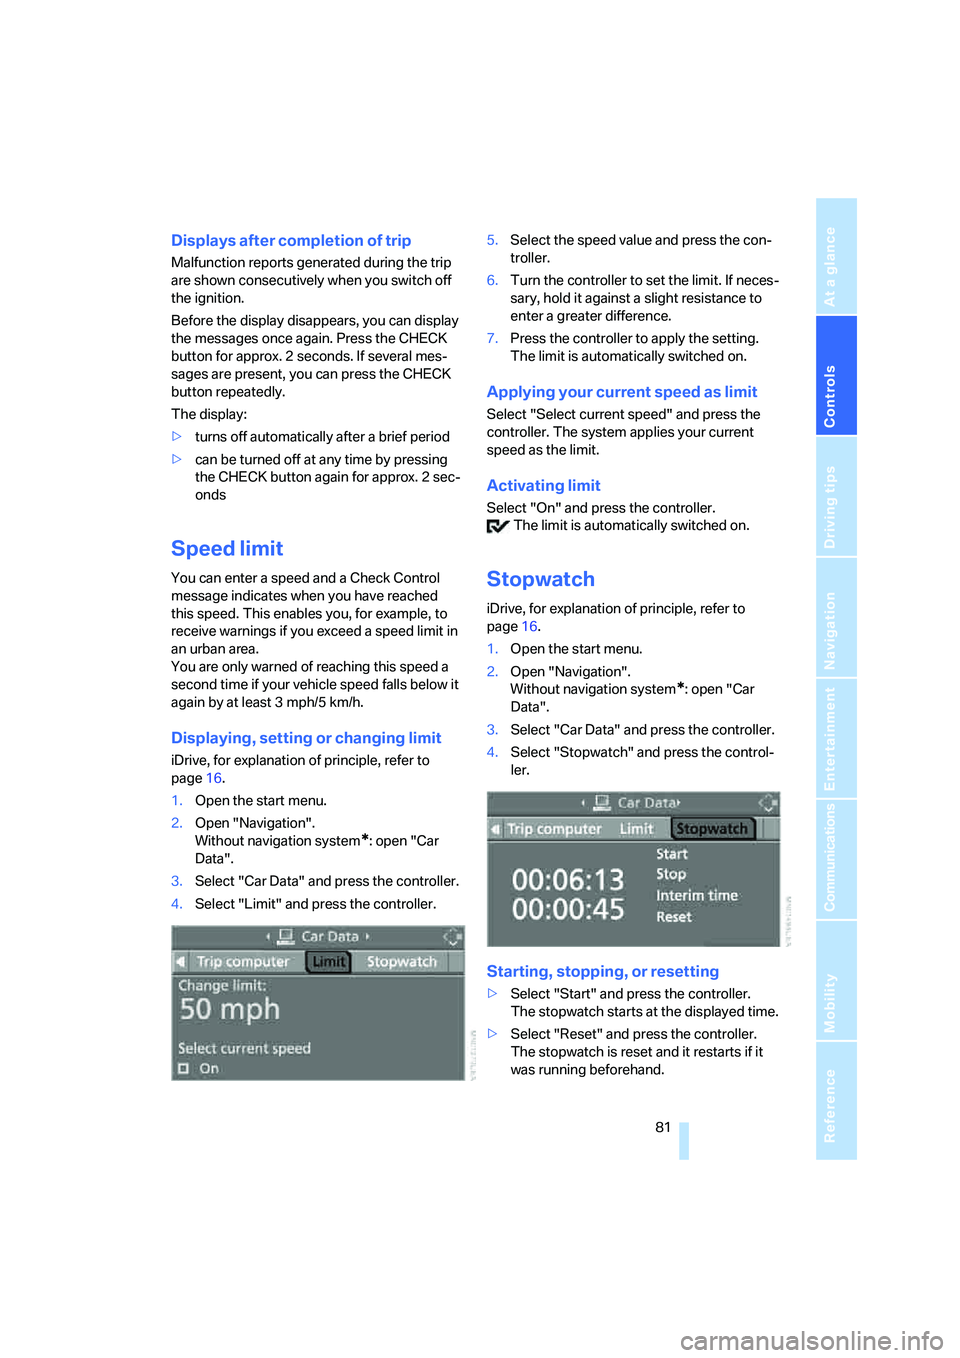
Displaying, setting or changing limit
iDrive, for explanation of principle, refer to
page16.
1.Open the start menu.
2.Open "Navigation".
Without navigation system
*: open "Car
Data".
3.Select "Car Data" and press the controller.
4.Select "Limit" and press the controller.5.Select the speed value and press the con-
troller.
6.Turn the controller to set the limit. If neces-
sary, hold it against a slight resistance to
enter a greater difference.
7.Press the controller to apply the setting.
The limit is automatically switched on.
Applying your current speed as limit
Select "Select current speed" and press the
controller. The system applies your current
speed as the limit.
Activating limit
Select "On" and press the controller.
The limit is automatically switched on.
Stopwatch
iDrive, for explanation of principle, refer to
page16.
1.Open the start menu.
2.Open "Navigation".
Without navigation system
*: open "Car
Data".
3.Select "Car Data" and press the controller.
4.Select "Stopwatch" and press the control-
ler.
Starting, stopping, or resetting
>Select "Start" and press the controller.
The stopwatch starts at the displayed time.
>Select "Reset" and press the controller.
The stopwatch is reset and it restarts if it
was running beforehand.
Page 91 of 242
Technology for comfort, convenience and safety
90
Functional requirement
In order to assure the reliable reporting of a flat
tire, the system must have been reset with the
correct tire inflation pressure.
Always use wheels with TPM electronics, as
otherwise fault-free operation of the system is
not ensured.
Reset the system again after each correc-
tion of the tire inflation pressure and after
every tire or wheel change.<
System limits
TPM cannot announce sudden serious
tire damage caused by external influ-
ences.<
The system does not function properly if it has
n o t b e e n r es e t , e. g . a f l a t t i re i s re p o rt e d d e s p it e
correct tire inflation pressures.
The system is inactive and cannot display a flat
tire if a wheel has been mounted without TPM
electronics, or if TPM is temporarily interfered
with by other systems or devices which use the
same radio frequency.
Status display on Control Display
The tire and system status is indicated by the
color of the tires.
TPM takes the fact that the tire pressure
changes during driving into account. A correc-
tion is only required if requested by TPM with
the color.
Green
The tire pressure matches the learned set state.
"TPM active" is displayed on the Control Dis-
play.
A wheel is yellow
Flat tire or a major drop in inflation pressure in
the indicated tire. A message appears on the
Control Display.
All wheels are yellow
Flat tire or a major drop in inflation pressure in
several tires. A message appears on the Control
Display.
Gray
The system cannot detect a flat tire.
Reasons for this can be:
>TPM is being reset
>Temporary interference due to systems or
devices which use the same radio fre-
quency
>Malfunction
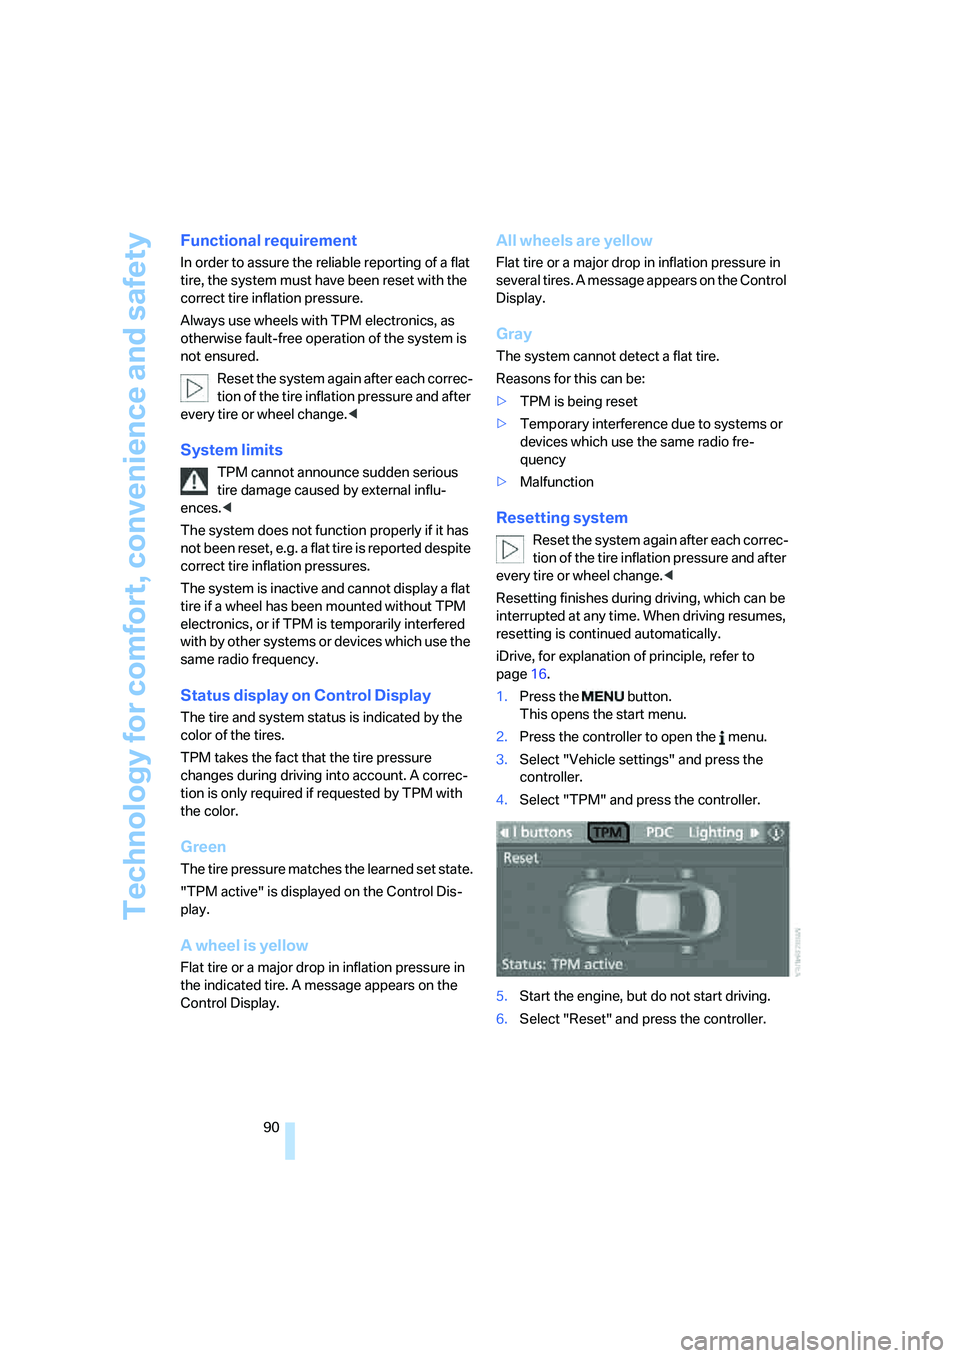
Resetting system
Reset the system again after each correc-
tion of the tire inflation pressure and after
every tire or wheel change.<
Resetting finishes during driving, which can be
interrupted at any time. When driving resumes,
resetting is continued automatically.
iDrive, for explanation of principle, refer to
page16.
1.Press the button.
This opens the start menu.
2.Press the controller to open the menu.
3.Select "Vehicle settings" and press the
controller.
4.Select "TPM" and press the controller.
5.Start the engine, but do not start driving.
6.Select "Reset" and press the controller.
Page 92 of 242
Controls
91Reference
At a glance
Driving tips
Communications
Navigation
Entertainment
Mobility
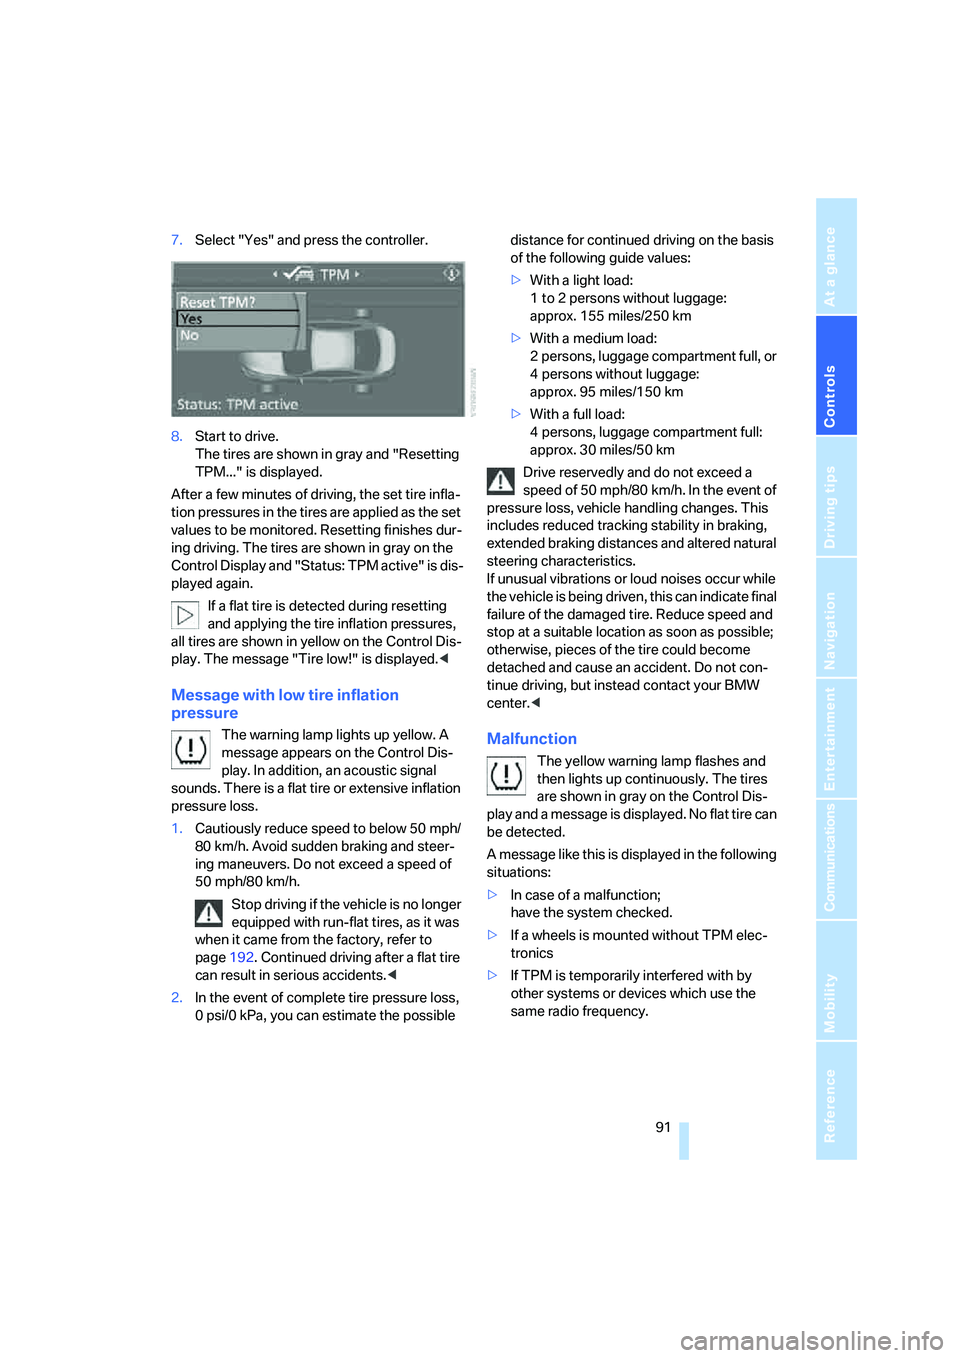
7.Select "Yes" and press the controller.
8.Start to drive.
The tires are shown in gray and "Resetting
TPM..." is displayed.
After a few minutes of driving, the set tire infla-
tion pressures in the tires are applied as the set
values to be monitored. Resetting finishes dur-
ing driving. The tires are shown in gray on the
Control Display and "Status: TPM active" is dis-
played again.
If a flat tire is detected during resetting
and applying the tire inflation pressures,
all tires are shown in yellow on the Control Dis-
play. The message "Tire low!" is displayed.<
Message with low tire inflation
pressure
The warning lamp lights up yellow. A
message appears on the Control Dis-
play. In addition, an acoustic signal
sounds. There is a flat tire or extensive inflation
pressure loss.
1.Cautiously reduce speed to below 50 mph/
80 km/h. Avoid sudden braking and steer-
ing maneuvers. Do not exceed a speed of
50 mph/80 km/h.
Stop driving if the vehicle is no longer
equipped with run-flat tires, as it was
when it came from the factory, refer to
page192. Continued driving after a flat tire
can result in serious accidents.<
2.In the event of complete tire pressure loss,
0 psi/0 kPa, you can estimate the possible distance for continued driving on the basis
of the following guide values:
>With a light load:
1 to 2 persons without luggage:
approx. 155 miles/250 km
>With a medium load:
2 persons, luggage compartment full, or
4 persons without luggage:
approx. 95 miles/150 km
>With a full load:
4 persons, luggage compartment full:
approx. 30 miles/50 km
Drive reservedly and do not exceed a
speed of 50 mph/80 km/h. In the event of
pressure loss, vehicle handling changes. This
includes reduced tracking stability in braking,
extended braking distances and altered natural
steering characteristics.
If unusual vibrations or loud noises occur while
the vehicle is being driven, this can indicate final
failure of the damaged tire. Reduce speed and
stop at a suitable location as soon as possible;
otherwise, pieces of the tire could become
detached and cause an accident. Do not con-
tinue driving, but instead contact your BMW
center.
then lights up continuously. The tires
are shown in gray on the Control Dis-
play and a message is displayed. No flat tire can
be detected.
A message like this is displayed in the following
situations:
>In case of a malfunction;
have the system checked.
>If a wheels is mounted without TPM elec-
tronics
>If TPM is temporarily interfered with by
other systems or devices which use the
same radio frequency.