2006 BMW 650I COUPE&CONVERTIBLE mirror controls
[x] Cancel search: mirror controlsPage 11 of 242
Cockpit
10
Cockpit
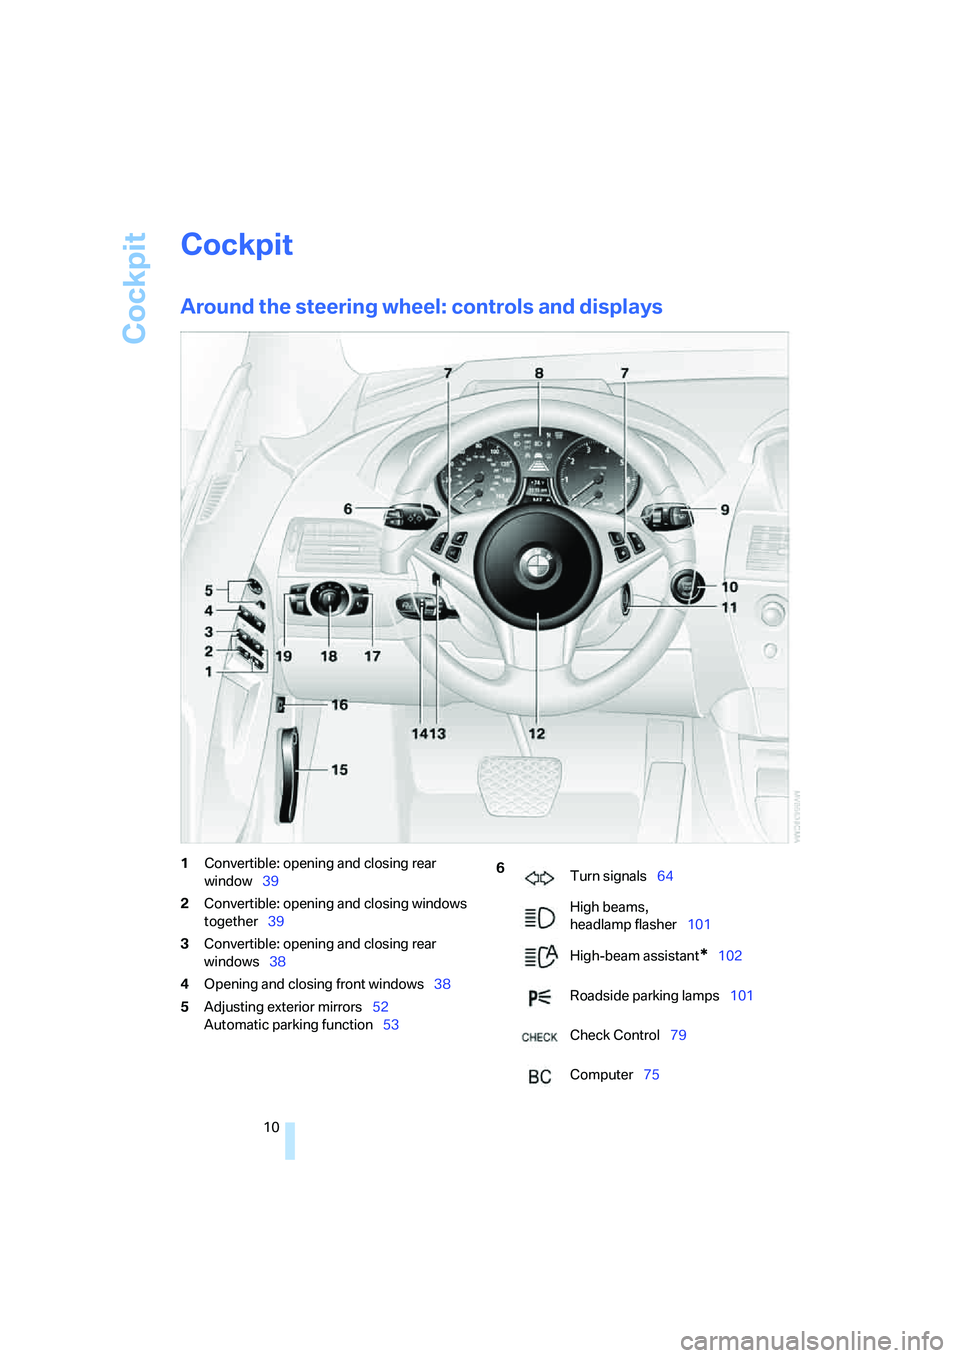
Around the steering wheel: controls and displays
1Convertible: opening and closing rear
window39
2Convertible: opening and closing windows
together39
3Convertible: opening and closing rear
windows38
4Opening and closing front windows38
5Adjusting exterior mirrors52
Automatic parking function536
Turn signals64
High beams,
headlamp flasher101
High-beam assistant
*102
Roadside parking lamps101
Check Control79
Computer75
Page 30 of 242
Controls
29Reference
At a glance
Driving tips
Communications
Navigation
Entertainment
Mobility
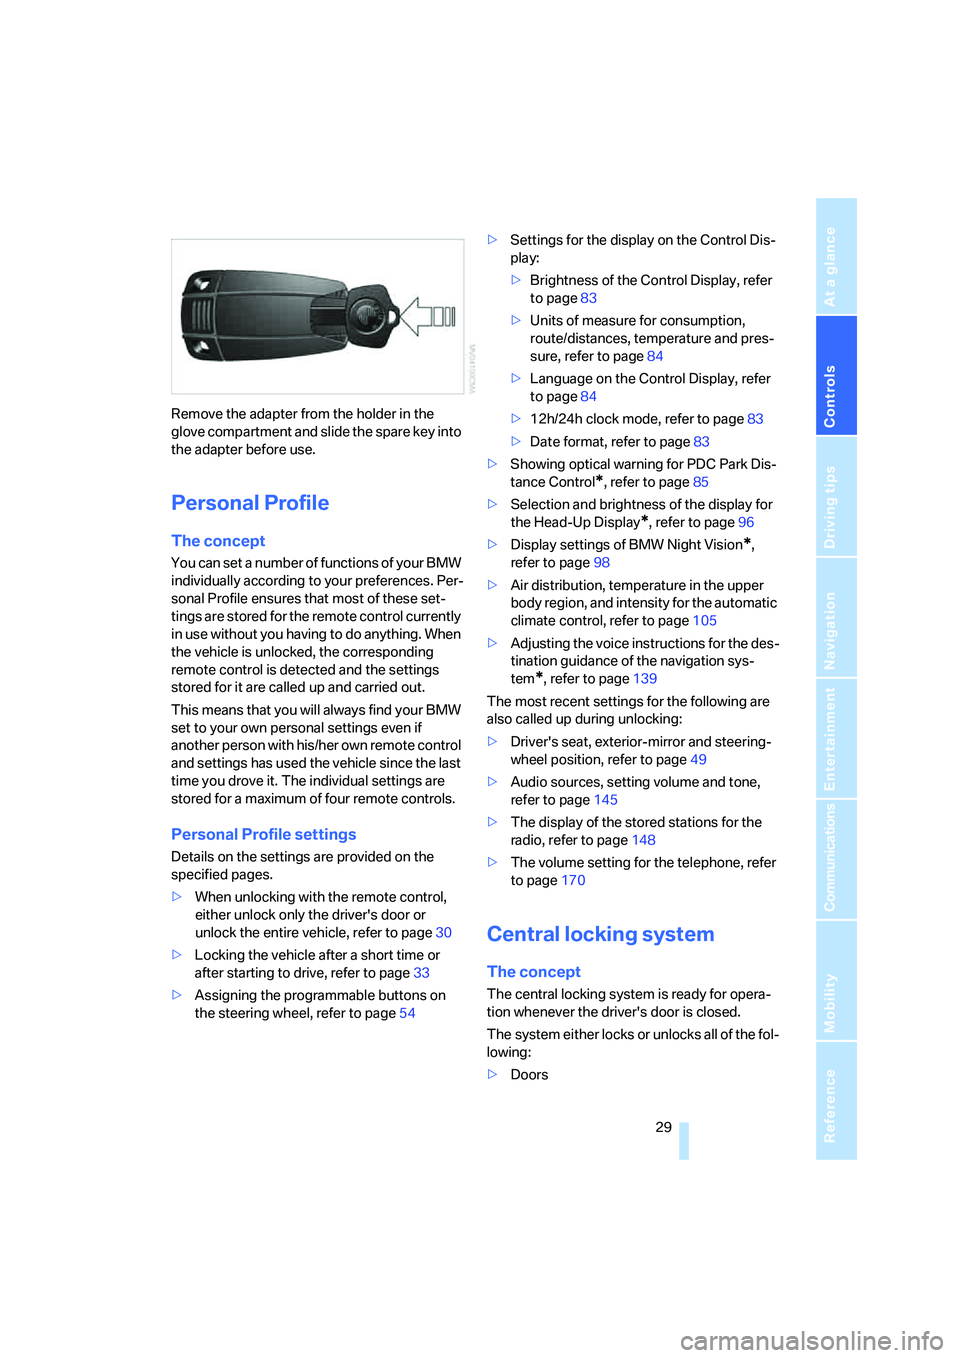
Remove the adapter from the holder in the
glove compartment and slide the spare key into
the adapter before use.
Personal Profile
The concept
You can set a number of functions of your BMW
individually according to your preferences. Per-
sonal Profile ensures that most of these set-
tings are stored for the remote control currently
in use without you having to do anything. When
the vehicle is unlocked, the corresponding
remote control is detected and the settings
stored for it are called up and carried out.
This means that you will always find your BMW
set to your own personal settings even if
another person with his/her own remote control
and settings has used the vehicle since the last
time you drove it. The individual settings are
stored for a maximum of four remote controls.
Personal Profile settings
Details on the settings are provided on the
specified pages.
>When unlocking with the remote control,
either unlock only the driver's door or
unlock the entire vehicle, refer to page30
>Locking the vehicle after a short time or
after starting to drive, refer to page33
>Assigning the programmable buttons on
the steering wheel, refer to page54>Settings for the display on the Control Dis-
play:
>Brightness of the Control Display, refer
to page83
>Units of measure for consumption,
route/distances, temperature and pres-
sure, refer to page84
>Language on the Control Display, refer
to page84
>12h/24h clock mode, refer to page83
>Date format, refer to page83
>Showing optical warning for PDC Park Dis-
tance Control
*, refer to page85
>Selection and brightness of the display for
the Head-Up Display
*, refer to page96
>Display settings of BMW Night Vision
*,
refer to page98
>Air distribution, temperature in the upper
body region, and intensity for the automatic
climate control, refer to page105
>Adjusting the voice instructions for the des-
tination guidance of the navigation sys-
tem
*, refer to page139
The most recent settings for the following are
also called up during unlocking:
>Driver's seat, exterior-mirror and steering-
wheel position, refer to page49
>Audio sources, setting volume and tone,
refer to page145
>The display of the stored stations for the
radio, refer to page148
>The volume setting for the telephone, refer
to page170
Central locking system
The concept
The central locking system is ready for opera-
tion whenever the driver's door is closed.
The system either locks or unlocks all of the fol-
lowing:
>Doors
Page 50 of 242
Controls
49Reference
At a glance
Driving tips
Communications
Navigation
Entertainment
Mobility
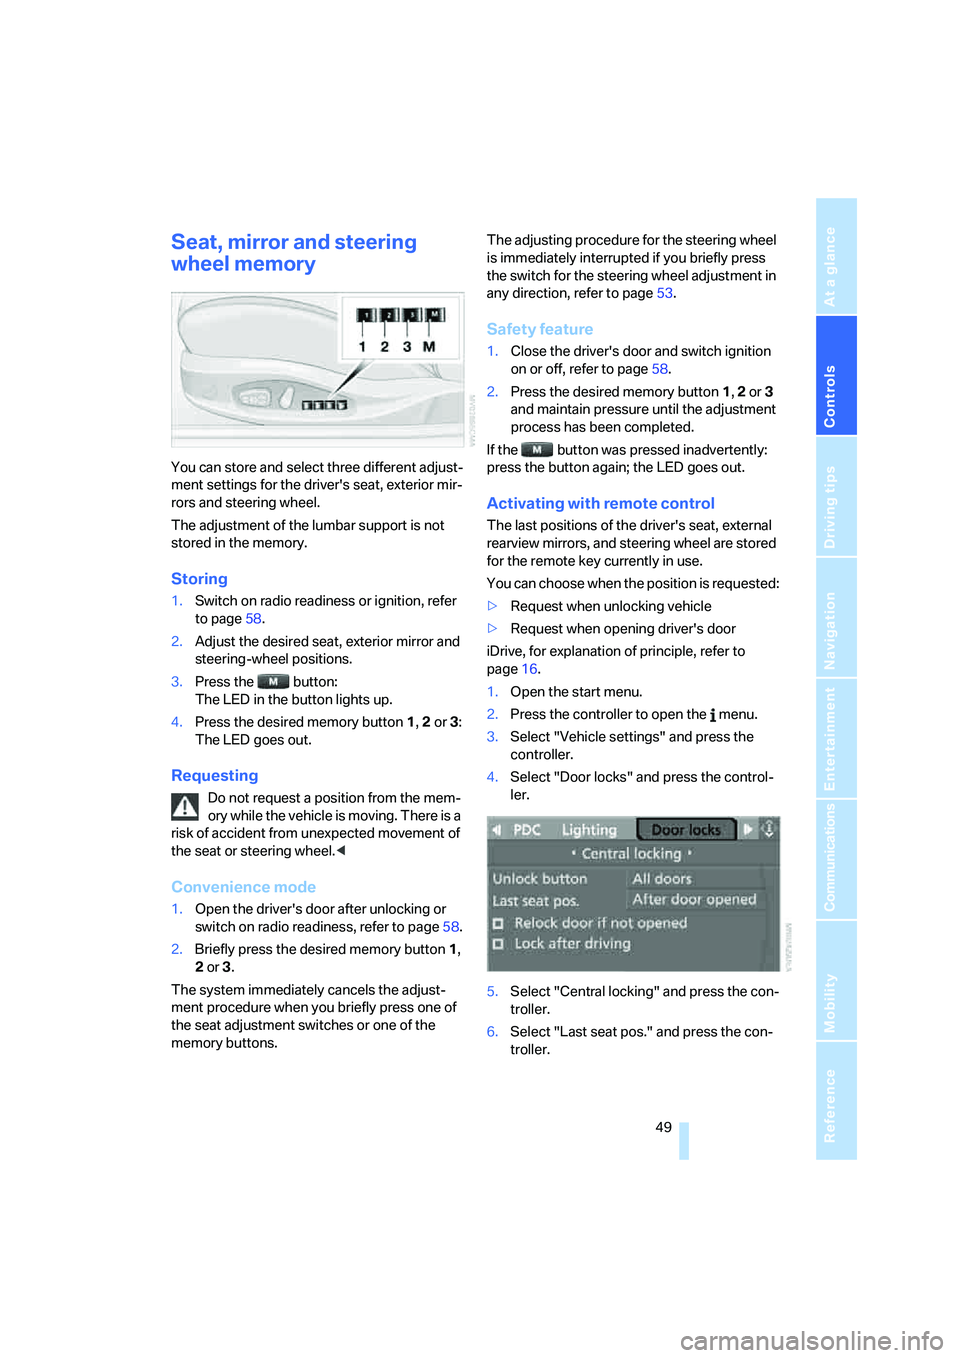
Seat, mirror and steering
wheel memory
You can store and select three different adjust-
ment settings for the driver's seat, exterior mir-
rors and steering wheel.
The adjustment of the lumbar support is not
stored in the memory.
Storing
1.Switch on radio readiness or ignition, refer
to page58.
2.Adjust the desired seat, exterior mirror and
steering-wheel positions.
3.Press the button:
The LED in the button lights up.
4.Press the desired memory button 1, 2 or3:
The LED goes out.
Requesting
Do not request a position from the mem-
ory while the vehicle is moving. There is a
risk of accident from unexpected movement of
the seat or steering wheel.<
Convenience mode
1.Open the driver's door after unlocking or
switch on radio readiness, refer to page58.
2.Briefly press the desired memory button1,
2 or3.
The system immediately cancels the adjust-
ment procedure when you briefly press one of
the seat adjustment switches or one of the
memory buttons.The adjusting procedure for the steering wheel
is immediately interrupted if you briefly press
the switch for the steering wheel adjustment in
any direction, refer to page53.
Safety feature
1.Close the driver's door and switch ignition
on or off, refer to page58.
2.Press the desired memory button 1, 2 or3
and maintain pressure until the adjustment
process has been completed.
If the button was pressed inadvertently:
press the button again; the LED goes out.
Activating with remote control
The last positions of the driver's seat, external
rearview mirrors, and steering wheel are stored
for the remote key currently in use.
You can choose when the position is requested:
>Request when unlocking vehicle
>Request when opening driver's door
iDrive, for explanation of principle, refer to
page16.
1.Open the start menu.
2.Press the controller to open the menu.
3.Select "Vehicle settings" and press the
controller.
4.Select "Door locks" and press the control-
ler.
5.Select "Central locking" and press the con-
troller.
6.Select "Last seat pos." and press the con-
troller.
Page 54 of 242
Controls
53Reference
At a glance
Driving tips
Communications
Navigation
Entertainment
Mobility
Automatic functions
>Below a certain outdoor temperature, both
exterior mirrors are automatically heated
when the motor is running or the ignition is
switched on.
>When the vehicle is moving forward, the
interior and exterior mirrors dim as a func-
tion of the incoming light.
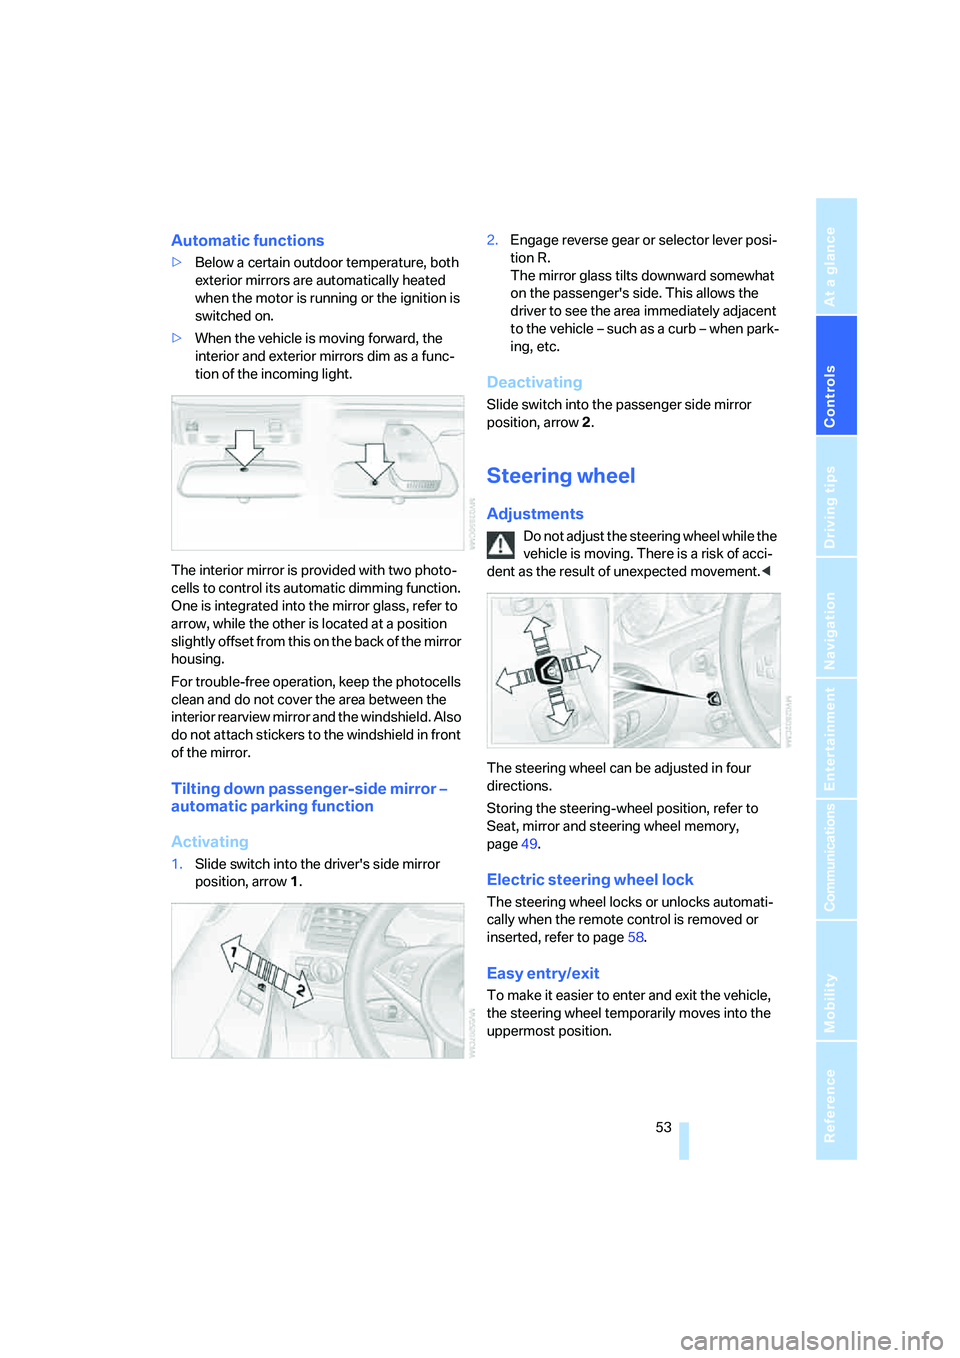
The interior mirror is provided with two photo-
cells to control its automatic dimming function.
One is integrated into the mirror glass, refer to
arrow, while the other is located at a position
slightly offset from this on the back of the mirror
housing.
For trouble-free operation, keep the photocells
clean and do not cover the area between the
interior rearview mirror and the windshield. Also
do not attach stickers to the windshield in front
of the mirror.
Tilting down passenger-side mirror –
automatic parking function
Activating
1.Slide switch into the driver's side mirror
position, arrow 1.2.Engage reverse gear or selector lever posi-
tion R.
The mirror glass tilts downward somewhat
on the passenger's side. This allows the
driver to see the area immediately adjacent
to the vehicle – such as a curb – when park-
ing, etc.
Deactivating
Slide switch into the passenger side mirror
position, arrow 2.
Steering wheel
Adjustments
Do not adjust the steering wheel while the
vehicle is moving. There is a risk of acci-
dent as the result of unexpected movement.<
The steering wheel can be adjusted in four
directions.
Storing the steering-wheel position, refer to
Seat, mirror and steering wheel memory,
page49.
Electric steering wheel lock
The steering wheel locks or unlocks automati-
cally when the remote control is removed or
inserted, refer to page58.
Easy entry/exit
To make it easier to enter and exit the vehicle,
the steering wheel temporarily moves into the
uppermost position.
Page 66 of 242
Controls
65Reference
At a glance
Driving tips
Communications
Navigation
Entertainment
Mobility
Using turn signals
Move the lever beyond the resistance point.
To switch off manually, only press the lever as
far as the resistance point.
Atypically rapid flashing of the indicator
lamp indicates the failure of a turn signal
lamp.<
Signaling briefly
Press the lever to the resistance point and hold
it there as long as you wish to signal.
Triple turn signal activation
Press the lever to the resistance point; the turn
signals flash three times.
You can activate or deactivate this function.
iDrive, for explanation of principle, refer to
page16.
1.Open the start menu.
2.Press the controller to open the menu.
3.Select "Vehicle settings" and press the
controller.
4.Select "Lighting" and press the controller.
5.Select "Triple turn signal activation" and
press the controller.
Triple turn signal is activated.
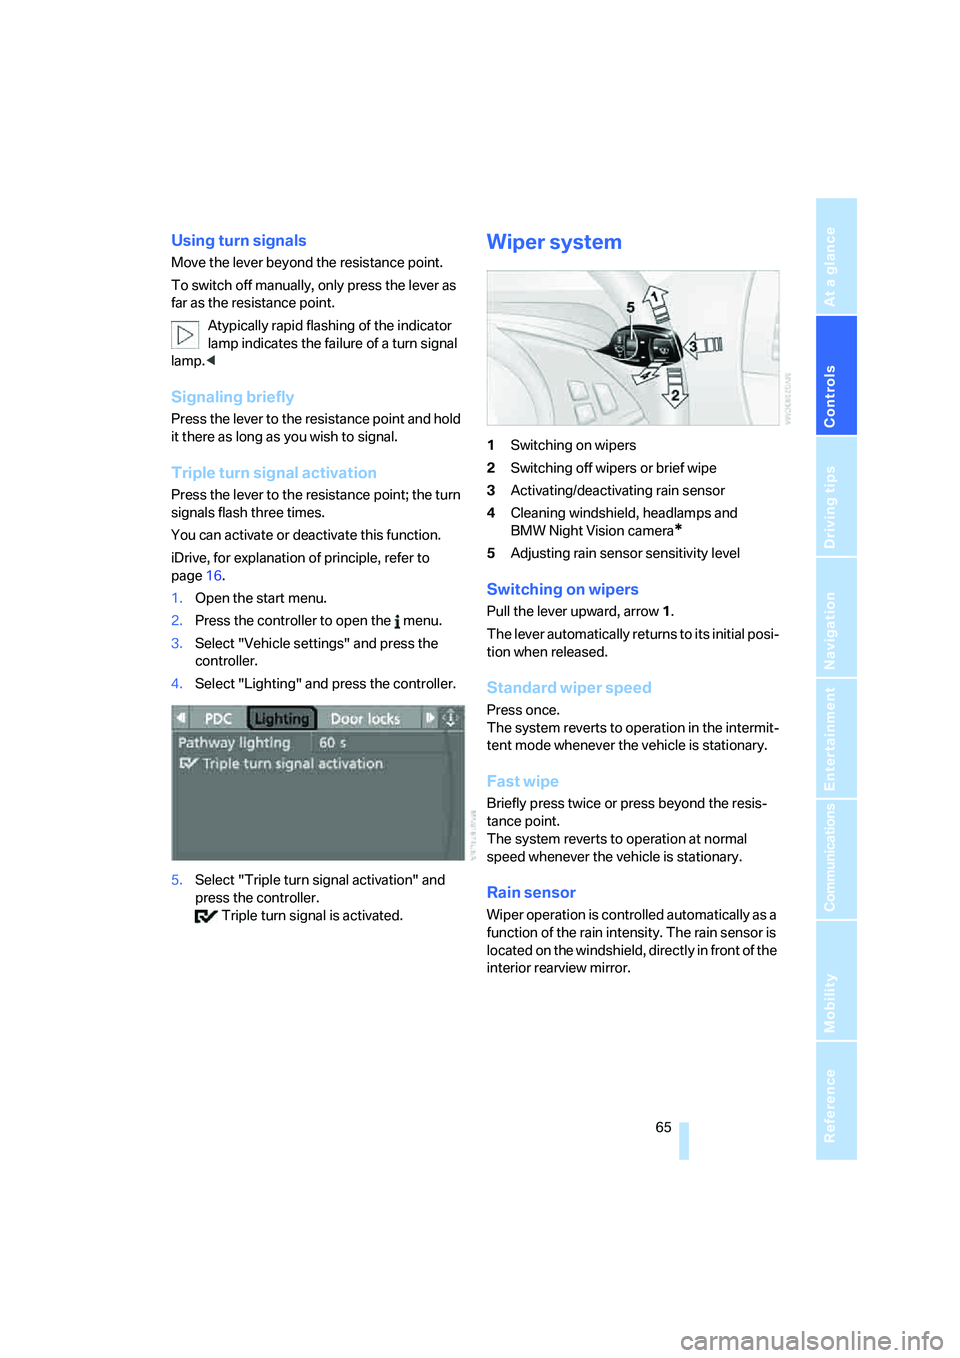
Wiper system
1Switching on wipers
2Switching off wipers or brief wipe
3Activating/deactivating rain sensor
4Cleaning windshield, headlamps and
BMW Night Vision camera
*
5Adjusting rain sensor sensitivity level
Switching on wipers
Pull the lever upward, arrow1.
The lever automatically returns to its initial posi-
tion when released.
Standard wiper speed
Press once.
The system reverts to operation in the intermit-
tent mode whenever the vehicle is stationary.
Fast wipe
Briefly press twice or press beyond the resis-
tance point.
The system reverts to operation at normal
speed whenever the vehicle is stationary.
Rain sensor
Wiper operation is controlled automatically as a
function of the rain intensity. The rain sensor is
located on the windshield, directly in front of the
interior rearview mirror.
Page 94 of 242
Controls
93Reference
At a glance
Driving tips
Communications
Navigation
Entertainment
Mobility
head and side airbags help provide protection in
the event of a side impact. The relevant side air-
bag supports the side upper body area. The
head airbag supports the head. The knee airbag
protects the legs from colliding with the cockpit.
The airbags are deliberately not triggered in
every impact situation, e. g. less severe acci-
dents or rear-end collisions.
Do not apply adhesive materials to the
cover panels of the airbags, cover them or
modify them in any other way. Do not attempt to
remove the airbag retention system from the
vehicle. Do not modify or tamper with either the
wiring or the individual components in the air-
bag system. This category includes the uphol-
stery in the center of the steering wheel, on the
instrument panel, the side trim panels on the
doors and on the Coupe, the roof pillars along
with the sides of the headliner. Do not attempt
to remove or dismantle the steering wheel.
Do not touch the individual components
directly after the system has been triggered,
because there is a danger of burns.
In the event of malfunctions, deactivation, or
triggering of the airbag restraint system, have
the testing, repair, removal, and disposal of air-
bag generators carried out only by a BMW cen-
ter or a workshop that works according to BMW
repair procedures with appropriately trained
personnel and has the required explosives
licenses. Unprofessional attempts to service
the system could lead to failure in an emer-
gency or undesired airbag activation, either of
which could result in personal injury.<
Warnings and information on the airbags is also
provided on the sun visors.
Automatic deactivation of front
passenger airbags
The occupation of the seat is detected by eval-
uating the impression on the occupied seat sur-
face of the front passenger seat. The system
correspondingly activates or deactivates the
front, knee and side airbag on the front passen-
ger side.The current status of the front passenger
airbag, i.e. deactivated or activated, is
indicated by the indicator lamp over the interior
rearview mirror, refer to Operating state of front
passenger airbags below.<
Before transporting a child in the front
passenger seat, read the safety informa-
tion and follow the instructions under Trans-
porting children safely, refer to page56.
The front, knee and side airbag on the front pas-
senger side can be deactivated for teenagers
and adults in certain seat positions; the indica-
tor lamp for the front passenger airbags lights
up when this occurs. In these cases, change the
seat position so that the front passenger air-
bags are activated and the indicator lamp goes
out. If the desired status cannot be produced by
changing the seat position, transport the corre-
sponding person in the rear seat.
Do not fit seat covers, seat cushion padding,
beaded mats or other items onto the front pas-
senger seat unless they are specifically recom-
mended by BMW. Do not place objects under
the seat which could press against the seat
from below. Otherwise a correct evaluation of
the occupied seat surface cannot be ensured.<
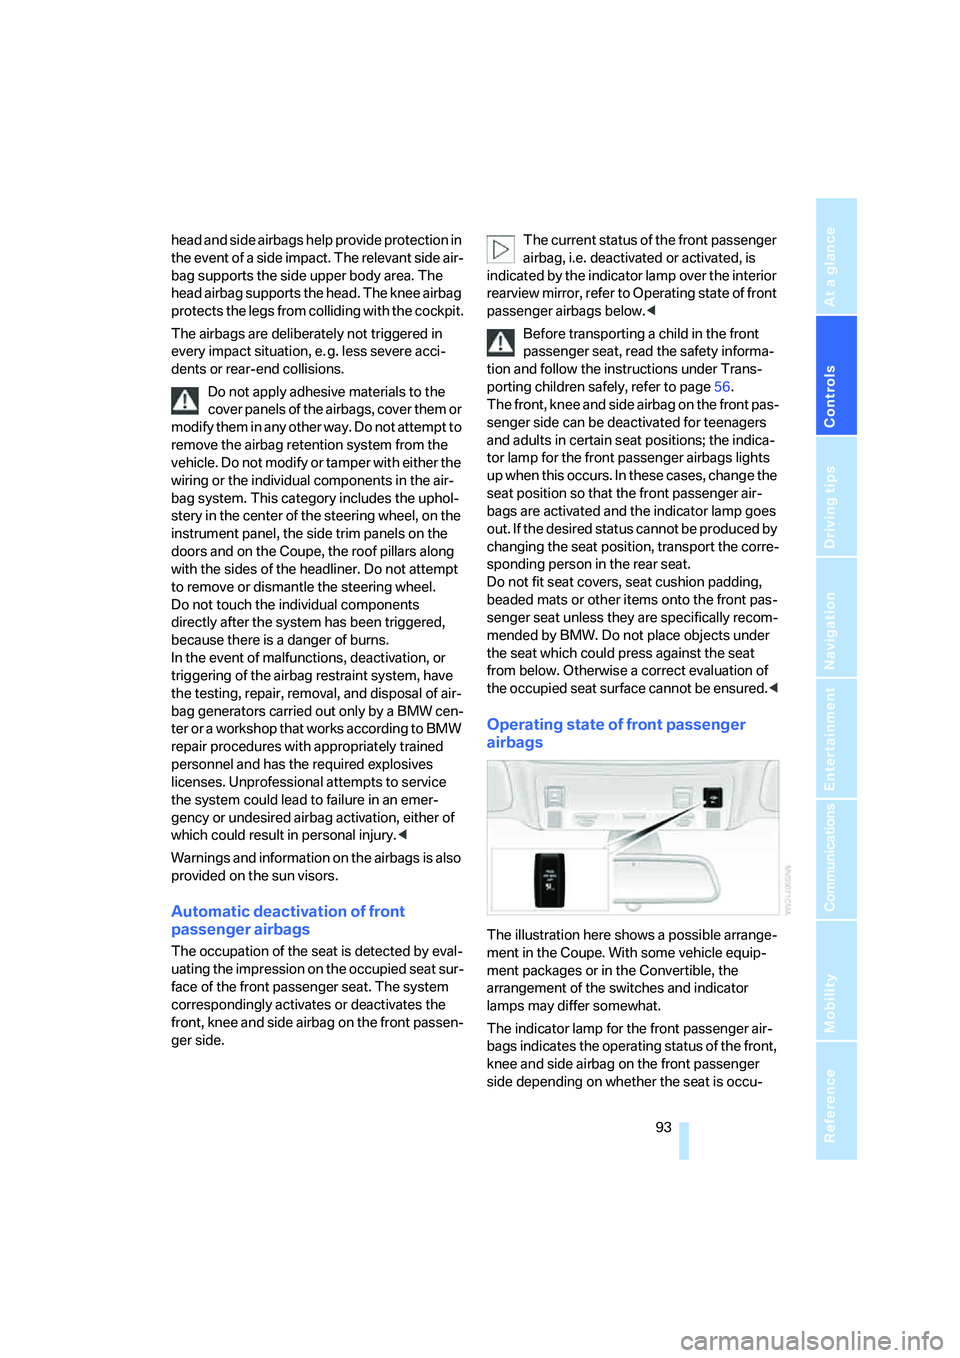
Operating state of front passenger
airbags
The illustration here shows a possible arrange-
ment in the Coupe. With some vehicle equip-
ment packages or in the Convertible, the
arrangement of the switches and indicator
lamps may differ somewhat.
The indicator lamp for the front passenger air-
bags indicates the operating status of the front,
knee and side airbag on the front passenger
side depending on whether the seat is occu-
Page 98 of 242
Controls
97Reference
At a glance
Driving tips
Communications
Navigation
Entertainment
Mobility
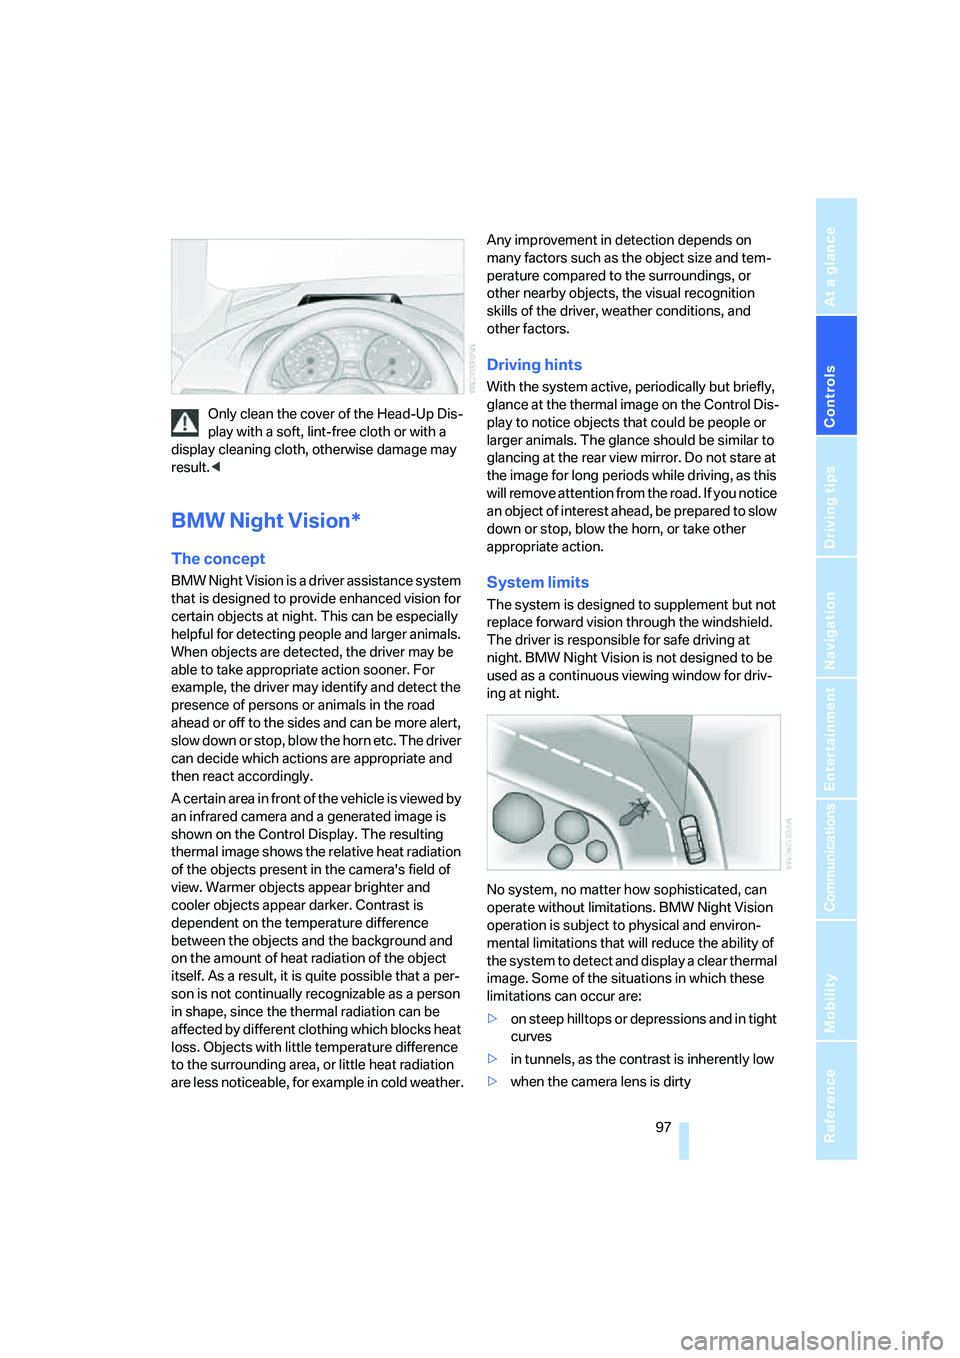
Only clean the cover of the Head-Up Dis-
play with a soft, lint-free cloth or with a
display cleaning cloth, otherwise damage may
result.<
BMW Night Vision*
The concept
BMW Night Vision is a driver assistance system
that is designed to provide enhanced vision for
certain objects at night. This can be especially
helpful for detecting people and larger animals.
When objects are detected, the driver may be
able to take appropriate action sooner. For
example, the driver may identify and detect the
presence of persons or animals in the road
ahead or off to the sides and can be more alert,
slow down or stop, blow the horn etc. The driver
can decide which actions are appropriate and
then react accordingly.
A certain area in front of the vehicle is viewed by
an infrared camera and a generated image is
shown on the Control Display. The resulting
thermal image shows the relative heat radiation
of the objects present in the camera's field of
view. Warmer objects appear brighter and
cooler objects appear darker. Contrast is
dependent on the temperature difference
between the objects and the background and
on the amount of heat radiation of the object
itself. As a result, it is quite possible that a per-
son is not continually recognizable as a person
in shape, since the thermal radiation can be
affected by different clothing which blocks heat
loss. Objects with little temperature difference
to the surrounding area, or little heat radiation
are less noticeable, for example in cold weather.Any improvement in detection depends on
many factors such as the object size and tem-
perature compared to the surroundings, or
other nearby objects, the visual recognition
skills of the driver, weather conditions, and
other factors.
Driving hints
With the system active, periodically but briefly,
glance at the thermal image on the Control Dis-
play to notice objects that could be people or
larger animals. The glance should be similar to
glancing at the rear view mirror. Do not stare at
the image for long periods while driving, as this
will remove attention from the road. If you notice
an object of interest ahead, be prepared to slow
down or stop, blow the horn, or take other
appropriate action.
System limits
The system is designed to supplement but not
replace forward vision through the windshield.
The driver is responsible for safe driving at
night. BMW Night Vision is not designed to be
used as a continuous viewing window for driv-
ing at night.
No system, no matter how sophisticated, can
operate without limitations. BMW Night Vision
operation is subject to physical and environ-
mental limitations that will reduce the ability of
the system to detect and display a clear thermal
image. Some of the situations in which these
limitations can occur are:
>on steep hilltops or depressions and in tight
curves
>in tunnels, as the contrast is inherently low
>when the camera lens is dirty
Page 103 of 242
Lamps
102
High-beam assistant*
The concept
This system automatically switches the high
beams on and off again. A sensor on the front of
the interior rearview mirror controls the pro-
cess. The assistant ensures that the high
beams are switched on whenever the traffic sit-
uation allows. This reduces the strain on you
while at the same time providing you with the
best possible visibility. Of course, you can inter-
vene at any time and switch the high beams on
and off in the accustomed manner.
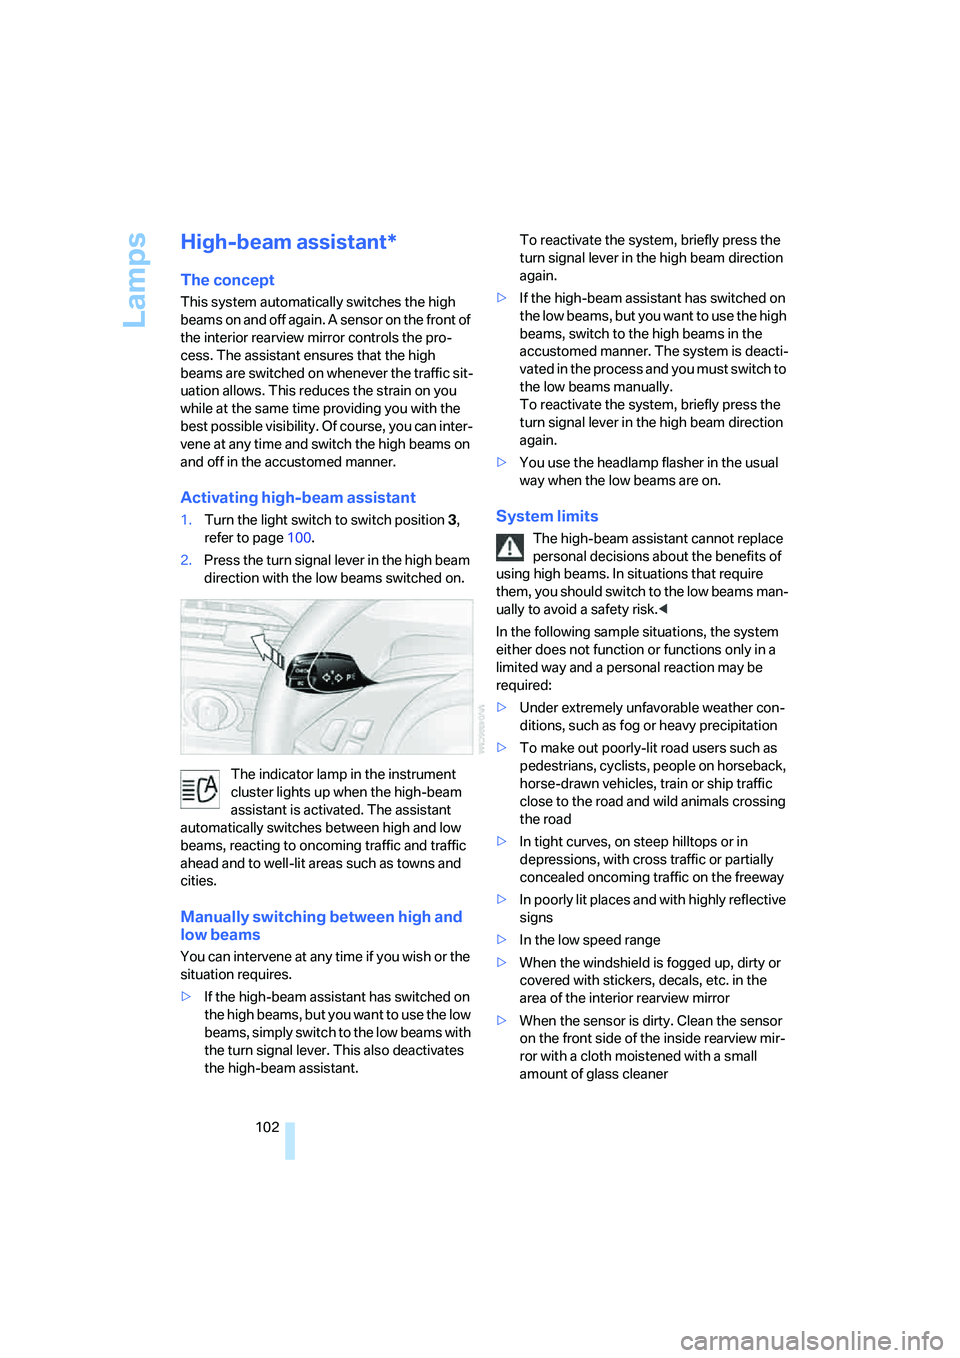
Activating high-beam assistant
1.Turn the light switch to switch position3,
refer to page100.
2.Press the turn signal lever in the high beam
direction with the low beams switched on.
The indicator lamp in the instrument
cluster lights up when the high-beam
assistant is activated. The assistant
automatically switches between high and low
beams, reacting to oncoming traffic and traffic
ahead and to well-lit areas such as towns and
cities.
Manually switching between high and
low beams
You can intervene at any time if you wish or the
situation requires.
>If the high-beam assistant has switched on
the high beams, but you want to use the low
beams, simply switch to the low beams with
the turn signal lever. This also deactivates
the high-beam assistant. To reactivate the system, briefly press the
turn signal lever in the high beam direction
again.
>If the high-beam assistant has switched on
the low beams, but you want to use the high
beams, switch to the high beams in the
accustomed manner. The system is deacti-
vated in the process and you must switch to
the low beams manually.
To reactivate the system, briefly press the
turn signal lever in the high beam direction
again.
>You use the headlamp flasher in the usual
way when the low beams are on.
System limits
The high-beam assistant cannot replace
personal decisions about the benefits of
using high beams. In situations that require
them, you should switch to the low beams man-
ually to avoid a safety risk.<
In the following sample situations, the system
either does not function or functions only in a
limited way and a personal reaction may be
required:
>Under extremely unfavorable weather con-
ditions, such as fog or heavy precipitation
>To make out poorly-lit road users such as
pedestrians, cyclists, people on horseback,
horse-drawn vehicles, train or ship traffic
close to the road and wild animals crossing
the road
>In tight curves, on steep hilltops or in
depressions, with cross traffic or partially
concealed oncoming traffic on the freeway
>In poorly lit places and with highly reflective
signs
>In the low speed range
>When the windshield is fogged up, dirty or
covered with stickers, decals, etc. in the
area of the interior rearview mirror
>When the sensor is dirty. Clean the sensor
on the front side of the inside rearview mir-
ror with a cloth moistened with a small
amount of glass cleaner