2006 BMW 650I COUPE&CONVERTIBLE reset
[x] Cancel search: resetPage 148 of 242
Navigation
Entertainment
Driving tips
147Reference
At a glance
Controls
Communications
Mobility
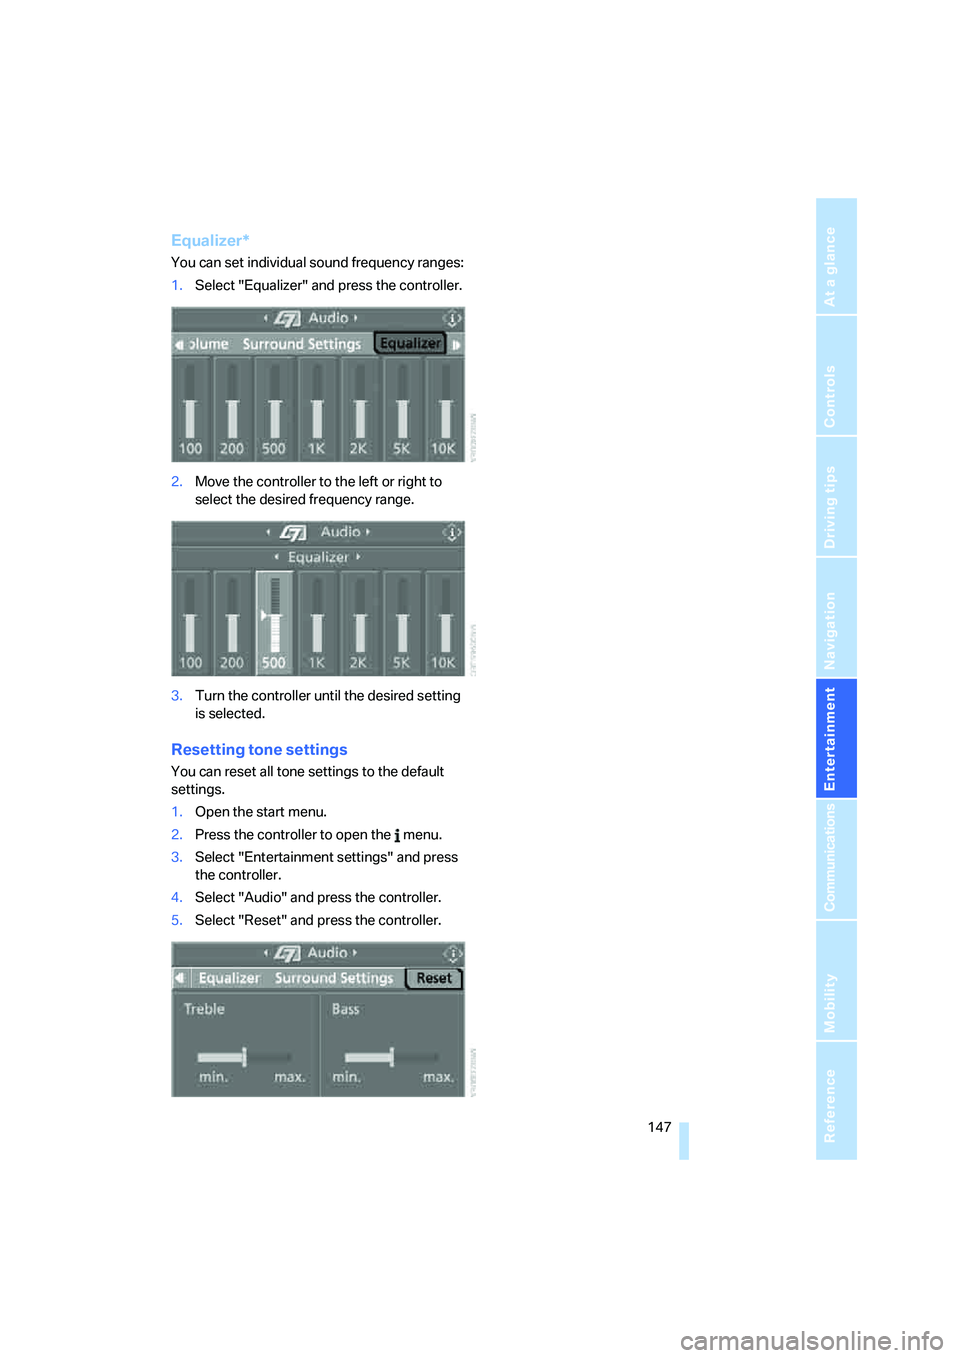
Equalizer*
You can set individual sound frequency ranges:
1.Select "Equalizer" and press the controller.
2.Move the controller to the left or right to
select the desired frequency range.
3.Turn the controller until the desired setting
is selected.
Resetting tone settings
You can reset all tone settings to the default
settings.
1.Open the start menu.
2.Press the controller to open the menu.
3.Select "Entertainment settings" and press
the controller.
4.Select "Audio" and press the controller.
5.Select "Reset" and press the controller.
Page 149 of 242
Radio
148
Radio
Your radio provides reception of the FM and AM
wavebands.
Listening to radio
Press the button if the sound output is switched
off.
iDrive, for explanation of principle, refer to
page16.
1.Press the button.
This opens the start menu.
2.Move the controller backwards to call up
"Entertainment".
3.Change to upper field if necessary. Turn
controller until "FM" or "AM" is selected.
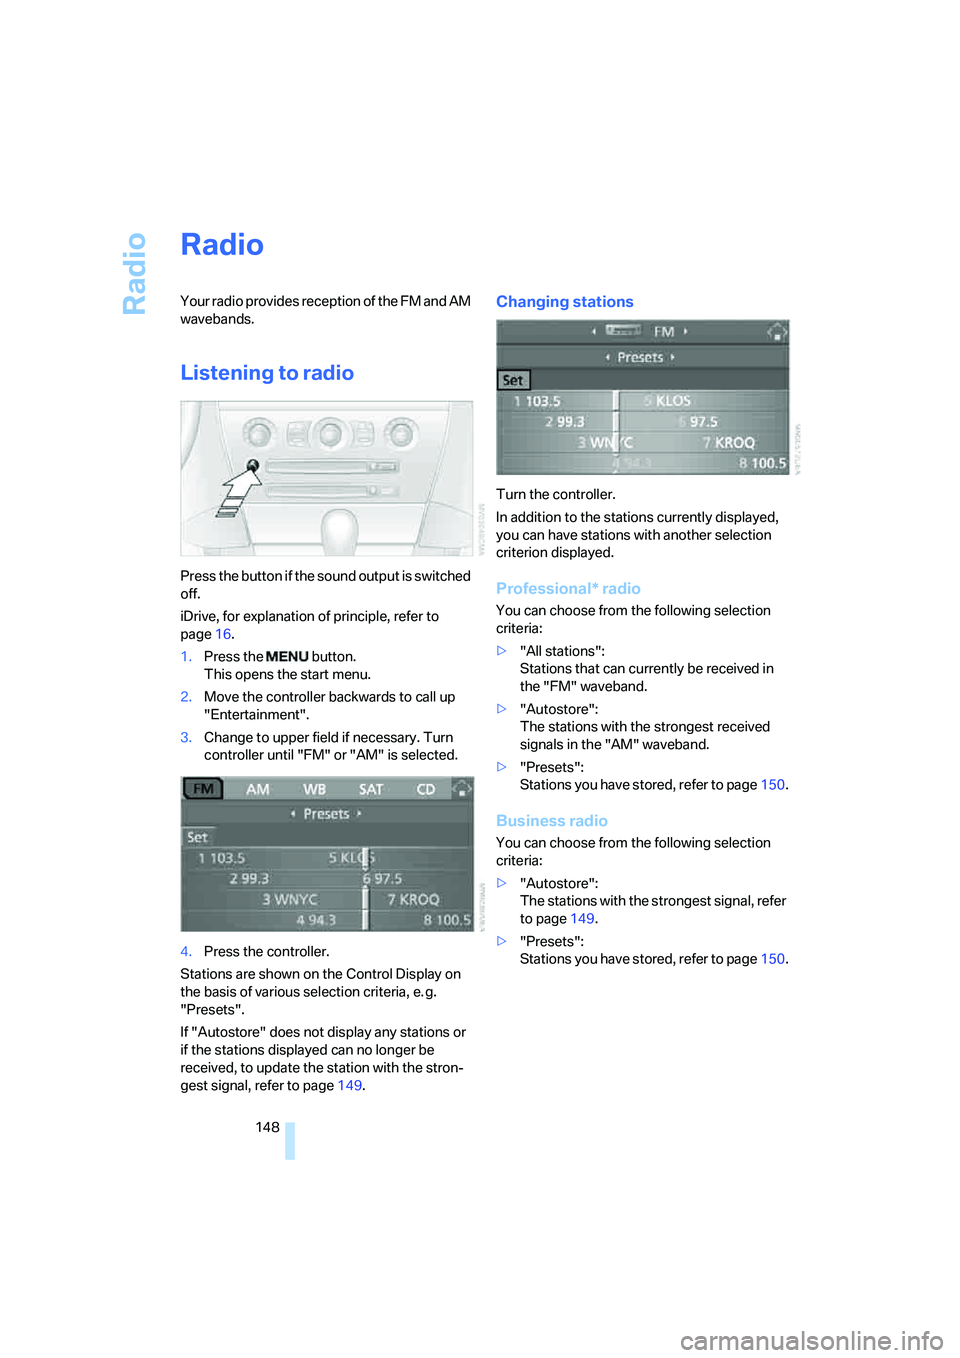
4.Press the controller.
Stations are shown on the Control Display on
the basis of various selection criteria, e. g.
"Presets".
If "Autostore" does not display any stations or
if the stations displayed can no longer be
received, to update the station with the stron-
gest signal, refer to page149.
Changing stations
Turn the controller.
In addition to the stations currently displayed,
you can have stations with another selection
criterion displayed.
Professional* radio
You can choose from the following selection
criteria:
>"All stations":
Stations that can currently be received in
the "FM" waveband.
>"Autostore":
The stations with the strongest received
signals in the "AM" waveband.
>"Presets":
Stations you have stored, refer to page150.
Business radio
You can choose from the following selection
criteria:
>"Autostore":
The stations with the strongest signal, refer
to page149.
>"Presets":
Stations you have stored, refer to page150.
Page 151 of 242
Radio
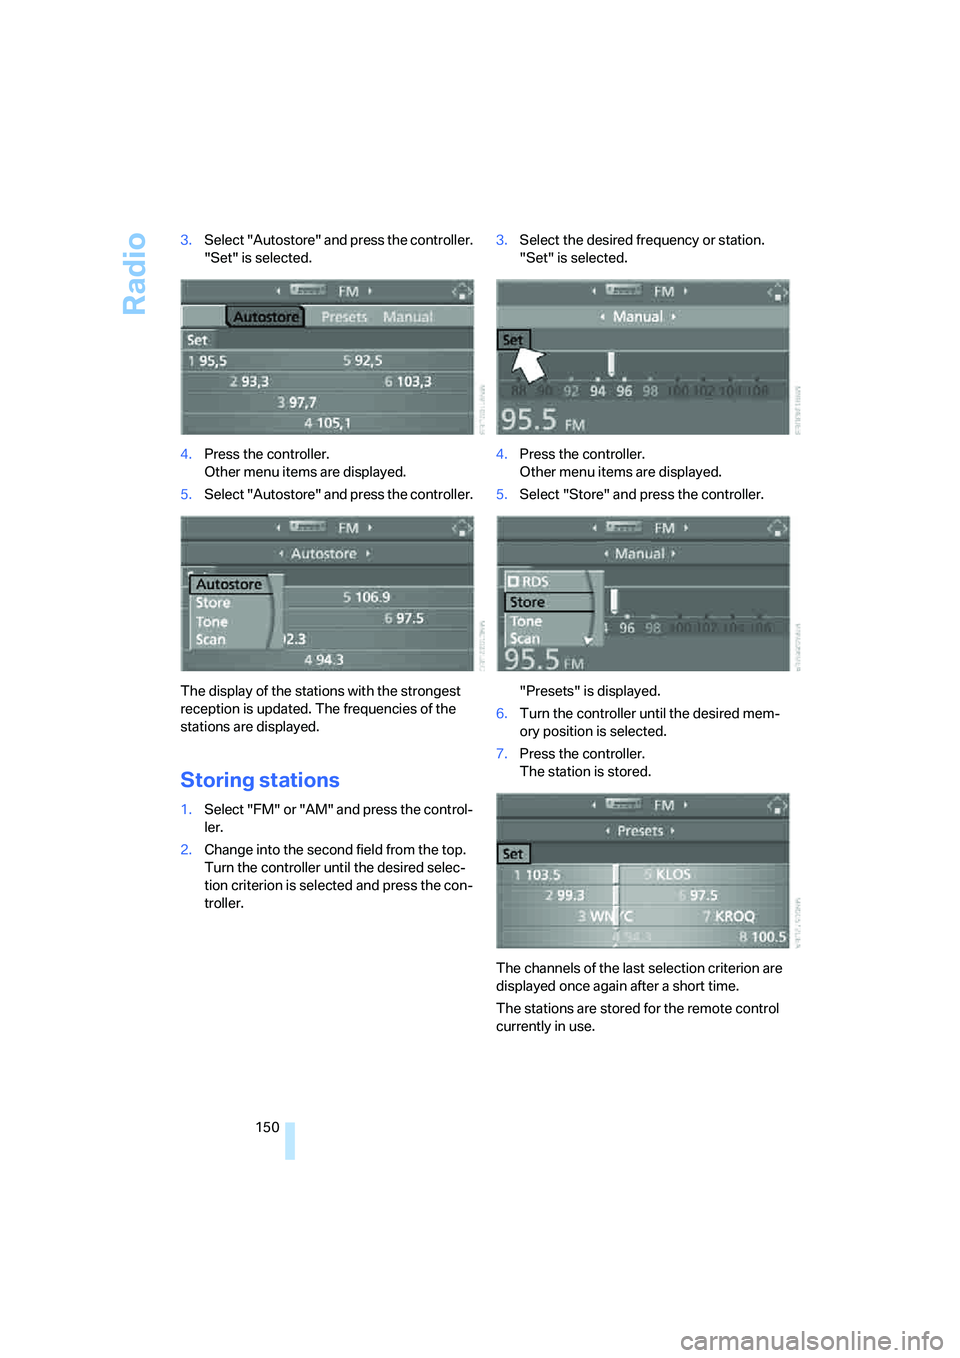
150 3.Select "Autostore" and press the controller.
"Set" is selected.
4.Press the controller.
Other menu items are displayed.
5.Select "Autostore" and press the controller.
The display of the stations with the strongest
reception is updated. The frequencies of the
stations are displayed.
Storing stations
1.Select "FM" or "AM" and press the control-
ler.
2.Change into the second field from the top.
Turn the controller until the desired selec-
tion criterion is selected and press the con-
troller.3.Select the desired frequency or station.
"Set" is selected.
4.Press the controller.
Other menu items are displayed.
5.Select "Store" and press the controller.
"Presets" is displayed.
6.Turn the controller until the desired mem-
ory position is selected.
7.Press the controller.
The station is stored.
The channels of the last selection criterion are
displayed once again after a short time.
The stations are stored for the remote control
currently in use.
Page 152 of 242
Navigation
Entertainment
Driving tips
151Reference
At a glance
Controls
Communications
Mobility
Changing a memory position
1.Select "Presets" and press the controller.
2.Select the desired station.
"Set" is selected.
3.Press the controller.
Other menu items are displayed.
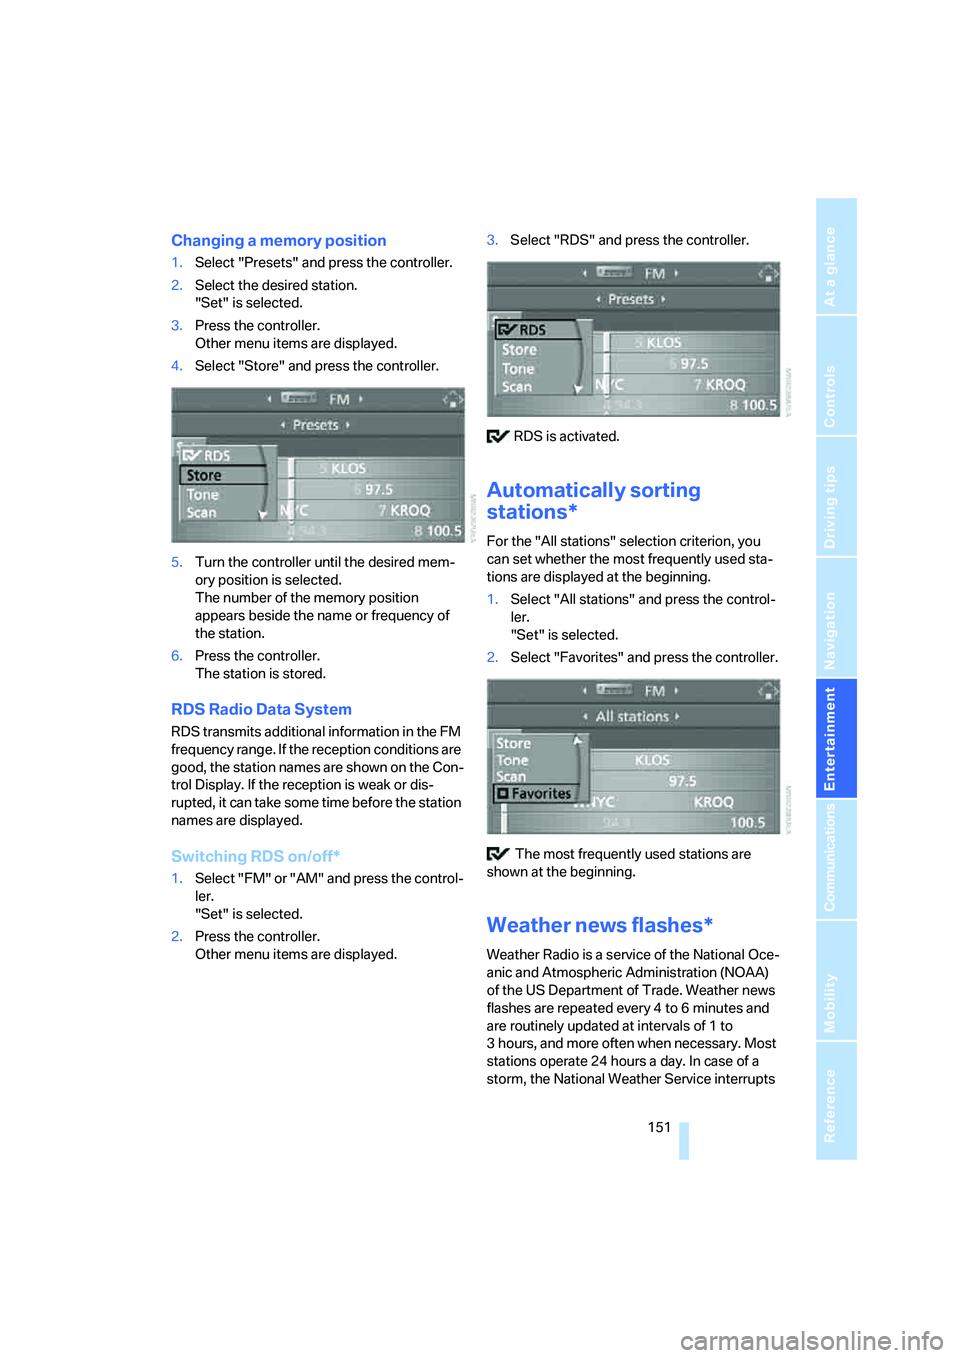
4.Select "Store" and press the controller.
5.Turn the controller until the desired mem-
ory position is selected.
The number of the memory position
appears beside the name or frequency of
the station.
6.Press the controller.
The station is stored.
RDS Radio Data System
RDS transmits additional information in the FM
frequency range. If the reception conditions are
good, the station names are shown on the Con-
trol Display. If the reception is weak or dis-
rupted, it can take some time before the station
names are displayed.
Switching RDS on/off*
1.Select "FM" or "AM" and press the control-
ler.
"Set" is selected.
2.Press the controller.
Other menu items are displayed.3.Select "RDS" and press the controller.
RDS is activated.
Automatically sorting
stations*
For the "All stations" selection criterion, you
can set whether the most frequently used sta-
tions are displayed at the beginning.
1.Select "All stations" and press the control-
ler.
"Set" is selected.
2.Select "Favorites" and press the controller.
The most frequently used stations are
shown at the beginning.
Weather news flashes*
Weather Radio is a service of the National Oce-
anic and Atmospheric Administration (NOAA)
of the US Department of Trade. Weather news
flashes are repeated every 4 to 6 minutes and
are routinely updated at intervals of 1 to
3 hours, and more often when necessary. Most
stations operate 24 hours a day. In case of a
storm, the National Weather Service interrupts
Page 155 of 242
Radio
154
Enabling or disabling channels
iDrive, for explanation of principle, refer to
page16.
1.Press the button.
This opens the start menu.
2.Move the controller backwards to call up
"Entertainment".
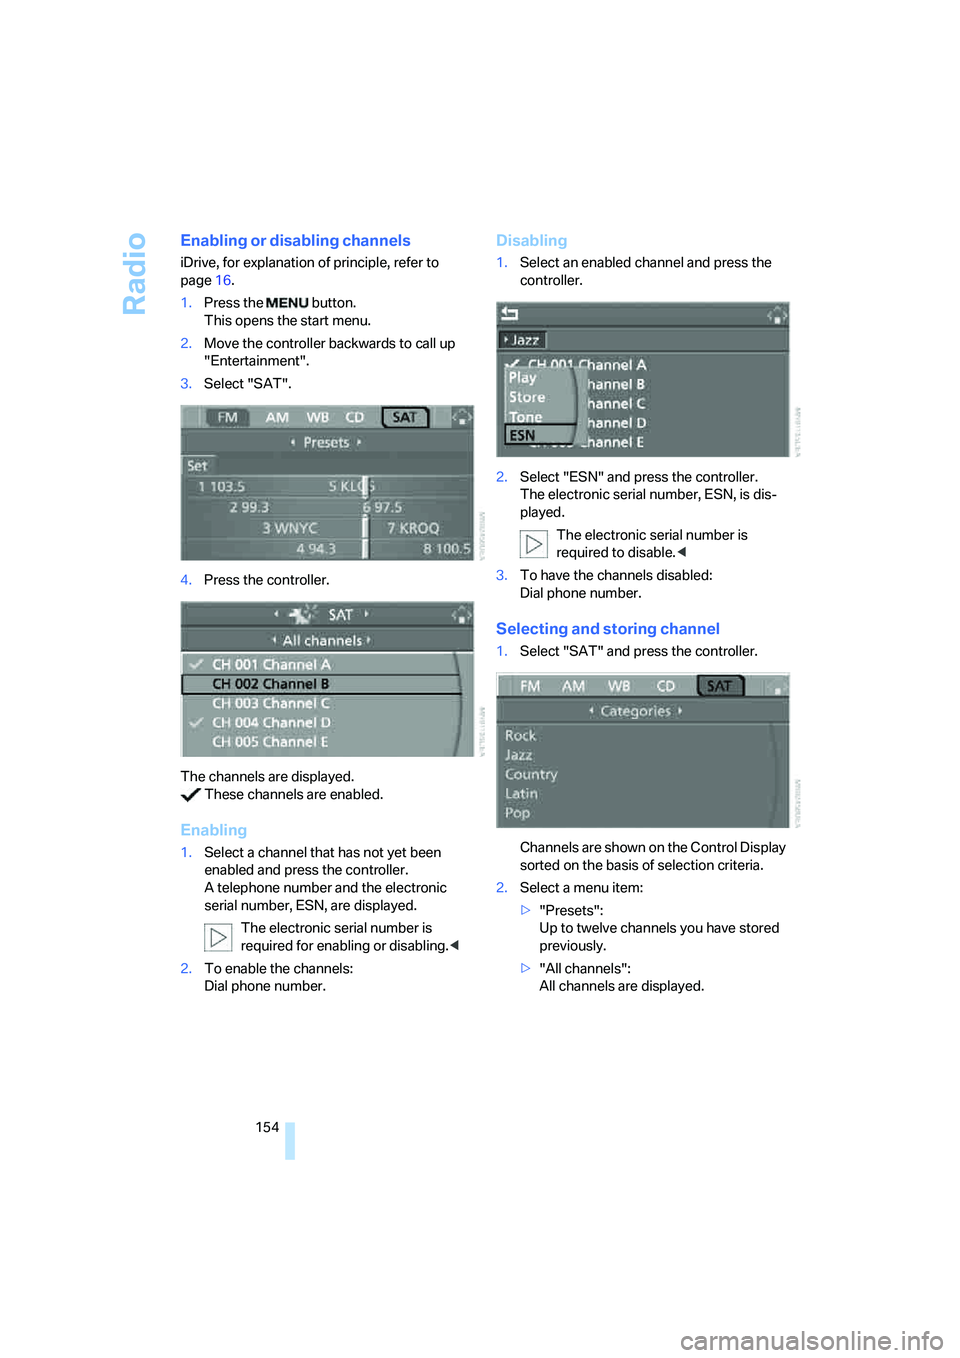
3.Select "SAT".
4.Press the controller.
The channels are displayed.
These channels are enabled.
Enabling
1.Select a channel that has not yet been
enabled and press the controller.
A telephone number and the electronic
serial number, ESN, are displayed.
The electronic serial number is
required for enabling or disabling.<
2.To enable the channels:
Dial phone number.
Disabling
1.Select an enabled channel and press the
controller.
2.Select "ESN" and press the controller.
The electronic serial number, ESN, is dis-
played.
The electronic serial number is
required to disable.<
3.To have the channels disabled:
Dial phone number.
Selecting and storing channel
1.Select "SAT" and press the controller.
Channels are shown on the Control Display
sorted on the basis of selection criteria.
2.Select a menu item:
>"Presets":
Up to twelve channels you have stored
previously.
>"All channels":
All channels are displayed.
Page 156 of 242
Navigation
Entertainment
Driving tips
155Reference
At a glance
Controls
Communications
Mobility
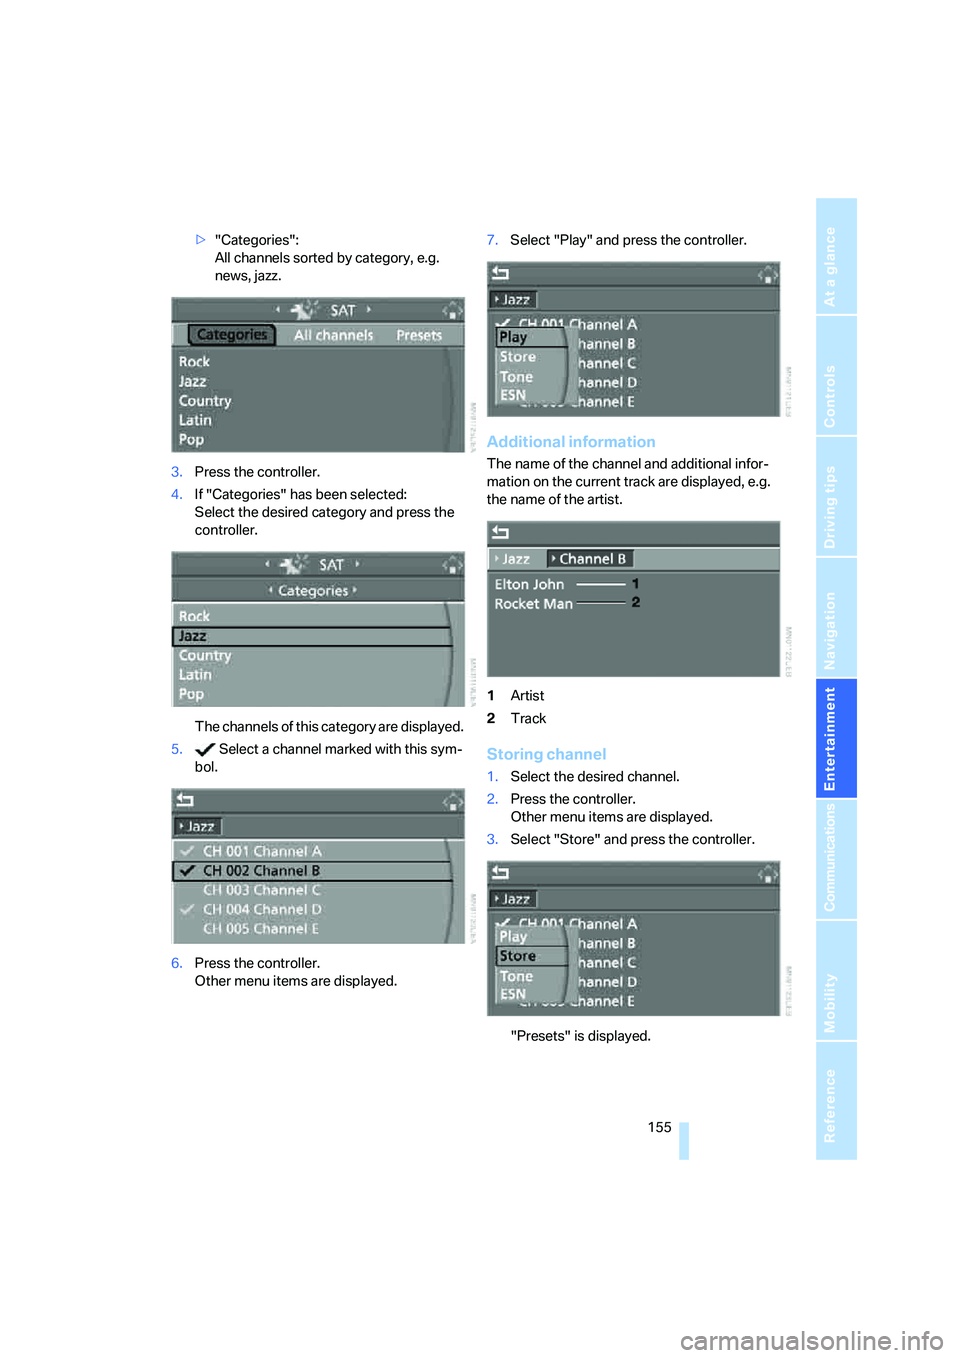
>"Categories":
All channels sorted by category, e.g.
news, jazz.
3.Press the controller.
4.If "Categories" has been selected:
Select the desired category and press the
controller.
The channels of this category are displayed.
5. Select a channel marked with this sym-
bol.
6.Press the controller.
Other menu items are displayed.7.Select "Play" and press the controller.
Additional information
The name of the channel and additional infor-
mation on the current track are displayed, e.g.
the name of the artist.
1Artist
2Track
Storing channel
1.Select the desired channel.
2.Press the controller.
Other menu items are displayed.
3.Select "Store" and press the controller.
"Presets" is displayed.
Page 168 of 242
167
Entertainment
Reference
At a glance
Controls
Driving tips Communications
Navigation
Mobility
Making calls with car phone:
BMW Assist calls
You can use the car phone via the handsfree
system for BMW Assist calls.
When the status information "BMW Assist" or
"BMW Service" is displayed in "Communica-
tion", only BMW Assist calls are possible.
It may not be possible to establish a telephone
connection using the mobile phone while a con-
nection is being established to BMW Assist
or while a call to BMW Assist is already in
progress. If this happens, you must unpair the
mobile phone and the vehicle if you wish to
place a call with the mobile phone.
Initial operation
Logging on mobile phone on vehicle
The following prerequisites must be met:
>The mobile phone is ready to operate.
>The Bluetooth links of the vehicle, refer to
page169, and the mobile phone are active.
>Depending on the mobile phone, presets in
the mobile phone are required: e.g. acti-
vated via the menu item Bluetooth or the
menu item Connection not with confirma-
tion.
>To log on, specify any desired number as
the Bluetooth passkey, e.g. 1. This Blue-
tooth passkey is no longer required follow-
ing successful logon.
>The ignition is switched on.
Only log on the mobile phone with the
vehicle stopped; otherwise you may
become distracted and inadvertently endanger
your passengers and other road users.<
Switching on ignition
1.Insert the remote control as far as possible
into the ignition lock.
2.S w i t c h o n t h e s w i t c h o n i g n i t i o n b y p r e s s i n g
the Start/Stop button without depressing
the brake or clutch pedal.
Preparation with iDrive
iDrive, for explanation of principle, refer to
page16.
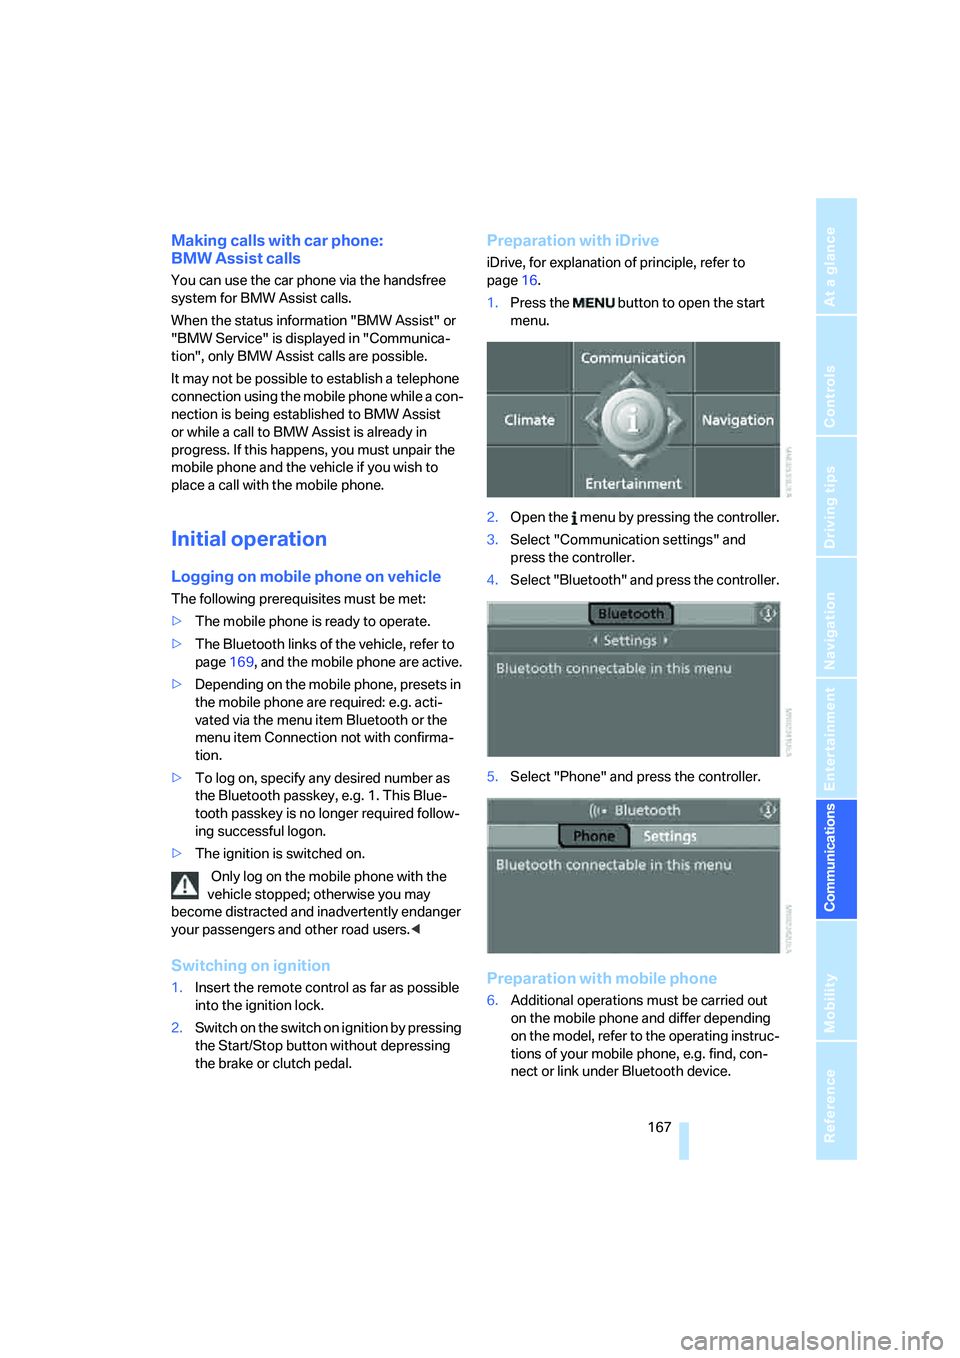
1.Press the button to open the start
menu.
2.Open the menu by pressing the controller.
3.Select "Communication settings" and
press the controller.
4.Select "Bluetooth" and press the controller.
5.Select "Phone" and press the controller.
Preparation with mobile phone
6.Additional operations must be carried out
on the mobile phone and differ depending
on the model, refer to the operating instruc-
tions of your mobile phone, e.g. find, con-
nect or link under Bluetooth device.
Page 189 of 242
Wheels and tires
188
Wheels and tires
Tire inflation pressure
Information for your safety
The condition of the tires and the maintenance
of the specified tire pressure are crucial not only
to the tire's service life, but also to driving com-
fort and most importantly, driving safety.
Checking pressure
Only check tire inflation pressure when the tires
are cold. This means after a maximum of
1.25 miles/2 km driving or when the vehicle has
been parked for at least 2 hours. When tires are
warm, the tire inflation pressure increases.
Check the tire inflation pressure regularly
and correct it as needed: at least twice a
month and before starting long trips. Otherwise
driving instability or tire damage, and therefore
accidents, can result from incorrect tire inflation
pressures.<
After correcting the tire inflation pressure,
reinitialize the Flat Tire Monitor, refer to
page88, or reset the Tire Pressure Monitor,
refer to page90.<
Pressure specifications
The tables below provide all the correct inflation
pressures for the specified tire sizes at ambient
temperature.
The inflation pressures apply to the tire
sizes and tire brands respectively
approved and recommended by BMW; a list of
these is available from your BMW center.<
For correct identification of the right tire infla-
tion pressure for your tires, observe the follow-
ing:
>Tire sizes for your vehicle
>Load conditions
>Maximum allowable driving speed
Tire inflation pressures for driving
up to 100 mph/160 km/h
For normal driving up to 100 mph/160 km/h,
adjust pressures to the respective tire inflation
pressures listed on the following pages in the
column for traveling speeds up to a max. of
100 mph/160 km/h to achieve optimum driving
comfort.
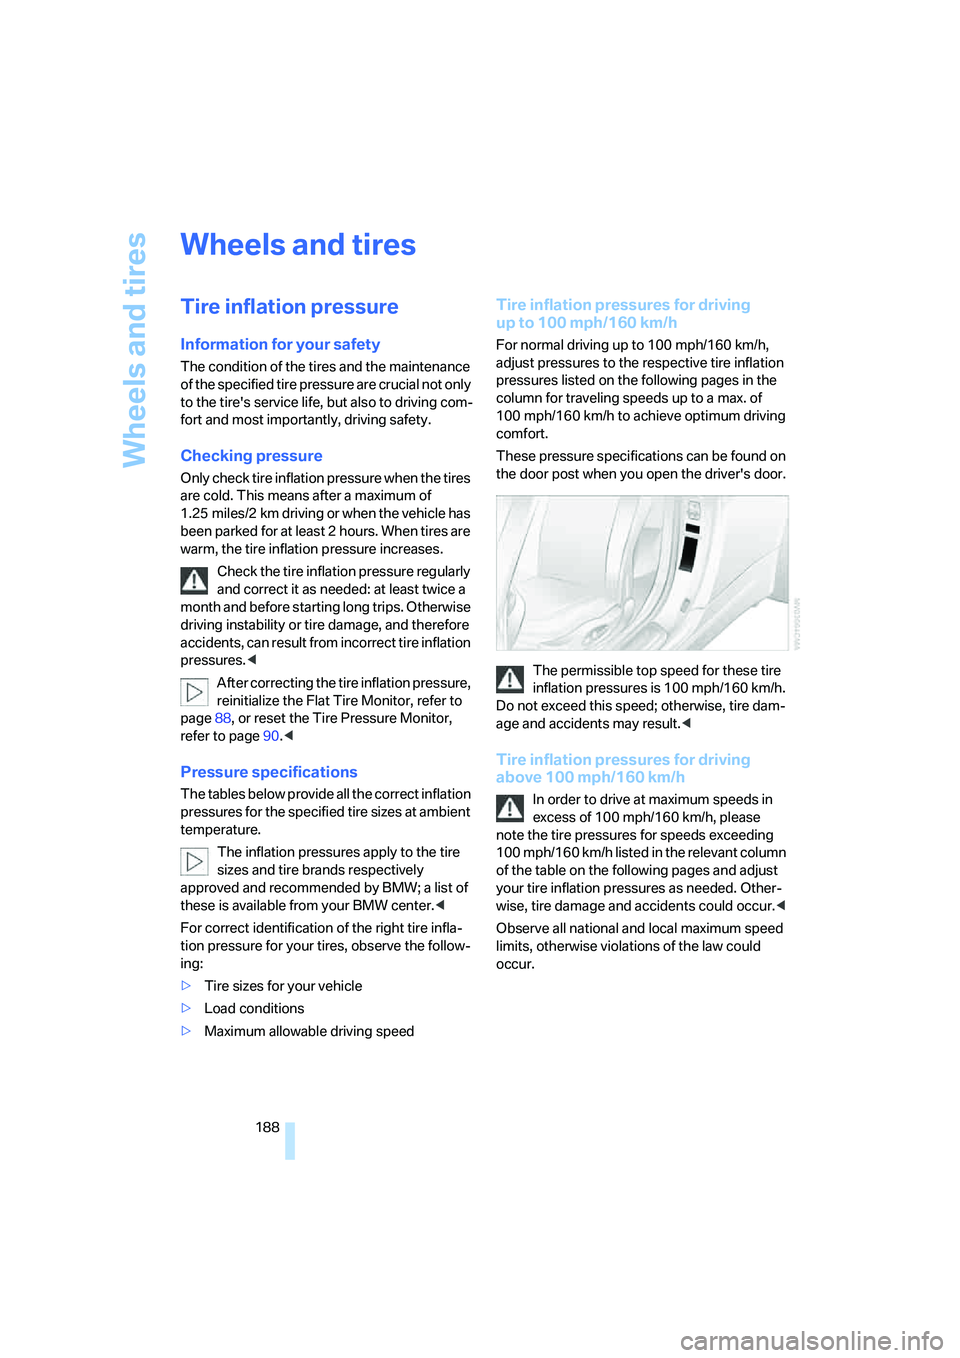
These pressure specifications can be found on
the door post when you open the driver's door.
The permissible top speed for these tire
inflation pressures is 100 mph/160 km/h.
Do not exceed this speed; otherwise, tire dam-
age and accidents may result.<
Tire inflation pressures for driving
above 100 mph/160 km/h
In order to drive at maximum speeds in
excess of 100 mph/160 km/h, please
note the tire pressures for speeds exceeding
100 mph/160 km/h listed in the relevant column
of the table on the following pages and adjust
your tire inflation pressures as needed. Other-
wise, tire damage and accidents could occur.<
Observe all national and local maximum speed
limits, otherwise violations of the law could
occur.