2006 BMW 650I COUPE&CONVERTIBLE height
[x] Cancel search: heightPage 37 of 242
Opening and closing
36
Indicator lamp displays
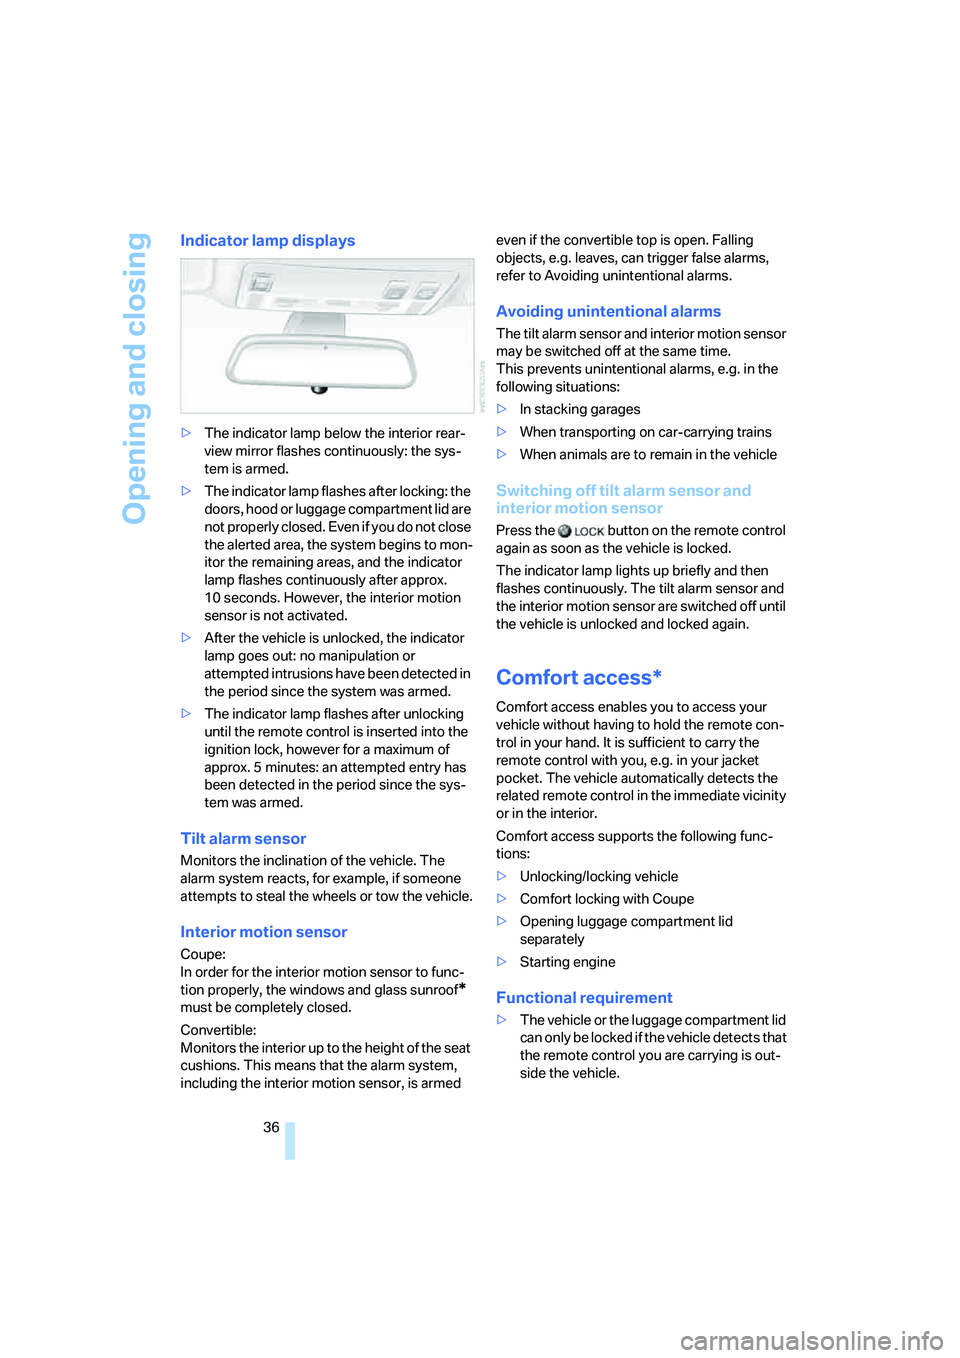
>The indicator lamp below the interior rear-
view mirror flashes continuously: the sys-
tem is armed.
>The indicator lamp flashes after locking: the
doors, hood or luggage compartment lid are
not properly closed. Even if you do not close
the alerted area, the system begins to mon-
itor the remaining areas, and the indicator
lamp flashes continuously after approx.
10 seconds. However, the interior motion
sensor is not activated.
>After the vehicle is unlocked, the indicator
lamp goes out: no manipulation or
attempted intrusions have been detected in
the period since the system was armed.
>The indicator lamp flashes after unlocking
until the remote control is inserted into the
ignition lock, however for a maximum of
approx. 5 minutes: an attempted entry has
been detected in the period since the sys-
tem was armed.
Tilt alarm sensor
Monitors the inclination of the vehicle. The
alarm system reacts, for example, if someone
attempts to steal the wheels or tow the vehicle.
Interior motion sensor
Coupe:
In order for the interior motion sensor to func-
tion properly, the windows and glass sunroof
*
must be completely closed.
Convertible:
Monitors the interior up to the height of the seat
cushions. This means that the alarm system,
including the interior motion sensor, is armed even if the convertible top is open. Falling
objects, e.g. leaves, can trigger false alarms,
refer to Avoiding unintentional alarms.
Avoiding unintentional alarms
The tilt alarm sensor and interior motion sensor
may be switched off at the same time.
This prevents unintentional alarms, e.g. in the
following situations:
>In stacking garages
>When transporting on car-carrying trains
>When animals are to remain in the vehicle
Switching off tilt alarm sensor and
interior motion sensor
Press the button on the remote control
again as soon as the vehicle is locked.
The indicator lamp lights up briefly and then
flashes continuously. The tilt alarm sensor and
the interior motion sensor are switched off until
the vehicle is unlocked and locked again.
Comfort access*
Comfort access enables you to access your
vehicle without having to hold the remote con-
trol in your hand. It is sufficient to carry the
remote control with you, e.g. in your jacket
pocket. The vehicle automatically detects the
related remote control in the immediate vicinity
or in the interior.
Comfort access supports the following func-
tions:
>Unlocking/locking vehicle
>Comfort locking with Coupe
>Opening luggage compartment lid
separately
>Starting engine
Functional requirement
>The vehicle or the luggage compartment lid
can only be locked if the vehicle detects that
the remote control you are carrying is out-
side the vehicle.
Page 49 of 242
Adjustments
48
Seats
Note before adjusting
Never attempt to adjust your seat while
operating the vehicle. The seat could
respond with unexpected movement and the
ensuing loss of vehicle control could lead to an
accident.
On the front passenger side as well, do not tilt
the backrest too far toward the rear. Failure to
observe this precaution can prevent the belt
from providing effective protection against
injury, as the passenger could slide under the
belt in an accident.<
Also follow the instructions regarding damage
to the safety belt on page52.
Convertible: with the wind deflector fitted,
do not incline the front seat backrests too
far backward if the seat is to be moved back to
the end position. Otherwise, the wind deflector
will be damaged.<
Seat adjustment
To ensure that the safety systems con-
tinue to provide optimized protection,
please follow the adjustment instructions on
page47.<
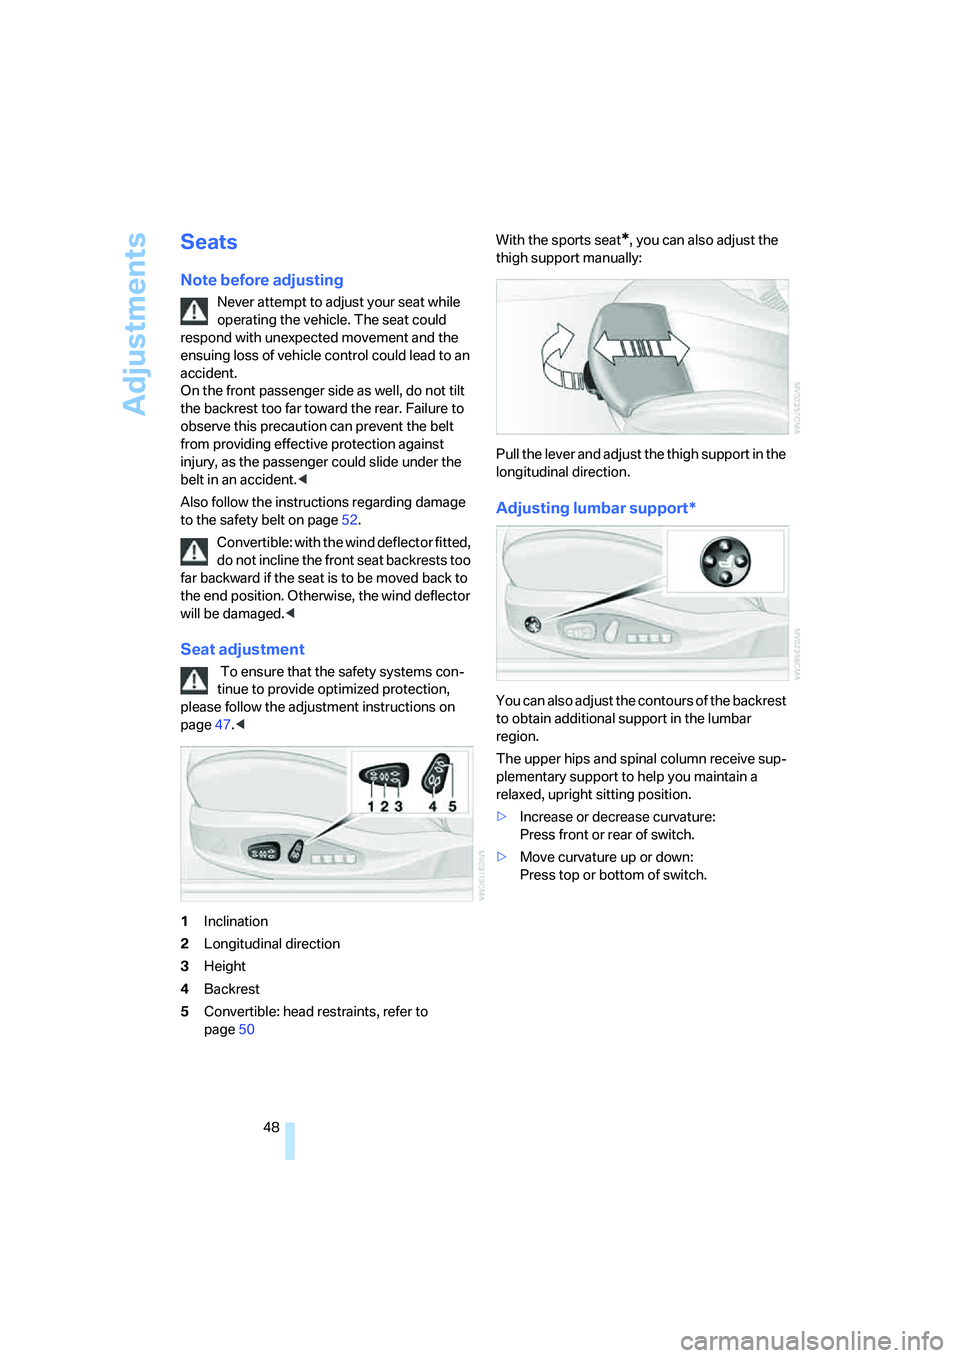
1Inclination
2Longitudinal direction
3Height
4Backrest
5Convertible: head restraints, refer to
page50With the sports seat
*, you can also adjust the
thigh support manually:
Pull the lever and adjust the thigh support in the
longitudinal direction.
Adjusting lumbar support*
You can also adjust the contours of the backrest
to obtain additional support in the lumbar
region.
The upper hips and spinal column receive sup-
plementary support to help you maintain a
relaxed, upright sitting position.
>Increase or decrease curvature:
Press front or rear of switch.
>Move curvature up or down:
Press top or bottom of switch.
Page 51 of 242
Adjustments
50 7.Select "After unlocking" or "After door
opened".
8.Press the controller.
To cancel the request:
Select "Deactivated" and press the controller.
When using this feature, always make
sure that the footwell behind the driver's
seat is empty and unobstructed. If you fail to do
so, any persons or objects behind the seat
could be injured or damaged by a rearward
movement of the seat.<
Front head restraints
A correctly adjusted head restraint reduces the
risk of injury to cervical vertebrae in an accident.
Adjust the head restraint so that its center
is approx. at ear level. Otherwise, there is
increased danger of injury in the event of an
accident.<
Coupe
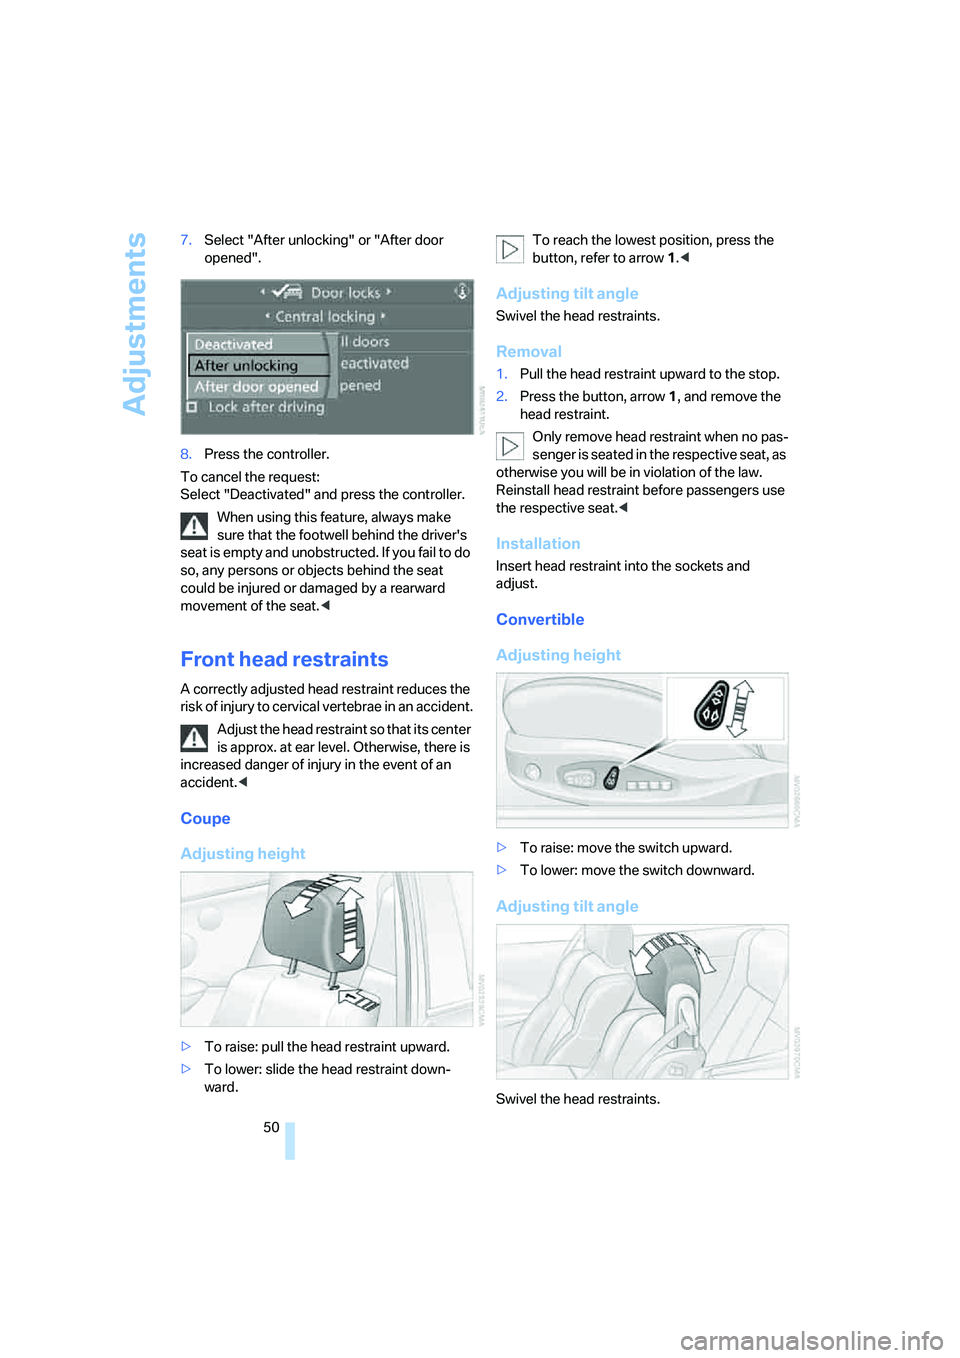
Adjusting height
>To raise: pull the head restraint upward.
>To lower: slide the head restraint down-
ward.To reach the lowest position, press the
button, refer to arrow 1.<
Adjusting tilt angle
Swivel the head restraints.
Removal
1.Pull the head restraint upward to the stop.
2.Press the button, arrow1, and remove the
head restraint.
Only remove head restraint when no pas-
senger is seated in the respective seat, as
otherwise you will be in violation of the law.
Reinstall head restraint before passengers use
the respective seat.<
Installation
Insert head restraint into the sockets and
adjust.
Convertible
Adjusting height
>To raise: move the switch upward.
>To lower: move the switch downward.
Adjusting tilt angle
Swivel the head restraints.
Page 57 of 242
Transporting children safely
56
Transporting children safely
The right place for children
Do not leave children unattended in the
vehicle; otherwise, they could endanger
themselves and other persons, e.g. by opening
the doors.<
Children always in the rear
Accident research shows that the safest place
for children is in the back.
Children younger than 13 years of age or
with a height under 5 ft/150 cm may only
be transported in the rear in child restraint sys-
tems which correspond to the age, weight and
height of the child. Otherwise there is an
increased danger of injury in an accident.<
Children 13 years of age or older must wear a
safety belt as soon as a suitable child restraint
system can no longer be used due to their age,
size and weight.
With the exception of the driver's seat, all seats
in your BMW comply with the recommenda-
tions of the standard SAE J1819 for the safe
securing of child restraint systems in motor
vehicles.
Exception for front passenger seat
Should it be necessary to use a child
restraint system on the front passenger
seat, the front, knee and side airbag on the pas-
senger side must be deactivated. Otherwise,
there is an increased risk of injury for the child if
the airbags are triggered, even with a child
restraint system. Your BMW center will be glad
to advise you.<
For more information on automatic deactivation
of the front passenger airbags, refer to page93.
Installing child restraint
systems
Follow child-restraint system manufac-
turer's instructions for the selection,
installation and use of child restraint systems.
Otherwise the degree of protection they offer
may be reduced.<
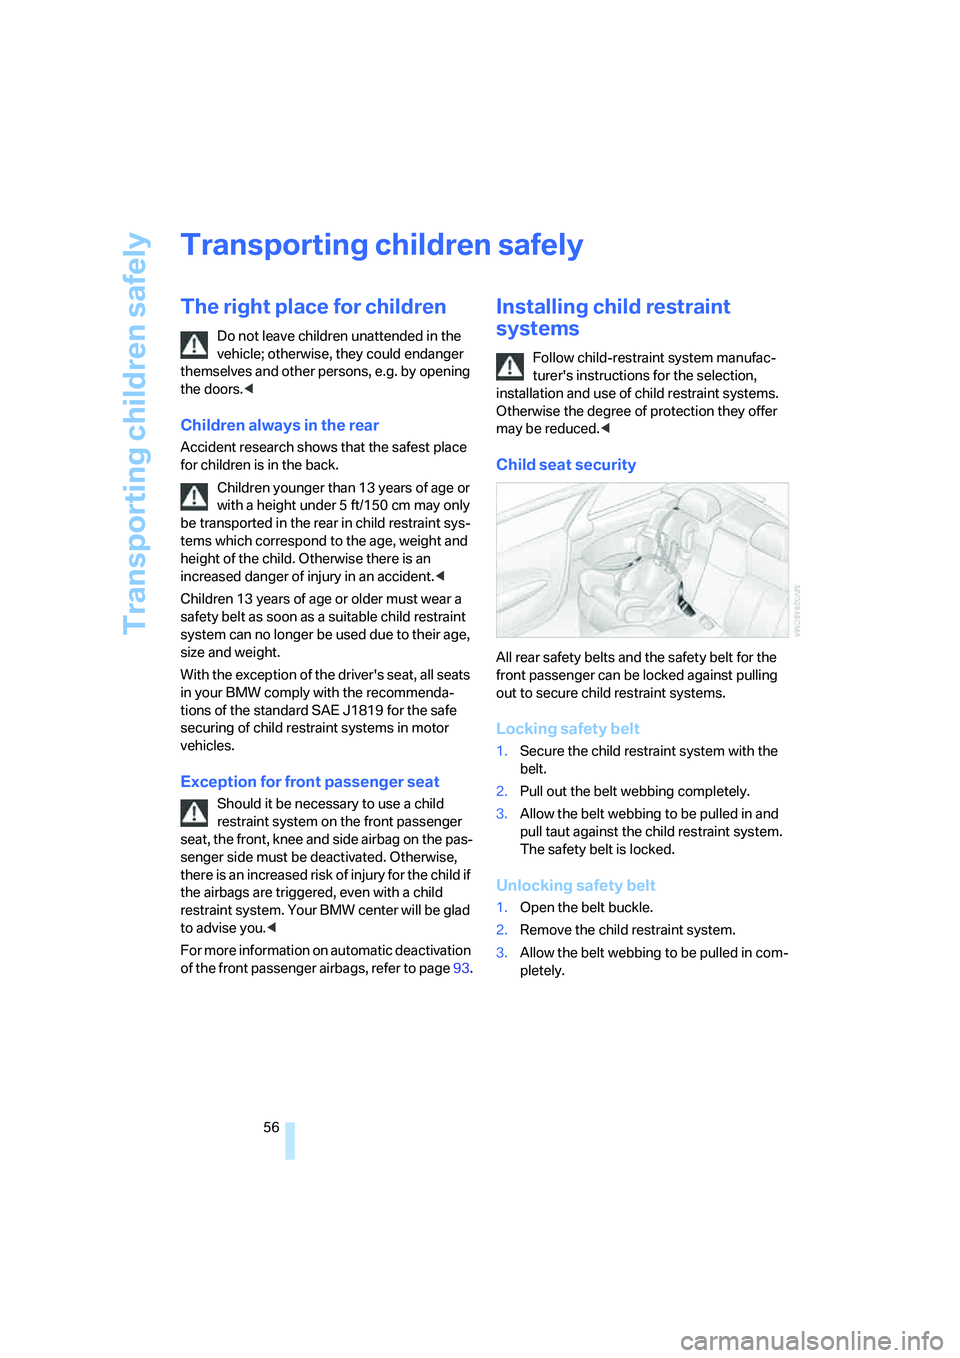
Child seat security
All rear safety belts and the safety belt for the
front passenger can be locked against pulling
out to secure child restraint systems.
Locking safety belt
1.Secure the child restraint system with the
belt.
2.Pull out the belt webbing completely.
3.Allow the belt webbing to be pulled in and
pull taut against the child restraint system.
The safety belt is locked.
Unlocking safety belt
1.Open the belt buckle.
2.Remove the child restraint system.
3.Allow the belt webbing to be pulled in com-
pletely.
Page 73 of 242
Driving
72 does not react to oncoming traffic, pedestrians
or other types of potential traffic such as a rider
on horseback. It is also possible that the system
may not detect smaller moving objects such as
motorcycles or bicycles. Be especially alert
when encountering any of these situations as
the system will neither automatically brake, nor
provide a warning to you. Also, be aware that
every decrease in the distance setting allows
your vehicle to come closer to a vehicle in front
of you and requires a heightened amount of
alertness.<
If your vehicle is actively following a vehicle in
front of you and the vehicle ahead speeds up or
the lane ahead becomes clear, then your vehi-
cle will accelerate to the speed you have
selected. Be aware that changing to a clear,
unobstructed lane will also result in your vehicle
accelerating.
Be certain to deactivate the system when
you pull into an exit lane for a highway off-
ramp.<
Also, vehicles traveling in a staggered manner
on a highway may cause a delay in the system's
reaction to a vehicle in front of you or may cause
the system to react to a vehicle actually in the
lane next to you. Always be ready to take action
or apply the brakes if necessary.
Active cruise control can only decelerate the
vehicle to approx. 20 mph/30 km/h. If the sys-
tem reduces vehicle speed below 20 mph/
30 km/h or if DSC/ABS is engaged while driving,
the system will automatically deactivate.
Remember, the system cannot stop your
vehicle. In addition, the system is deacti-
vated whenever the driver applies the vehicle
brakes, shifts into neutral, or deactivates DSC.
After any deactivation, the system will no longer
automatically activate the vehicle brakes, which
means the driver must intervene and resume
manual braking. You should then reactivate the
system only when you are fully aware of the
prior speed and distance settings.<
Active cruise control may brake when you
reduce the stored desired speed; however, the
driver must constantly monitor traffic and inter-
vene if necessary.When you switch off the engine or ignition,
active cruise control is fully switched off, too,
and any settings you have selected are can-
celed.
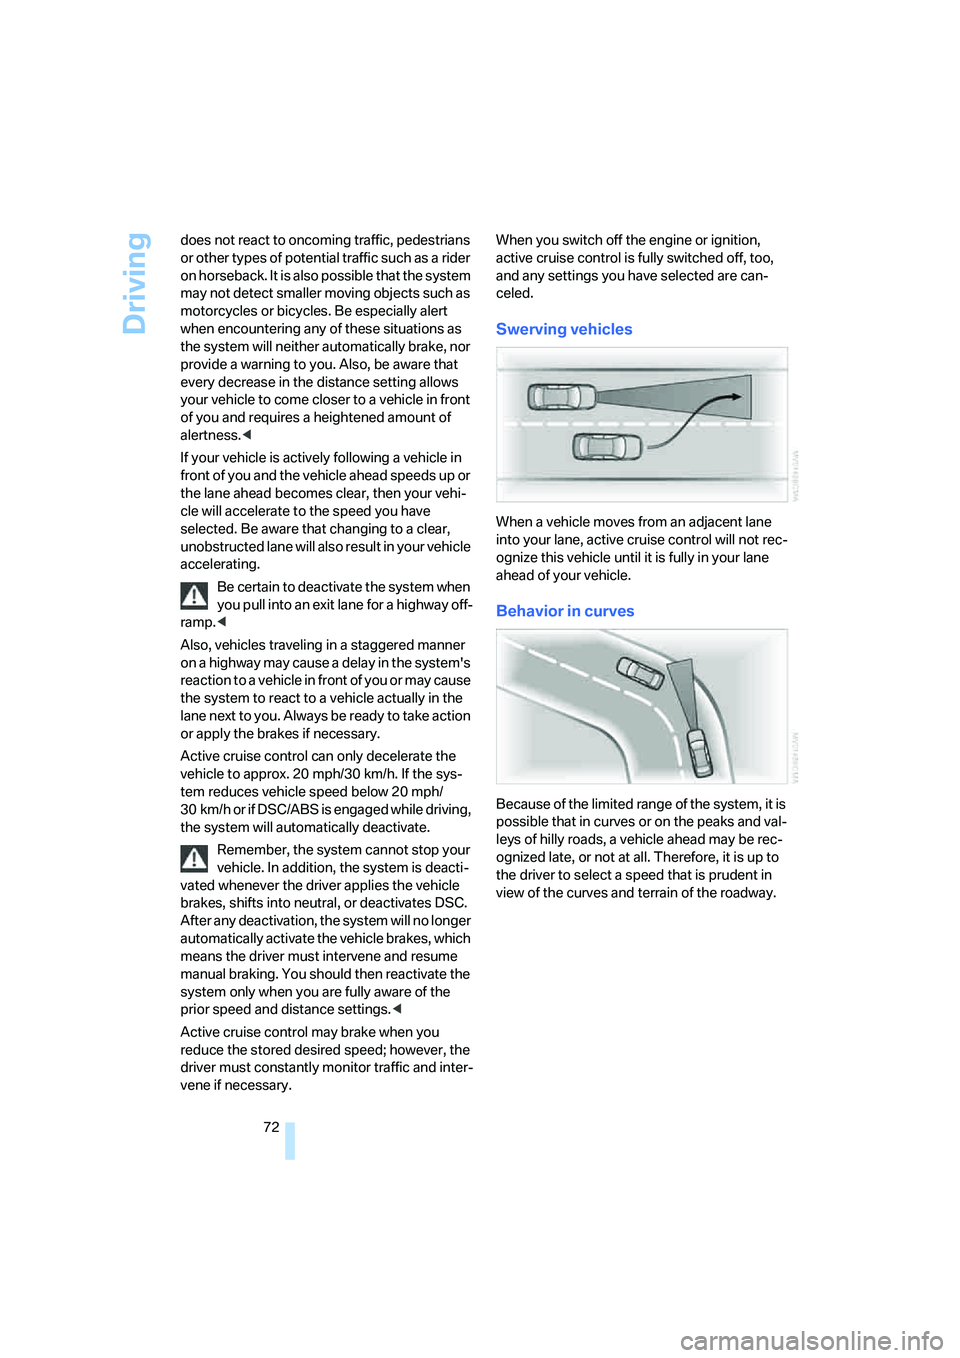
Swerving vehicles
When a vehicle moves from an adjacent lane
into your lane, active cruise control will not rec-
ognize this vehicle until it is fully in your lane
ahead of your vehicle.
Behavior in curves
Because of the limited range of the system, it is
possible that in curves or on the peaks and val-
leys of hilly roads, a vehicle ahead may be rec-
ognized late, or not at all. Therefore, it is up to
the driver to select a speed that is prudent in
view of the curves and terrain of the roadway.
Page 95 of 242
Technology for comfort, convenience and safety
94 pied. The indicator lamp shows whether the
front passenger airbags are activated or deacti-
vated.
>The indicator lamp lights up when a child in
a child restraint system intended for the
purpose is properly detected on the seat.
The front, knee and side airbag on the front
passenger side are deactivated.
>The indicator lamp does not light up when,
for example, a correctly seated person of
sufficient height is detected on the seat.
The front, knee and side airbag on the front
passenger side are activated.
>The indicator lamp does not light up when
the seat is empty.
But the front, knee and side airbag on the
front passenger side are still deactivated.
Operational readiness of airbag system
From radio readiness, refer to page58, the
warning lamp lights up briefly, indicating the
operational readiness of the entire airbag sys-
tem and the safety belt tensioners.
Airbag system malfunction
>Warning lamp does not light up as of radio
readiness.
>Warning lamp lights up continuously.
Have the airbag system checked immedi-
ately in case of a malfunction; otherwise,
there is a danger that the airbag system may not
respond in the expected manner in an accident
despite an impact of corresponding intensity.<
Convertible: rollover
protection system
The rollover protection system is automatically
activated in the event of an accident or a critical
driving situation, extreme inclination on the lon-
gitudinal or transverse axis, or loss of ground
contact. The rollover bars located behind the
rear head restraints are deployed within frac-
tions of a second.
As a supplement to the rollover bar integrated
into the windshield frame, the rollover protec-
tion system ensures that all vehicle occupants
have the necessary headroom.
Always keep the path of movement of the
rollover protection system clear.
In less severe accidents, you are protected by
the fastened safety belt and, depending on the
severity of the accident, the belt tensioner and
the multistage airbag restraint system.<
Lowering
If the rollover protection system experienced no
impact after automatic activation, then it can be
lowered again. No tools are necessary for this
purpose.
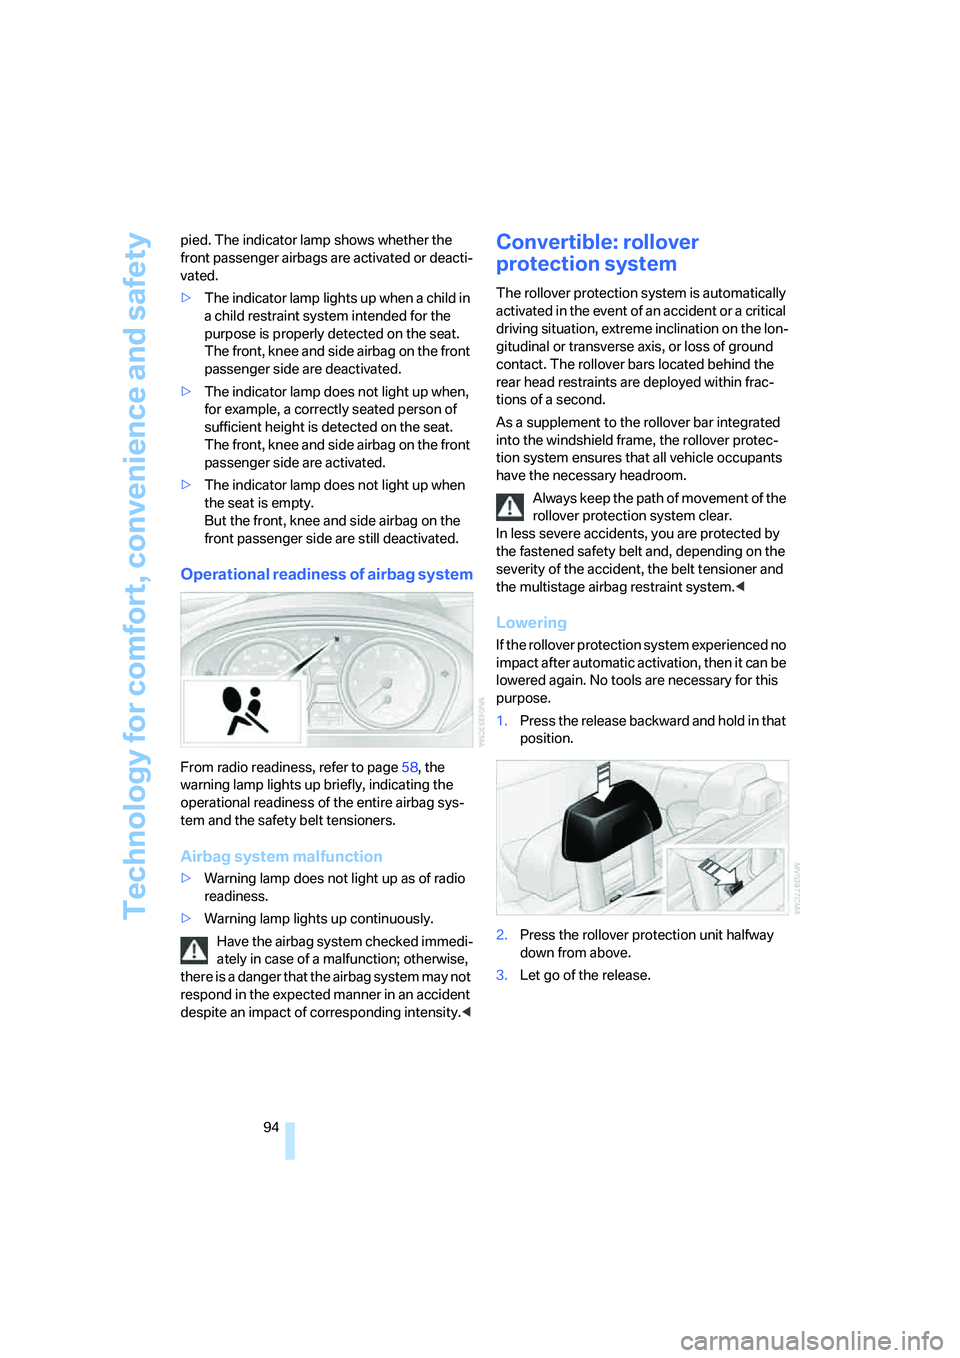
1.Press the release backward and hold in that
position.
2.Press the rollover protection unit halfway
down from above.
3.Let go of the release.
Page 113 of 242
Practical interior accessories
112 Remove the flashlight from the socket when
needed.
Be sure that the flashlight is switched off
when it is inserted into its socket. Failure
to comply with this precaution could lead to
overcharging and damage.<
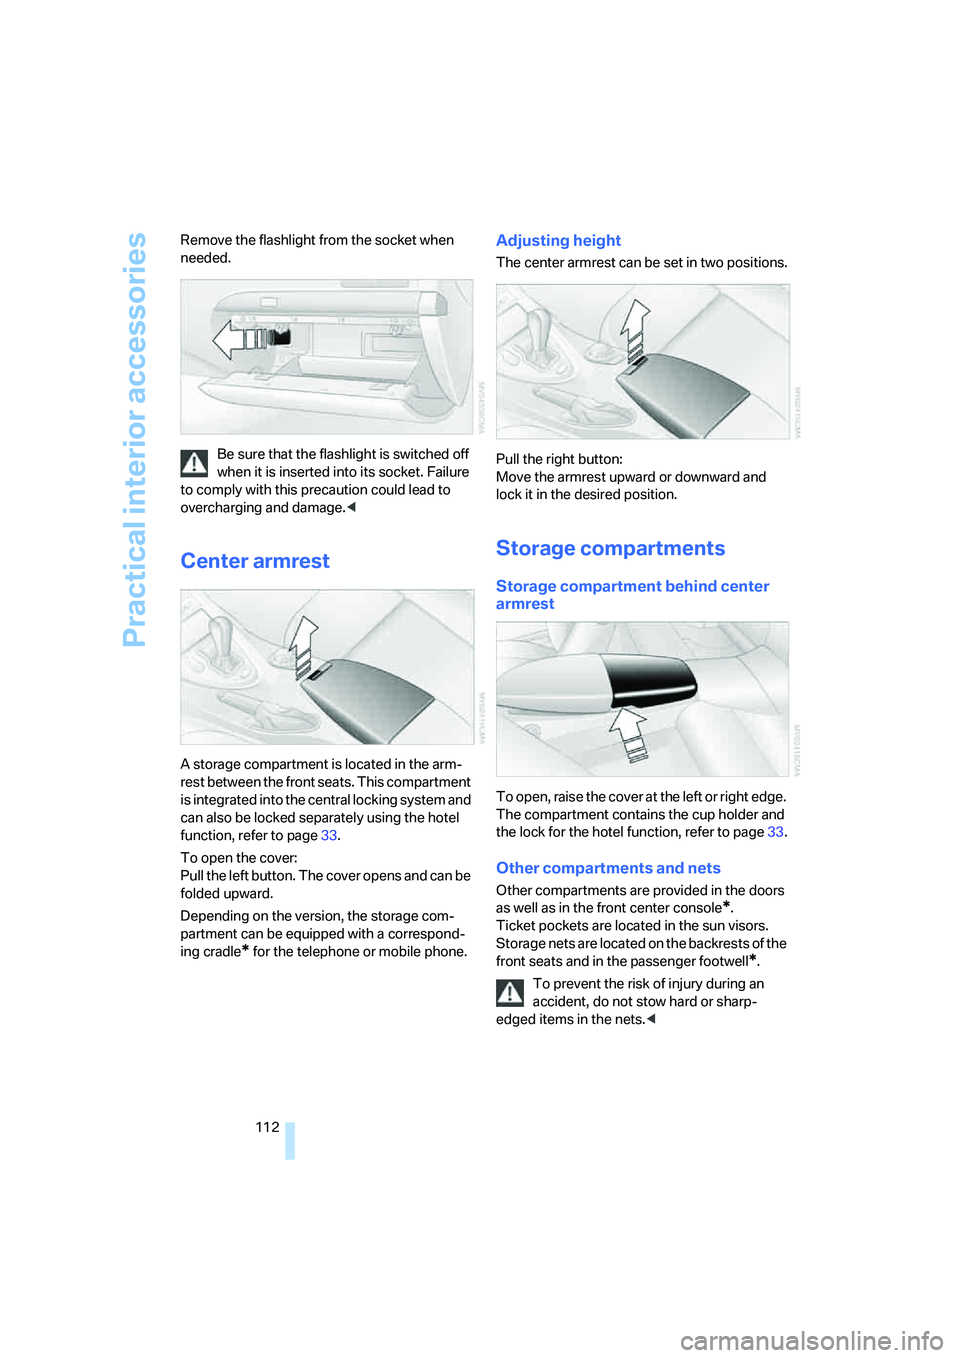
Center armrest
A storage compartment is located in the arm-
rest between the front seats. This compartment
is integrated into the central locking system and
can also be locked separately using the hotel
function, refer to page33.
To open the cover:
Pull the left button. The cover opens and can be
folded upward.
Depending on the version, the storage com-
partment can be equipped with a correspond-
ing cradle
* for the telephone or mobile phone.
Adjusting height
The center armrest can be set in two positions.
Pull the right button:
Move the armrest upward or downward and
lock it in the desired position.
Storage compartments
Storage compartment behind center
armrest
To open, raise the cover at the left or right edge.
The compartment contains the cup holder
and
the lock for the hotel function, refer to page33.
Other compartments and nets
Other compartments are provided in the doors
as well as in the front center console
*.
Ticket pockets are located in the sun visors.
Storage nets are located on the backrests of the
front seats and in the passenger footwell
*.
To prevent the risk of injury during an
accident, do not stow hard or sharp-
edged items in the nets.<
Page 195 of 242
Under the hood
194
Under the hood
Never attempt to perform any service or
repair operations on your vehicle without
the required professional technical training. If
you are unfamiliar with the specifications to be
observed, only have work carried out on your
vehicle by a BMW center or a repair shop that
works in accordance with BMW guidelines and
uses appropriately trained personnel. Other-
wise there is a danger of damage and associ-
ated safety risks if this work is performed
improperly.<
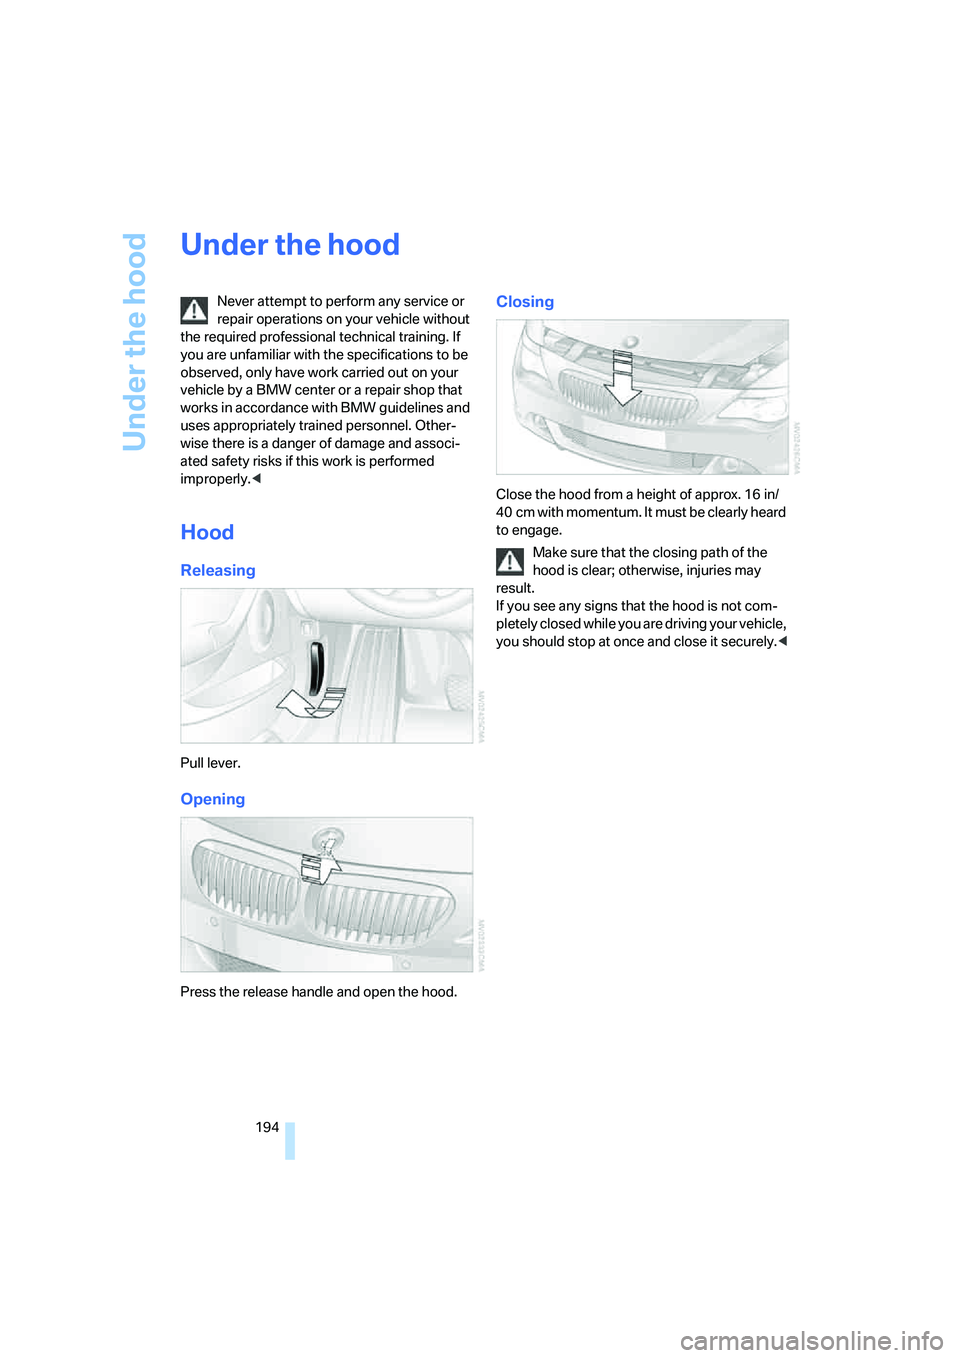
Hood
Releasing
Pull lever.
Opening
Press the release handle and open the hood.
Closing
Close the hood from a height of approx. 16 in/
40 cm with momentum. It must be clearly heard
to engage.
Make sure that the closing path of the
hood is clear; otherwise, injuries may
result.
If you see any signs that the hood is not com-
pletely closed while you are driving your vehicle,
you should stop at once and close it securely.<