2006 BMW 650I CONVERTIBLE rear entertainment
[x] Cancel search: rear entertainmentPage 58 of 236

Controls
57Reference
At a glance
Driving tips
Communications
Navigation
Entertainment
Mobility
Locking safety belt
1.Secure the child restraint system with the
belt.
2.Pull out the belt webbing completely.
3.Allow the belt webbing to be pulled in and
pull taut against the child restraint system.
The safety belt is locked.
Unlocking safety belt
1.Open the belt buckle.
2.Remove the child restraint system.
3.Allow the belt webbing to be pulled in com-
pletely.
Coupe: child restraint system with
tether strap
There are two additional mounting points for
child restraint systems with a tether strap, refer
to arrows.
Placement of tether strap
1.Fold anchor fitting into upright position.
2.Push head restraint downward.
3.Guide tether strap over head restraint and
hook onto anchor fitting.
LATCH child-restraint fixing system
LATCH: Lower Anchor and Tethers for CHil-
dren.
To attach a LATCH child's seat, follow the
operating and safety instructions of the
child's seat manufacturer.<
Rear seats
The anchorage points for the LATCH child-
restraint fixing system are located underneath
the identifying symbol. They are not visible from
the outside.
Before attaching the LATCH child's seat, pull
the belt away from the region of the child-
restraint fixing system.
Page 64 of 236
Controls
63Reference
At a glance
Driving tips
Communications
Navigation
Entertainment
Mobility
To prevent the vehicle from creeping
after you select a driving position,
maintain pressure on the brake pedal until
you are ready to start.<
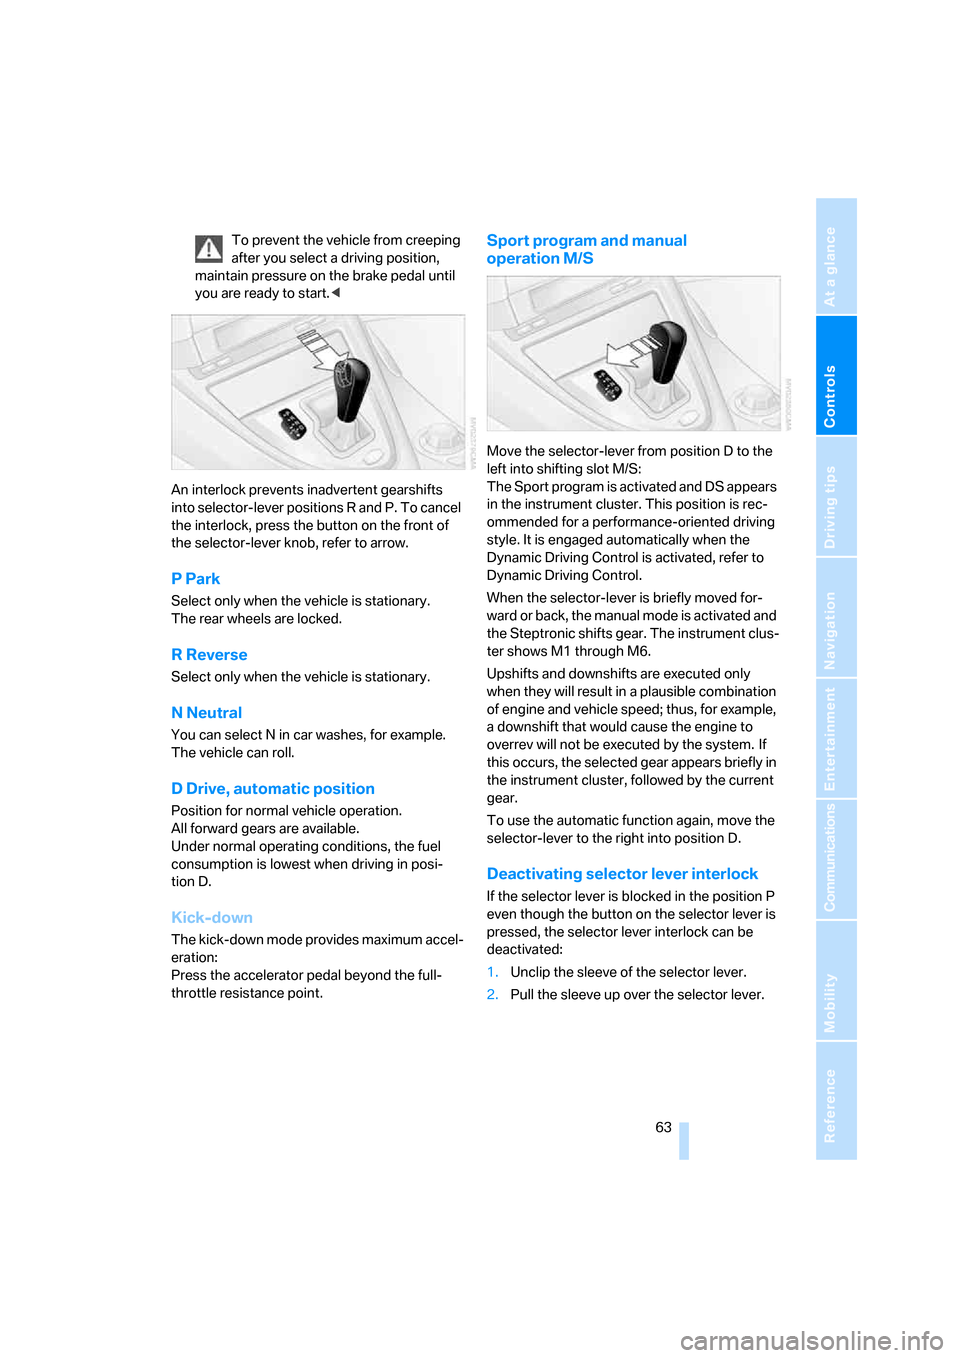
An interlock prevents inadvertent gearshifts
into selector-lever positions R and P. To cancel
the interlock, press the button on the front of
the selector-lever knob, refer to arrow.
P Park
Select only when the vehicle is stationary.
The rear wheels are locked.
R Reverse
Select only when the vehicle is stationary.
N Neutral
You can select N in car washes, for example.
The vehicle can roll.
D Drive, automatic position
Position for normal vehicle operation.
All forward gears are available.
Under normal operating conditions, the fuel
consumption is lowest when driving in posi-
tion D.
Kick-down
The kick-down mode provides maximum accel-
eration:
Press the accelerator pedal beyond the full-
throttle resistance point.
Sport program and manual
operation M/S
Move the selector-lever from position D to the
left into shifting slot M/S:
The Sport program is activated and DS appears
in the instrument cluster. This position is rec-
ommended for a performance-oriented driving
style. It is engaged automatically when the
Dynamic Driving Control is activated, refer to
Dynamic Driving Control.
When the selector-lever is briefly moved for-
ward or back, the manual mode is activated and
the Steptronic shifts gear. The instrument clus-
ter shows M1 through M6.
Upshifts and downshifts are executed only
when they will result in a plausible combination
of engine and vehicle speed; thus, for example,
a downshift that would cause the engine to
overrev will not be executed by the system. If
this occurs, the selected gear appears briefly in
the instrument cluster, followed by the current
gear.
To use the automatic function again, move the
selector-lever to the right into position D.
Deactivating selector lever interlock
If the selector lever is blocked in the position P
even though the button on the selector lever is
pressed, the selector lever interlock can be
deactivated:
1.Unclip the sleeve of the selector lever.
2.Pull the sleeve up over the selector lever.
Page 66 of 236
Controls
65Reference
At a glance
Driving tips
Communications
Navigation
Entertainment
Mobility
Using turn signals
Move the lever beyond the resistance point.
To switch off manually, only press the lever as
far as the resistance point.
Atypically rapid flashing of the indicator
lamp indicates the failure of a turn signal
lamp.<
Brief signaling
Press the lever to the resistance point and hold
it there as long as you wish to signal.
Triple turn signal activation
Press the lever to the resistance point; the turn
signals flash three times.
You can activate or deactivate this function.
iDrive, for principle details, refer to page16.
1.Open the start menu.
2.Press the controller to open the menu.
3.Select "Vehicle settings" and press the
controller.
4.Select "Lighting" and press the controller.
5.Select "Triple turn signal activation" and
press the controller.
Triple turn signal is activated.
Wiper system
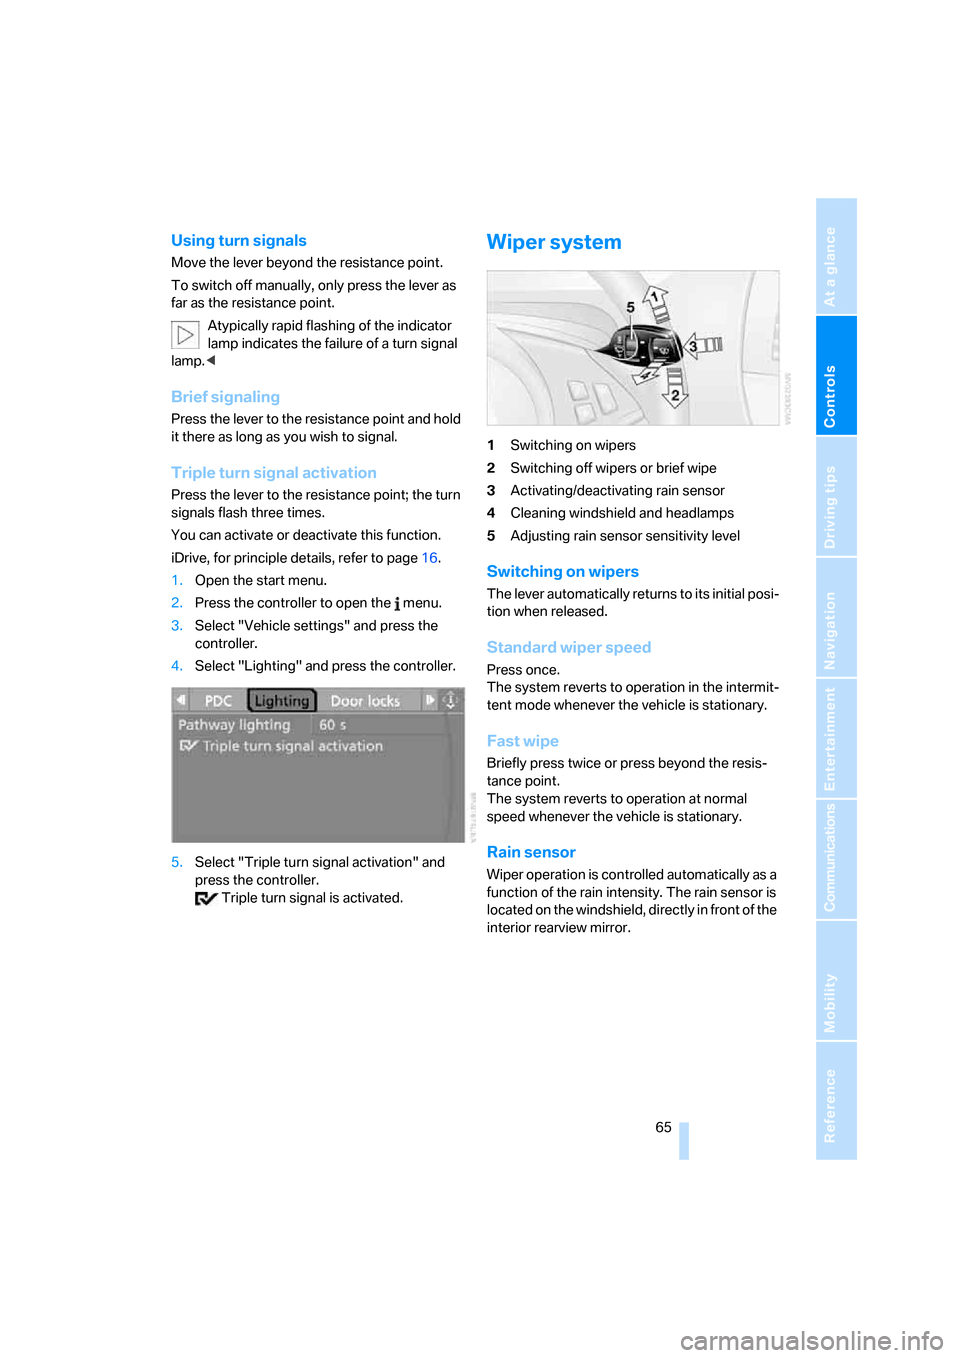
1Switching on wipers
2Switching off wipers or brief wipe
3Activating/deactivating rain sensor
4Cleaning windshield and headlamps
5Adjusting rain sensor sensitivity level
Switching on wipers
The lever automatically returns to its initial posi-
tion when released.
Standard wiper speed
Press once.
The system reverts to operation in the intermit-
tent mode whenever the vehicle is stationary.
Fast wipe
Briefly press twice or press beyond the resis-
tance point.
The system reverts to operation at normal
speed whenever the vehicle is stationary.
Rain sensor
Wiper operation is controlled automatically as a
function of the rain intensity. The rain sensor is
located on the windshield, directly in front of the
interior rearview mirror.
Page 86 of 236
Controls
85Reference
At a glance
Driving tips
Communications
Navigation
Entertainment
Mobility
Technology for comfort, convenience and
safety
PDC Park Distance Control*
The concept
The PDC assists you when you are parking.
Acoustic signals and an optical display
* alert
you to the approach of an object from behind
your vehicle. To measure the distance, there
are four ultrasonic sensors in each bumper.
The range of these sensors is approx. 7 ft/2 m.
But an acoustic warning first sounds at approx.
24 in/60 cm for the sensors at the front and two
rear corners and at approx. 5 ft/1,50 m for the
center rear sensors.
PDC is a parking aid that can indicate the
presence of objects when they are being
approached slowly, as is usually the case when
parking. Avoid approaching an object at high
speed; otherwise, the physical circumstances
could cause the system warning to be activated
too late.<
Automatically activating
With the engine running or the ignition switched
on, the system starts to operate automatically
approx. 1 second after you shift into reverse.
Wait this short period before driving.
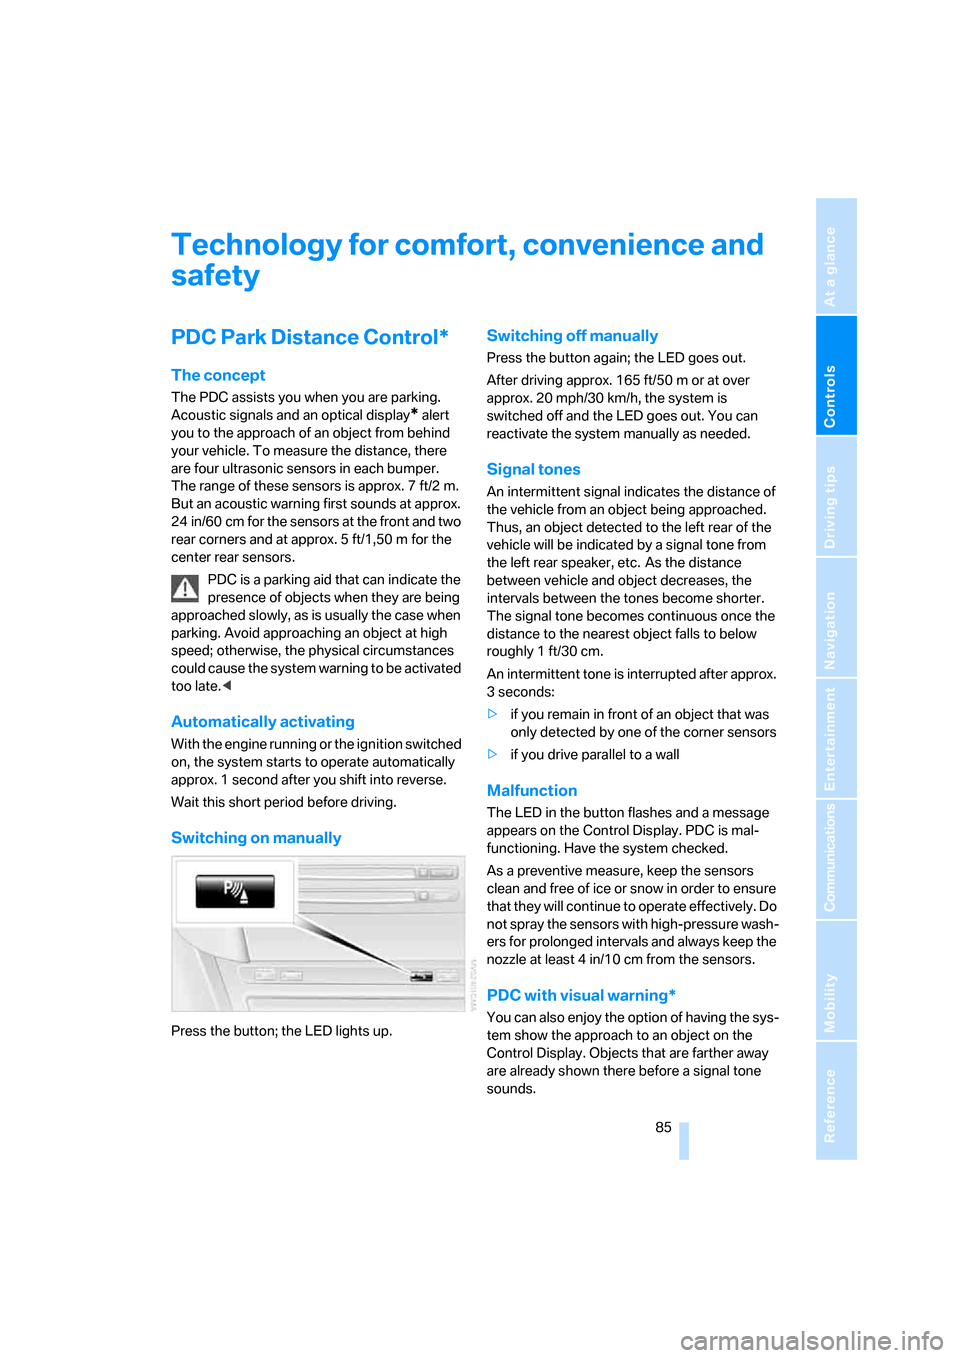
Switching on manually
Press the button; the LED lights up.
Switching off manually
Press the button again; the LED goes out.
After driving approx. 165 ft/50 m or at over
approx. 20 mph/30 km/h, the system is
switched off and the LED goes out. You can
reactivate the system manually as needed.
Signal tones
An intermittent signal indicates the distance of
the vehicle from an object being approached.
Thus, an object detected to the left rear of the
vehicle will be indicated by a signal tone from
the left rear speaker, etc. As the distance
between vehicle and object decreases, the
intervals between the tones become shorter.
The signal tone becomes continuous once the
distance to the nearest object falls to below
roughly 1 ft/30 cm.
An intermittent tone is interrupted after approx.
3seconds:
>if you remain in front of an object that was
only detected by one of the corner sensors
>if you drive parallel to a wall
Malfunction
The LED in the button flashes and a message
appears on the Control Display. PDC is mal-
functioning. Have the system checked.
As a preventive measure, keep the sensors
clean and free of ice or snow in order to ensure
that they will continue to operate effectively. Do
not spray the sensors with high-pressure wash-
ers for prolonged intervals and always keep the
nozzle at least 4 in/10 cm from the sensors.
PDC with visual warning*
You can also enjoy the option of having the sys-
tem show the approach to an object on the
Control Display. Objects that are farther away
are already shown there before a signal tone
sounds.
Page 92 of 236
Controls
91Reference
At a glance
Driving tips
Communications
Navigation
Entertainment
Mobility
Protective action
To ensure that the safety systems con-
tinue to provide optimized protection,
please follow the adjustment instructions on
page47.<
The front airbags help protect the driver and
front passenger by responding to frontal
impacts in which safety belts alone cannot pro-
vide adequate restraint. When needed, the
head and side airbags help provide protection in
the event of a side impact. The relevant side air-
bag supports the side upper body area. The
head airbag supports the head. The knee airbag
protects the legs from colliding with the cockpit.
The airbags are deliberately not triggered in
every impact situation, e. g. less severe acci-
dents or rear-end collisions.
For details on the correct seat position, refer to
page47.
Do not apply adhesive materials to the
cover panels of the airbags, cover them or
modify them in any other way.
Do not attempt to remove the airbag retention
system from the vehicle. Do not modify or
tamper with either the wiring or the individual
components in the airbag system.This category
includes the upholstery in the center of the
steering wheel, on the instrument panel, the
side trim panels on the doors and on the Coupe,
the roof pillars along with the sides of the head-
liner. Do not attempt to remove or dismantle the
steering wheel.
Do not touch the individual components
directly after the system has been triggered,
because there is a danger of burns.
In the event of malfunctions, deactivation, or
triggering of the airbag restraint system, have
the testing, repair, removal, and disposal of air-
bag generators carried out only by a BMW cen-
ter or a workshop that works according to BMW
repair procedures with appropriately trained
personnel and has the required explosives
licenses. Unprofessional attempts to service
the system could lead to failure in an emer-
gency or undesired airbag activation, either of
which could result in personal injury.
Automatic deactivation of front
passenger airbags
The occupation of the seat is detected by eval-
uating the impression on the occupied seat sur-
face of the front passenger seat. The system
correspondingly activates or deactivates the
front, knee and side airbag on the front passen-
ger side.
The current status of the front passenger
airbag, i.e. deactivated or activated, is
indicated by the indicator lamp over the interior
rearview mirror, refer to Operating state of front
passenger airbags below.<
Before transporting a child in the front
passenger seat, read the safety informa-
tion and follow the instructions under Trans-
porting children safely, refer to page56.
The front, knee and side airbag on the front pas-
senger side can be deactivated for teenagers
and adults in certain seat positions; the indica-
tor lamp for the front passenger airbags lights
up when this occurs. In these cases, change the
seat position so that the front passenger air-
bags are activated and the indicator lamp goes
out. If the desired status cannot be produced by
changing the seat position, transport the corre-
sponding person in the rear seat.
Do not fit seat covers, seat cushion padding,
beaded mats or other items onto the front pas-
senger seat unless they are specifically recom-
mended by BMW. Do not place objects under
the seat which could press against the seat
from below. Otherwise a correct evaluation of
the occupied seat surface cannot be ensured.<
Page 98 of 236
Controls
97Reference
At a glance
Driving tips
Communications
Navigation
Entertainment
Mobility
cannot detect fog. To avoid safety risks, you
should always switch on the lamps manually
under these conditions.<
Adaptive Head Light*
The concept
Adaptive Head Light is a variable headlamp
control system that enables better illumination
of the road surface. Depending on the steering
angle and other parameters, the light from the
headlamp follows the course of the road.
Activating Adaptive Head Light
In switch position1, the Adaptive Head Light is
active and the automatic headlamp control is
switched on.
To avoid blinding oncoming traffic, the Adaptive
Head Light is not active when driving in reverse
and points toward the passenger side when the
vehicle is stopped.
Malfunction
The LED next to the symbol for automatic head-
lamp control flashes. The Adaptive Head Light
is malfunctioning or has failed. Have the system
checked as soon as possible.
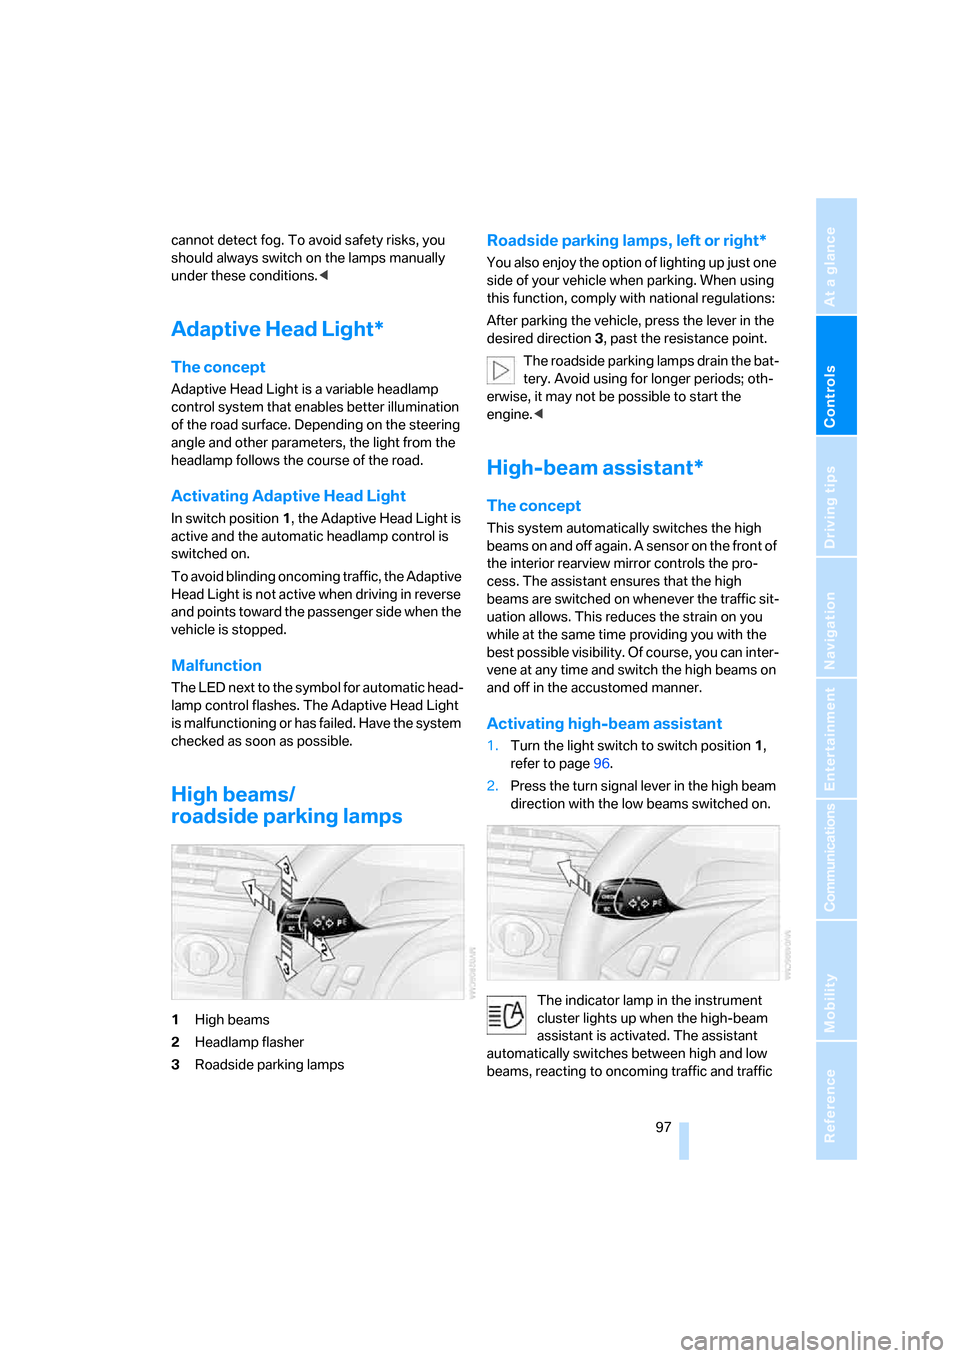
High beams/
roadside parking lamps
1High beams
2Headlamp flasher
3Roadside parking lamps
Roadside parking lamps, left or right*
You also enjoy the option of lighting up just one
side of your vehicle when parking. When using
this function, comply with national regulations:
After parking the vehicle, press the lever in the
desired direction3, past the resistance point.
The roadside parking lamps drain the bat-
tery. Avoid using for longer periods; oth-
erwise, it may not be possible to start the
engine.<
High-beam assistant*
The concept
This system automatically switches the high
beams on and off again. A sensor on the front of
the interior rearview mirror controls the pro-
cess. The assistant ensures that the high
beams are switched on whenever the traffic sit-
uation allows. This reduces the strain on you
while at the same time providing you with the
best possible visibility. Of course, you can inter-
vene at any time and switch the high beams on
and off in the accustomed manner.
Activating high-beam assistant
1.Turn the light switch to switch position1,
refer to page96.
2.Press the turn signal lever in the high beam
direction with the low beams switched on.
The indicator lamp in the instrument
cluster lights up when the high-beam
assistant is activated. The assistant
automatically switches between high and low
beams, reacting to oncoming traffic and traffic
Page 110 of 236
Controls
109Reference
At a glance
Driving tips
Communications
Navigation
Entertainment
Mobility
Another storage space is located in the luggage
compartment in the right side panel. If you wish,
this is also suitable to store the onboard docu-
mentation.
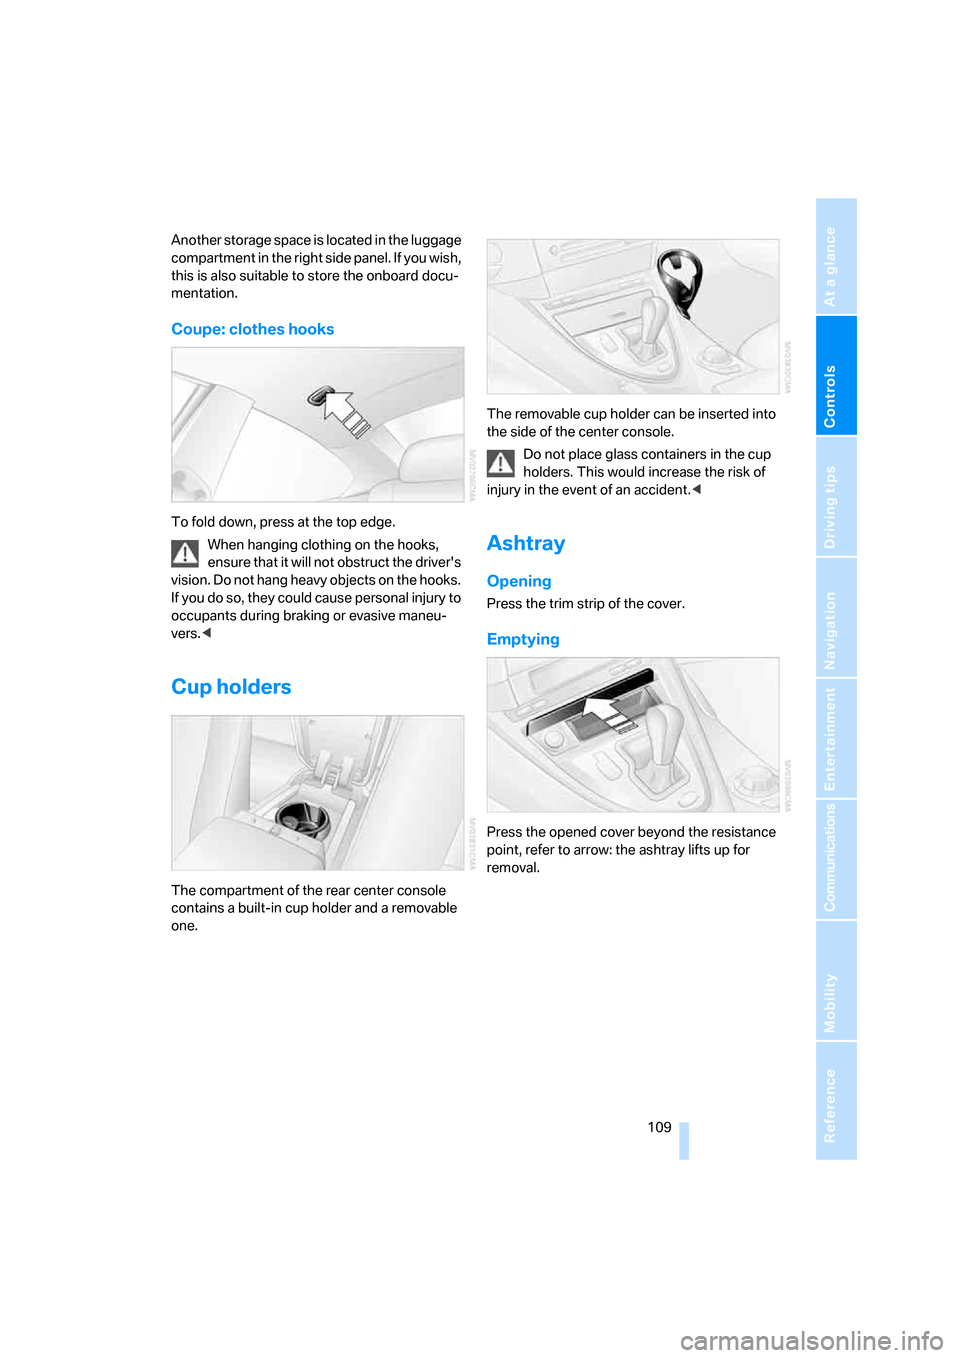
Coupe: clothes hooks
To fold down, press at the top edge.
When hanging clothing on the hooks,
ensure that it will not obstruct the driver's
vision. Do not hang heavy objects on the hooks.
If you do so, they could cause personal injury to
occupants during braking or evasive maneu-
vers.<
Cup holders
The compartment of the rear center console
contains a built-in cup holder and a removable
one.The removable cup holder can be inserted into
the side of the center console.
Do not place glass containers in the cup
holders. This would increase the risk of
injury in the event of an accident.<
Ashtray
Opening
Press the trim strip of the cover.
Emptying
Press the opened cover beyond the resistance
point, refer to arrow: the ashtray lifts up for
removal.
Page 112 of 236
Controls
111Reference
At a glance
Driving tips
Communications
Navigation
Entertainment
Mobility
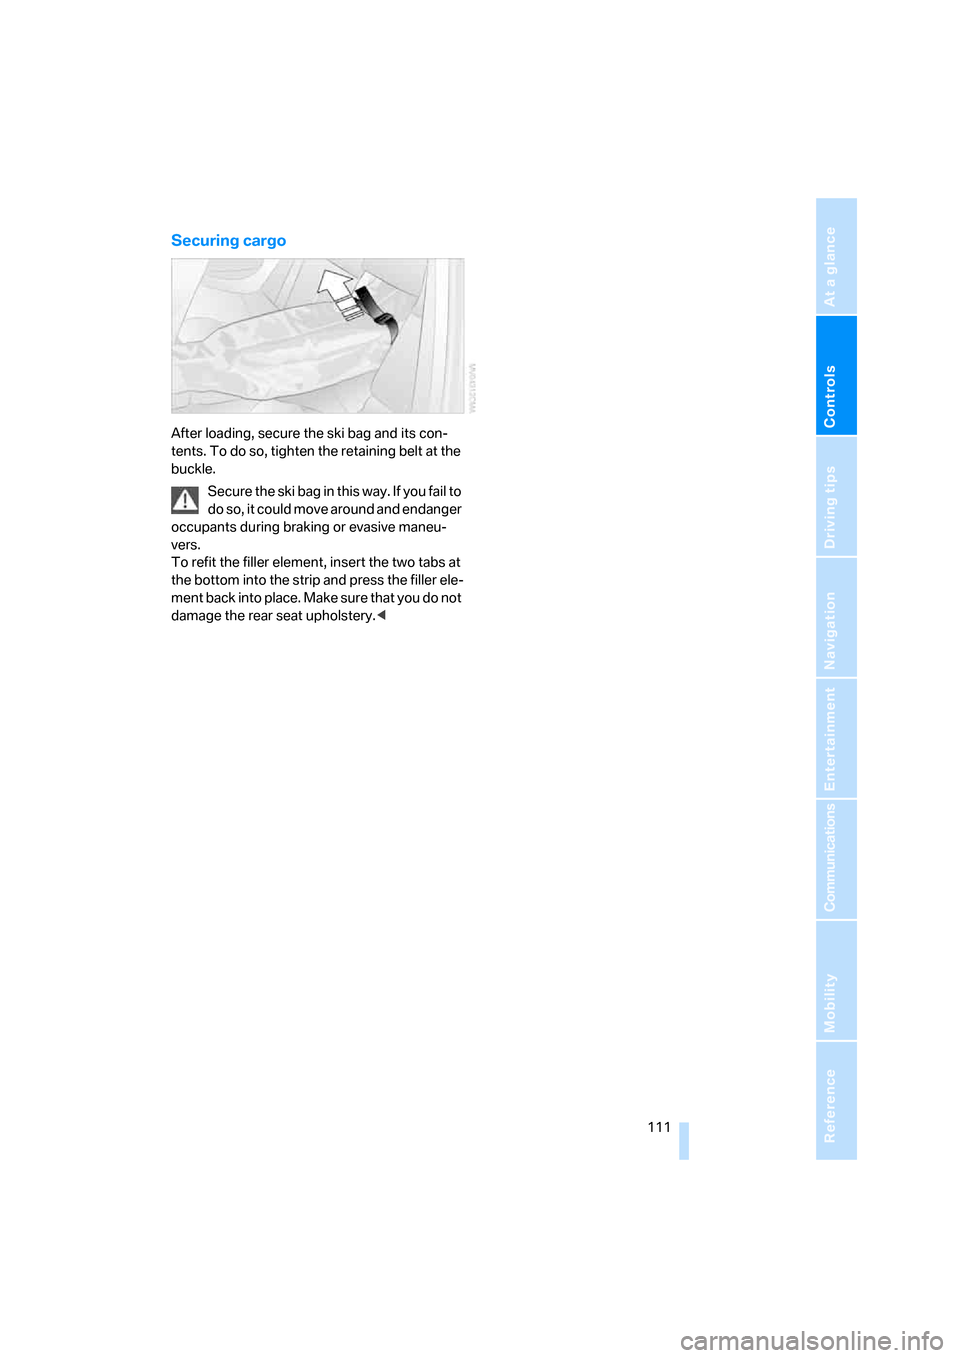
Securing cargo
After loading, secure the ski bag and its con-
tents. To do so, tighten the retaining belt at the
buckle.
Secure the ski bag in this way. If you fail to
do so, it could move around and endanger
occupants during braking or evasive maneu-
vers.
To refit the filler element, insert the two tabs at
the bottom into the strip and press the filler ele-
ment back into place. Make sure that you do not
damage the rear seat upholstery.<