2006 BMW 650I CONVERTIBLE mirror
[x] Cancel search: mirrorPage 11 of 236
Cockpit
10
Cockpit
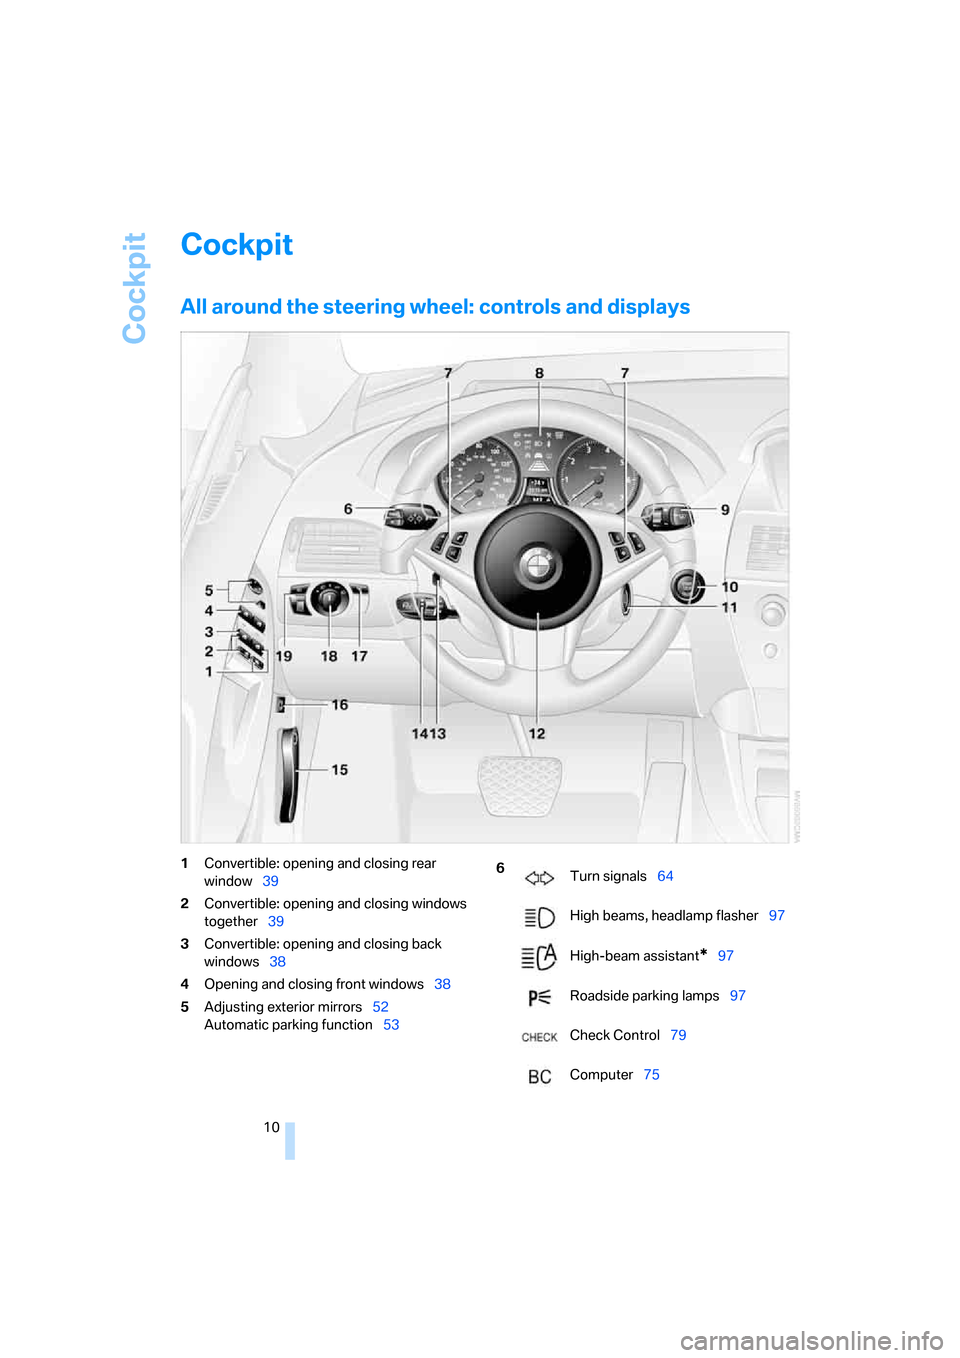
All around the steering wheel: controls and displays
1Convertible: opening and closing rear
window39
2Convertible: opening and closing windows
together39
3Convertible: opening and closing back
windows38
4Opening and closing front windows38
5Adjusting exterior mirrors52
Automatic parking function536
Turn signals64
High beams, headlamp flasher97
High-beam assistant
*97
Roadside parking lamps97
Check Control79
Computer75
Page 23 of 236
Voice command system
22
Voice command system
The concept
The voice command system allows you to con-
trol operation of various vehicle systems with-
out ever removing your hands from the steering
wheel.
Individual menu items on the Control Display
can be spoken as commands. This frees you of
having to use the controller.
The voice command system transforms your
spoken commands into control signals for the
selected systems and provides support in the
form of instructions or questions.
The voice command system includes a special
microphone.
The microphone is located:
>Near the interior rearview mirror in the
Coupe, refer to page14
>On the steering column in the Convertible
Prerequisite
In order to enable identification of the com-
mands to be spoken, use iDrive to set the lan-
guage for the voice command system. Setting
iDrive language, refer to page84.
Symbol in the Owner's Manual
Voice commands
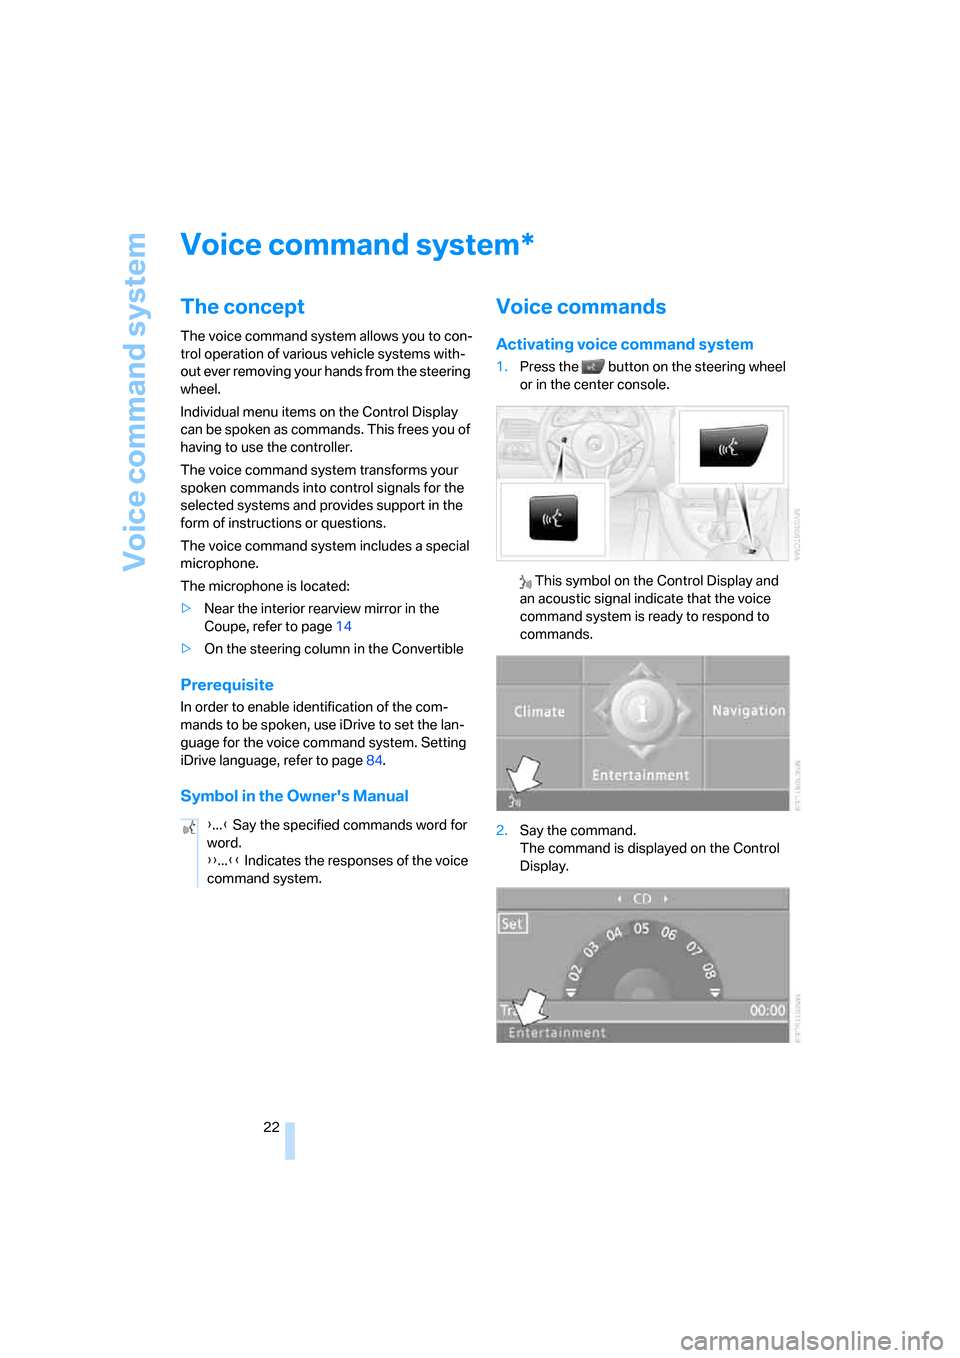
Activating voice command system
1.Press the button on the steering wheel
or in the center console.
This symbol on the Control Display and
an acoustic signal indicate that the voice
command system is ready to respond to
commands.
2.Say the command.
The command is displayed on the Control
Display.
*
{...} Say the specified commands word for
word.
{{...}} Indicates the responses of the voice
command system.
Page 30 of 236

Controls
29Reference
At a glance
Driving tips
Communications
Navigation
Entertainment
Mobility
Remove the adapter from the holder in the
glove compartment and slide the spare key into
the adapter.
Personal Profile
The concept
You can set a number of functions of your BMW
individually according to your preferences.
Personal Profile ensures that most of these set-
tings are stored for the remote control currently
in use without you having to do anything. When
the vehicle is unlocked, the corresponding
remote control is detected and the settings
stored for it are called up and carried out.
This means that you will always find your BMW
set to your own personal settings even if
another person with his/her own remote control
and settings has used the vehicle since the last
time you drove it. The individual settings are
stored for a maximum of four remote controls.
Personal Profile settings
>When unlocking with the remote control,
either unlock only the driver's door or
unlock the entire vehicle, refer to page30
>Locking the vehicle after a short time or
after starting to drive, refer to page32
>Assigning the programmable buttons on
the steering wheel, refer to page54>Display settings for the Control Display:
>Brightness of the Control Display, refer
to page83
>Units of measure for consumption,
route/distances, temperature and pres-
sure, refer to page83
>Language on the Control Display, refer
to page84
>12h/24h clock mode, refer to page83
>Date format, refer to page83
>Displaying optical warning for the PDC Park
Distance Control
*, refer to page85
>Selection and brightness of the display for
the Head-Up Display
*, refer to page94
>Air distribution, temperature in the upper
body region, and intensity for the automatic
climate control, refer to page101
>Adjusting the voice instructions for the des-
tination guidance of the navigation sys-
tem
*, refer to page135
The most recent settings for the following are
also called up during unlocking:
>Driver's seat, exterior-mirror and steering-
wheel position, refer to page49
>The volume and tone settings for audio
sources, refer to page141
>The display of the stored stations for the
radio, refer to page144
>The volume setting for the telephone, refer
to page166
Central locking system
The concept
The central locking system is ready for opera-
tion whenever the driver's door is closed.
The system either locks or unlocks all of the fol-
lowing:
>Doors
>Compartment in the front center console
>Luggage compartment lid
>Fuel filler door
Page 37 of 236
Opening and closing
36
Indicator lamp displays
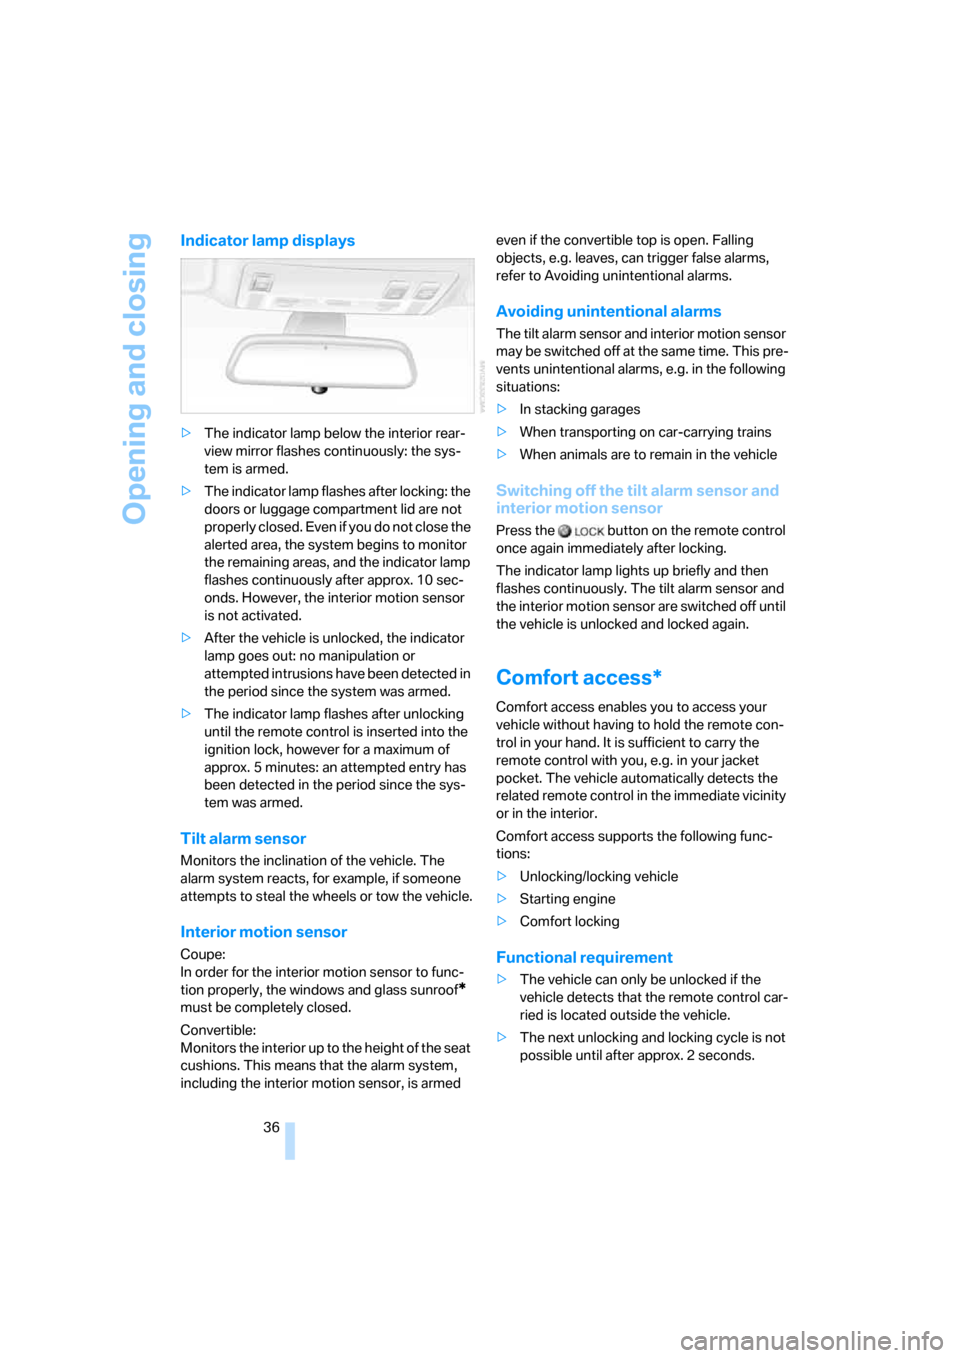
>The indicator lamp below the interior rear-
view mirror flashes continuously: the sys-
tem is armed.
>The indicator lamp flashes after locking: the
doors or luggage compartment lid are not
properly closed. Even if you do not close the
alerted area, the system begins to monitor
the remaining areas, and the indicator lamp
flashes continuously after approx. 10 sec-
onds. However, the interior motion sensor
is not activated.
>After the vehicle is unlocked, the indicator
lamp goes out: no manipulation or
attempted intrusions have been detected in
the period since the system was armed.
>The indicator lamp flashes after unlocking
until the remote control is inserted into the
ignition lock, however for a maximum of
approx. 5 minutes: an attempted entry has
been detected in the period since the sys-
tem was armed.
Tilt alarm sensor
Monitors the inclination of the vehicle. The
alarm system reacts, for example, if someone
attempts to steal the wheels or tow the vehicle.
Interior motion sensor
Coupe:
In order for the interior motion sensor to func-
tion properly, the windows and glass sunroof
*
must be completely closed.
Convertible:
Monitors the interior up to the height of the seat
cushions. This means that the alarm system,
including the interior motion sensor, is armed even if the convertible top is open. Falling
objects, e.g. leaves, can trigger false alarms,
refer to Avoiding unintentional alarms.
Avoiding unintentional alarms
The tilt alarm sensor and interior motion sensor
may be switched off at the same time. This pre-
vents unintentional alarms, e.g. in the following
situations:
>In stacking garages
>When transporting on car-carrying trains
>When animals are to remain in the vehicle
Switching off the tilt alarm sensor and
interior motion sensor
Press the button on the remote control
once again immediately after locking.
The indicator lamp lights up briefly and then
flashes continuously. The tilt alarm sensor and
the interior motion sensor are switched off until
the vehicle is unlocked and locked again.
Comfort access*
Comfort access enables you to access your
vehicle without having to hold the remote con-
trol in your hand. It is sufficient to carry the
remote control with you, e.g. in your jacket
pocket. The vehicle automatically detects the
related remote control in the immediate vicinity
or in the interior.
Comfort access supports the following func-
tions:
>Unlocking/locking vehicle
>Starting engine
>Comfort locking
Functional requirement
>The vehicle can only be unlocked if the
vehicle detects that the remote control car-
ried is located outside the vehicle.
>The next unlocking and locking cycle is not
possible until after approx. 2 seconds.
Page 50 of 236

Controls
49Reference
At a glance
Driving tips
Communications
Navigation
Entertainment
Mobility
Seat, mirror and steering
wheel memory
You can store and select three different adjust-
ment settings for the driver's seat, exterior mir-
rors and steering wheel.
The adjustment of the lumbar support is not
stored in the memory.
Storing
1.Switch on radio readiness or ignition, refer
to page58.
2.Adjust the desired seat, exterior mirror and
steering-wheel positions.
3.Press the button:
The LED in the button lights up.
4.Press the desired memory button 1, 2 or3:
The LED goes out.
Requesting
Do not request a position from the mem-
ory while the vehicle is moving. There is a
risk of accident from unexpected movement of
the seat or steering wheel.<
Convenience mode
1.Open the driver's door after unlocking or
switch on radio readiness, refer to page58.
2.Briefly press the desired memory button1,
2 or3.
The system immediately cancels the adjust-
ment procedure when you briefly press one of
the seat adjustment switches or one of the
memory buttons.The adjusting procedure for the steering wheel
is immediately interrupted if you operate the
switch for the steering wheel adjustment in any
direction, refer to page53.
Safety feature
1.Close the driver's door and switch ignition
on or off, refer to page58.
2.Press the desired memory button 1, 2 or3
and maintain pressure until the adjustment
process has been completed.
If the button was pressed inadvertently:
press the button again; the LED goes out.
Activating with remote control
The last positions of the driver's seat, external
rearview mirrors, and steering wheel are stored
for the remote key currently in use.
You can choose when the position is requested:
>Request when unlocking vehicle
>Request when opening driver's door
iDrive, for principle details, refer to page16.
1.Open the start menu.
2.Press the controller to open the menu.
3.Select "Vehicle settings" and press the
controller.
4.Select "Door locks" and press the control-
ler.
5.Select "Central locking" and press the con-
troller.
6.Select "Last seat pos." and press the con-
troller.
Page 53 of 236
Adjustments
52
Releasing
1.Hold the belt firmly.
2.Press the red button in the belt buckle.
3.Guide the belt into its reel.
The shoulder strap's anchorage point will be in
the correct position for adults of every build if
the seat is correctly adjusted, refer to page48.
Safety belt reminder for driver's seat
and passenger seat*
The indicator lamp lights up and a sig-
nal sounds. At the same time, an addi-
tional message appears on the Control
Display. Please check whether safety belts are
being worn correctly.
The safety belt reminder is operative at speeds
above approx. 5 mph/8 km/h. It can also be acti-
vated if objects are placed onto the passenger
seat.
Damage to safety belts
In case of strain due to an accident or
damage, replace the belt system includ-
ing the safety belt tensioners and have the belt
anchor points checked. Have this work carried
out only by a BMW center or a workshop that
works according to BMW repair procedures
with appropriately trained personnel. Otherwise
correct operation of this safety equipment is not
guaranteed.<
Heated seats
The temperature setting advances one step in
its control sequence each time you press the button. The maximum preselected temperature
is supplied when three LEDs are lit.
To switch off:
Press the button longer.
Mirrors
Exterior mirrors
The mirror on the passenger's side is
more curved than the driver's mirror.
Objects reflected in the mirror are closer than
they appear. Do not estimate the distance of
following traffic based what you see in the mir-
rors; otherwise, there is an increased accident
risk.<
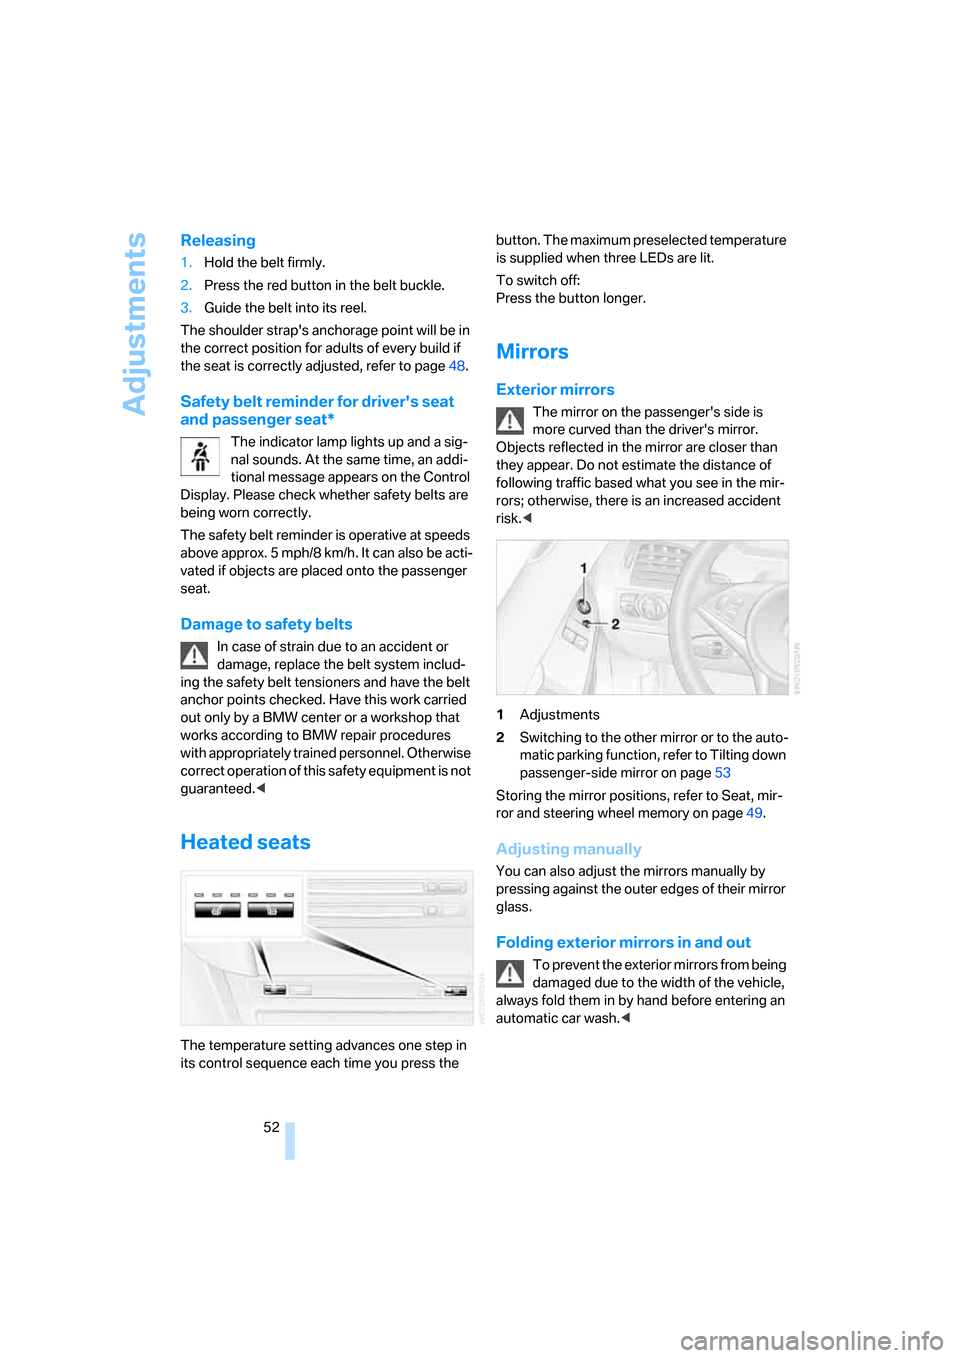
1Adjustments
2Switching to the other mirror or to the auto-
matic parking function, refer to Tilting down
passenger-side mirror on page53
Storing the mirror positions, refer to Seat, mir-
ror and steering wheel memory on page49.
Adjusting manually
You can also adjust the mirrors manually by
pressing against the outer edges of their mirror
glass.
Folding exterior mirrors in and out
To prevent the exterior mirrors from being
damaged due to the width of the vehicle,
always fold them in by hand before entering an
automatic car wash.<
Page 54 of 236
Controls
53Reference
At a glance
Driving tips
Communications
Navigation
Entertainment
Mobility
Automatic functions
>Both exterior mirrors are automatically
heated when the engine is running or the
ignition is switched on.
>When the vehicle is moving forward, the
interior and exterior mirrors dim as a func-
tion of the incoming light.
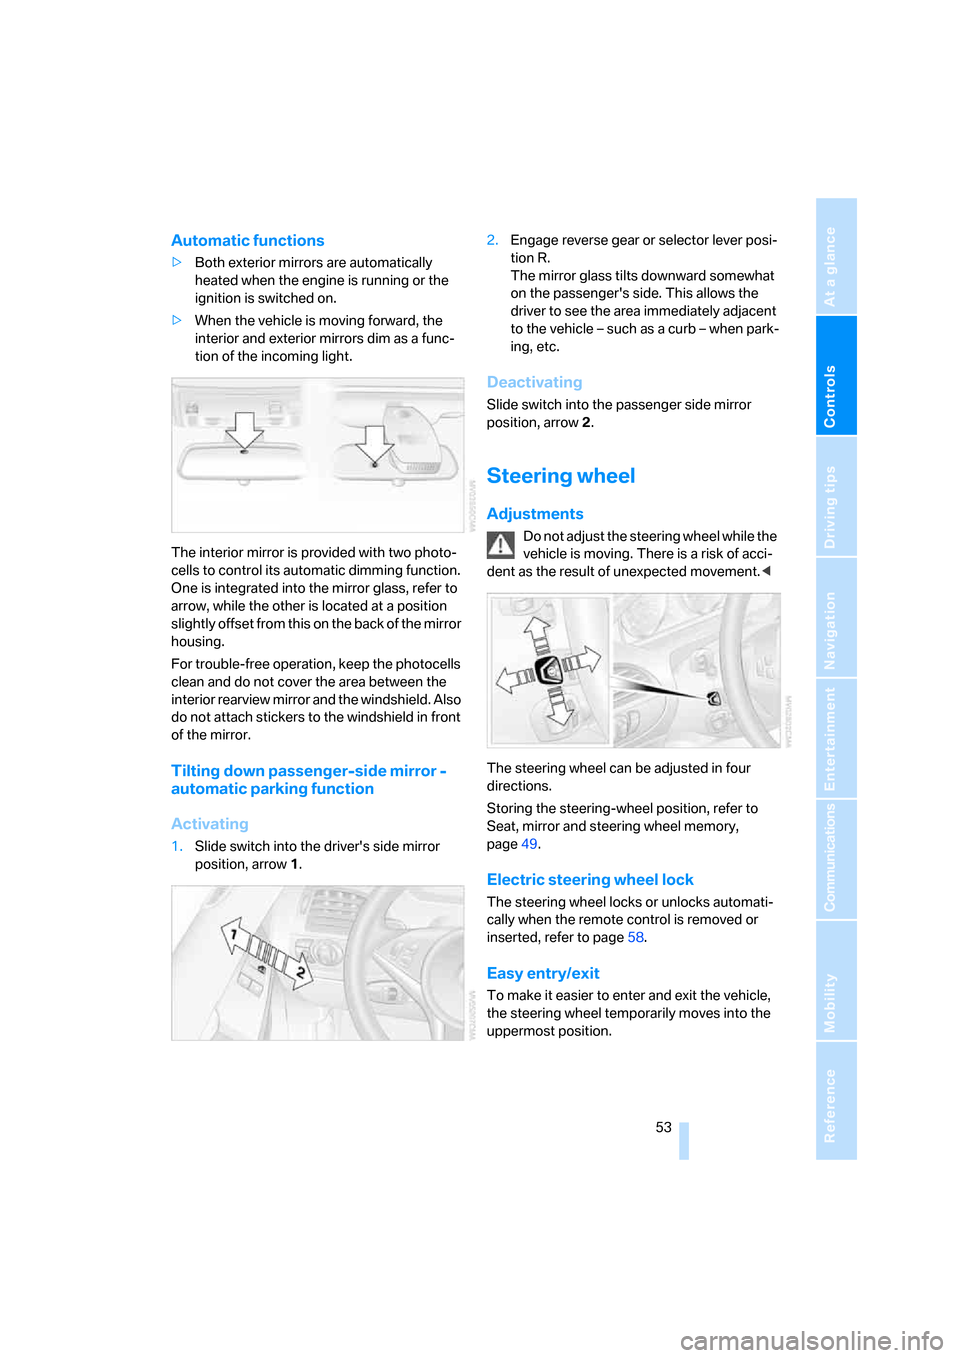
The interior mirror is provided with two photo-
cells to control its automatic dimming function.
One is integrated into the mirror glass, refer to
arrow, while the other is located at a position
slightly offset from this on the back of the mirror
housing.
For trouble-free operation, keep the photocells
clean and do not cover the area between the
interior rearview mirror and the windshield. Also
do not attach stickers to the windshield in front
of the mirror.
Tilting down passenger-side mirror -
automatic parking function
Activating
1.Slide switch into the driver's side mirror
position, arrow 1.2.Engage reverse gear or selector lever posi-
tion R.
The mirror glass tilts downward somewhat
on the passenger's side. This allows the
driver to see the area immediately adjacent
to the vehicle – such as a curb – when park-
ing, etc.
Deactivating
Slide switch into the passenger side mirror
position, arrow 2.
Steering wheel
Adjustments
Do not adjust the steering wheel while the
vehicle is moving. There is a risk of acci-
dent as the result of unexpected movement.<
The steering wheel can be adjusted in four
directions.
Storing the steering-wheel position, refer to
Seat, mirror and steering wheel memory,
page49.
Electric steering wheel lock
The steering wheel locks or unlocks automati-
cally when the remote control is removed or
inserted, refer to page58.
Easy entry/exit
To make it easier to enter and exit the vehicle,
the steering wheel temporarily moves into the
uppermost position.
Page 66 of 236
Controls
65Reference
At a glance
Driving tips
Communications
Navigation
Entertainment
Mobility
Using turn signals
Move the lever beyond the resistance point.
To switch off manually, only press the lever as
far as the resistance point.
Atypically rapid flashing of the indicator
lamp indicates the failure of a turn signal
lamp.<
Brief signaling
Press the lever to the resistance point and hold
it there as long as you wish to signal.
Triple turn signal activation
Press the lever to the resistance point; the turn
signals flash three times.
You can activate or deactivate this function.
iDrive, for principle details, refer to page16.
1.Open the start menu.
2.Press the controller to open the menu.
3.Select "Vehicle settings" and press the
controller.
4.Select "Lighting" and press the controller.
5.Select "Triple turn signal activation" and
press the controller.
Triple turn signal is activated.
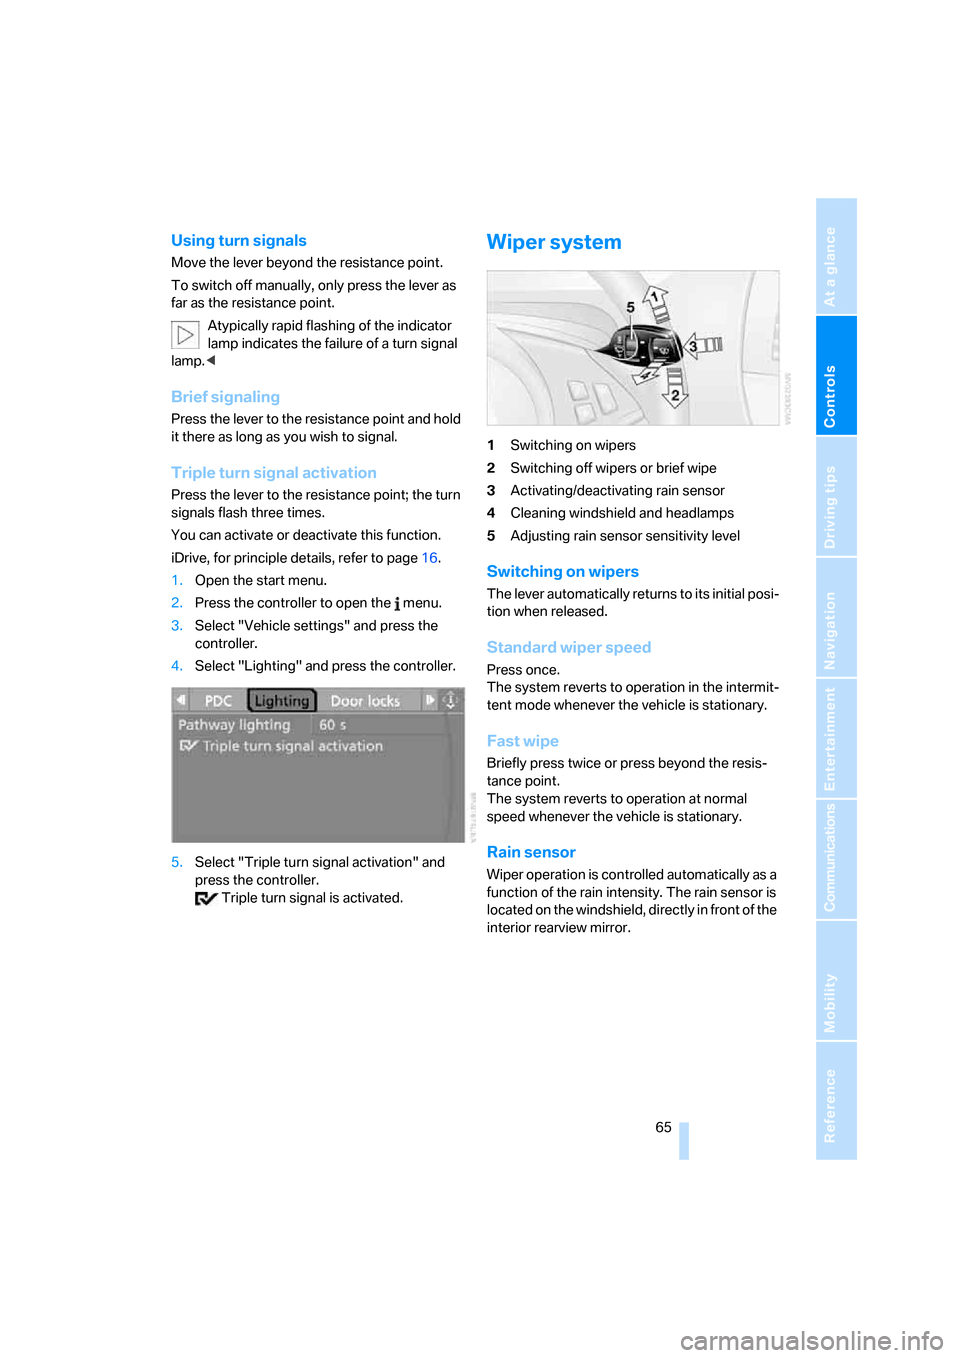
Wiper system
1Switching on wipers
2Switching off wipers or brief wipe
3Activating/deactivating rain sensor
4Cleaning windshield and headlamps
5Adjusting rain sensor sensitivity level
Switching on wipers
The lever automatically returns to its initial posi-
tion when released.
Standard wiper speed
Press once.
The system reverts to operation in the intermit-
tent mode whenever the vehicle is stationary.
Fast wipe
Briefly press twice or press beyond the resis-
tance point.
The system reverts to operation at normal
speed whenever the vehicle is stationary.
Rain sensor
Wiper operation is controlled automatically as a
function of the rain intensity. The rain sensor is
located on the windshield, directly in front of the
interior rearview mirror.