2006 BMW 325CI warning light
[x] Cancel search: warning lightPage 83 of 174

83
System limitations
The Flat Tire Monitor cannot pro-
vide you with advance warning of
sudden and severe tire damage caused
by external factors and does not detect
the balanced and very gradual pressure
loss that takes place in all four tires
over an extended period of time.<
On the other hand, the following situa-
tions can lead to a delayed detection of
pressure loss and even to the system
not functioning:
>Driving on snow-covered or slippery
roads
>Performance-oriented driving: slip at
the drive wheels, high levels of lateral
acceleration
>When driving with snow chains, false
warnings and undetected pressure
losses may occur
>When driving with a space-saver
spare tire, the Flat Tire Monitor can-
not function.
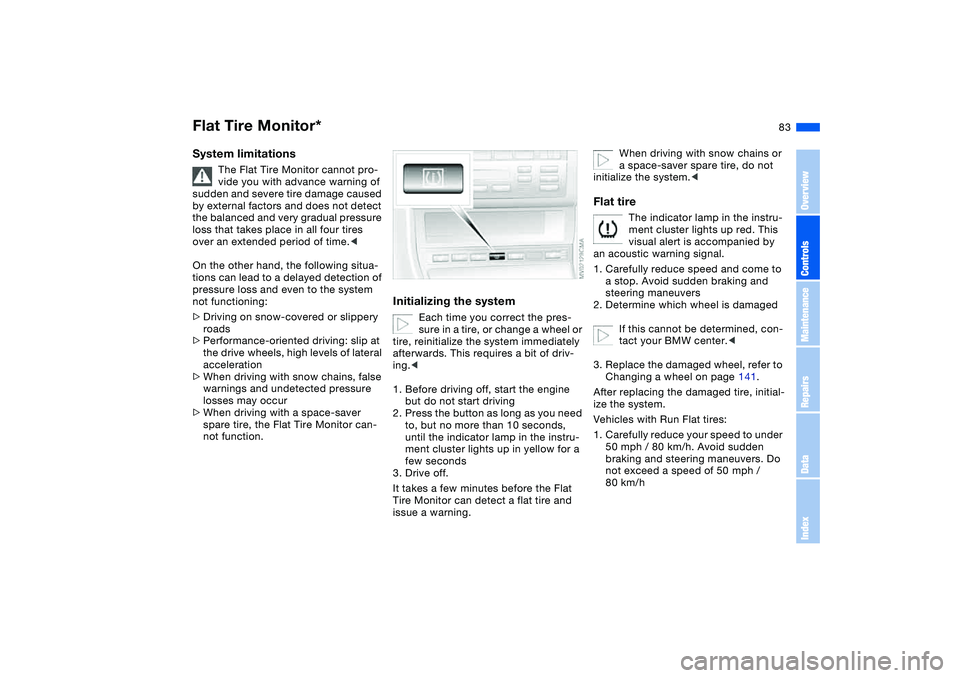
Initializing the system
Each time you correct the pres-
sure in a tire, or change a wheel or
tire, reinitialize the system immediately
afterwards. This requires a bit of driv-
ing.<
1. Before driving off, start the engine
but do not start driving
2. Press the button as long as you need
to, but no more than 10 seconds,
until the indicator lamp in the instru-
ment cluster lights up in yellow for a
few seconds
3. Drive off.
It takes a few minutes before the Flat
Tire Monitor can detect a flat tire and
issue a warning.
When driving with snow chains or
a space-saver spare tire, do not
initialize the system.<
Flat tire
The indicator lamp in the instru-
ment cluster lights up red. This
visual alert is accompanied by
an acoustic warning signal.
1. Carefully reduce speed and come to
a stop. Avoid sudden braking and
steering maneuvers
2. Determine which wheel is damaged
If this cannot be determined, con-
tact your BMW center.<
3. Replace the damaged wheel, refer to
Changing a wheel on page 141.
After replacing the damaged tire, initial-
ize the system.
Vehicles with Run Flat tires:
1. Carefully reduce your speed to under
50 mph / 80 km/h. Avoid sudden
braking and steering maneuvers. Do
not exceed a speed of 50 mph /
80 km/h
Flat Tire Monitor*
OverviewControlsMaintenanceRepairsDataIndex
Page 85 of 174

85 Lamps
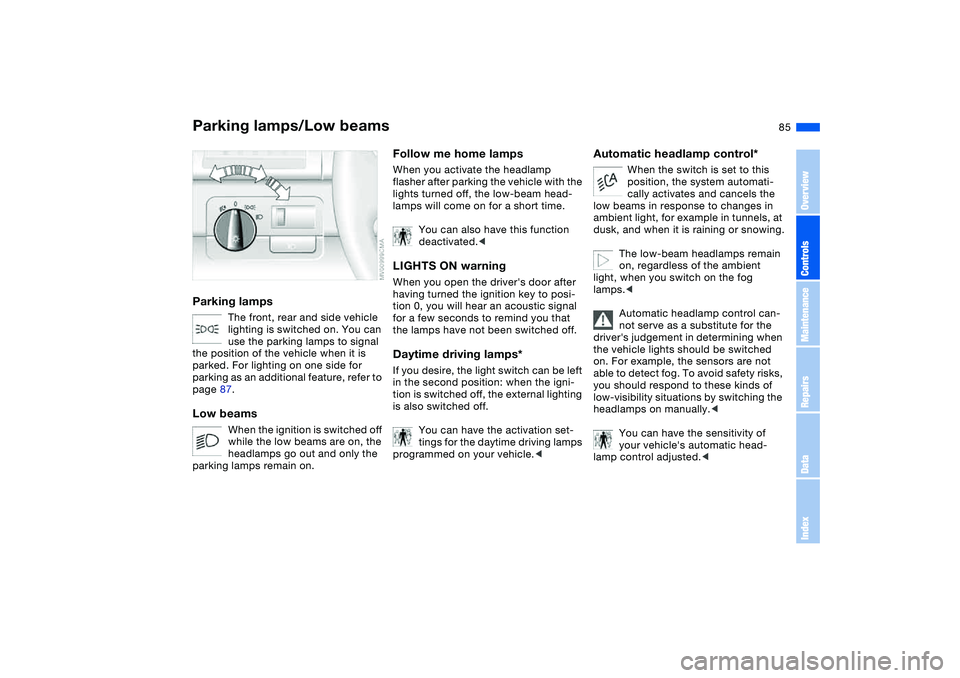
Parking lamps/Low beamsParking lamps
The front, rear and side vehicle
lighting is switched on. You can
use the parking lamps to signal
the position of the vehicle when it is
parked. For lighting on one side for
parking as an additional feature, refer to
page 87.
Low beams
When the ignition is switched off
while the low beams are on, the
headlamps go out and only the
parking lamps remain on.
Follow me home lampsWhen you activate the headlamp
flasher after parking the vehicle with the
lights turned off, the low-beam head-
lamps will come on for a short time.
You can also have this function
deactivated.
tion 0, you will hear an acoustic signal
for a few seconds to remind you that
the lamps have not been switched off.Daytime driving lamps*If you desire, the light switch can be left
in the second position: when the igni-
tion is switched off, the external lighting
is also switched off.
You can have the activation set-
tings for the daytime driving lamps
programmed on your vehicle.<
Automatic headlamp control*
When the switch is set to this
position, the system automati-
cally activates and cancels the
low beams in response to changes in
ambient light, for example in tunnels, at
dusk, and when it is raining or snowing.
The low-beam headlamps remain
on, regardless of the ambient
light, when you switch on the fog
lamps.<
Automatic headlamp control can-
not serve as a substitute for the
driver's judgement in determining when
the vehicle lights should be switched
on. For example, the sensors are not
able to detect fog. To avoid safety risks,
you should respond to these kinds of
low-visibility situations by switching the
headlamps on manually.<
You can have the sensitivity of
your vehicle's automatic head-
lamp control adjusted.<
OverviewControlsMaintenanceRepairsDataIndex
Page 128 of 174

128
Coolant
Do not add coolant to the cooling
system when the engine is hot. If
you attempt to do so, escaping coolant
can cause burns.<
Coolant consists of water as well as an
additive such as antifreeze with corro-
sion inhibitor. Not all commercially
available additives are suitable for your
BMW. Your BMW center knows which
additives are appropriate.
Only use approved additives, as
the engine could otherwise be
damaged. The additives are hazardous
to your health; therefore, follow the
instructions on the containers.<
Comply with the applicable envi-
ronmental laws regulating the dis-
posal of antifreeze with corrosion inhib-
itor.<
Checking the coolant level and
adding coolantCheck the coolant level when the
engine is cold, approx. 687/+206.
1. Open the cap for the expansion tank
by turning it slightly counterclock-
wise to allow accumulated pressure
to escape. Then open
2. The coolant level is correct when the
upper end of the red float rod is at
least even with the upper edge of the
filler neck; see arrow. The end of the
float may stick out by a maximum of
3/4 in/2 cm – that is, up to the sec-
ond mark on the float
3. If necessary, add coolant. If the cool-
ant is low, slowly add coolant until
the correct level is reached – do not
overfill.
Brake fluidIndicator lamp
The warning lamp comes on
even though the parking brake
is released:
The brake fluid level in the reservoir is
too low, refer to page 18. At the same
time, there may be significantly greater
pedal travel. Have the system checked
as soon as possible.
Warning lamp for Canadian
models.
If you continue driving, extended
pedal travel may be necessary
and braking distances may be signifi-
cantly longer. Be sure to adapt your
driving style accordingly.<
Page 133 of 174

133
engine misfiring for even a short period
of time can seriously damage emission
control system components, especially
the catalytic converter.
Service Engine Soon warning
lamp for Canadian models.
If the gas cap is not on tight
enough, the OBD system can
detect leaking vapor and the indicator
will light up. If the gas cap is then tight-
ened, the indicator will usually go out
after a short period of time.
Page 141 of 174

141
License plate lamps5 watt bulb
1. Place a screwdriver in the slot and
press toward the left to release the
lens
2. Replace the bulb.Light-emitting diodesLight-emitting diodes (LEDs) installed
behind translucent lenses serve as the
light sources for many of the controls
and displays in your vehicle. These
light-emitting diodes are related to con-
ventional lasers, and legislation defines
them as light-emitting diodes, Class 1.
Do not remove the protective lens,
and avoid staring directly at the
unfiltered beam for several hours, as
inflammation of the retina could
result.<
Changing a wheel
Safety precautions in the event of
a flat tire or wheel change:
Stop the vehicle as far as possible from
passing traffic. Park on a firm, flat sur-
face. Switch on the hazard warning
flashers. Turn the steering wheel to the
straight-ahead position and engage the
steering lock. Shift into 1st or Reverse,
or if you have an automatic transmis-
sion position the selector lever in Park,
and engage the parking brake.
All passengers should be outside the
vehicle and well away from your imme-
diate working area, behind a guardrail,
for example.
If a warning triangle or portable hazard
warning lamp is available, set it up on
the roadside at an appropriate distance
from the rear of the vehicle. Comply
with all local safety guidelines and reg-
ulations.
Change the wheel only on a level, firm
surface which is not slippery. Avoid
jacking the vehicle on a soft or slippery
support surface – snow, ice, loose
gravel, etc. – as either the vehicle or the
jack could slip sideways.
Position the jack on a firm support sur-
face.
Do not place wooden blocks or similar
objects under the jack. They could pre-
vent the jack from extending to its full
Lamps and bulbs
OverviewControlsMaintenanceRepairsDataIndex
Page 150 of 174

150
With a tow bar
The towing vehicle must not be
lighter than the vehicle being
towed; otherwise, vehicle handling can
no longer be controlled.<
The towing eyelets of both vehicles
should be on the same side.
If the tow bar can only be used in a
diagonal position, please note the fol-
lowing:
>Clearance is restricted while you are
driving around corners
>The inclination of the tow bar pro-
duces lateral force.
Only attach the tow bar to the
towing eyelets. Other parts of the
vehicles could otherwise be dam-
aged.<
With a tow ropeWhen the towing vehicle is driving off,
make sure that the tow rope is taut.
Use nylon ropes or straps for tow-
ing because they prevent sudden
jerking movements. Attach the tow rope
only to the towing eyelets. Other parts
of the vehicles could otherwise be
damaged.<
With a tow truckHave the BMW transported by a tow
truck with a lift sling, or on a flatbed.
Never allow passengers to ride in
a towed vehicle for any reason.<
Do not lift the vehicle by the tow-
ing eyelet, nor by parts of the
body or chassis. Otherwise damage
could result.
automatic transmissions. Jump-
starting, refer to page 147.<
Only tow-start vehicles with catalytic
converters if the engine is cold. It is
better to have the engine jump-started,
refer to page 147.
1. Turn on hazard warning flashers;
comply with national regulations
2. Turn the ignition key to position 2
3. Engage the 3rd gear
4. Have the vehicle towed with the
clutch pedal completely depressed
and then slowly release the clutch
pedal. After the engine has started,
immediately depress the clutch pedal
again completely
5. Pull over at a suitable location,
remove the tow bar or tow rope, and
turn on the hazard warning flashers
6. Have the vehicle checked.
Vehicles with sequential manual gear-
box SMG:
>Have the vehicle towed with the
selector lever in position N
>Select sequential mode. The correct
gear will automatically be selected
and engaged.
Towing and tow-starting the vehicle
Page 160 of 174

Everything from A to ZA
ABS Antilock Brake
System 115
indicator lamp 18
Acceleration assistant 66
Accessories, refer to For
your own safety 5
Accident, refer to Emer-
gency call 146
Activated-charcoal filter 98
Adaptive brake lamp, refer
to Brake force display 84
Adaptive headlights 86
Adding brake fluid 129
Additional sources of infor-
mation 4
Air conditioning 90
Air conditioning mode 92
automatic climate
control 96
Air distribution
air conditioning 92
automatic climate
control 96
Air distribution, individual 96
Air outlets, refer to Ventila-
tion 90, 94
Air pressure, refer to Tire
inflation pressure 116
Air recirculation, refer to
Recirculated-air mode
92, 97Air supply
air conditioning 92
automatic climate
control 96
Air, drying, refer to Air con-
ditioning mode 92, 96
Airbags 51
deactivating 54
indicator lamp 18, 53
sitting safely 41
Airing out, refer to Ventila-
tion 90, 94
AKI, refer to Fuel specifica-
tions 24
Alarm system 36
avoiding unintentional
alarms 37
All-season tires, refer to
Winter tires 121, 122
Antifreeze 128
coolant 128
washer fluid 126
Antilock Brake System
(ABS) 115
indicator lamp 18
Anti-theft system 28
Anti-theft warning system,
refer to Alarm system 36
Approved axle loads, refer
to Weights 156
Approved gross weight,
refer to Weights 156Armrest
front 100
rear 101
Artificial leather, refer to the
Caring for your vehicle
brochure
Ashtray
front 102
rear 102
Assistant systems, refer to
Dynamic Stability Control
(DSC) 81
AUC Automatic recircu-
lated-air control 97
AUTO program 96
Automatic
cruise control 72
headlamp control 85
Automatic air distribution,
refer to AUTO program 96
Automatic air supply, refer
to AUTO program 96
Automatic car wash, refer to
the Caring for your vehicle
brochure
Automatic climate control 94
Automatic curb monitor 48
Automatic dimming, interior
rearview mirror 50
Automatic recirculated-air
control (AUC) 97Automatic transmission with
Steptronic 67
indicator lamp 19, 69
interlock 59
selector lever lock 67
shiftlock 67
tow-starting 150
Automatic windshield
washer, refer to Rain sen-
sor 71
Average fuel
consumption 79
Average speed 79
Avoiding unintentional
alarms 37
Axle loads, refer to
Weights 156
B
Backrest
unlocking 45
Backrest, refer to Seat
adjustment 42, 44
Backup lamps 62
bulb replacement 139
Bandages, refer to First-aid
kit 22
Bar, for towing 149
Page 161 of 174

Everything from A to Z
161
Battery 145
charge 145
charge current 18
disposal 145
indicator lamp 18
jump-starting 147
remote control 28, 29
Belts, refer to Safety
belts 46
Beverage holders 100, 101
Blower
air conditioning 92
automatic climate
control 96
BMW High Performance
Synthetic Oils 127
BMW Maintenance
System 130
BMW sports seat 43
Bottle holders, see Bever-
age holders 100, 101
Brake fluid 128
indicator lamp 18, 128
level 128
Brake force display 84
Brake lamps
bulb replacement 139
indicator lamp, defective
lamp 76
Brake lamps, refer to Brake
force display 84Brake pads
brake fluid level 18, 129
breaking in 112
Brake rotors
breaking in 112
Brake system
brake pads, indicator
lamp 19
Brake wear warning
indicator lamp 19
Brakes
ABS 115
brake fluid 128
brake force display 84
brake pads 114
breaking in 112
driving notes 113
indicator/warning lamp
18, 19
parking brake 61
Break-in procedures 112
Bulb replacement, refer to
Lamps and bulbs 137
Bulb, replacing 137
Buttons in steering wheel 21
C
California laws
event data recorders 132
Proposition 65
warning 132Can holders, see Beverage
holders 100, 101
Capacities 157
Car battery 145
Car care, refer to the Caring
for your vehicle brochure
Car keys, refer to Keys 28
Car radio, refer to the
Owner's Manual for Radio
Car telephone
preparation 101
Car telephone, refer to the
separate Owner's Manual
Car vacuum cleaner, con-
necting 102
Car wash, refer to the Caring
for your vehicle brochure
Carpet care, refer to the
Caring for your vehicle
brochure
Cassette operation, refer to
the Owner's Manual for
Radio/Onboard Computer
CBC Cornering Brake Con-
trol 115
warning lamp 18
CD changer, refer to the
Owner's Manual for
Radio/Onboard Computer
CD operation, refer to the
Owner's Manual for
Radio/Onboard ComputerCenter high-mount brake
lamp
bulb replacement 140
Central locking system 28
button 32
passenger
compartment 32
Charge indicator lamp 18
Check Control 76
Check Gas Cap
indicator lamp 19
Child seats, refer to Child-
restraint systems 54
Child-restraint mounting
system (LATCH) 56
Child-restraint systems 54
Chock 142
Cigarette lighter 102
Cleaning chrome parts, refer
to the Caring for your vehi-
cle brochure
Cleaning light alloy wheels,
refer to the Caring for your
vehicle brochure
Cleaning the vehicle, refer to
the Caring for your vehicle
brochure
Cleaning windshield 72
OverviewControlsMaintenanceRepairsDataIndex