2006 BMW 325CI low beam
[x] Cancel search: low beamPage 9 of 174

Contents
9
Passenger safety systems:
Airbags51
Transporting children safely54
Vehicle Memory, Key
Memory58
Driving:
Ignition lock59
Starting the engine59
Switching off the engine61
Parking brake61
Manual transmission62
Sequential manual gearbox
SMG*63
Automatic transmission with
Steptronic*67
Turn signal indicator/Headlamp
flasher70
Washer/wiper system/Rain
sensor*71
Cruise control*72
Everything under control:
Odometer74
Tachometer74
Energy control74
Fuel gauge75
Engine coolant temperature
gauge75
Service interval display76
Check Control76
Clock77
Computer78
Technology for safety and
driving convenience:
Park Distance Control (PDC)*80
Dynamic Stability Control
(DSC)81
Flat Tire Monitor*82
Brake force display84
Lamps:
Parking lamps/Low beams85
Adaptive headlights*86
Instrument lighting86
High beams/Standing lamps87
Front fog lamps87
Interior lamps88
Controlling the climate for
pleasant driving:
Air conditioning90
Automatic climate control*94
Roller sun blind*98
Interior conveniences:
Premium sound system*99
Glove compartment99
Storage compartments100
Microphone*101
Ashtray, front*102
Ashtray, rear*102
Clothes hooks103
Loading and transporting:
Through-loading system104
Ski bag*105
Cargo loading106
Roof-mounted luggage
rack*109
Controls and features
Page 15 of 174

15
1Parking lamps/Low beams85
2
>
Turn signal indicators70
>
Standing lamps87
>
High beams87
>
Headlamp flasher70
>
Computer78
3Washer/wiper system/Rain
sensor71
4Hazard warning flashers
5Central locking system28
6
>
Initiating an emergency call146
>
Mobile Service147
7Rear window defroster92, 97
8Horn: the entire surface
9Adjusting the steering wheel50
10 Fog lamps87
Cockpit
OverviewControlsMaintenanceRepairsDataIndex
Page 20 of 174

20
Dynamic Brake Control (DBC)
●
Malfunction in the DBC system.
Conventional braking efficiency
is available and unrestricted.
Have the system checked as soon as
possible.
For additional information, refer to
page 115.
Dynamic Brake Control (DBC)
warning lamp for Canadian
models.
Add washer fluid
The washer fluid level is too low,
top it up at the earliest opportu-
nity.
For additional information, refer to
page 126.
CHECK GAS CAP*
●
This indicator lamp comes on
when the gas cap is loose or
missing.
Close the gas cap tightly: refer to
page 24.
SERVICE ENGINE SOON
●
If the indicator lamp comes on
either continuously or intermit-
tently, this indicates a fault in the emis-
sions-related electronic systems.
Although the vehicle remains opera-
tional, you should have the systems
checked by your BMW center at the
earliest possible opportunity.
For additional information, refer to
page 132.
Service Engine Soon indicator
lamp for Canadian models.
Engine electronics
●
There is a fault in the electronic
engine-management system.
You can continue to drive with reduced
engine output or engine speed. Please
have the system inspected at your
BMW center.
Add coolant
The coolant level is too low. Add
coolant at the earliest opportu-
nity.
For additional information, refer to
page 128.
Green: for your information
Turn signal indicator
Flashes when the turn signal is
operated.
Rapid flashing indicates a system mal-
function.
For additional information, refer to
page 70.
Cruise control
Lights up when the cruise con-
trol is activated. Ready for oper-
ation via the buttons in the steering
wheel.
For additional information, refer to
page 72.
Front fog lamps
Lights up whenever you switch
on the front fog lamps.
For additional information, refer to
page 87.
Blue: for your information
High beams
Comes on when the high beams
are on or the headlamp flasher
is actuated.
For additional information, refer to
pages 70, 87.
Indicator and warning lamps
Page 36 of 174

36
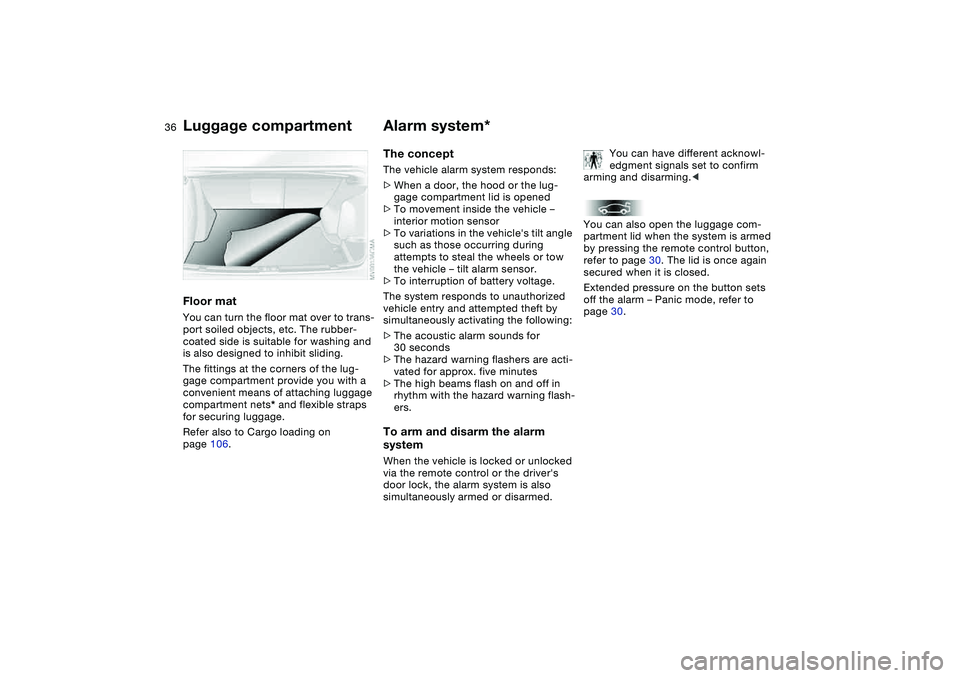
Floor matYou can turn the floor mat over to trans-
port soiled objects, etc. The rubber-
coated side is suitable for washing and
is also designed to inhibit sliding.
The fittings at the corners of the lug-
gage compartment provide you with a
convenient means of attaching luggage
compartment nets* and flexible straps
for securing luggage.
Refer also to Cargo loading on
page 106.
Alarm system*The conceptThe vehicle alarm system responds:
>When a door, the hood or the lug-
gage compartment lid is opened
>To movement inside the vehicle –
interior motion sensor
>To variations in the vehicle's tilt angle
such as those occurring during
attempts to steal the wheels or tow
the vehicle – tilt alarm sensor.
>To interruption of battery voltage.
The system responds to unauthorized
vehicle entry and attempted theft by
simultaneously activating the following:
>The acoustic alarm sounds for
30 seconds
>The hazard warning flashers are acti-
vated for approx. five minutes
>The high beams flash on and off in
rhythm with the hazard warning flash-
ers.To arm and disarm the alarm
systemWhen the vehicle is locked or unlocked
via the remote control or the driver's
door lock, the alarm system is also
simultaneously armed or disarmed.You can have different acknowl-
edgment signals set to confirm
arming and disarming.<
You can also open the luggage com-
partment lid when the system is armed
by pressing the remote control button,
refer to page 30. The lid is once again
secured when it is closed.
Extended pressure on the button sets
off the alarm – Panic mode, refer to
page 30.
Luggage compartment
Page 76 of 174

76
Service interval displayRemaining distance to next
serviceThe displays shown in the illustration
appear for a few seconds when the
ignition key is in position 1 or higher or
after the engine is started.
The next service due appears with the
message OIL SERVICE or
INSPECTION, together with the dis-
tance remaining in miles – in kilometers
in Canada – before the next scheduled
service.
The computer bases its calculations of
the remaining distance on the preced-
ing driving style.
A flashing message and a "–" in front of
the number mean that the service inter-
val has already been exceeded by the
distance shown on the display. Please
contact your BMW center for an
appointment.
Check ControlWhen the ignition key is in position 2,
the following information and/or condi-
tions are indicated using symbols until
the conditions have been corrected.
1Check the low beams and high
beams, as well as the parking lamps
2Door open
3Luggage compartment lid open
4Check tail or brake lamps
When you open the driver's door after
having turned the ignition key to posi-
tion 0, you will hear an acoustic signal
for a few seconds to remind you that
the lamps have not been switched off.
Page 85 of 174

85 Lamps
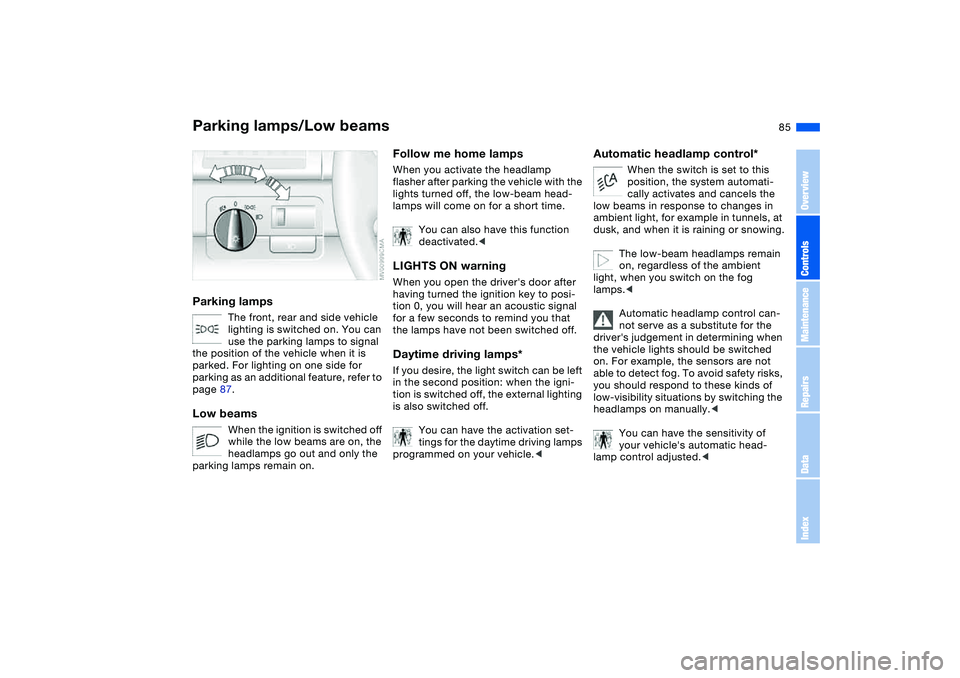
Parking lamps/Low beamsParking lamps
The front, rear and side vehicle
lighting is switched on. You can
use the parking lamps to signal
the position of the vehicle when it is
parked. For lighting on one side for
parking as an additional feature, refer to
page 87.
Low beams
When the ignition is switched off
while the low beams are on, the
headlamps go out and only the
parking lamps remain on.
Follow me home lampsWhen you activate the headlamp
flasher after parking the vehicle with the
lights turned off, the low-beam head-
lamps will come on for a short time.
You can also have this function
deactivated.
tion 0, you will hear an acoustic signal
for a few seconds to remind you that
the lamps have not been switched off.Daytime driving lamps*If you desire, the light switch can be left
in the second position: when the igni-
tion is switched off, the external lighting
is also switched off.
You can have the activation set-
tings for the daytime driving lamps
programmed on your vehicle.<
Automatic headlamp control*
When the switch is set to this
position, the system automati-
cally activates and cancels the
low beams in response to changes in
ambient light, for example in tunnels, at
dusk, and when it is raining or snowing.
The low-beam headlamps remain
on, regardless of the ambient
light, when you switch on the fog
lamps.<
Automatic headlamp control can-
not serve as a substitute for the
driver's judgement in determining when
the vehicle lights should be switched
on. For example, the sensors are not
able to detect fog. To avoid safety risks,
you should respond to these kinds of
low-visibility situations by switching the
headlamps on manually.<
You can have the sensitivity of
your vehicle's automatic head-
lamp control adjusted.<
OverviewControlsMaintenanceRepairsDataIndex
Page 87 of 174

87
High beams/Standing lamps1High beams
2Headlamp flasher
3Standing lampsStanding lamps, left or rightAs an additional feature, you can illumi-
nate your vehicle on either side for
parking:
With the ignition key in position 0,
engage the lever in the appropriate
turn-signal position.
Front fog lampsTap the button to switch on or off.
The parking lamps or low-beam
headlamps must be switched
on. The green indicator lamp in
the instrument cluster lights up to indi-
cate that the front fog lamps are on.
If the automatic headlamp control
is on, the low beams will come on
automatically whenever you activate
the front fog lamps.<
OverviewControlsMaintenanceRepairsDataIndex
Page 137 of 174

137
Lamps and bulbsThe lamps and bulbs make essential
contributions to the safety of your vehi-
cle. Therefore, proceed carefully when
handling bulbs. BMW recommends that
you have such work performed by your
BMW center if you are not familiar with
the procedures.
Do not touch the glass portion of
a new bulb with your bare hands
since even small amounts of impurities
burn in to the surface and reduce the
service life of the bulb. Use a clean
cloth, paper napkin, or a similar mate-
rial, or hold the bulb by its metallic
base.<
A replacement bulb set is available from
your BMW center.
Before working on the electrical
system, switch off the electrical
accessory you are working on or dis-
connect the cable from the negative
terminal of the battery. Failure to
observe this precaution could result in
short circuits.
To prevent injuries and damage, com-
ply with any instructions provided by
the bulb manufacturer.<
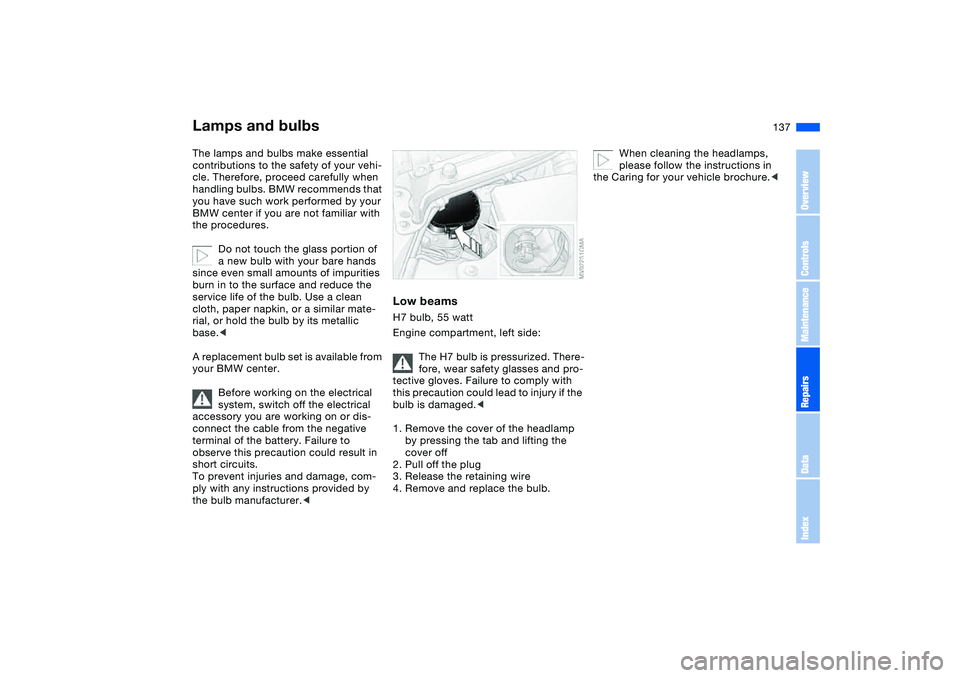
Low beamsH7 bulb, 55 watt
Engine compartment, left side:
The H7 bulb is pressurized. There-
fore, wear safety glasses and pro-
tective gloves. Failure to comply with
this precaution could lead to injury if the
bulb is damaged.<
1. Remove the cover of the headlamp
by pressing the tab and lifting the
cover off
2. Pull off the plug
3. Release the retaining wire
4. Remove and replace the bulb.
When cleaning the headlamps,
please follow the instructions in
the Caring for your vehicle brochure.<
OverviewControlsMaintenanceRepairsDataIndex