���
�(�#�'�����������
���
�����������
���
� �����)����
17-83
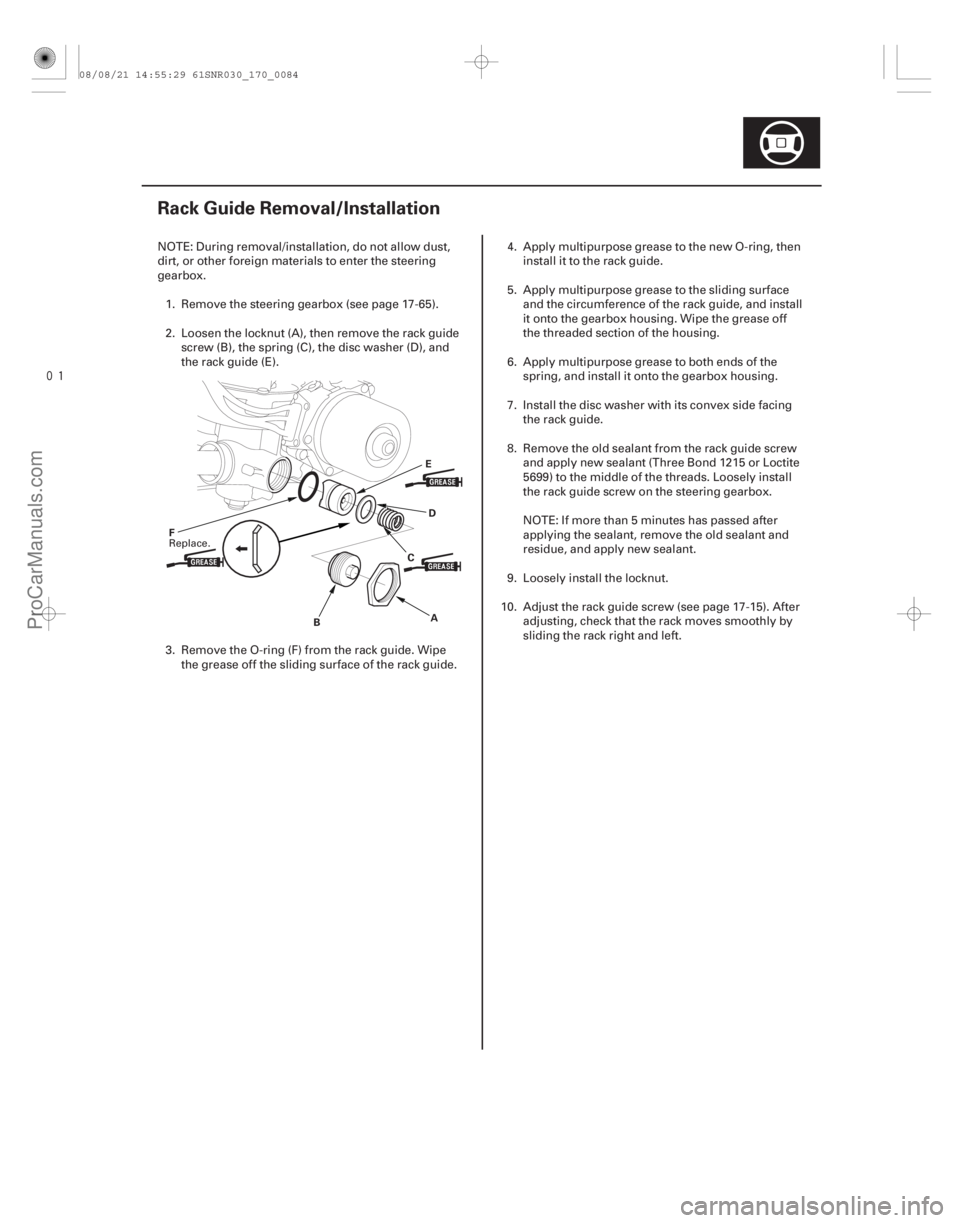
Rack Guide Removal/Installation
A
B C
D
E
F
NOTE: During removal/installation, do not allow dust,
dirt, or other foreign materials to enter the steering
gearbox. 1. Remove the steering gearbox (see page 17-65).
2. Loosen the locknut (A), then remove the rack guide screw (B), the spring (C), the disc washer (D), and
the rack guide (E).
3. Remove the O-ring (F) from the rack guide. Wipe the grease off the sliding surface of the rack guide. 4. Apply multipurpose grease to the new O-ring, then
install it to the rack guide.
5. Apply multipurpose grease to the sliding surface and the circumference of the rack guide, and install
it onto the gearbox housing. Wipe the grease off
the threaded section of the housing.
6. Apply multipurpose grease to both ends of the spring, and install it onto the gearbox housing.
7. Install the disc washer with its convex side facing the rack guide.
8. Remove the old sealant from the rack guide screw and apply new sealant (Three Bond 1215 or Loctite
5699) to the middle of the threads. Loosely install
the rack guide screw on the steering gearbox.
NOTE: If more than 5 minutes has passed after
applying the sealant, remove the old sealant and
residue, and apply new sealant.
9. Loosely install the locknut.
10. Adjust the rack guide screw (see page 17-15). After adjusting, check that the rack moves smoothly by
sliding the rack right and left.
Replace.
08/08/21 14:55:29 61SNR030_170_0084
ProCarManuals.com
DYNOMITE -2009-
���
�(�#�'���������������
����������������� �����)����
Front Subframe Torque
20-187
Subframe Replacement
10x1.25mm
54 N·m
(5.5 kgf·m, 40 lbf·ft)
REFERENCE HOLE
(Body side)
Reference hole alignment
SUBFRAME
SCREWDRIVER or
TAPERED PUNCH
INSTALLATION
REFERENCE HOLE FRONT SUSPENSION
SUBFRAME INSTALLATION
REFERENCE HOLE
(Subframe side)
To body To body
To body
GEARBOX REAR
STIFFENER
GEARBOX FRONT
STIFFENER
BODY MOUNT
BRACKET
SPECIAL BOLTS
14 x 1.5 mm
103 N·m
(10.5 kgf·m, 75.9 lbf·ft) 12x1.25mm
64 N·m
(6.5 kgf·m, 47 lbf·ft)
FRONT SUSPENSION
SUBFRAME
To body
INSTALLATION
REFERENCE HOLE
NOTE: After loosening the subframe mounting bolts, be sure to replace them with new ones.
When installing, align both installation reference holes in the subframe with both reference holes in the body using a screwdriver or tapered punch as a guide.
Replace.
08/08/21 15:05:36 61SNR030_200_0189
ProCarManuals.com
DYNOMITE -2009-