Page 2081 of 2893

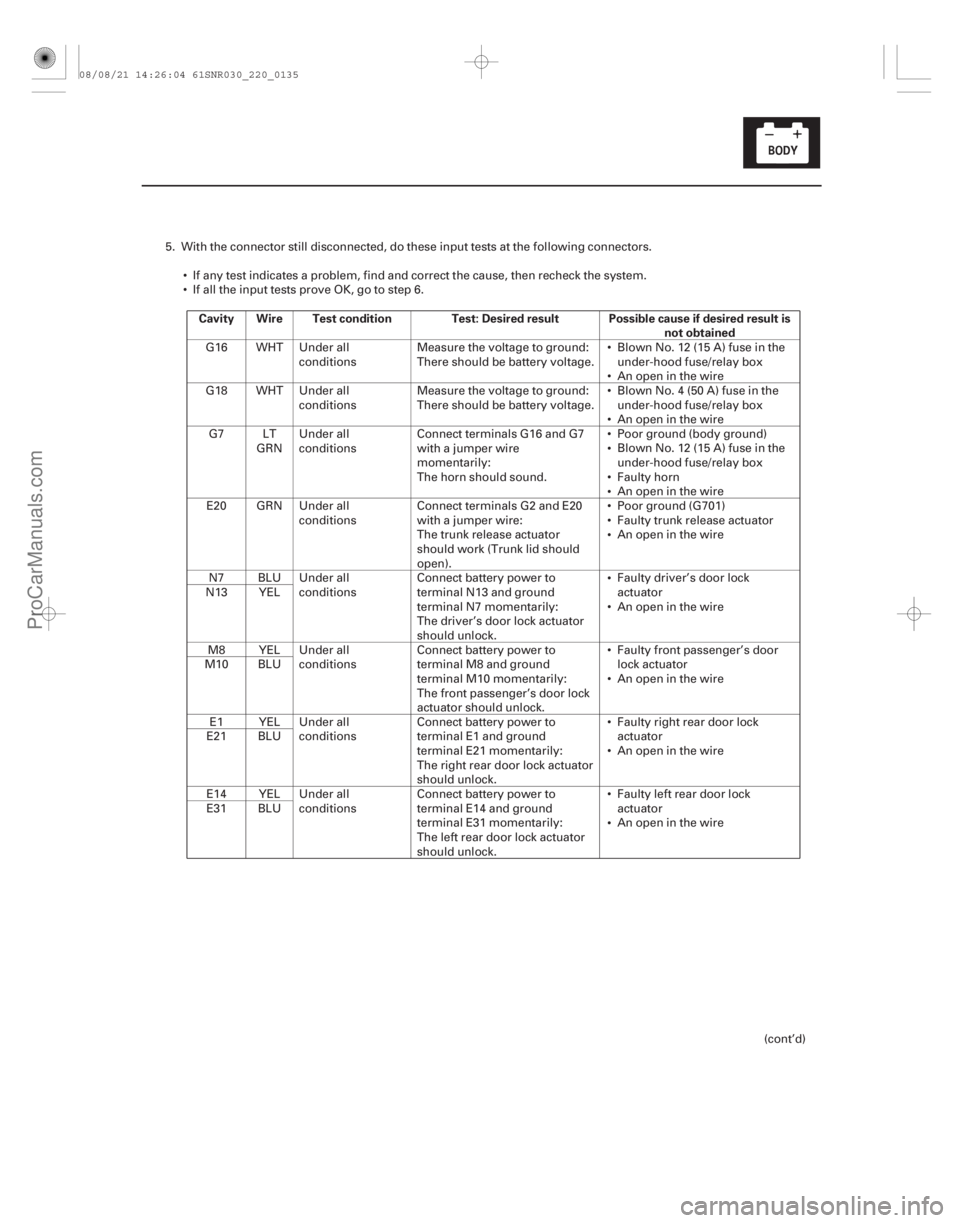
Cavity Wire Test conditionTest: Desired result Possible cause if desired result is
not obtained
22-133
5. With the connector still disconnected, do these input tests at the following connectors.
If any test indicates a problem, find and correct the cause, then recheck the system.
If all the input tests prove OK, go to step 6.
G16 WHT Under all
conditions Measure the voltage to ground:
There should be battery voltage. Blown No. 12 (15 A) fuse in the
under-hood fuse/relay box
An open in the wire
G18 WHT Under all conditions Measure the voltage to ground:
There should be battery voltage. Blown No. 4 (50 A) fuse in the
under-hood fuse/relay box
An open in the wire
G7 LT GRNUnder all
conditions Connect terminals G16 and G7
with a jumper wire
momentarily:
The horn should sound. Poor ground (body ground)
Blown No. 12 (15 A) fuse in the
under-hood fuse/relay box
Faulty horn
An open in the wire
E20 GRN Under all conditions Connect terminals G2 and E20
with a jumper wire:
The trunk release actuator
should work (Trunk lid should
open). Poor ground (G701)
Faulty trunk release actuator
An open in the wire
N7 BLU Under all conditions Connect battery power to
terminal N13 and ground
terminal N7 momentarily:
The driver’s door lock actuator
should unlock. Faulty driver’s door lock
actuator
An open in the wire
N13 YEL
M8 YEL Under all conditions Connect battery power to
terminal M8 and ground
terminal M10 momentarily:
The front passenger’s door lock
actuator should unlock. Faulty front passenger’s door
lock actuator
An open in the wire
M10 BLU
E1 YEL Under all conditions Connect battery power to
terminal E1 and ground
terminal E21 momentarily:
The right rear door lock actuator
should unlock. Faulty right rear door lock
actuator
An open in the wire
E21 BLU
E14 YEL Under all
conditions Connect battery power to
terminal E14 and ground
terminal E31 momentarily:
The left rear door lock actuator
should unlock. Faulty left rear door lock
actuator
An open in the wire
E31 BLU
(cont’d)
08/08/21 14:26:04 61SNR030_220_0135
ProCarManuals.com
DYNOMITE -2009-
Page 2089 of 2893

���
�(�#�'���������������������������������������)���� ���
�(�#�'�������������������������������
�������)����
22-14122-141
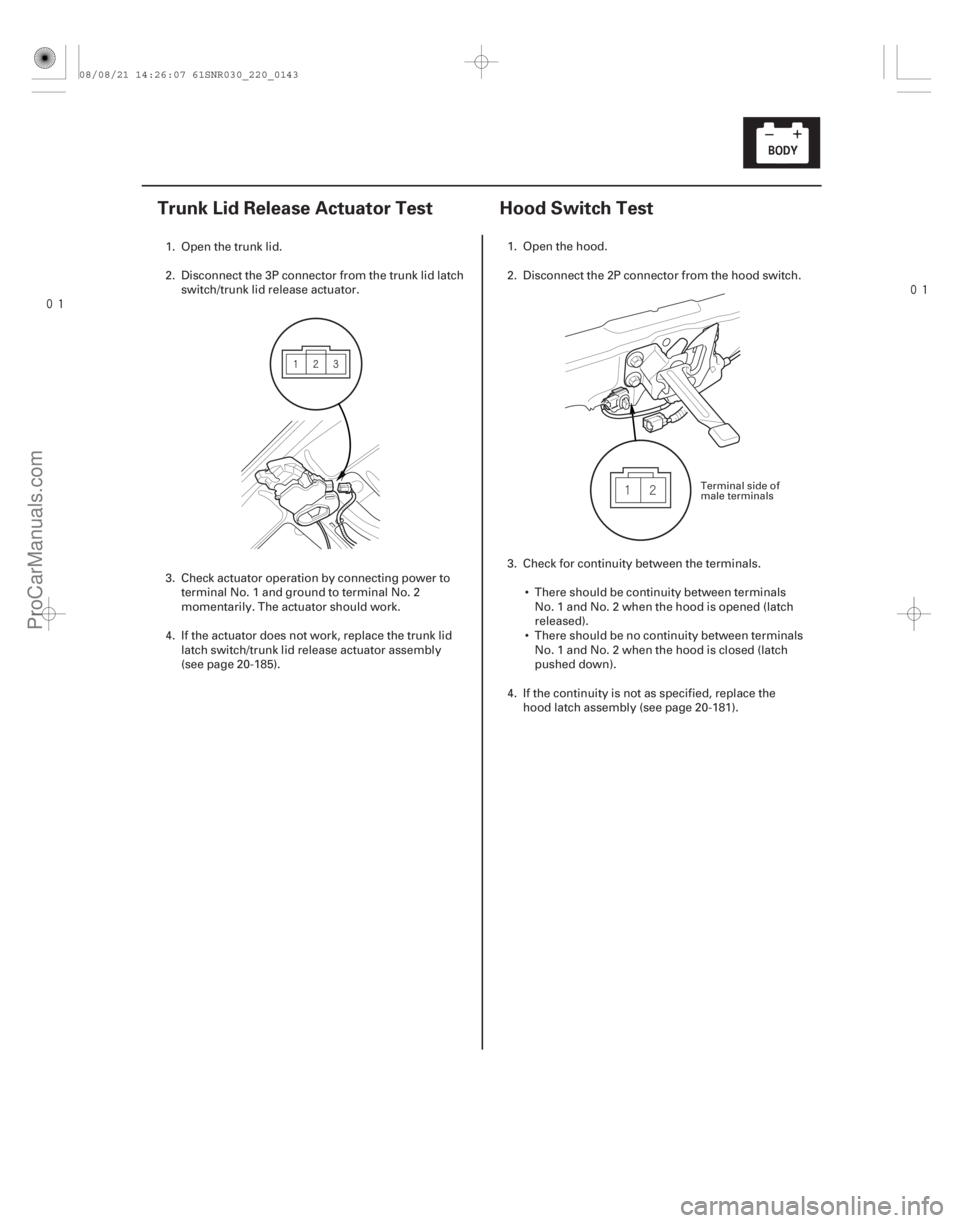
Trunk Lid Release Actuator Test Hood Switch Test
1. Open the trunk lid.
2. Disconnect the 3P connector from the trunk lid latch switch/trunk lid release actuator.
3. Check actuator operation by connecting power to terminal No. 1 and ground to terminal No. 2
momentarily. The actuator should work.
4. If the actuator does not work, replace the trunk lid latch switch/trunk lid release actuator assembly
(see page 20-185). 1. Open the hood.
2. Disconnect the 2P connector from the hood switch.
3. Check for continuity between the terminals.
There should be continuity between terminalsNo. 1 and No. 2 when the hood is opened (latch
released).
There should be no continuity between terminals No. 1 and No. 2 when the hood is closed (latch
pushed down).
4. If the continuity is not as specified, replace the hood latch assembly (see page 20- 181).
Terminal side of
male terminals
08/08/21 14:26:07 61SNR030_220_0143
ProCarManuals.com
DYNOMITE -2009-
Page 2129 of 2893

���
�(�#�'���������������
���������������
� �����)���� ���
����
�(�#�'���������������
�
�������
�����
� �����)���
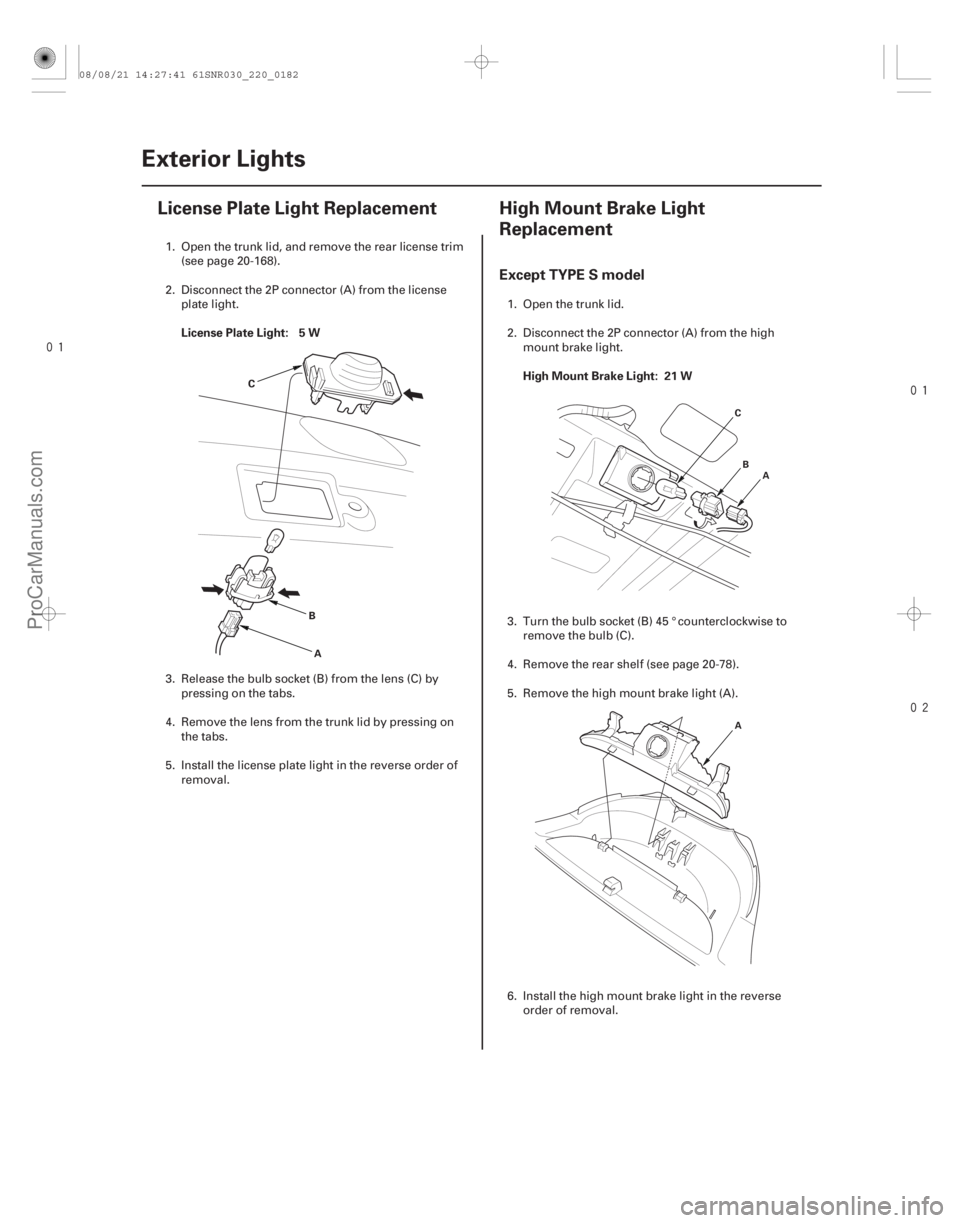
License Plate Light: 5 W
High Mount Brake Light: 21 W
Except TYPE S model
22-18022-180Exterior Lights
License Plate Light Replacement High Mount Brake Light
Replacement
A
B
C
A
B
C
A
1. Open the trunk lid, and remove the rear license trim (see page 20-168).
2. Disconnect the 2P connector (A) from the license plate light.
3. Release the bulb socket (B) from the lens (C) by pressing on the tabs.
4. Remove the lens from the trunk lid by pressing on the tabs.
5. Install the license plate light in the reverse order of removal. 1. Open the trunk lid.
2. Disconnect the 2P connector (A) from the high
mount brake light.
3. Turn the bulb socket (B) 45 ° counterclockwise to remove the bulb (C).
4. Remove the rear shelf (see page 20-78).
5. Remove the high mount brake light (A).
6. Install the high mount brake light in the reverse order of removal.
08/08/21 14:27:41 61SNR030_220_0182
ProCarManuals.com
DYNOMITE -2009-