Page 2845 of 2893

��������� ����
�µ
�µ �µ
�µ
YES
NO YES
NO
24-165
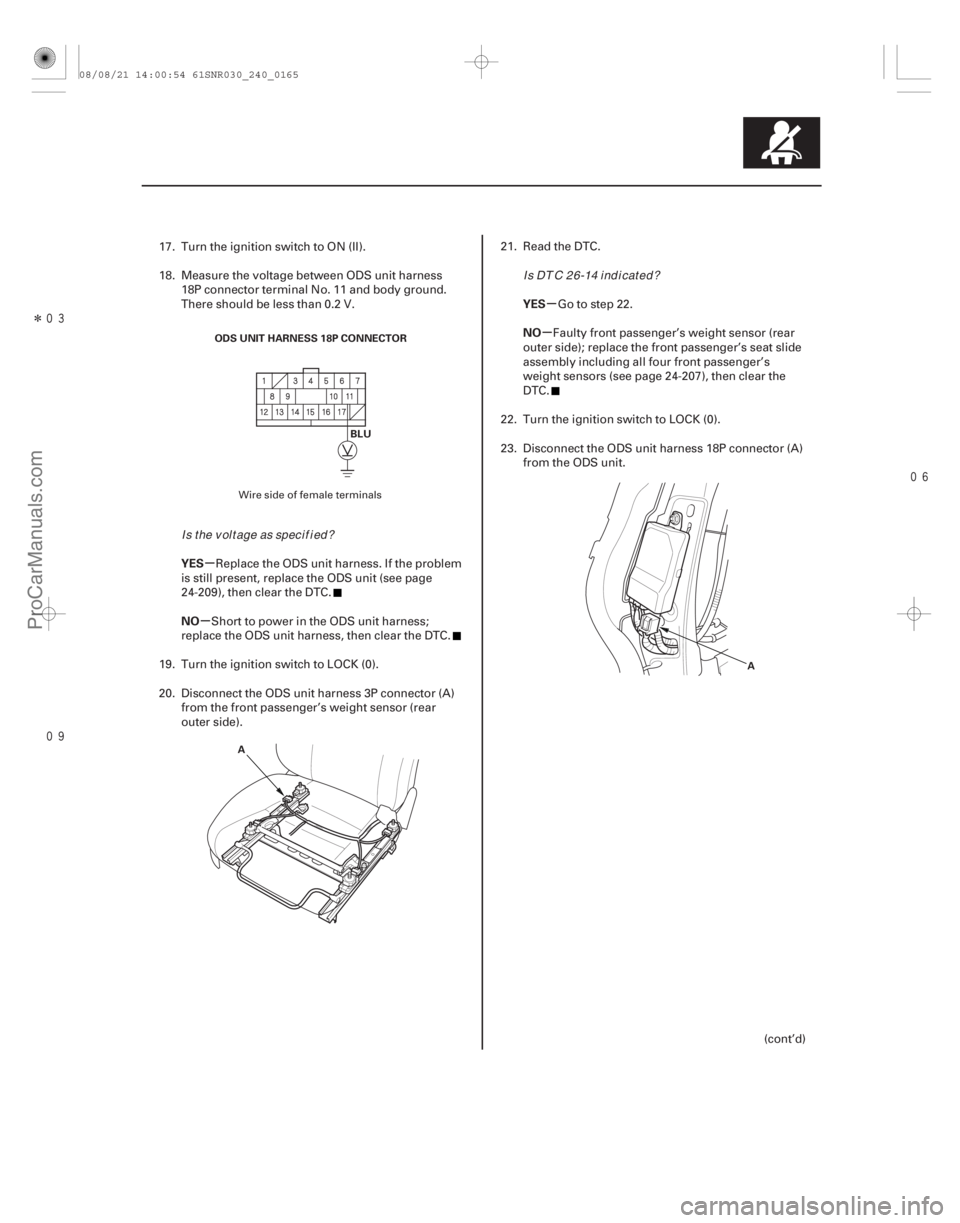
ODS UNIT HARNESS 18P CONNECTOR
BLU
A A
17. Turn the ignition switch to ON (II).
18. Measure the voltage between ODS unit harness
18P connector terminal No. 11 and body ground.
There should be less than 0.2 V.
Replace the ODS unit harness. If the problem
is still present, replace the ODS unit (see page
24-209), then clear the DTC.
Short to power in the ODS unit harness;
replace the ODS unit harness, then clear the DTC.
19. Turn the ignition switch to LOCK (0).
20. Disconnect the ODS unit harness 3P connector (A) from the front passenger’s weight sensor (rear
outer side). 21. Read the DTC.
Go to step 22.
Faulty front passenger’s weight sensor (rear
outer side); replace the front passenger’s seat slide
assembly including all four front passenger’s
weight sensors (see page 24-207), then clear the
DTC.
22. Turn the ignition switch to LOCK (0).
23. Disconnect the ODS unit harness 18P connector (A) from the ODS unit.
(cont’d)
Wire side of female terminals
Is the voltage as specif ied? Is DTC 26-14 indicated?
08/08/21 14:00:54 61SNR030_240_0165
ProCarManuals.com
DYNOMITE -2009-
Page 2866 of 2893

�(�#�'���������������������������������"�����)����
24-185
Component Replacement/Inspection After Deployment
NOTE: Before doing any SRS repairs, check the SRS DTCs (see page 24-22) for the less obvious deployed
components (seat belt tensioners, front impact
sensors, side airbag sensors, etc.).
After a vehicle collision, do the ODS unit operation check (see page 24-28).
Do not replace the ODS unit unless it is physically damaged or a specific fault was found during DTC
troubleshooting.
After a vehicle collision, inspect the front seat active head restraints (see page 20-117).
After a collision where the seat belt tensioners
deployed, replace these items: SRS unit
Seat belt tensioners
Seat belt buckle tensioners
Front impact sensors
After a collision where the front airbag(s) deployed,
replace these items: SRS unit
Deployed airbag(s)
Seat belt tensioners
Seat belt buckle tensioners
Front impact sensors
After a collision where the side airbag(s) deployed,
replace these items: SRS unit
Side impact sensor(s) (first)
Side impact sensor(s) (second)
B-pillar lower trim
Front seat assembly (Impact side) After a collision where a side curtain airbag deployed,
replace the items for the side(s) that deployed:
SRS unit
Deployed side curtain airbag(s)
Seatbelttensioner(s)
Side impact sensor(s) (first)
Side impact sensor(s) (second)
Rear safing sensor
Roof trim
A-pillar trim
B-pillar lower trim
C-pillar trim
Front grab handle
Rear grab handle
All related trim clips
Sunvisor
After a moderate to severe side or rear collision, inspect
for any damage on the side curtain airbag or other
related components. Replace the components as
needed.
(cont’d)
08/08/21 14:01:53 61SNR030_240_0185
ProCarManuals.com
DYNOMITE -2009-
Page 2886 of 2893

����������
�(�#�'�����������������������������
�
� �����)���
Removal Installation
24-205
Side Impact Sensor (Second) Replacement
A
C B
B
9.8 N·m
(1.0 kgf·m, 7.2 lbf·ft) A
C
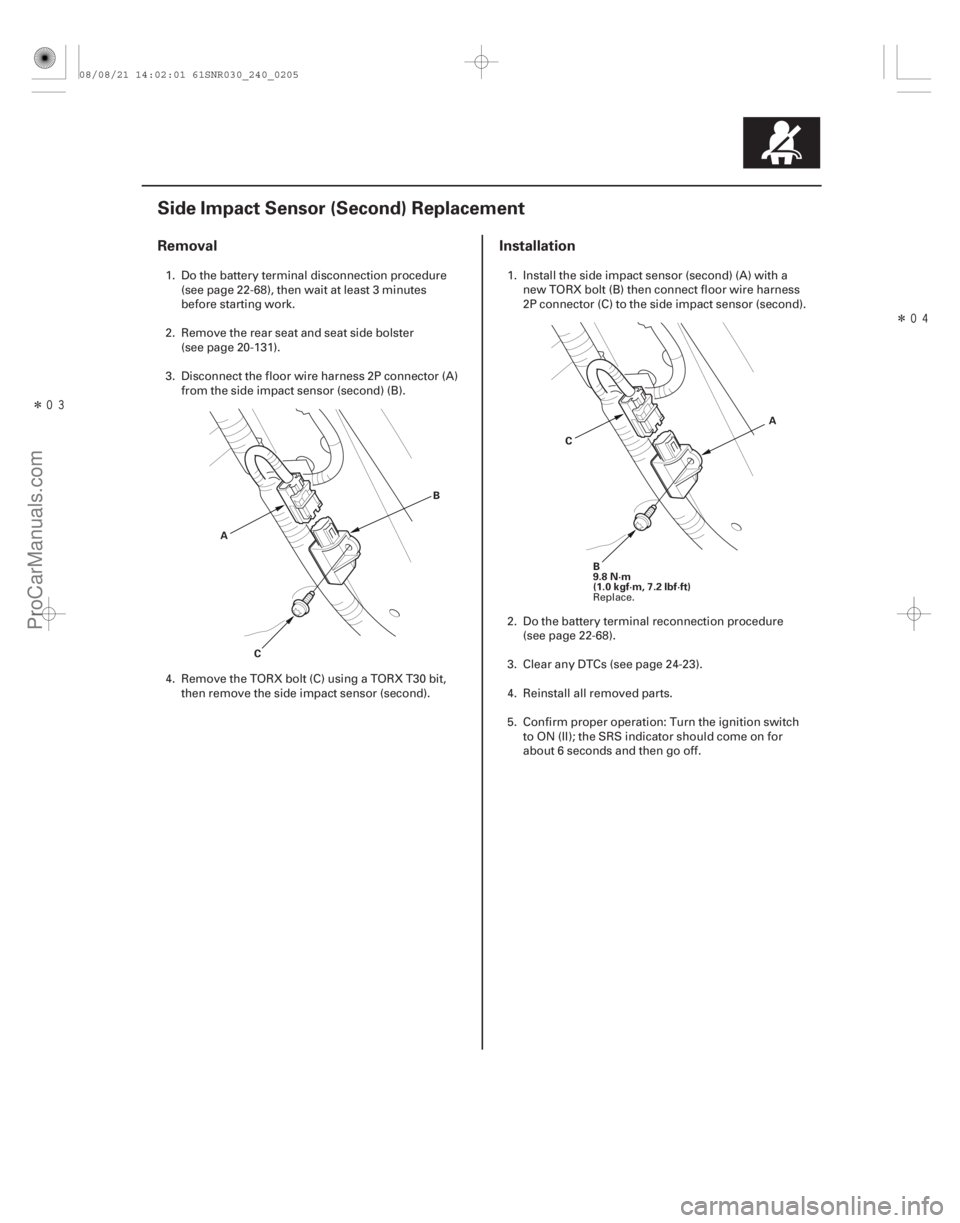
1. Do the battery terminal disconnection procedure (see page 22-68), then wait at least 3 minutes
before starting work.
2. Remove the rear seat and seat side bolster (see page 20-131).
3. Disconnect the floor wire harness 2P connector (A) from the side impact sensor (second) (B).
4. Remove the TORX bolt (C) using a TORX T30 bit, then remove the side impact sensor (second). 1. Install the side impact sensor (second) (A) with a
new TORX bolt (B) then connect floor wire harness
2P connector (C) to the side impact sensor (second).
2. Do the battery terminal reconnection procedure (see page 22-68).
3. Clear any DTCs (see page 24-23).
4. Reinstall all removed parts.
5. Confirm proper operation: Turn the ignition switch to ON (II); the SRS indicator should come on for
about 6 seconds and then go off.
Replace.
08/08/21 14:02:01 61SNR030_240_0205
ProCarManuals.com
DYNOMITE -2009-
Page 2887 of 2893

����
���
�(�#�'�������������������������������
� �����)����
Removal Installation
24-206SRS
Rear Safing Sensor Replacement
A
C
B
A
B
9.8 N·m
(1.0 kgf·m, 7.2 lbf·ft)
C
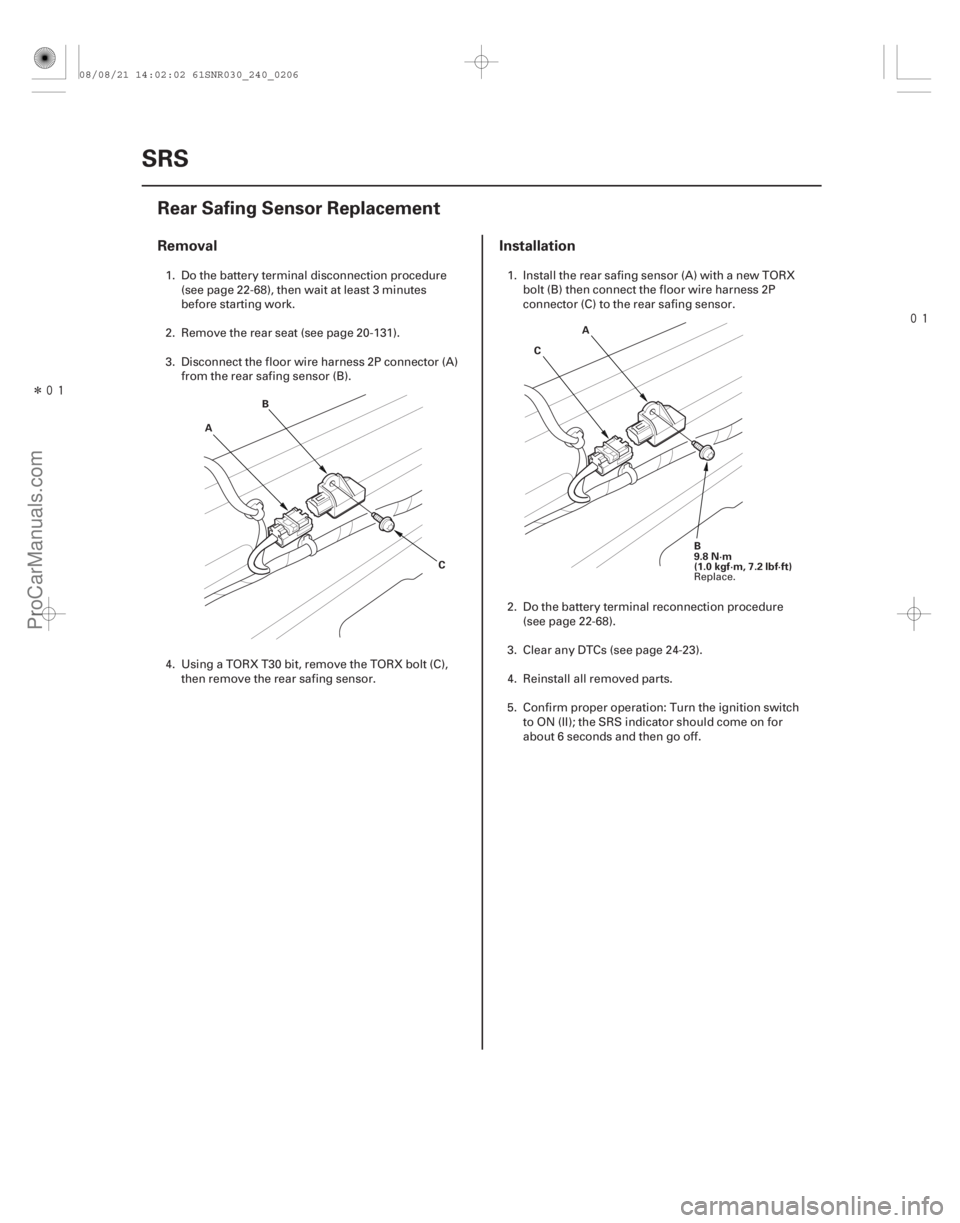
1. Do the battery terminal disconnection procedure
(see page 22-68), then wait at least 3 minutes
before starting work.
2. Remove the rear seat (see page 20-131).
3. Disconnect the floor wire harness 2P connector (A) from the rear safing sensor (B).
4. Using a TORX T30 bit, remove the TORX bolt (C), then remove the rear safing sensor. 1. Install the rear safing sensor (A) with a new TORX
bolt (B) then connect the floor wire harness 2P
connector (C) to the rear safing sensor.
2. Do the battery terminal reconnection procedure (see page 22-68).
3. Clear any DTCs (see page 24-23).
4. Reinstall all removed parts.
5. Confirm proper operation: Turn the ignition switch to ON (II); the SRS indicator should come on for
about 6 seconds and then go off.
Replace.
08/08/21 14:02:02 61SNR030_240_0206
ProCarManuals.com
DYNOMITE -2009-