2005 VOLVO S40 wheel
[x] Cancel search: wheelPage 82 of 127
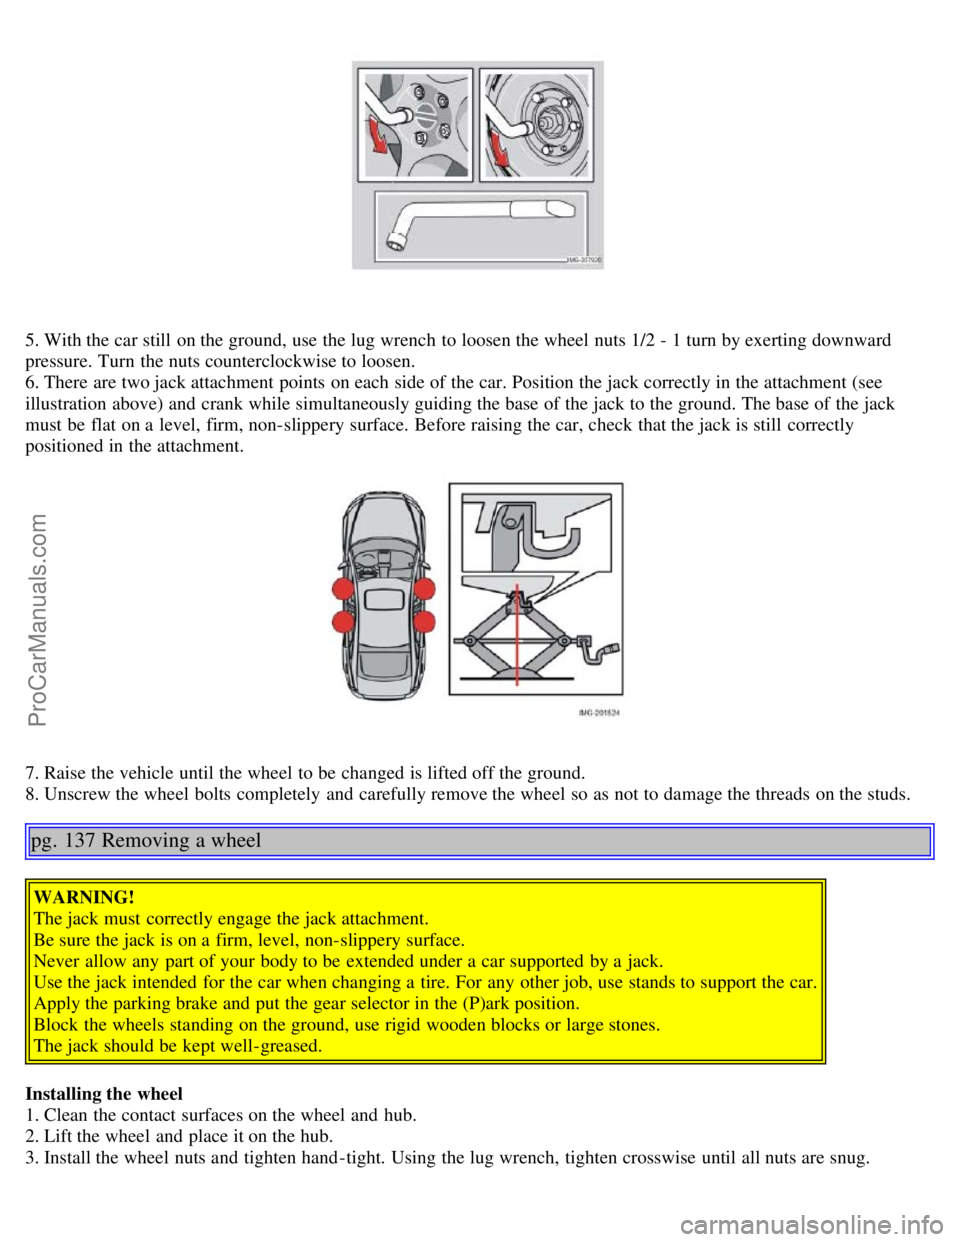
5. With the car still on the ground, use the lug wrench to loosen the wheel nuts 1/2 - 1 turn by exerting downward
pressure. Turn the nuts counterclockwise to loosen.
6. There are two jack attachment points on each side of the car. Position the jack correctly in the attachment (see
illustration above) and crank while simultaneously guiding the base of the jack to the ground. The base of the jack
must be flat on a level, firm, non-slippery surface. Before raising the car, check that the jack is still correctly
positioned in the attachment.
7. Raise the vehicle until the wheel to be changed is lifted off the ground.
8. Unscrew the wheel bolts completely and carefully remove the wheel so as not to damage the threads on the studs.
pg. 137 Removing a wheel
WARNING!
The jack must correctly engage the jack attachment.
Be sure the jack is on a firm, level, non-slippery surface.
Never allow any part of your body to be extended under a car supported by a jack.
Use the jack intended for the car when changing a tire. For any other job, use stands to support the car.
Apply the parking brake and put the gear selector in the (P)ark position.
Block the wheels standing on the ground, use rigid wooden blocks or large stones.
The jack should be kept well-greased.
Installing the wheel
1. Clean the contact surfaces on the wheel and hub.
2. Lift the wheel and place it on the hub.
3. Install the wheel nuts and tighten hand -tight. Using the lug wrench, tighten crosswise until all nuts are snug.
ProCarManuals.com
Page 83 of 127
4. Lower the vehicle to the ground and alternately tighten the bolts crosswise to 62 ft. lbs. (85 Nm).
5. Install the wheel cap (where applicable).
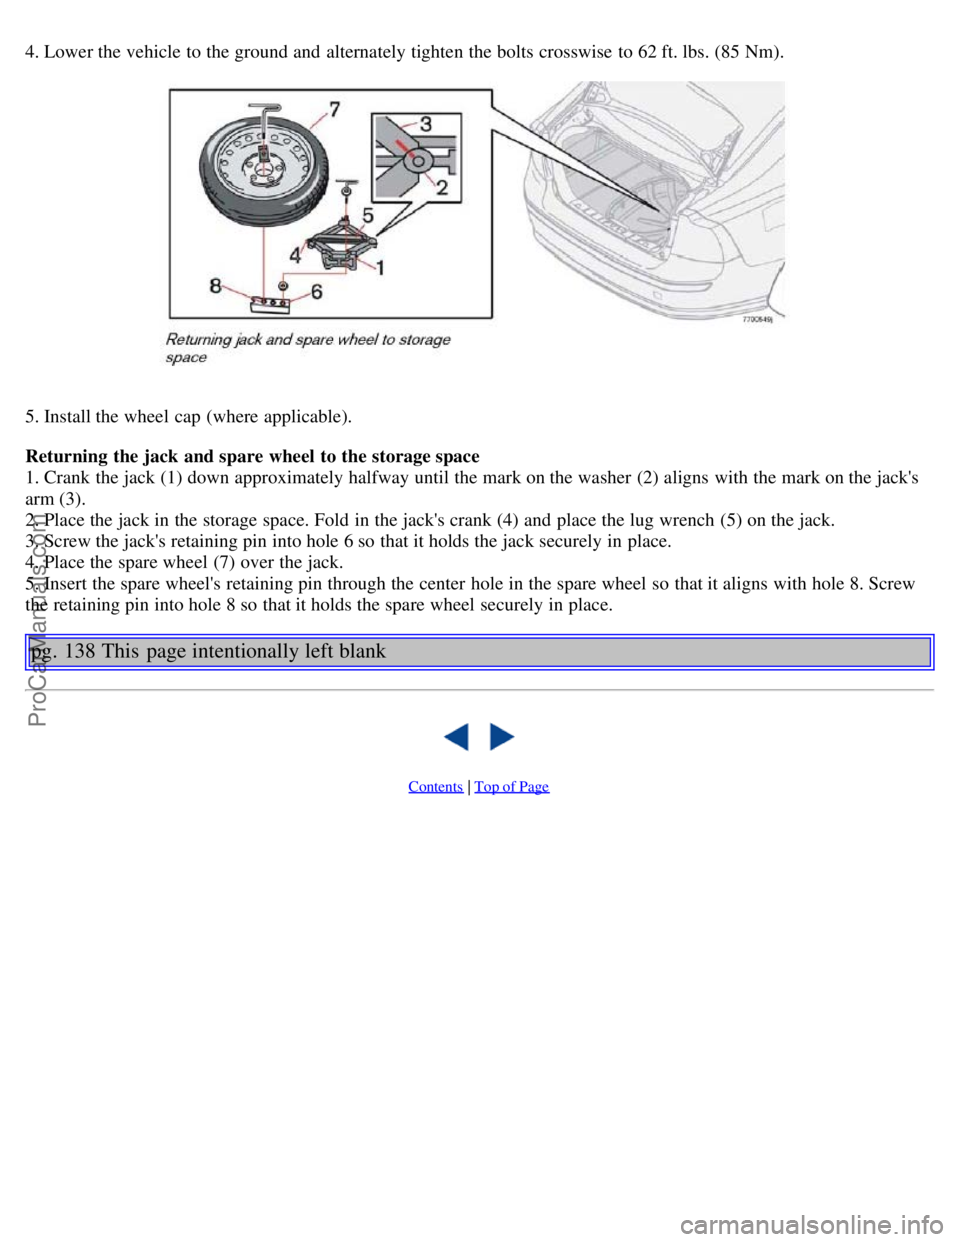
Returning the jack and spare wheel to the storage space
1. Crank the jack (1) down approximately halfway until the mark on the washer (2) aligns with the mark on the jack's
arm (3).
2. Place the jack in the storage space. Fold in the jack's crank (4) and place the lug wrench (5) on the jack.
3. Screw the jack's retaining pin into hole 6 so that it holds the jack securely in place.
4. Place the spare wheel (7) over the jack.
5. Insert the spare wheel's retaining pin through the center hole in the spare wheel so that it aligns with hole 8. Screw
the retaining pin into hole 8 so that it holds the spare wheel securely in place.
pg. 138 This page intentionally left blank
Contents | Top of Page
ProCarManuals.com
Page 84 of 127
2 0 0 5
VOLVO S40
Chapter 9 - Vehicle care
pg. 139 Vehicle care
Washing and cleaning the car140
Paint touch up143
pg. 140 Washing and cleaning the car
Washing and cleaning the car
Washing the car
The following points should be kept in mind when washing and cleaning the car:
The car should be washed at regular intervals since dirt, dust, insects and tar spots adhere to the paint and may cause
damage. To help prevent corrosion, it is particularly important to wash the car frequently in the wintertime.
Avoid washing your car in direct sunlight. Doing so may cause detergents and wax to dry out and become abrasive.
To avoid scratching, use lukewarm water to soften the dirt before you wash with a soft sponge, and plenty of sudsy
water.
Bird droppings : Remove from paint work as soon as possible. Otherwise the finish may be permanently damaged.
A detergent can be used to facilitate the softening of dirt and oil.
A water-soluble grease solvent may be used in cases of sticky dirt. However, use a wash place equipped with a
drainage separator.
Dry the car with a clean chamois and remember to clean the drain holes in the doors and rocker panels.
Tar spots can be removed with kerosene or tar remover after the car has been washed.
A stiff-bristle brush and lukewarm soapy water can be used to clean the wiper blades. Frequent cleaning improves
visibility considerably.
Wash off the dirt from the underside (wheel housings, fenders, etc).
In areas of high industrial fallout, more frequent washing is recommended.
After cleaning the engine, the spark plug wells should be inspected for water and blown dry if necessary.
Bumpers : Wash the bumpers with the same cleaning agent used on the rest of the car. Never clean the bumpers with
gasoline or paint thinner. Difficult spots can be removed with denatured alcohol. To avoid scratches, do not dry the
bumpers with paper.
NOTE: When washing the car, remember to remove dirt from the drain holes in the doors and sills.
CAUTION!
During high pressure washing, the spray mouthpiece must never be closer to the vehicle than 13" (30 cm). Do not
spray into the locks.
When washing or steam cleaning the engine, avoid spraying water or steam directly on the electrical components or
ProCarManuals.com
Page 94 of 127
removing the cap, that there is sufficient fluid in the reservoir.
Fluid type: DOT 4+ boiling point >536°F (280°C), P/N 9437433
Replace: The fluid should be replaced according to the intervals specified in the Warranty and Service Records
Information booklet. When driving under extremely hard conditions (mountain driving, etc), it may be necessary to
replace the fluid more often. Consult your Volvo retailer. Always entrust brake fluid changing to an authorized Volvo
retailer.
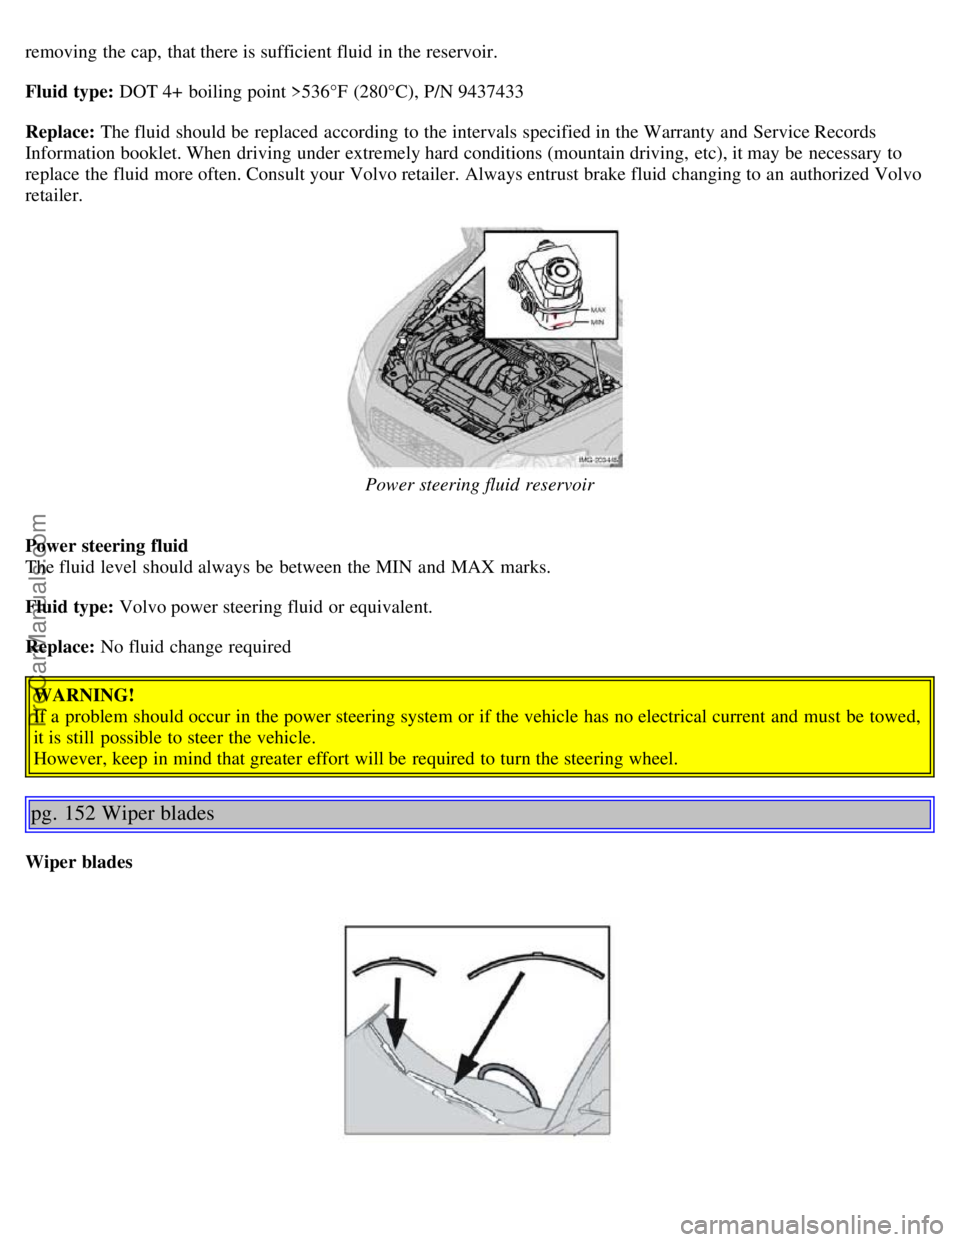
Power steering fluid reservoir
Power steering fluid
The fluid level should always be between the MIN and MAX marks.
Fluid type: Volvo power steering fluid or equivalent.
Replace: No fluid change required WARNING!
If a problem should occur in the power steering system or if the vehicle has no electrical current and must be towed,
it is still possible to steer the vehicle.
However, keep in mind that greater effort will be required to turn the steering wheel.
pg. 152 Wiper blades
Wiper blades
ProCarManuals.com
Page 98 of 127

2 0 0 5
VOLVO S40
Chapter 11 - Audio
pg. 167 Audio
Audio system - introduction168
Audio system overview169
Audio functions171
Radio functions174
CD player177
CD changer (certain audio systems only)179
Audio menu settings and selections181
pg. 168 Audio system - introduction
The audio system in your car is operated with the buttons and keys in the front, center control panel. Certain functions,
such as adjusting the volume, changing radio stations or tracks on a CD, etc, can also be controlled with the optional
steering wheel-mounted keypad.
The audio system is available in three
1 versions:
Performance
Features: AM/FM radio, single-disc CD player, 4x25W output, 4 full-range speakers and two treble speakers.
High-performance
Features: AM/FM radio, CD player, 4x40W output, eight speakers (bass and treble speakers in each door).
Premium sound
Features: AM/FM radio, integrated CD changer (6 discs), 4x70W output plus 25W Dolby Pro Logic II, twelve
speakers (bass, mid-range and treble speakers in the front doors, bass and treble speakers in the rear doors, and bass
and treble in the dashboard's center speaker).
A subwoofer mounted under the floor in the trunk is available as an accessory. Consult your Volvo retailer.
1. All three audio systems may not be available in all markets.
pg. 169 Audio system overview
ProCarManuals.com
Page 100 of 127
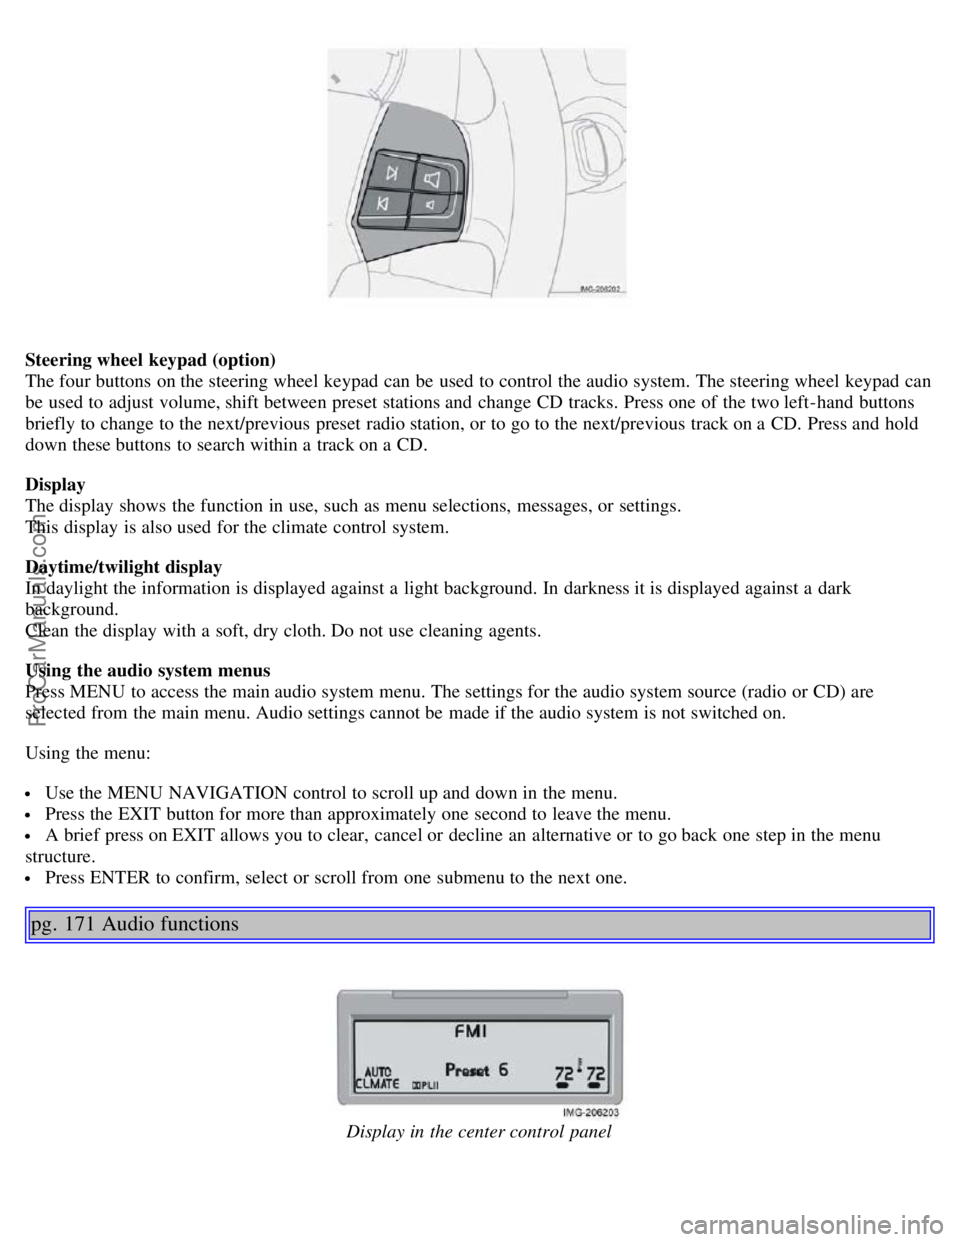
Steering wheel keypad (option)
The four buttons on the steering wheel keypad can be used to control the audio system. The steering wheel keypad can
be used to adjust volume, shift between preset stations and change CD tracks. Press one of the two left-hand buttons
briefly to change to the next/previous preset radio station, or to go to the next/previous track on a CD. Press and hold
down these buttons to search within a track on a CD.
Display
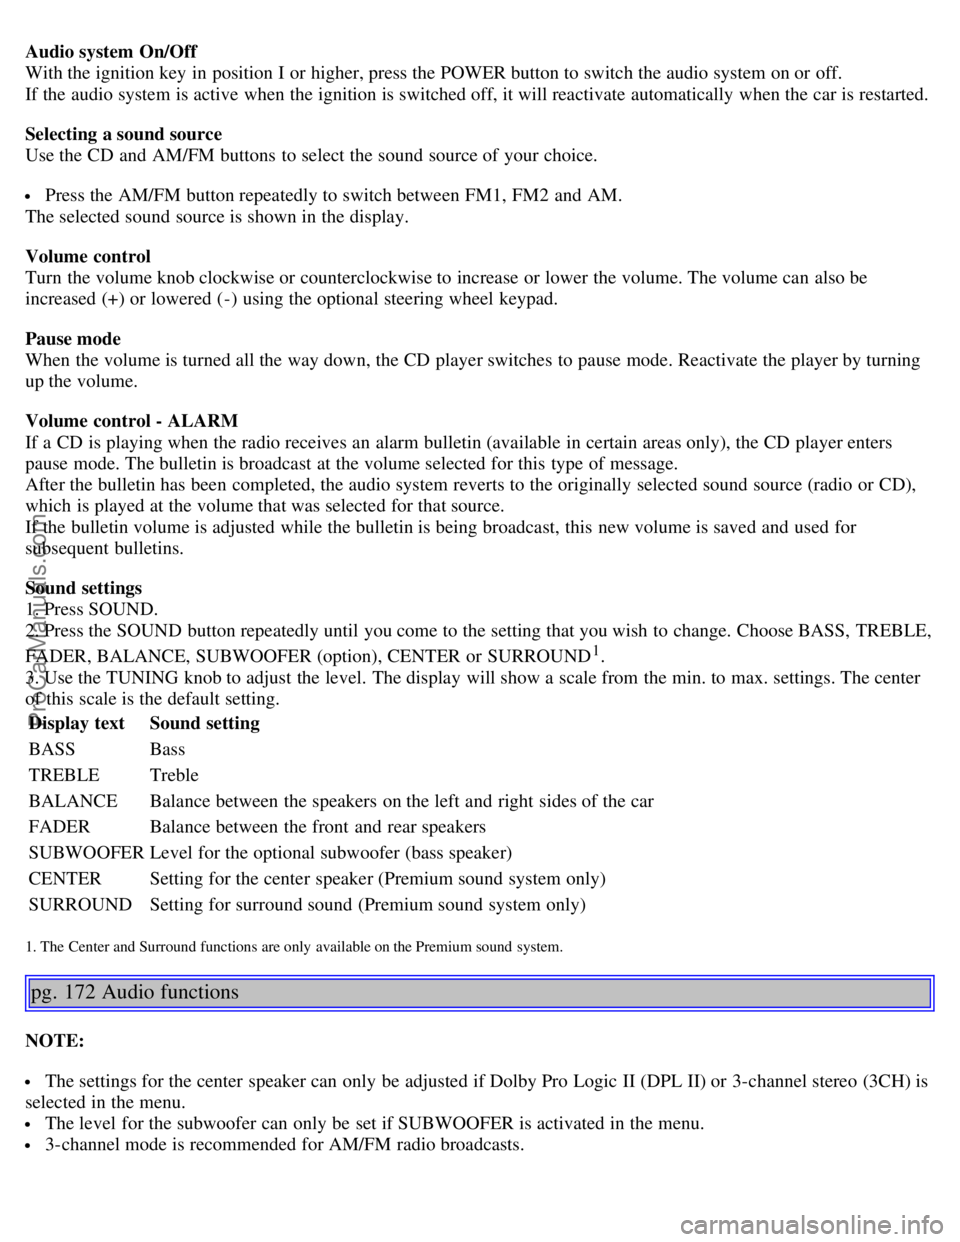
The display shows the function in use, such as menu selections, messages, or settings.
This display is also used for the climate control system.
Daytime/twilight display
In daylight the information is displayed against a light background. In darkness it is displayed against a dark
background.
Clean the display with a soft, dry cloth. Do not use cleaning agents.
Using the audio system menus
Press MENU to access the main audio system menu. The settings for the audio system source (radio or CD) are
selected from the main menu. Audio settings cannot be made if the audio system is not switched on.
Using the menu:
Use the MENU NAVIGATION control to scroll up and down in the menu.
Press the EXIT button for more than approximately one second to leave the menu.
A brief press on EXIT allows you to clear, cancel or decline an alternative or to go back one step in the menu
structure.
Press ENTER to confirm, select or scroll from one submenu to the next one.
pg. 171 Audio functions
Display in the center control panel
ProCarManuals.com
Page 101 of 127
Audio system On/Off
With the ignition key in position I or higher, press the POWER button to switch the audio system on or off.
If the audio system is active when the ignition is switched off, it will reactivate automatically when the car is restarted.
Selecting a sound source
Use the CD and AM/FM buttons to select the sound source of your choice.
Press the AM/FM button repeatedly to switch between FM1, FM2 and AM.
The selected sound source is shown in the display.
Volume control
Turn the volume knob clockwise or counterclockwise to increase or lower the volume. The volume can also be
increased (+) or lowered (-) using the optional steering wheel keypad.
Pause mode
When the volume is turned all the way down, the CD player switches to pause mode. Reactivate the player by turning
up the volume.
Volume control - ALARM
If a CD is playing when the radio receives an alarm bulletin (available in certain areas only), the CD player enters
pause mode. The bulletin is broadcast at the volume selected for this type of message.
After the bulletin has been completed, the audio system reverts to the originally selected sound source (radio or CD),
which is played at the volume that was selected for that source.
If the bulletin volume is adjusted while the bulletin is being broadcast, this new volume is saved and used for
subsequent bulletins.
Sound settings
1. Press SOUND.
2. Press the SOUND button repeatedly until you come to the setting that you wish to change. Choose BASS, TREBLE,
FADER, BALANCE, SUBWOOFER (option), CENTER or SURROUND
1.
3. Use the TUNING knob to adjust the level. The display will show a scale from the min. to max. settings. The center
of this scale is the default setting.
Display text Sound setting
BASS Bass
TREBLE Treble
BALANCE Balance between the speakers on the left and right sides of the car
FADER Balance between the front and rear speakers
SUBWOOFER Level for the optional subwoofer (bass speaker)
CENTER Setting for the center speaker (Premium sound system only)
SURROUND Setting for surround sound (Premium sound system only)
1. The Center and Surround functions are only available on the Premium sound system.
pg. 172 Audio functions
NOTE:
The settings for the center speaker can only be adjusted if Dolby Pro Logic II (DPL II) or 3-channel stereo (3CH) is
selected in the menu.
The level for the subwoofer can only be set if SUBWOOFER is activated in the menu.
3-channel mode is recommended for AM/FM radio broadcasts.
ProCarManuals.com
Page 106 of 127
3. Select ADVANCED RADIO SETTINGS in the menu and press ENTER.
4. Select AF and press ENTER.
To deactivate this function, select AF and press ENTER.
Resetting RBDS functions
This function restores all radio settings to the original factory settings.
1. Select FM1 or FM2 and press the MENU button.
2. Press ENTER.
3. Select ADVANCED RADIO SETTINGS in the menu and press ENTER.
4. Select RESET ALL in the menu and press ENTER.
5. Press ENTER again to confirm your selection.
pg. 177 CD player
CD player
Starting the CD player
Start the CD player by pressing the CD button and inserting a disc in the player.
Changing tracks
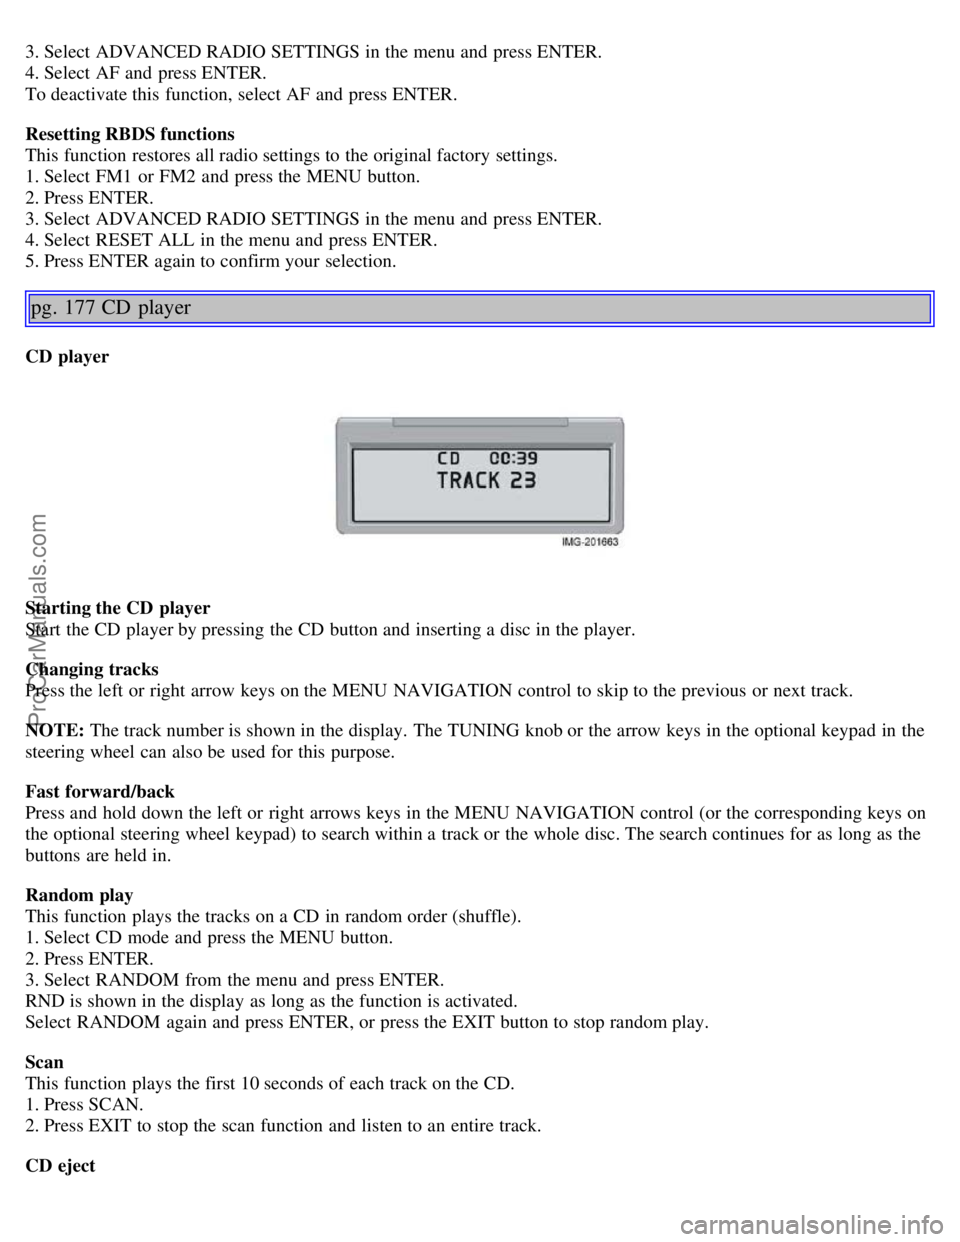
Press the left or right arrow keys on the MENU NAVIGATION control to skip to the previous or next track.
NOTE: The track number is shown in the display. The TUNING knob or the arrow keys in the optional keypad in the
steering wheel can also be used for this purpose.
Fast forward/back
Press and hold down the left or right arrows keys in the MENU NAVIGATION control (or the corresponding keys on
the optional steering wheel keypad) to search within a track or the whole disc. The search continues for as long as the
buttons are held in.
Random play
This function plays the tracks on a CD in random order (shuffle).
1. Select CD mode and press the MENU button.
2. Press ENTER.
3. Select RANDOM from the menu and press ENTER.
RND is shown in the display as long as the function is activated.
Select RANDOM again and press ENTER, or press the EXIT button to stop random play.
Scan
This function plays the first 10 seconds of each track on the CD.
1. Press SCAN.
2. Press EXIT to stop the scan function and listen to an entire track.
CD eject
ProCarManuals.com