2005 VOLVO S40 wheel
[x] Cancel search: wheelPage 28 of 127

Move the lever toward the steering wheel and release it to switch between high and low beams.
With the headlights off: headlight flasher (3)
With the headlights switched off (the switch on the lighting panel in position 0), move the lever toward the steering
wheel. The high beams will remain on until the lever is released.
Home safe lighting (3)
When you leave your car at night, you can make use of the home safe lighting function to illuminate the area in front
of the car:
1. Remove the key from the ignition switch.
2. Pull the direction indicator lever towards the steering wheel (as when using the headlight flasher function).
3. Exit the car and lock the doors.
The headlights, parking lights, license plate lights will now come on and remain on for 30, 60 or 90 seconds. The time
interval can be changed according to your preferences by using the Personal Settings function, described at the end of
this chapter.
Trip computer (option)
The trip computer stores information gathered from several systems in your car and has four menus (five on Canadian
models) that can be shown in the information display.
Driving distance on current fuel reserve
Average fuel consumption
Current fuel consumption
Average speed
Current speed in m.p.h. (Canadian models only)
pg. 48 Left-side steering wheel lever
NOTE: Warning messages from the car's monitoring systems will override the trip computer function. If a warning
message is shown in the information display while you are using the trip computer, you must acknowledge the
message by pressing the READ button (A). Press button A again to return to the trip computer function.
Controls
The four trip computer functions (five on Canadian models) can be accessed by twisting INFO (B) one step at a time
in either direction. Twisting a fifth time (sixth time on Canadian models) returns you to the original function.
The trip computer can be reset (average fuel consumption and average speed will be erased from system memory) by
pressing RESET (C) for at least five seconds.
Driving distance on current fuel reserve
This function shows the approximate distance that can be driven on the fuel remaining in the tank. This calculation is
ProCarManuals.com
Page 29 of 127

based on average fuel consumption during the last 20 miles (30 km) of driving and the amount of fuel remaining in the
tank when the reading was taken. When the driving distance on current fuel reserve is less than 12 miles (20 km), "---"
will be displayed in the information display.
Average fuel consumption
This value indicates fuel consumption since the last time the trip computer was reset (by pressing RESET, button C).
When the engine is switched off, information on fuel consumption is stored and remains in system memory until the
RESET (button C) is pressed again.
Current fuel consumption
This value indicates the current fuel consumption, based on readings taken once per second. When the car is not
moving, "---- " will be displayed.
Average speed
This value indicates average speed since the last time the trip computer was reset (by pressing RESET, button C).
When the engine is switched off, information on average speed is stored and remains in system memory until the
RESET (button C) is pressed again.
Current speed in m.p.h. (Canadian models only)
This function provides the driver with an instantaneous conversion of the car's current speed from km/h to m.p.h.
NOTE: Trip computer readings may vary slightly depending on the circumference of the tires on the car or on tire
inflation.
pg. 49 Cruise control (option)
Cruise control
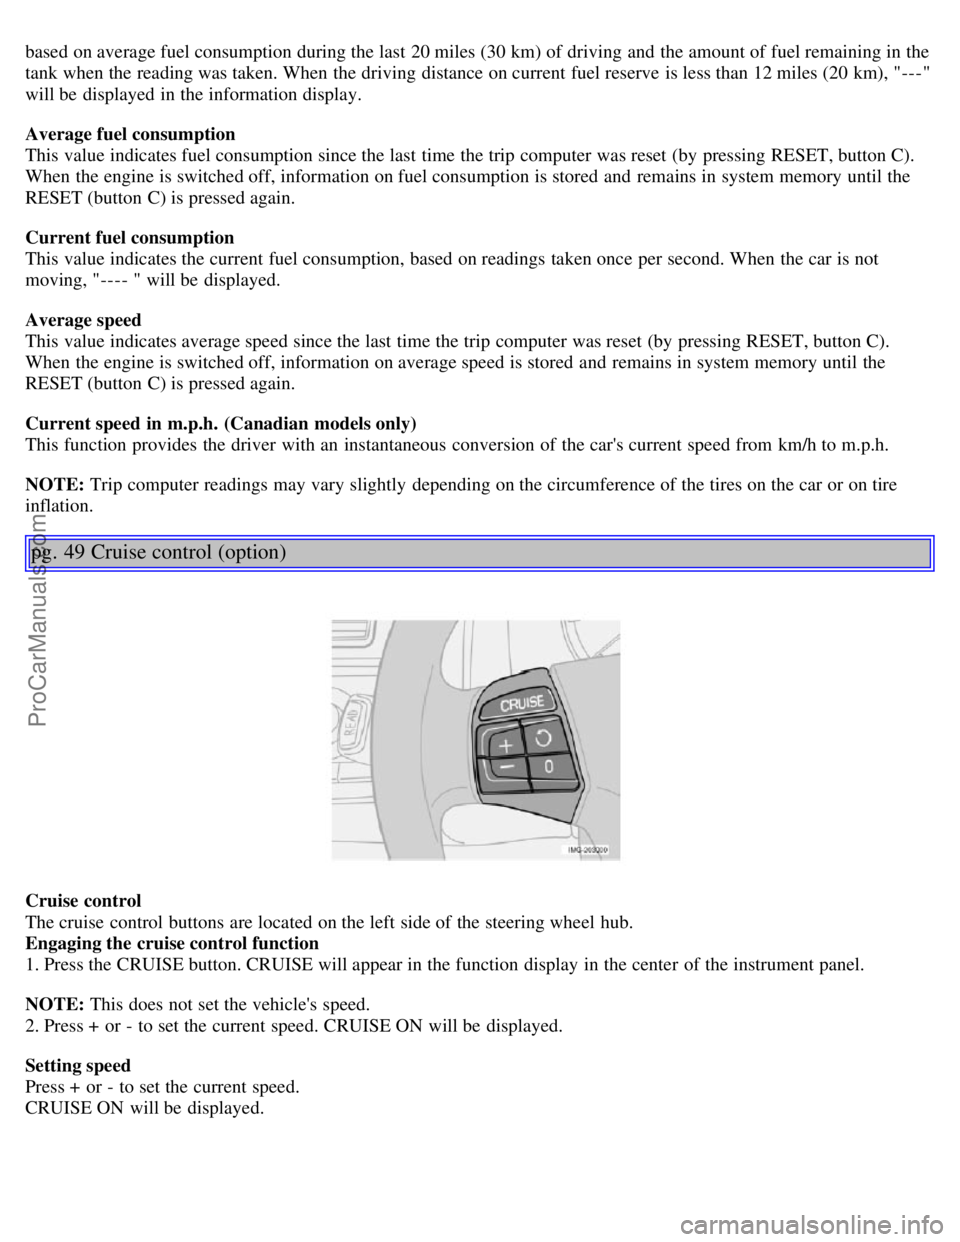
The cruise control buttons are located on the left side of the steering wheel hub.
Engaging the cruise control function
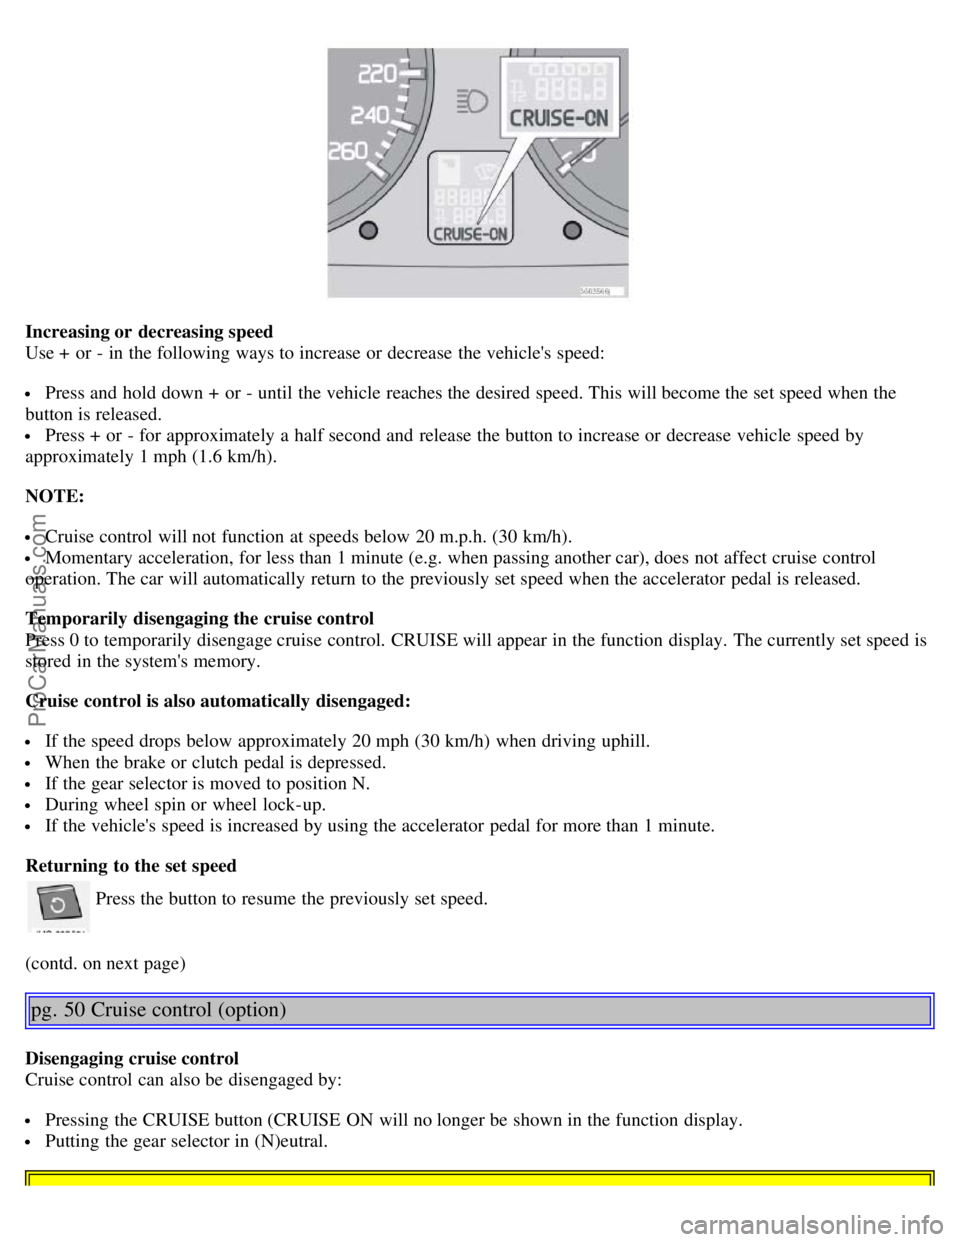
1. Press the CRUISE button. CRUISE will appear in the function display in the center of the instrument panel.
NOTE: This does not set the vehicle's speed.
2. Press + or - to set the current speed. CRUISE ON will be displayed.
Setting speed
Press + or - to set the current speed.
CRUISE ON will be displayed.
ProCarManuals.com
Page 30 of 127

Increasing or decreasing speed
Use + or - in the following ways to increase or decrease the vehicle's speed:
Press and hold down + or - until the vehicle reaches the desired speed. This will become the set speed when the
button is released.
Press + or - for approximately a half second and release the button to increase or decrease vehicle speed by
approximately 1 mph (1.6 km/h).
NOTE:
Cruise control will not function at speeds below 20 m.p.h. (30 km/h).
Momentary acceleration, for less than 1 minute (e.g. when passing another car), does not affect cruise control
operation. The car will automatically return to the previously set speed when the accelerator pedal is released.
Temporarily disengaging the cruise control
Press 0 to temporarily disengage cruise control. CRUISE will appear in the function display. The currently set speed is
stored in the system's memory.
Cruise control is also automatically disengaged:
If the speed drops below approximately 20 mph (30 km/h) when driving uphill.
When the brake or clutch pedal is depressed.
If the gear selector is moved to position N.
During wheel spin or wheel lock-up.
If the vehicle's speed is increased by using the accelerator pedal for more than 1 minute.
Returning to the set speed
Press the button to resume the previously set speed.
(contd. on next page)
pg. 50 Cruise control (option)
Disengaging cruise control
Cruise control can also be disengaged by:
Pressing the CRUISE button (CRUISE ON will no longer be shown in the function display.
Putting the gear selector in (N)eutral.
ProCarManuals.com
Page 31 of 127

WARNING!
Cruise control should not be used in heavy traffic or when driving on wet or slippery roads. Cruise control may not
maintain set speed on steep downgrades.
pg. 51 Right -side steering wheel lever
Windshield wipers
A. Windshield/headlight washers
B. Rain sensor (option) - on/off
C. Thumb wheel
D. Not in use
Windshield wipers off
The windshield wipers are off when the lever is in position 0
Manual wiper function
From position 0, move the lever upward. The windshield wipers will sweep one stroke at a time for as long as
the lever is held up.
Intermittent wiper function
With the lever in this position, you can set the wiper interval by moving the thumb wheel (C) upward to
increase wiper speed or downward to decrease the speed.
Continuous wiper function
The wipers operate at "normal" speed.
High speed wiper function.
A -Windshield washers
Pull the lever toward the steering wheel and release it. The wipers will make 2-3 sweeps across the windshield after the
lever has been released.
Headlight washers (certain models)
When the lever has been pulled, high pressure jets mounted in the bumper will spray the headlights.
The following applies to conserve washer fluid (see page 45 for information on the light switch positions):
ProCarManuals.com
Page 32 of 127

Low/high beam headlights on
The headlights will be washed the first time the windshield is washed. Thereafter, the headlights will only be washed
once for every five times the windshield is washed within a 10-minute period.
Parking lights on
Optional Bi -Xenon headlights will be washed once for every five times the windshield is washed.
Normal halogen headlights will not be washed.
Headlights off
Optional Bi -Xenon headlights will be washed once for every five times the windshield is washed.
Normal halogen headlights will not be washed.
pg. 52 Right -side steering wheel lever
B - Rain sensor (option)
The rain sensor regulates windshield wiper speed according to the amount of water on the windshield. The sensitivity
of the rain sensor is adjusted by moving the thumb wheel (C in the illustration on the previous page) up (the wipers
will sweep the windshield more frequently) or down (the wipers will sweep the windshield less frequently).
On/Off
To activate the rain sensor:
1. Switch on the ignition.
2. Put the windshield wiper lever in position 0.
3. Press button B (see the illustration on the previous page). The rain sensor symbol will appear in the lower display.
The rain sensor can be deactivated by:
Pressing button (B).
or
ProCarManuals.com
Page 33 of 127

Moving the windshield wiper lever down. If the lever is moved up, the rain sensor function will remain activated.
CAUTION!
The rain sensor should be deactivated when washing the car in an automatic car wash, etc. If the rain sensor function
is left on, the wipers will start inadvertently in the car wash and could be damaged.
The rain sensor is automatically deactivated:
When the key is removed from the ignition.
Five minutes after the ignition is switched off if the key is left in the ignition.
C - Thumb wheel
The thumb wheel is used to set the wiper interval when intermittent wiping is selected, or the sensitivity to the amount
of rain on the windshield when the rain sensor is selected. Move the wheel upward or downward to increase/decrease
wiper speed when the intermittent function is selected, or to increase/decrease the optional rain sensor's sensitivity
when the this function is activated.
D - Not in use
Contents | Top of Page
ProCarManuals.com
Page 59 of 127

2 0 0 5
VOLVO S40
Chapter 7 - Starting and driving
pg. 97 Starting and driving
General information98
Fuel requirements101
Starting the vehicle104
Manual transmission107
Automatic transmission - Geartronic108
All Wheel Drive (option)110
Brake system111
Stability system113
Rear park assist115
Towing116
Jump starting118
Towing a trailer119
Trailer towing120
Detachable trailer hitch121
Transporting loads122
pg. 98 General information
Economical driving conserves natural resources
Better driving economy may be obtained by thinking ahead, avoiding rapid starts and stops and adjusting the speed of
your vehicle to immediate traffic conditions.
Observe the following rules:
Bring the engine to normal operating temperature as soon as possible by driving with a light foot on the accelerator
pedal for the first few minutes of operation. A cold engine uses more fuel and is subject to increased wear.
Whenever possible, avoid using the vehicle for driving short distances. This does not allow the engine to reach
normal operating temperature.
ProCarManuals.com
Page 60 of 127

Drive carefully and avoid rapid acceleration and hard braking.
Use the transmission's (D)rive position as often as possible and avoid using kickdown.
Do not exceed posted speed limits.
Avoid carrying unnecessary items (extra load) in the vehicle.
Maintain correct tire pressure. Check tire pressure regularly (when tires are cold).
Remove snow tires when threat of snow or ice has ended.
Note that roof racks, ski racks, etc, increase air resistance and also fuel consumption.
At highway driving speeds, fuel consumption will be lower with the air conditioning on and the windows closed
than with the air conditioning off and the windows open.
Using the onboard trip computer's fuel consumption modes can help you learn how to drive more economically.
Other factors that decrease gas mileage are:
Dirty air cleaner
Dirty engine oil and clogged oil filter
Dragging brakes
Incorrect front end alignment
Some of the above mentioned items and others are checked at the standard maintenance intervals.
Weight distribution affects handling
At the specified curb weight your vehicle has a tendency to understeer, which means that the steering wheel has to be
turned more than might seem appropriate for the curvature of a bend. This ensures good stability and reduces the risk
of rear wheel skid. Remember that these properties can alter with the vehicle load. The heavier the load in the cargo
area, the less the tendency to understeer.
WARNING!
Driving with the trunk open: Driving with the trunk open could lead to poisonous exhaust gases entering the
passenger compartment. If the trunk must be kept open for any reason, proceed as follows:
Close the windows
Set the ventilation system control to air flow to floor, windshield and side windows and the blower control to its
highest setting.
CAUTION!
Drive slowly and carefully if going through standing water (i.e. flooded roadways, etc.). Damage to the engine could
result if excess water is drawn in through the air intake system. Never drive the vehicle in water deeper than 18
inches (48 cm).
pg. 99 General information
Handling, roadholding
Vehicle load, tire design and inflation pressure all affect vehicle handling. Therefore, check that the tires are inflated to
the recommended pressure according to the vehicle load. See the "Tire pressure" section. Loads should be distributed
so that capacity weight or maximum permissible axle loads are not exceeded.
Cold weather precautions
If you wish to check your vehicle before the approach of cold weather, the following advice is worth noting:
Make sure that the engine coolant contains 50 percent antifreeze. Any other mixture will reduce freeze protection.
This gives protection against freezing down to -31°F (-35°C). See section "Coolant". The use of "recycled" antifreeze
is not approved by Volvo. Different types of antifreeze must not be mixed.
Volvo recommends using only genuine Volvo antifreeze in your vehicle's radiator. Your Volvo retailer stocks plenty
of Volvo engine coolant to help protect your vehicle during cold weather.
ProCarManuals.com