Page 152 of 336
152
26p115
You can select the language shown on
the screen. Touch your desired switch
on the screen.
—Screen setting
26p030c
AUTOMATIC TRANSITION
The function returning to the previous
screen from the audio or air conditioner
screen is selectable. Select “ON” or
“OFF” and then touch “OK”.
ON:The previous screen automatically re-
turns from the audio or air condition-
er screen 20 seconds after the end
of audio or air conditioner screen op-
eration.
OFF: The audio or air conditioner screen
remains on.
BACKGROUND COLOR
Select the desired background color
and touch “OK”.
Adjustment
26p024a
Type A Type B
Push the “DISPLAY” button to display
the “Display” screen.
—Language
Page 153 of 336

153
26p026b
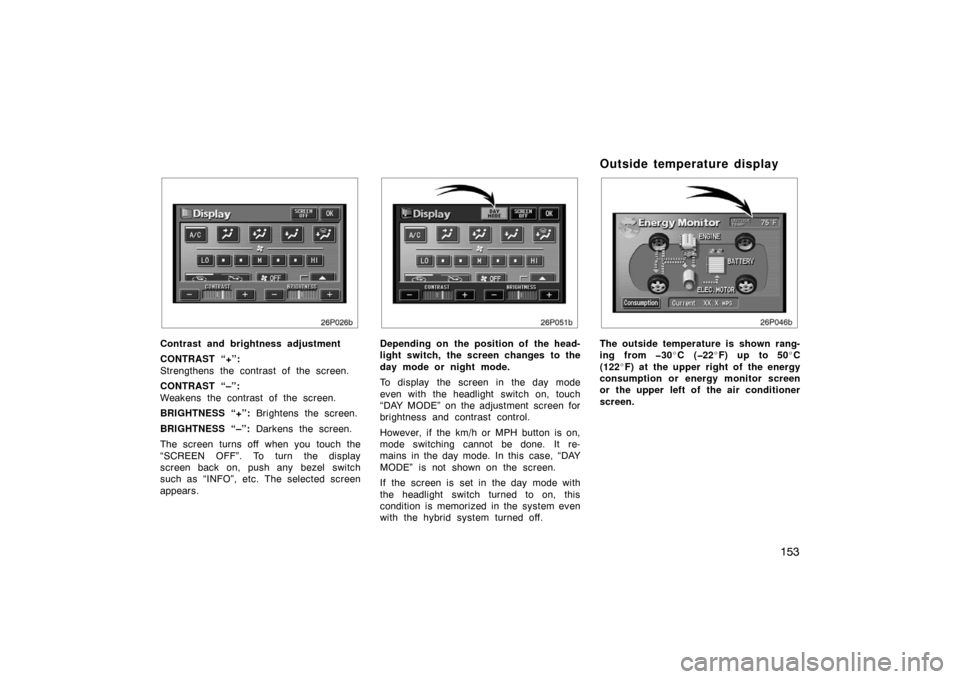
Contrast and brightness adjustment
CONTRAST “+”:
Strengthens the contrast of the screen.
CONTRAST “–”:
Weakens the contrast of the screen.
BRIGHTNESS “+”: Brightens the screen.
BRIGHTNESS “–”: Darkens the screen.
The screen turns off when you touch the
“SCREEN OFF”. To turn the display
screen back on, push any bezel switch
such as “INFO”, etc. The selected screen
appears.
26P051b
Depending on the position of the head-
light switch, the screen changes to the
day mode or night mode.
To display the screen in the day mode
even with the headlight switch on, touch
“DAY MODE” on the adjustment screen for
brightness and contrast control.
However, if the km/h or MPH button is on,
mode switching cannot be done. It re-
mains in the day mode. In this case, “DAY
MODE” is not shown on the screen.
If the screen is set in the day mode with
the headlight switch turned to on, this
condition is memorized in the system even
with the hybrid system turned off.
Outside temperature display
26p046b
The outside temperature is shown rang-
ing from �30 �C (�22 �F) up to 50 �C
(122 �F) at the upper right of the energy
consumption or energy monitor screen
or the upper left of the air conditioner
screen.
Page 156 of 336
156
1. Multi−information display screen*
(See page 160 for details.)
2. Ejecting a compact disc (See page 170 for details.)
3. Compact disc slot (See page 169 for details.)
4. Frequency tuning (See page 163 for details.)
5. Scan tuning (See page 164 for details.)
6. Compact disc mode button (See page 169 for details.)
7. Radio mode button (See page 163 for details.)
8. Radio mode: Seek tuning (See page 164 for
details.)
Compact disc
mode: Direct access to a desired program
(See page 172 for
details.)
9. Adjusting the volume (See page 159 for details.)
10. Turning the system on (See page 159 for details.)
11. Audio operation screen display button (See page 160 for details.)
*: In this manual, English version screens are shown as an example.
Reference
�Ty p e 1
26p014c
With
Navigation
System
Page 157 of 336
157
1. Multi−information display screen*
(See page 160 for details.)
2. Compact disc slot (See page 169 for details.)
3. Ejecting a compact disc (See page 170 for details.)
4. Radio mode button (See page 163 for details.)
5. Frequency tuning (See page 163 for details.)
6. Stopping and ejecting a casette tape (See page 166 for details.)
7. Scan tuning (See page 164 for details.)
8. Tape or Compact disc mode button (See page 166 or 169 for details.)
9. Casette tape slot (See page 166 for details.)
10. Radio mode: Seek tuning (See page 164 for
details.)
Tape or Compact
disc mode: Direct access to a desired program
(See page 168 or 172
for details.)
11. Turning the system on (See page 159 for details.)
�
Ty p e 2
26p110a
With
Navigation
System
Page 158 of 336
158
12. Adjusting the volume(See page 159 for details.)
13. Compact disc load button (See page 169 for details.)
14. Audio operation screen display button (See page 160 for details.)
*: In this manual, English version screens are shown as an example. This section describes some of the basic
features of the Toyota audio system.
Some information may not pertain to your
system.
Your audio system works when the hybrid
system is in “ACC” or “IG
−ON”.
NOTICE
To prevent the battery from being
discharged, do not leave the audio on
longer than necessary when the
hybrid system is not running.
TURNING THE SYSTEM ON AND OFF
Push “PWR” button to turn the audio sys-
tem on and off. The system turns on in
the last mode used.
Using your audio system—
—Some basics
Page 160 of 336
160
26p136a
Radio
26p137a
Casette tape
26p138a
Compact disc (Type 1)
26p149b
Compact disc (Type 2)
The switches for radio, cassette tape
and compact disc player operation are
displayed on the liquid crystal display.
Touch them lightly and directly on the
screen.
The selected switch is highlighted in
green.
Page 161 of 336

161
26p140a
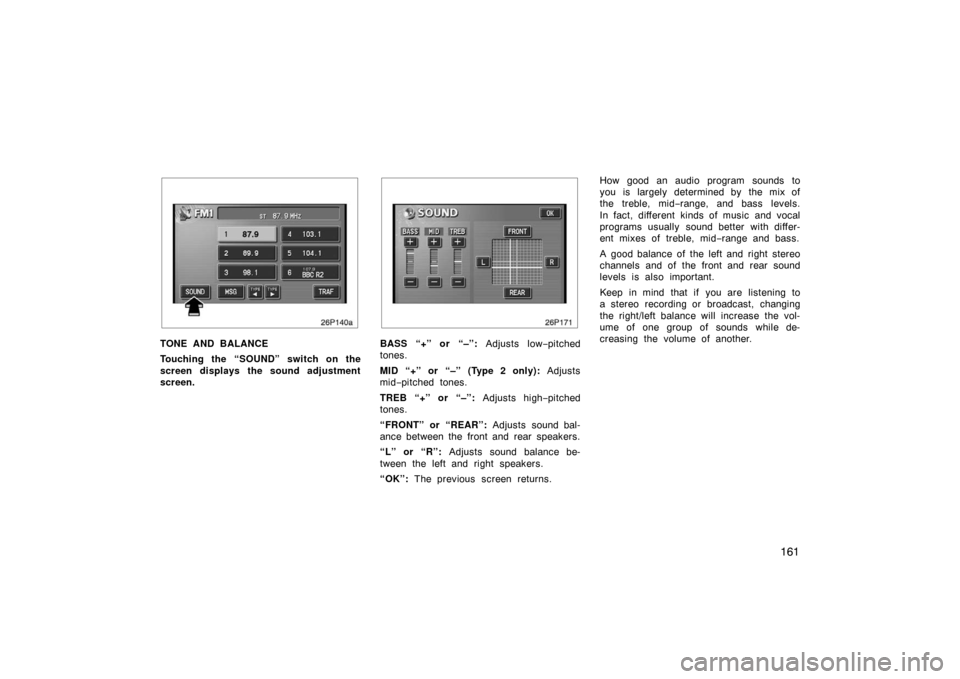
TONE AND BALANCE
Touching the “SOUND” switch on the
screen displays the sound adjustment
screen.BASS “+” or “–”: Adjusts low−pitched
tones.
MID “+” or “–” (Type 2 only): Adjusts
mid −pitched tones.
TREB “+” or “–”: Adjusts high−pitched
tones.
“FRONT” or “REAR”: Adjusts sound bal-
ance between the front and rear speakers.
“L” or “R”: Adjusts sound balance be-
tween the left and right speakers.
“OK”: The previous screen returns. How good an audio program sounds to
you is largely determined by the mix of
the treble, mid−
range, and bass levels.
In fact, different kinds of music and vocal
programs usually sound better with differ-
ent mixes of treble, mid− range and bass.
A good balance of the left and right stereo
channels and of the front and rear sound
levels is also important.
Keep in mind that if you are listening to
a stereo recording or broadcast, changing
the right/left balance will increase the vol-
ume of one group of sounds while de-
creasing the volume of another.
Page 162 of 336

162
YOUR RADIO ANTENNA
To remove an antenna on the roof, care-
fully turn it counterclockwise.
NOTICE
To prevent damage to the antenna,
make sure to remove it before driving
your Toyota through an automatic car
wash.
YOUR CASSETTE PLAYER
When you insert a cassette, the exposed
tape should be to the right.
NOTICE
Do not oil any part of the player and
do not insert anything other than cas-
sette tapes into the slot, or the tape
player may be damaged.
YOUR COMPACT DISC PLAYER
When you insert a disc, gently push it in
with the label side up.
The discs set in the player are played
continuously, starting with disc number 1.
The disc number of the disc currently be-
ing played, the track number and the time
from the beginning of the program appear
on the display.
Type 2 only:
When play of one disc ends, the first
track of the following disc starts. When
play of the final disc ends, play of the
first disc starts again.
The player will skip any empty disc num-
ber.
NOTICE
�Do not stack up two discs for in-
sertion, or it will cause damage the
compact disc player. Insert only one
compact disc into slot at a time.
� Never try to disassemble or oil any
part of the compact disc player. Do
not insert anything other than com-
pact discs into the slot.
The player is intended for use with 12 cm
(4.7 in.) discs only.