Page 124 of 250

Downloaded from www.Manualslib.com manuals search engine
NU761_2_G2-FRA.qxd 4/11/05 10:48 Page 2.24
2.24
EMERGENCY BRAKE ASSIST
This system is complementary to
ABS and helps reduce vehicle
stopping distances.
Operating principle
The system is for detecting an
emergency braking situation. In this
case, the braking assistance
immediately develops maximum
power and may trigger ABS
regulation.
ABS braking is maintained as long
as the brake pedal is not released.
Hazard warning lights switching
on
Depending on the vehicle, these
may light up in the event of sudden
deceleration.This function is an
additional aid in case of
critical driving conditions
to enable the vehicle
behaviour to be adapted to suit the
driving conditions.
However, the function does not take
the place of the driver. I t does not
increase the vehicle’s limits and
should not encourage you to drive
more quickly.
Therefore, it can under no
circumstances replace the vigilance
or responsibility of the driver when
manoeuvring the vehicle (the driver
must always be ready for sudden
incidents which may occur when
driving).
NU761_2_G2-ENG.qxp 03-Jan-06 20:48 Page 2.24 (Black/Process Black\
plate)
Page 133 of 250
Downloaded from www.Manualslib.com manuals search engine
1
NU761_2_G2-FRA.qxd 4/11/05 10:48 Page 2.33
PARKING PROXIMITY SENSOR (continued)
Temporary deactivation of the
system
Press switch 1to deactivate the
system.
The warning light built into the
switch lights up to remind you that
the system has been deactivated.
Pressing the switch again will
reactivate the system and switch off
the warning light.
The system is automatically
reactivated after the ignition is
switched off and the engine
restarted.
Prolonged deactivation of the
system
You can deactivate the system
permanently by pressing the switch
for longer than approximately three
seconds.
The warning light built into the
switch remains lit permanently.
Once deactivated, the system can be
reactivated by pressing the button
again for longer than approximately
three seconds.
2.33
NU761_2_G2-ENG.qxp 03-Jan-06 20:48 Page 2.33 (Black/Process Black\
plate)
Page 134 of 250

Downloaded from www.Manualslib.com manuals search engine
1
1
NU761_2_G2-FRA.qxd 4/11/05 10:48 Page 2.34
2.34
AUTOMATIC GEARBOX
Operation
With the lever in position Por N,
switch on the ignition.
Foot on the brake pedal (the warning
light goes out), move the lever out of
position P.
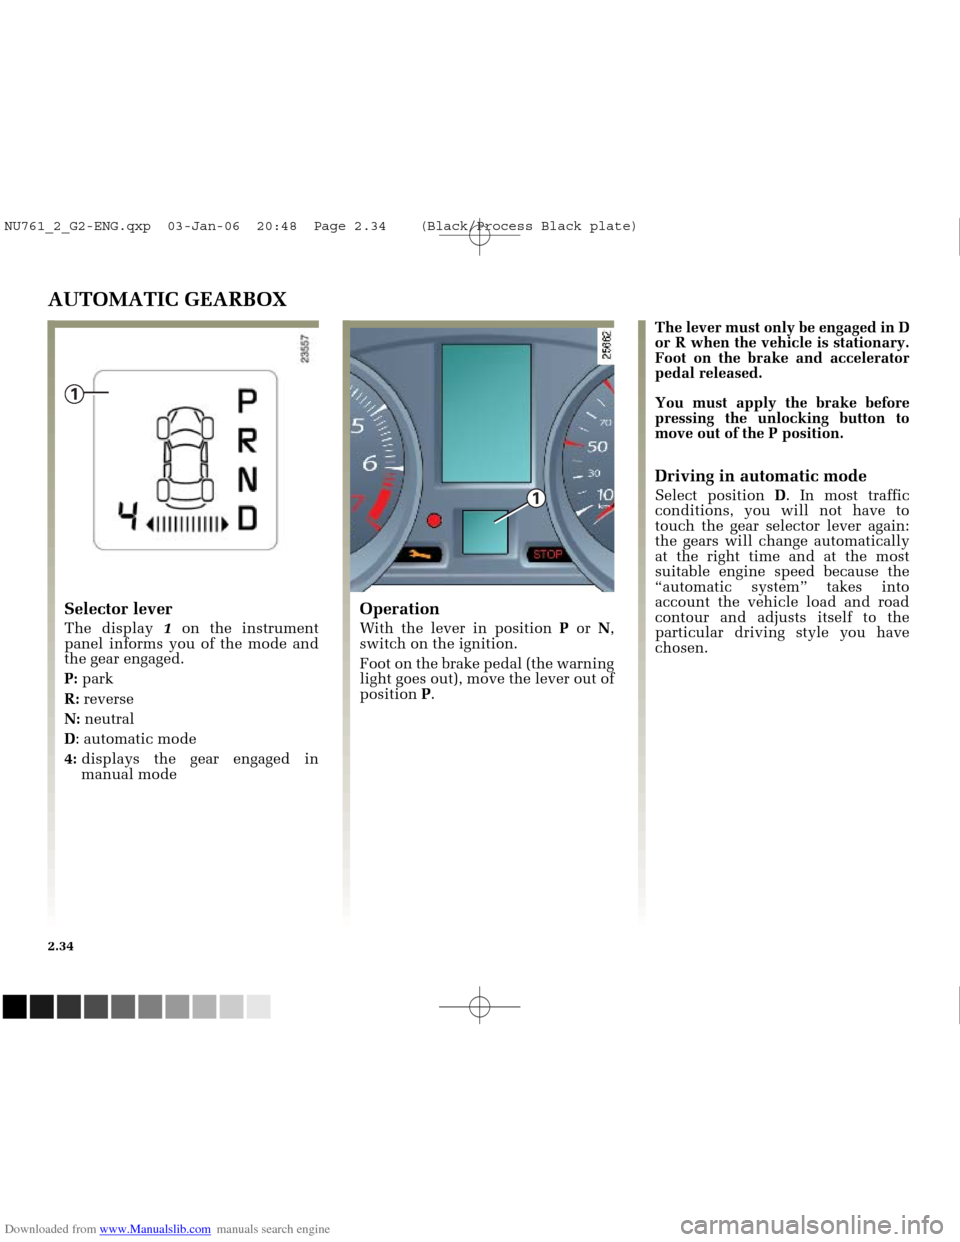
Selector lever
The display 1on the instrument
panel informs you of the mode and
the gear engaged.
P: park
R: reverse
N: neutral
D : automatic mode
4: displays the gear engaged in
manual mode The lever must only be engaged in D
or R when the vehicle is stationary.
Foot on the brake and accelerator
pedal released.
You must apply the brake before
pressing the unlocking button to
move out of the P position.
Driving in automatic mode
Select position
D. In most traffic
conditions, you will not have to
touch the gear selector lever again:
the gears will change automatically
at the right time and at the most
suitable engine speed because the
“automatic system” takes into
account the vehicle load and road
contour and adjusts itself to the
particular driving style you have
chosen.
NU761_2_G2-ENG.qxp 03-Jan-06 20:48 Page 2.34 (Black/Process Black\
plate)
Page 135 of 250

Downloaded from www.Manualslib.com manuals search engine
NU761_2_G2-FRA.qxd 4/11/05 10:48 Page 2.35
AUTOMATIC TRANSMISSION (continued)Driving in manual mode
With the selector lever in position D,
move the lever to the left.
Pushing the lever repeatedly allows
you to change gears manually.
- to move down through the gears, push the lever backwards.
- to move up through the gears, push the lever forwards.
The gear selected is displayed on the
instrument panel. Special cases
Under certain driving conditions
(e.g.: engine protection, with
electronic stability program (ESP)
operational: etc.) the “automatic
system” may change gear
automatically.
Likewise, to prevent “incorrect
manoeuvres”, a gear change may be
refused by the “automatic system”:
in this case the gear display flashes
for a few seconds as a warning.
How to drive as economically as
possible
Leave the selector in position
Don
the open road, depress the
accelerator pedal slightly to ensure
automatic gear changes at
comparatively low engine speeds.
Accelerating and overtaking
Depress the accelerator pedal
briskly and fully (so that it goes
beyond the kickdown point).
This will enable you to change
down to the optimal gear within the
engine range.
2.35
NU761_2_G2-ENG.qxp 03-Jan-06 20:48 Page 2.35 (Black/Process Black\
plate)
Page 137 of 250

Downloaded from www.Manualslib.com manuals search engine
NU761_2_G2-FRA.qxd 4/11/05 10:49 Page 2.37
AUTOMATIC TRANSMISSION (continued)
Operating faults
- when driving , if the message
“Check gearbox” along with the
warning light appears on the
instrument panel, this indicates a
fault.
Consult your RENAULT Dealer as
soon as possible.
- when driving , if the message
“Gearbox overheating” along with
the warning light appears on
the instrument panel, avoid leaving
the lever in position D(or R), traffic
permitting: systematically return to
position Nwhile stopping.
Consult your RENAULT Dealer as
soon as possible.
- Recovering a vehicle with an
automatic transmission : refer to
the information on Towing in
Section 5.
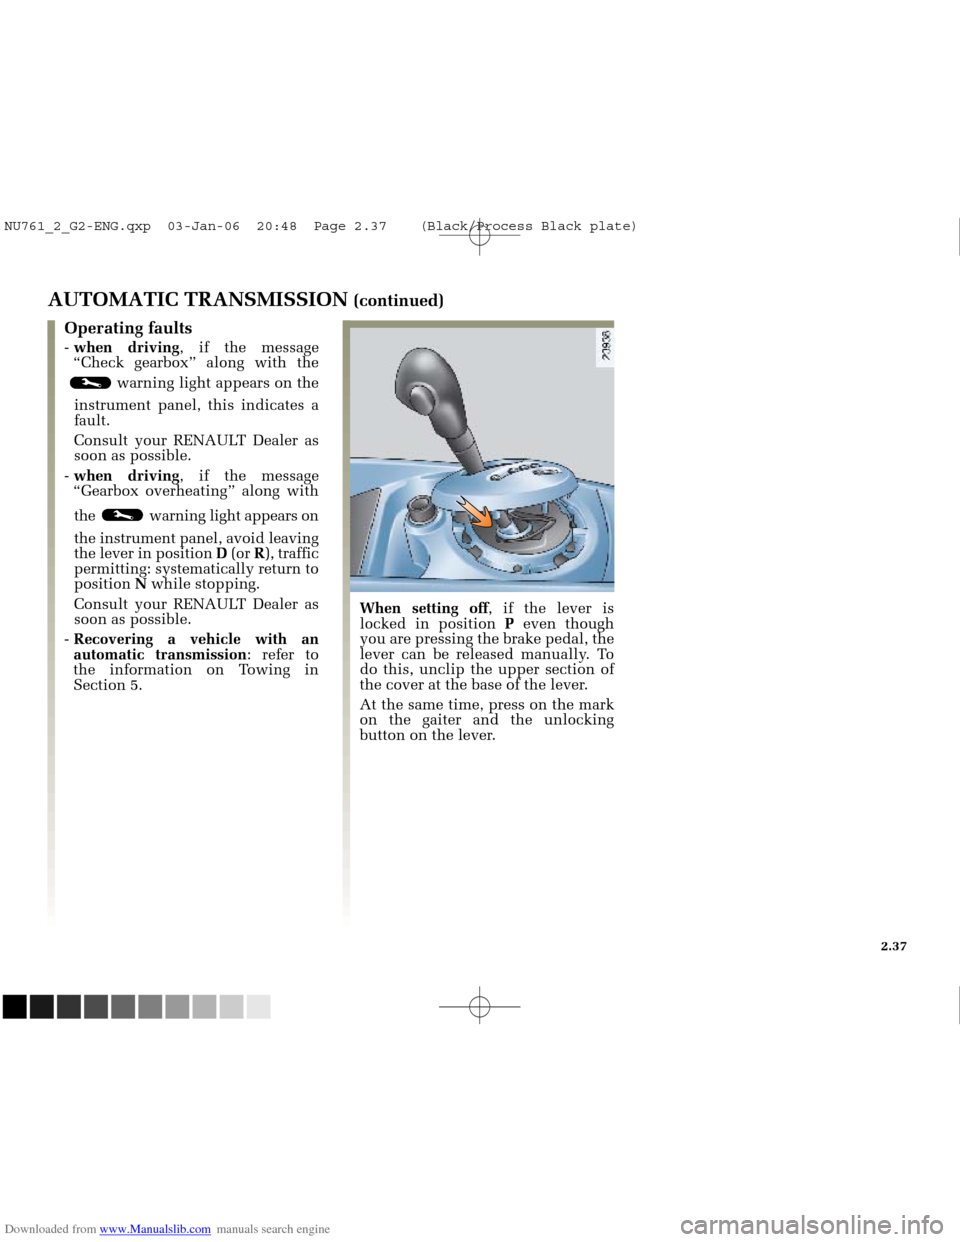
When setting off , if the lever is
locked in position Peven though
you are pressing the brake pedal, the
lever can be released manually. To
do this, unclip the upper section of
the cover at the base of the lever.
At the same time, press on the mark
on the gaiter and the unlocking
button on the lever.
2.37
NU761_2_G2-ENG.qxp 03-Jan-06 20:48 Page 2.37 (Black/Process Black\
plate)
Page 142 of 250
Downloaded from www.Manualslib.com manuals search engine
ABC D
FE
NU761_2_G3-FRA.qxd 4/11/05 10:51 Page 3.04
3.04
HEATING/AIR CONDITIONING
The controls
A - Air recirculation control.
B - Air temperature adjustment.
C - Ventilation speed adjustment.
D - Adjusting the passenger
compartment air distribution. E
- Heated rear screen and heated
door mirror control and
indicator light (depending on
vehicle).
F - Air conditioning control and
warning light (depending on
vehicle).
Adjusting the air temperature
Turn control Bto obtain the desired
temperature. The further the slide is
in the red, the more the temperature
will be increased.
When the air conditioning system is
used for long periods, it may begin
to feel cold. This can be corrected by
increasing the quantity of hot air
(turn control Bto the right).
NU761_2_G3-ENG.qxp 1/5/2006 5:28 PM Page 3.04 (Black plate)
Page 146 of 250
Downloaded from www.Manualslib.com manuals search engine
12345 67 813 12 11 10
14 9
NU761_2_G3-FRA.qxd 4/11/05 10:51 Page 3.08
3.08
CLIMATE CONTROL
The controls
1
- “Clear view” button to demist
and de-ice the windows.
2 - “Clear view” function indicator
light.
3 - Switching the air conditioning
on and off.
4 and 7- Air temperature adjustment. 5
- Display.
6 - Switching automatic mode on
and off.
8 and 10- Air distribution adjustment
for the passenger
compartment.
9 and 11- Ventilation speed
adjustment. 12
- Heated rear screen and heated
door mirrors (depending on
vehicle).
13 - Heated rear screen indicator
light.
14 - Air recirculation control.
Information and advice for use Refer to the end of the section on
heating/air conditioning.
Buttons 1and 12are
supplemented by operating
warning lights ( 2and 13):
- indicator light lit up, the function is switched on,
- indicator light off, the function is switched off.
NU761_2_G3-ENG.qxp 1/5/2006 5:28 PM Page 3.08 (Black plate)
Page 151 of 250
Downloaded from www.Manualslib.com manuals search engine
13 12
NU761_2_G3-FRA.qxd 4/11/05 10:51 Page 3.13
3.13
CLIMATE CONTROL (continued)
Rear screen de-icing/demisting
Press button 12: operating warning
light 13lights up.
This function permits rapid
demisting/de-icing of the rear screen
and de-icing of the door mirrors
(depending on version). To exit this function
, press button
12 again. If this does not occur,
demisting stops automatically.
NU761_2_G3-ENG.qxp 1/5/2006 5:28 PM Page 3.13 (Black plate)