Page 89 of 250
Downloaded from www.Manualslib.com manuals search engine
C
F
1
D
E
2
A
B
NU761_2_G1-FRA.qxd 10/11/05 15:55 Page 1.79
1.79
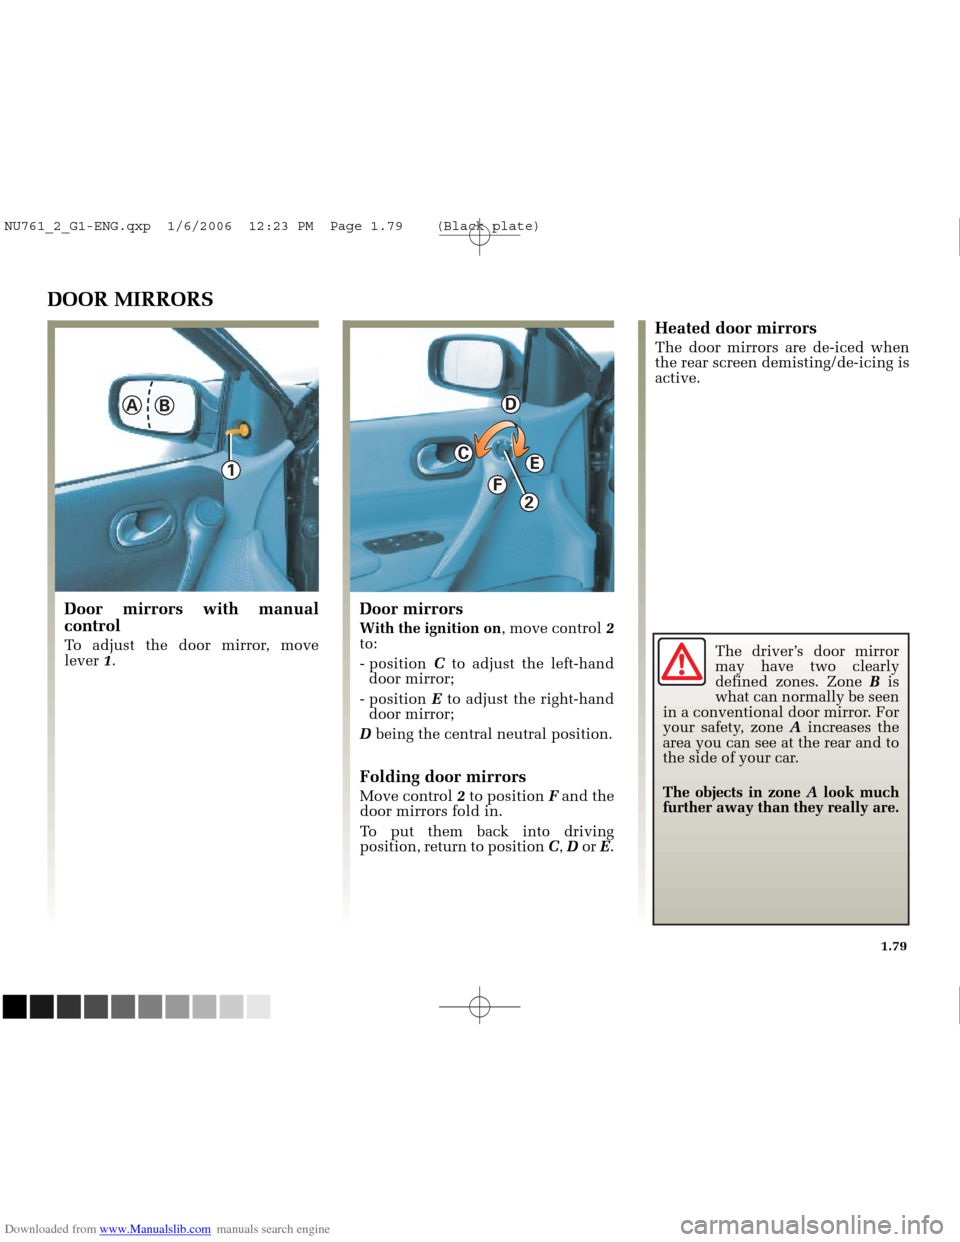
The driver’s door mirror
may have two clearly
defined zones. Zone Bis
what can normally be seen
in a conventional door mirror. For
your safety, zone Aincreases the
area you can see at the rear and to
the side of your car.
The objects in zone Alook much
further away than they really are.
DOOR MIRRORS
Door mirrors with manual
control
To adjust the door mirror, move
lever 1.
Door mirrors
With the ignition on , move control 2
to:
- position Cto adjust the left-hand
door mirror;
- position Eto adjust the right-hand
door mirror;
D being the central neutral position.
Folding door mirrors
Move control 2to position Fand the
door mirrors fold in.
To put them back into driving
position, return to position C, D or E.
Heated door mirrors
The door mirrors are de-iced when
the rear screen demisting/de-icing is
active.
NU761_2_G1-ENG.qxp 1/6/2006 12:23 PM Page 1.79 (Black plate)
Page 90 of 250
Downloaded from www.Manualslib.com manuals search engine
1
2
NU761_2_G1-FRA.qxd 10/11/05 15:55 Page 1.80
1.80
REAR-VIEW MIRRORS
Interior rear-view mirror
Its position can be adjusted. For
night driving, to avoid being dazzled
by the headlights of the car behind
you, move the small lever 1located
behind the mirror.
Auto-dimming rear-view mirror 2
The rear-view mirror darkens
automatically at night when you are
followed by a vehicle with lights
(main beam headlights).
NU761_2_G1-ENG.qxp 1/6/2006 12:23 PM Page 1.80 (Black plate)
Page 91 of 250
Downloaded from www.Manualslib.com manuals search engine
1
2
0
NU761_2_G1-FRA.qxd 10/11/05 15:55 Page 1.81
1.81
THE HORN AND HAZARD LIGHTS
Horn
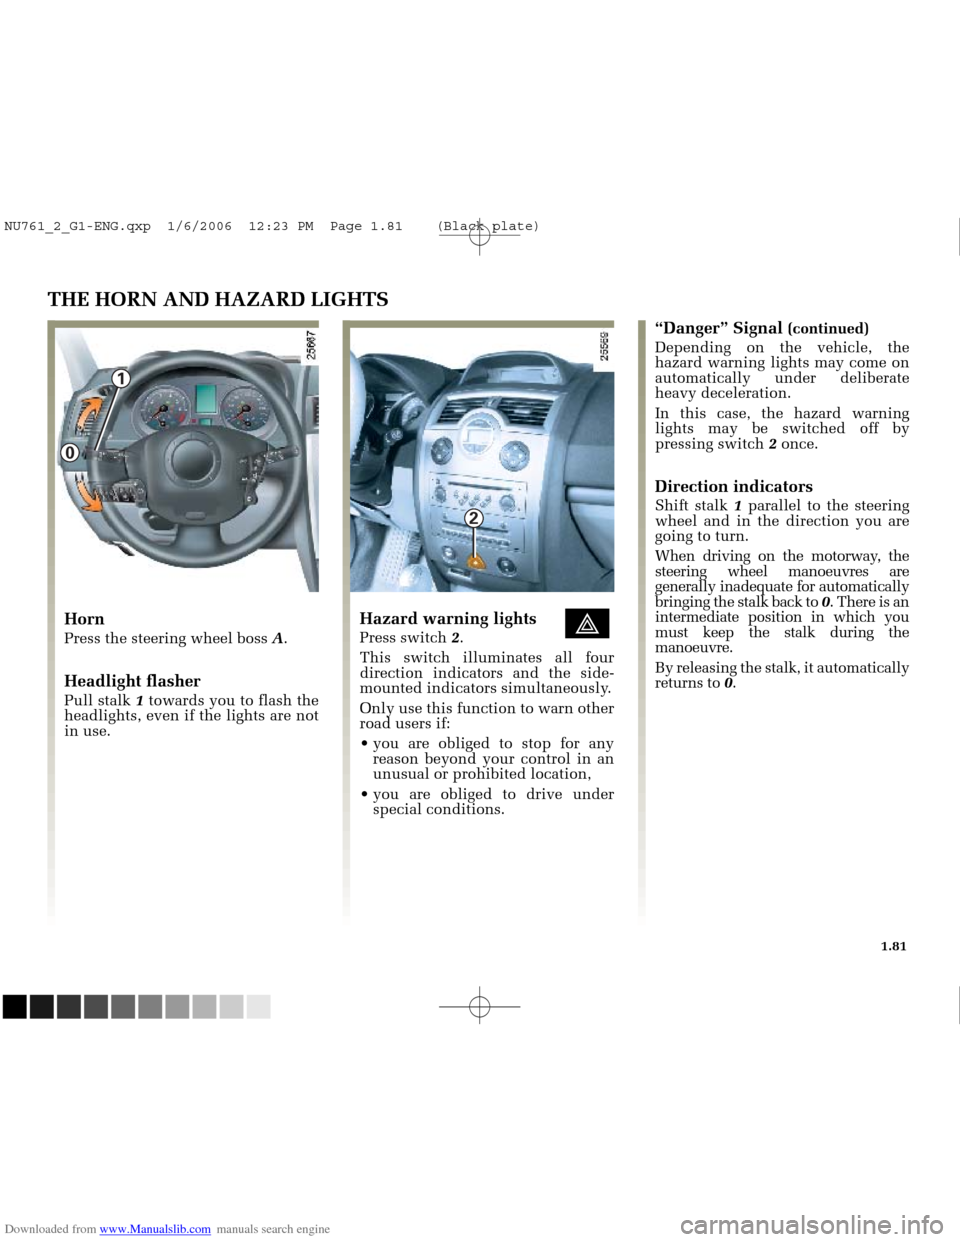
Press the steering wheel boss A.
Headlight flasher
Pull stalk 1towards you to flash the
headlights, even if the lights are not
in use.
Hazard warning lights éPress switch 2.
This switch illuminates all four
direction indicators and the side-
mounted indicators simultaneously.
Only use this function to warn other
road users if:
you are obliged to stop for any reason beyond your control in an
unusual or prohibited location,
you are obliged to drive under special conditions.
“Danger” Signal (continued)
Depending on the vehicle, the
hazard warning lights may come on
automatically under deliberate
heavy deceleration.
In this case, the hazard warning
lights may be switched off by
pressing switch 2once.
Direction indicators
Shift stalk 1parallel to the steering
wheel and in the direction you are
going to turn.
When driving on the motorway, the
steering wheel manoeuvres are
generally inadequate for automatically
bringing the stalk back to 0. There is an
intermediate position in which you
must keep the stalk during the
manoeuvre.
By releasing the stalk, it automatically
returns to 0.
NU761_2_G1-ENG.qxp 1/6/2006 12:23 PM Page 1.81 (Black plate)
Page 92 of 250
Downloaded from www.Manualslib.com manuals search engine
1
4
1
3
2
NU761_2_G1-FRA.qxd 10/11/05 15:55 Page 1.82
1.82
EXTERIOR LIGHTING AND SIGNALS
Switching on the side ulights
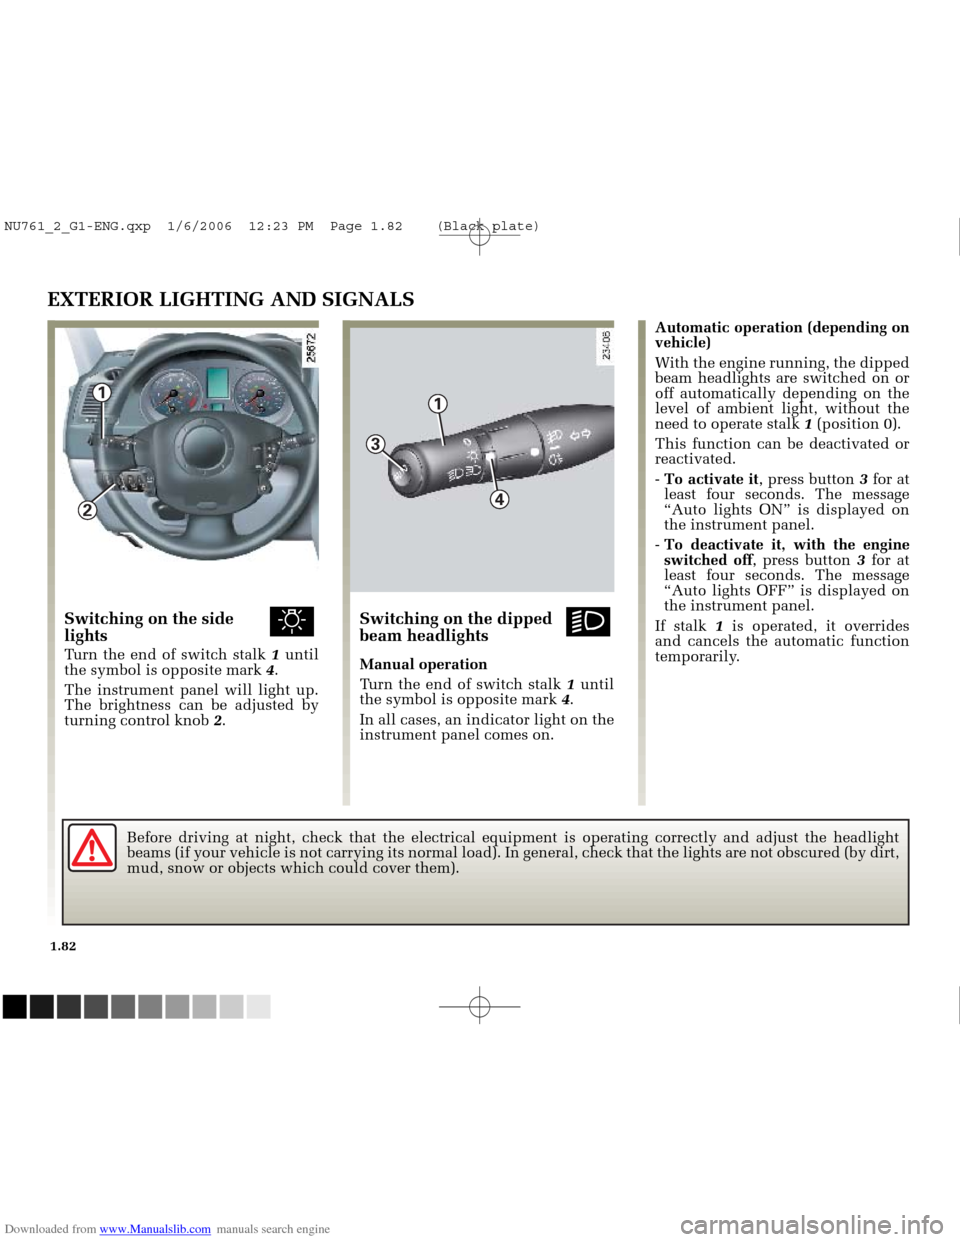
Turn the end of switch stalk 1until
the symbol is opposite mark 4.
The instrument panel will light up.
The brightness can be adjusted by
turning control knob 2.
Switching on the dipped kbeam headlights
Manual operation
Turn the end of switch stalk 1until
the symbol is opposite mark 4.
In all cases, an indicator light on the
instrument panel comes on. Automatic operation (depending on
vehicle)
With the engine running, the dipped
beam headlights are switched on or
off automatically depending on the
level of ambient light, without the
need to operate stalk
1(position 0).
This function can be deactivated or
reactivated.
- To activate it , press button 3for at
least four seconds. The message
“Auto lights ON” is displayed on
the instrument panel.
- To deactivate it, with the engine
switched off , press button 3for at
least four seconds. The message
“Auto lights OFF” is displayed on
the instrument panel.
If stalk 1is operated, it overrides
and cancels the automatic function
temporarily.
Before driving at night, check that the electrical equipment is operatin\
g correctly and adjust the headlight
beams (if your vehicle is not carrying its normal load). In general, c\
heck that the lights are not obscured (by dirt,
mud, snow or objects which could cover them).
NU761_2_G1-ENG.qxp 1/6/2006 12:23 PM Page 1.82 (Black plate)
Page 93 of 250
Downloaded from www.Manualslib.com manuals search engine
1
NU761_2_G1-FRA.qxd 10/11/05 15:55 Page 1.83
1.83
EXTERIOR LIGHTING AND SIGNALS (continued)Switching off the lights
Manual operation
There are two possibilities:
- return stalk 1to its original
position;
- the lights go out when the engine is stopped, when the driver’s door is
opened or when the vehicle is
locked. In this case, the next time
the engine is started the lights will
be switched back on according to
the position of the stalk 1.
Automatic operation (depending on
vehicle)
The lights go out when the engine is
stopped, when the driver’s door is
opened or when the vehicle is
locked.
Lights on warning buzzer
If the lights are on after the engine is
switched off, a warning beep sounds
when the driver’s door is opened to
warn you that the lights are still on.
See me home lighting function
This function (useful, for example,
to light the way when opening a
gate, a garage door, etc.), enables you
to temporarily switch on the dipped
beam headlights.
With the engine and the lights
switched off
, and the end of the
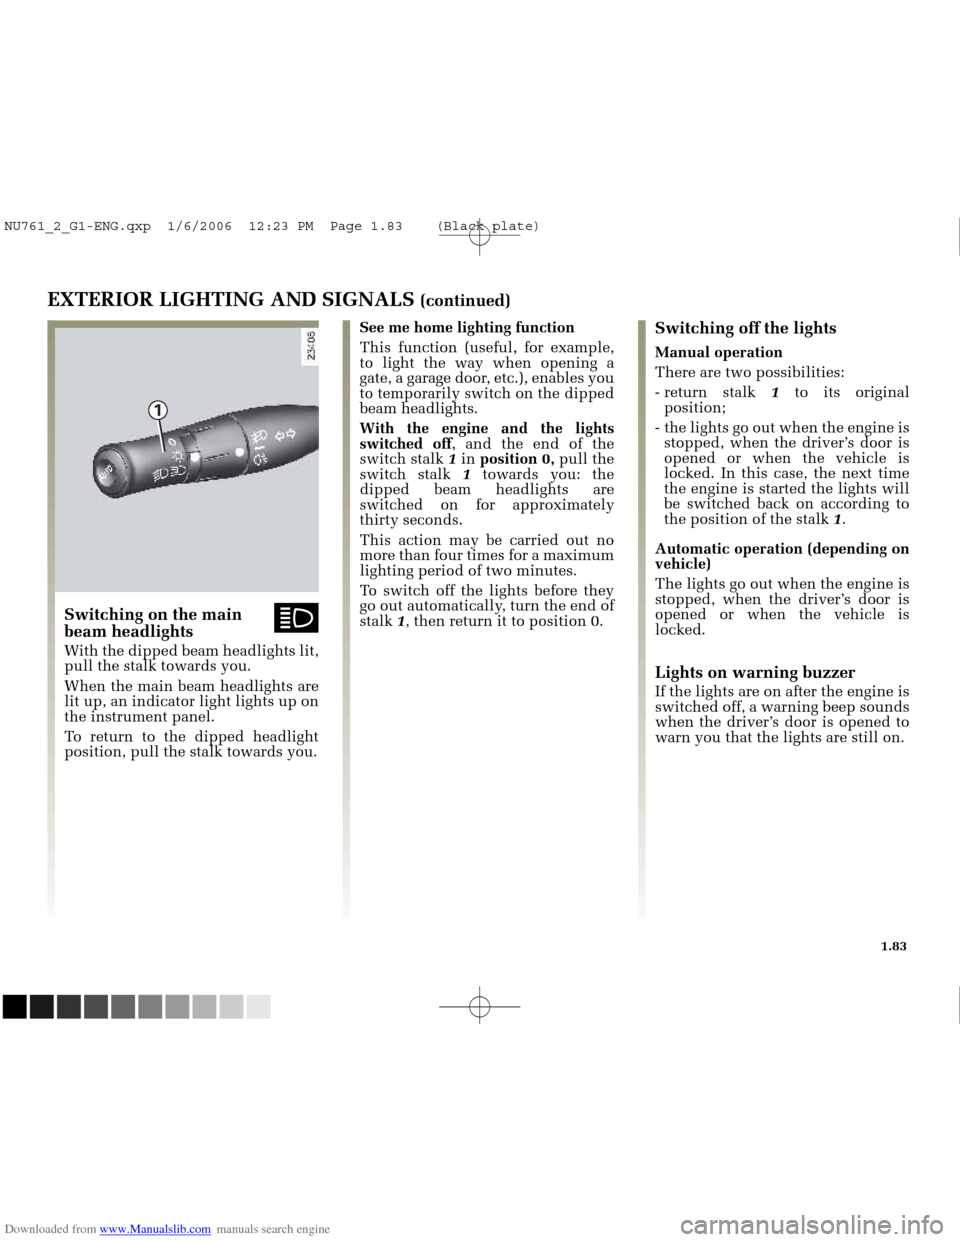
switch stalk 1 in position 0, pull the
switch stalk 1towards you: the
dipped beam headlights are
switched on for approximately
thirty seconds.
This action may be carried out no
more than four times for a maximum
lighting period of two minutes.
To switch off the lights before they
go out automatically, turn the end of
stalk 1, then return it to position 0.
Switching on the main ábeam headlights
With the dipped beam headlights lit,
pull the stalk towards you.
When the main beam headlights are
lit up, an indicator light lights up on
the instrument panel.
To return to the dipped headlight
position, pull the stalk towards you.
NU761_2_G1-ENG.qxp 1/6/2006 12:23 PM Page 1.83 (Black plate)
Page 94 of 250
Downloaded from www.Manualslib.com manuals search engine
5
6
NU761_2_G1-FRA.qxd 10/11/05 15:55 Page 1.84
1.84
EXTERIOR LIGHTING AND SIGNALS (continued)
Switching off the lights
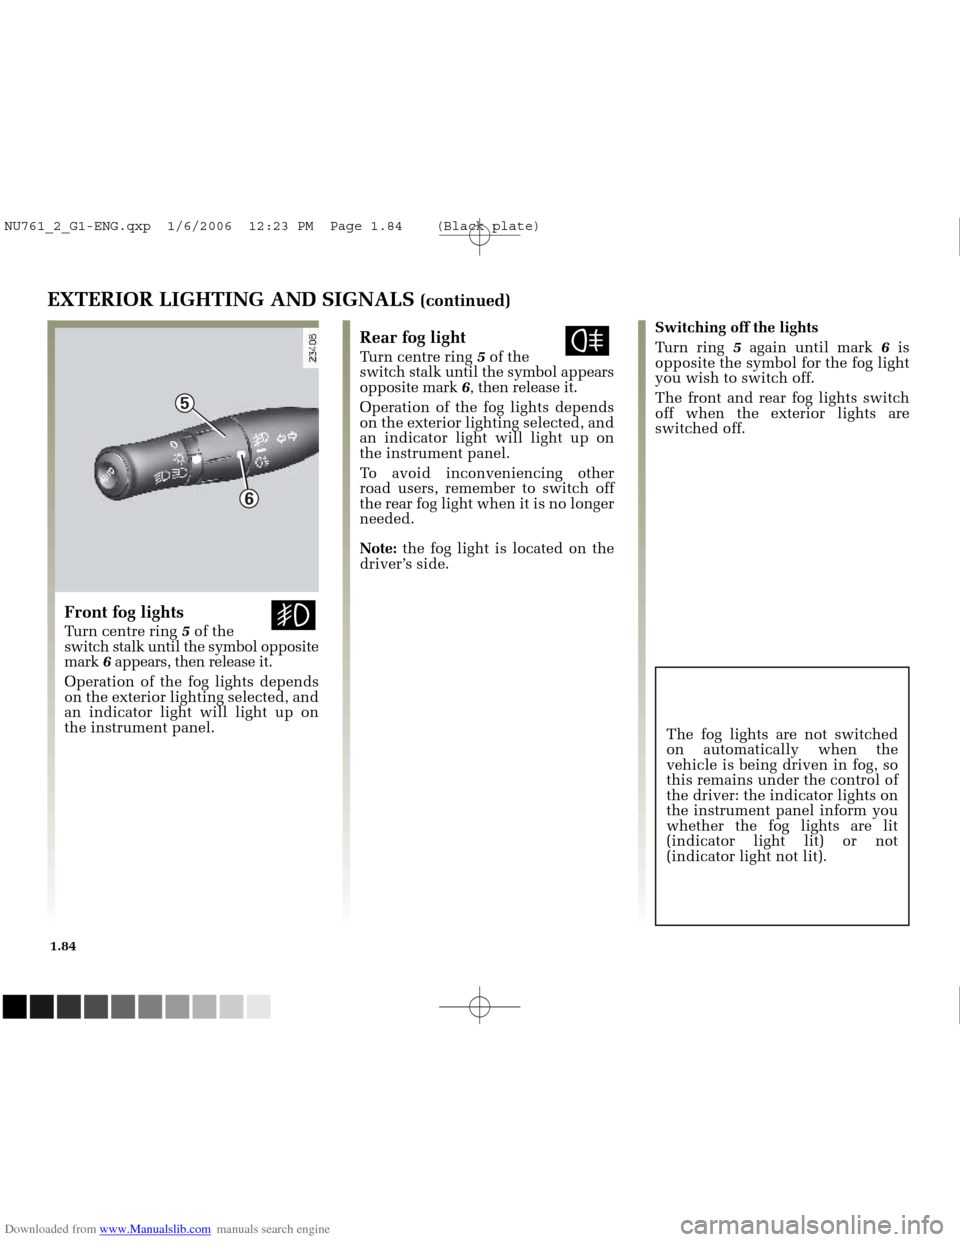
Turn ring 5again until mark 6is
opposite the symbol for the fog light
you wish to switch off.
The front and rear fog lights switch
off when the exterior lights are
switched off.Rear fog light fTurn centre ring 5 of the
switch stalk until the symbol appears
opposite mark 6, then release it.
Operation of the fog lights depends
on the exterior lighting selected, and
an indicator light will light up on
the instrument panel.
To avoid inconveniencing other
road users, remember to switch off
the rear fog light when it is no longer
needed.
Note: the fog light is located on the
driver’s side.
Front fog lights gTurn centre ring 5 of the
switch stalk until the symbol opposite
mark 6appears, then release it.
Operation of the fog lights depends
on the exterior lighting selected, and
an indicator light will light up on
the instrument panel. The fog lights are not switched
on automatically when the
vehicle is being driven in fog, so
this remains under the control of
the driver: the indicator lights on
the instrument panel inform you
whether the fog lights are lit
(indicator light lit) or not
(indicator light not lit).
NU761_2_G1-ENG.qxp 1/6/2006 12:23 PM Page 1.84 (Black plate)
Page 95 of 250
Downloaded from www.Manualslib.com manuals search engine
A
NU761_2_G1-FRA.qxd 10/11/05 15:55 Page 1.85
1.85
ELECTRIC BEAM HEIGHT ADJUSTMENT
On vehicles equipped with this
function, control knob Aallows you
to adjust the height of the headlight
beams according to the vehicle load.
Turn control Adownwards to lower
the headlights and upwards to raise
them.
Adjustment is automatic on other
versions.
Control Aadjustment position
Versions 3 door - 5 door Utility version
00
00
1–
3–
44
44
NU761_2_G1-ENG.qxp 1/6/2006 12:23 PM Page 1.85 (Black plate)
Page 96 of 250
Downloaded from www.Manualslib.com manuals search engine
1
C
B
A
1
2
D
NU761_2_G1-FRA.qxd 10/11/05 15:55 Page 1.86
1.86
WINDSCREEN WASH/WIPE
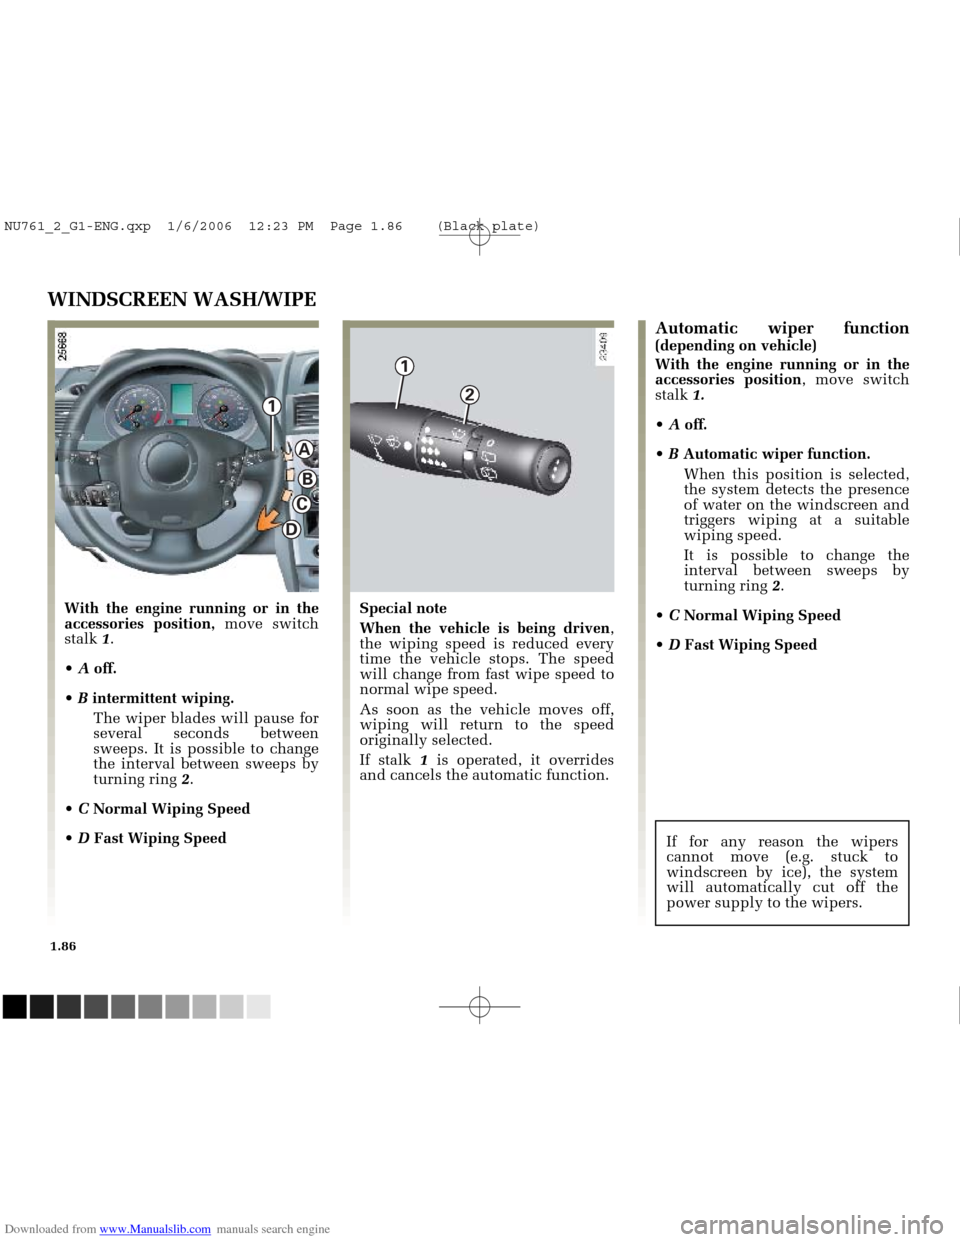
With the engine running or in the
accessories position,move switch
stalk 1.
A off.
B intermittent wiping.
The wiper blades will pause for
several seconds between
sweeps. It is possible to change
the interval between sweeps by
turning ring 2.
C Normal Wiping Speed
D Fast Wiping Speed Special note
When the vehicle is being driven
,
the wiping speed is reduced every
time the vehicle stops. The speed
will change from fast wipe speed to
normal wipe speed.
As soon as the vehicle moves off,
wiping will return to the speed
originally selected.
If stalk 1is operated, it overrides
and cancels the automatic function.
Automatic wiper function(depending on vehicle)
With the engine running or in the
accessories position , move switch
stalk 1.
A off.
B Automatic wiper function.
When this position is selected,
the system detects the presence
of water on the windscreen and
triggers wiping at a suitable
wiping speed.
It is possible to change the
interval between sweeps by
turning ring 2.
C Normal Wiping Speed
D Fast Wiping Speed
If for any reason the wipers
cannot move (e.g. stuck to
windscreen by ice), the system
will automatically cut off the
power supply to the wipers.
NU761_2_G1-ENG.qxp 1/6/2006 12:23 PM Page 1.86 (Black plate)