2005 PONTIAC BONNEVILLE ECO mode
[x] Cancel search: ECO modePage 70 of 438
Personalization Features
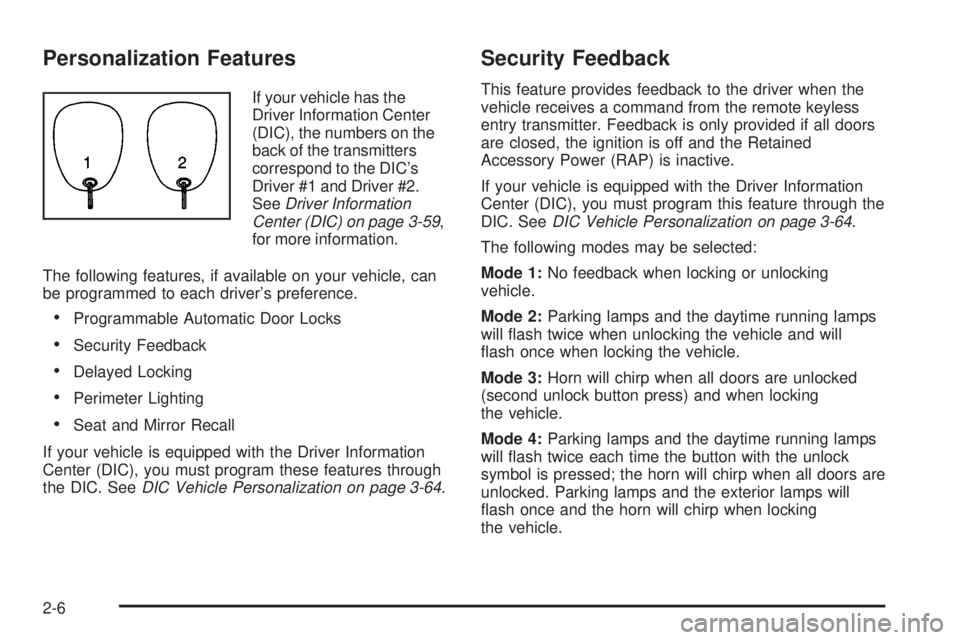
If your vehicle has the
Driver Information Center
(DIC), the numbers on the
back of the transmitters
correspond to the DIC’s
Driver #1 and Driver #2.
SeeDriver Information
Center (DIC) on page 3-59,
for more information.
The following features, if available on your vehicle, can
be programmed to each driver’s preference.
Programmable Automatic Door Locks
Security Feedback
Delayed Locking
Perimeter Lighting
Seat and Mirror Recall
If your vehicle is equipped with the Driver Information
Center (DIC), you must program these features through
the DIC. SeeDIC Vehicle Personalization on page 3-64.
Security Feedback
This feature provides feedback to the driver when the
vehicle receives a command from the remote keyless
entry transmitter. Feedback is only provided if all doors
are closed, the ignition is off and the Retained
Accessory Power (RAP) is inactive.
If your vehicle is equipped with the Driver Information
Center (DIC), you must program this feature through the
DIC. SeeDIC Vehicle Personalization on page 3-64.
The following modes may be selected:
Mode 1:No feedback when locking or unlocking
vehicle.
Mode 2:Parking lamps and the daytime running lamps
will �ash twice when unlocking the vehicle and will
�ash once when locking the vehicle.
Mode 3:Horn will chirp when all doors are unlocked
(second unlock button press) and when locking
the vehicle.
Mode 4:Parking lamps and the daytime running lamps
will �ash twice each time the button with the unlock
symbol is pressed; the horn will chirp when all doors are
unlocked. Parking lamps and the exterior lamps will
�ash once and the horn will chirp when locking
the vehicle.
2-6
Page 75 of 438
Delayed Locking
This feature lets the driver delay the actual locking of the
vehicle. When the driver’s power door lock switch or the
remote keyless entry transmitter lock button is pressed,
with the key removed from the ignition and the driver’s
door open, a chime will sound three times to signal that
the delayed locking system is active. When all doors have
been closed, the doors will lock automatically after
�ve seconds. If any door is opened before this, the
�ve-second timer will reset itself once all the doors have
been closed again.
Pressing a power door lock switch or the remote
keyless entry transmitter lock button again will override
this feature.
Personalization Programming
The delayed locking feature can be turned on or off.
If your vehicle is equipped with the Driver Information
Center (DIC), you must program this feature through the
DIC. SeeDIC Vehicle Personalization on page 3-64.If your vehicle is not equipped with remote keyless
entry, the delayed locking feature can be turned on or
off by using the following procedure:
1. Keep all doors closed, the vehicle in PARK (P) and
the ignition on throughout this procedure.
2. Press and hold the driver’s power door lock switch
in LOCK through Step 4.
3. Cycle the parking lamp switch from off to on
six times. On the sixth cycle, the doors will unlock to
con�rm that the feature has been turned on. Your
doors will remain locked if delayed locking is
off. If the doors unlock, delayed locking is on.
4. To change modes, cycle the parking lamp switch
once more. A locking action will con�rm the
new mode.
5. Release the power door lock switch.
To turn the feature off, repeat the previous procedure.
2-11
Page 76 of 438
If your vehicle is equipped with remote keyless entry,
your vehicle can be programmed to each driver’s
preference for each of the transmitters. Use the following
procedure to turn the feature off using the corresponding
transmitter:
1. Keep all doors closed, the vehicle in PARK (P) and
the ignition on throughout this procedure.
2. Press and hold the power door lock switch in LOCK
throughout this procedure. All the doors will lock.
3. Press the button with the unlock symbol on the
transmitter. The lock delay is still on and all the
doors will unlock.
4. Press the button with the unlock symbol on the
transmitter again. Lock delay is now off and all
the doors will lock.
5. Release the power door lock switch.
To turn this feature on, repeat the previous procedure.
This procedure changes the mode for only the
transmitter used to change this setting. The procedure
will need to be repeated for the second transmitter.Programmable Automatic Door
Locks
Close the doors and turn on the ignition. Every time you
move the shift lever out of PARK (P), all of the doors will
lock. And, every time you stop and move the shift lever
into PARK (P), the doors will unlock. If someone needs to
get out while you are not in PARK (P), have that person
use the manual door lock or the power door lock switch.
When the door is closed again, it will not lock
automatically. Use the manual door lock or the power
door lock switch to lock the door again.
Personalization Programming
You can program the automatic door lock feature to
change to the following modes:
Mode 0:No automatic door lock or unlock.
Mode 1:All doors automatically lock when shifted out
of PARK (P). No automatic door unlock.
Mode 2:All doors automatically lock when shifted out
of PARK (P). Only the driver’s door automatically
unlocks when shifted into PARK (P).
Mode 3:All doors automatically lock when shifted out
of PARK (P). All doors automatically unlock when shifted
into PARK (P).
2-12
Page 77 of 438
Mode 4:All doors automatically lock when shifted out
of PARK (P). Only the driver’s door automatically
unlocks when the key is turned to OFF (DIC equipped
vehicles only).
Mode 5:All doors automatically lock when shifted out
of PARK (P). All doors automatically unlock when
the key is turned to OFF (DIC equipped vehicles only).
If your vehicle is equipped with the Driver Information
Center (DIC), you must program this feature through the
DIC. SeeDIC Vehicle Personalization on page 3-64.
If your vehicle is not equipped with remote keyless entry,
use the following procedure to change modes:
1. Keep all doors closed, the vehicle in PARK (P) and
the ignition on throughout this procedure.
2. Press and hold the driver’s power door lock switch
in LOCK through Step 3.
3. Cycle the shift lever, starting in PARK (P), out of
PARK (P) and then back into PARK (P), to
advance by one mode for each cycle.
After the �rst cycle, you will hear a door locking
action, which identi�es the current mode.
4. Release the power door lock switch. The automatic
door locks will remain in the most recent mode
selected.If your vehicle is equipped with remote keyless entry,
use the following procedure to change modes:
1. Keep all doors closed, the vehicle in PARK (P) and
the ignition on throughout this procedure.
2. Press and hold the driver’s power door lock switch
in LOCK through Step 4.
3. Press the button with the lock symbol on the
remote keyless entry transmitter. The automatic
door locks will remain in the current mode.
4. Press the button with the lock symbol on the
transmitter again. Each time the transmitter’s
lock button is pressed, the mode will advance by
one, going from 3 to 0 to 1, etc.
The door locks will cycle according to the mode
entered. Mode 0 has no feedback.
5. Release the power door lock switch. The automatic
door locks will remain in the most recent mode
selected.
This procedure changes the mode for only the
transmitter used to change this setting. The procedure
will need to be repeated for the second transmitter.
2-13
Page 105 of 438
If your vehicle is equipped with the HomeLink®
Transmitter, it complies with Part 15 of the FCC Rules.
Operation is subject to the following two conditions:
(1) this device may not cause harmful interference, and
(2) this device must accept any interference received,
including interference that may cause undesired
operation.
This device complies with RSS-210 of Industry Canada.
Operation is subject to the following two conditions:
(1) this device may not cause interference, and (2) this
device must accept any interference, including
interference that may cause undesired operation of the
device.
Changes and modi�cations to this system by other than
an authorized service facility could void authorization
to use this equipment.
Programming the HomeLink®
Transmitter
Do not use the HomeLink®Transmitter with any garage
door opener that does not have the “stop and reverse”
feature. This includes any garage door opener model
manufactured before April 1, 1982. If you have a newer
garage door opener with rolling codes, please be
sure to follow Steps 6 through 8 to complete the
programming of your HomeLink
®Transmitter.Read the instructions completely before attempting to
program the HomeLink
®Transmitter. Because of
the steps involved, it may be helpful to have another
person available to assist you in programming the
transmitter.
Keep the original transmitter for use in other vehicles as
well as for future HomeLink
®programming. It is also
recommended that upon the sale of the vehicle,
the programmed HomeLink
®buttons should be erased
for security purposes. Refer to “Erasing HomeLink®
Buttons” or, for assistance, contact HomeLink®on the
internet at: www.homelink.com or by calling
1-800-355-3515.
Be sure that people and objects are clear of the garage
door or gate operator you are programming. When
programming a garage door, it is advised to park outside
of the garage.
It is recommended that a new battery be installed in
your hand-held transmitter for quicker and more
accurate transmission of the radio frequency.
2-41
Page 108 of 438
Erasing HomeLink®Buttons
To erase programming from the three buttons do the
following:
1. Press and hold down the two outside buttons until
the indicator light begins to �ash, after 20 seconds.
Do not hold the two outside buttons for longer
than 30 seconds.
2. Release both buttons.
HomeLink
®is now in the train (learning) mode and can
be programmed at any time beginning with Step 2
under “Programming HomeLink
®” shown earlier in this
section.
Individual buttons cannot be erased, but they can be
reprogrammed. See “Reprogramming a Single
HomeLink
®Button” following this section.
Reprogramming a Single HomeLink®
Button
To program a device to HomeLink®using a HomeLink®
button previously trained, follow these steps:
1. Press and hold the desired HomeLink
®button. Do
not release the button.
2. The indicator light will begin to �ash after
20 seconds. While still holding the HomeLink
®
button, proceed with Step 2 under “Programming
HomeLink®” shown earlier in this section.
Resetting Defaults
To reset HomeLink®to default settings do the following:
1. Hold down the two outside buttons for about
20 seconds until the indicator light begins to �ash.
2. Continue to hold both buttons until the HomeLink
®
indicator light turns off.
3. Release both buttons.
For questions or comments, contact HomeLink
®at
1-800-355-3515, or on the internet at
www.homelink.com.
Storage Areas
Glove Box
Use the master key to lock and unlock the glove box.
To open it, lift the latch release on the left side of
the glove box door.
The VALET key, if equipped, will not work in the glove
box door lock.
2-44
Page 121 of 438
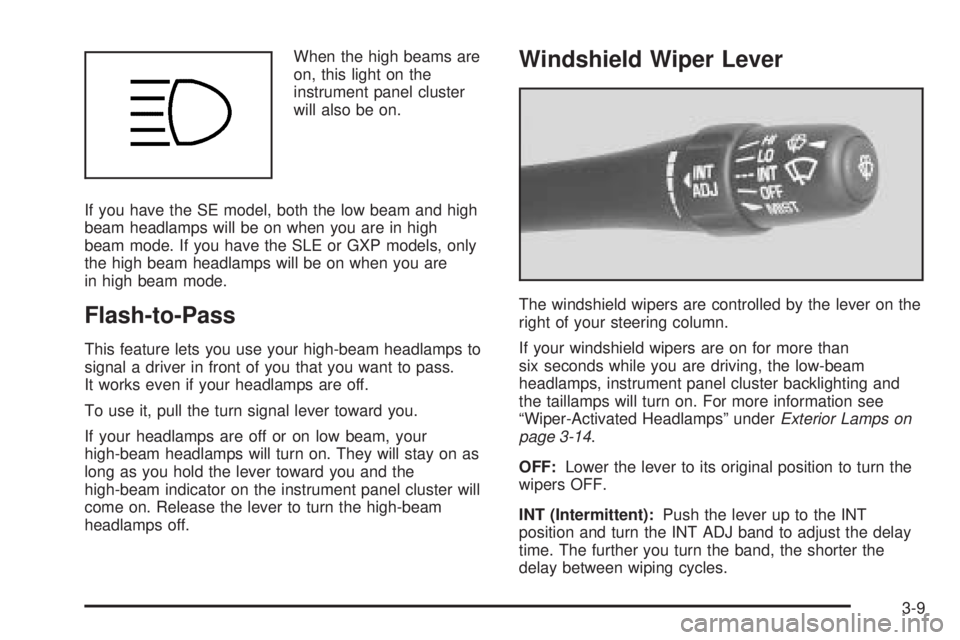
When the high beams are
on, this light on the
instrument panel cluster
will also be on.
If you have the SE model, both the low beam and high
beam headlamps will be on when you are in high
beam mode. If you have the SLE or GXP models, only
the high beam headlamps will be on when you are
in high beam mode.
Flash-to-Pass
This feature lets you use your high-beam headlamps to
signal a driver in front of you that you want to pass.
It works even if your headlamps are off.
To use it, pull the turn signal lever toward you.
If your headlamps are off or on low beam, your
high-beam headlamps will turn on. They will stay on as
long as you hold the lever toward you and the
high-beam indicator on the instrument panel cluster will
come on. Release the lever to turn the high-beam
headlamps off.
Windshield Wiper Lever
The windshield wipers are controlled by the lever on the
right of your steering column.
If your windshield wipers are on for more than
six seconds while you are driving, the low-beam
headlamps, instrument panel cluster backlighting and
the taillamps will turn on. For more information see
“Wiper-Activated Headlamps” underExterior Lamps on
page 3-14.
OFF:Lower the lever to its original position to turn the
wipers OFF.
INT (Intermittent):Push the lever up to the INT
position and turn the INT ADJ band to adjust the delay
time. The further you turn the band, the shorter the
delay between wiping cycles.
3-9
Page 126 of 438
Exterior Lamps
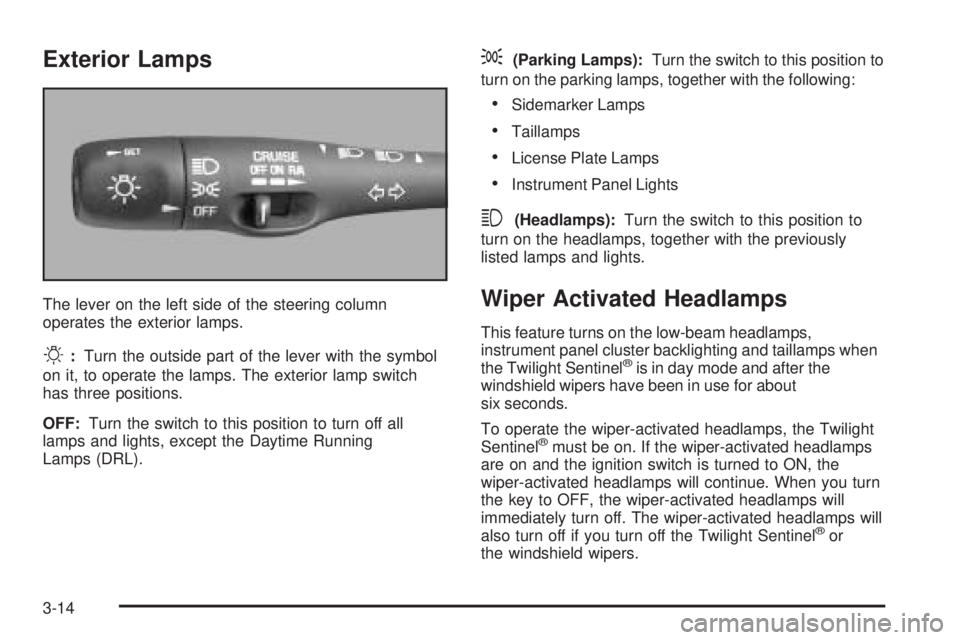
The lever on the left side of the steering column
operates the exterior lamps.
O:Turn the outside part of the lever with the symbol
on it, to operate the lamps. The exterior lamp switch
has three positions.
OFF:Turn the switch to this position to turn off all
lamps and lights, except the Daytime Running
Lamps (DRL).
;(Parking Lamps):Turn the switch to this position to
turn on the parking lamps, together with the following:
Sidemarker Lamps
Taillamps
License Plate Lamps
Instrument Panel Lights
3(Headlamps):Turn the switch to this position to
turn on the headlamps, together with the previously
listed lamps and lights.
Wiper Activated Headlamps
This feature turns on the low-beam headlamps,
instrument panel cluster backlighting and taillamps when
the Twilight Sentinel
®is in day mode and after the
windshield wipers have been in use for about
six seconds.
To operate the wiper-activated headlamps, the Twilight
Sentinel
®must be on. If the wiper-activated headlamps
are on and the ignition switch is turned to ON, the
wiper-activated headlamps will continue. When you turn
the key to OFF, the wiper-activated headlamps will
immediately turn off. The wiper-activated headlamps will
also turn off if you turn off the Twilight Sentinel
®or
the windshield wipers.
3-14