2005 PONTIAC BONNEVILLE trunk
[x] Cancel search: trunkPage 133 of 438
Inadvertent Power Battery Saver
This feature is designed to protect your vehicle’s battery
against drainage from the interior lamps, trunk lamp
or glove box lamp. When the ignition is turned off, the
power to these features will automatically turn off
after 10 minutes. Power will be restored for an additional
10 minutes if any door is opened, the trunk is opened
or the courtesy lamps are turned on.
Head-Up Display (HUD)
{CAUTION:
If the HUD image is too bright, or too high in
your �eld of view, it may take you more time to
see things you need to see when it is dark
outside. Be sure to keep the HUD image dim
and placed low in your �eld of view.
If you have the optional Head-Up Display (HUD), you
can see some of the driver information also available on
your instrument panel cluster. The information maybe displayed in English or metric units and appears as
an image focused out toward the front of your vehicle.
The HUD shows the following:
Speedometer Reading
Turn Signal Indicators
High-beam Indicator Symbol
CHECK GAGES Message (for low oil pressure,
high coolant temperature, low oil level, high/low
battery, brake, ABS and air bag)
Low Fuel Warning Symbol
Radio Frequency and Playback Mode (with the
exception of the XM™ radio)
3-21
Page 167 of 438
On vehicles with a DIC, the door that is ajar will be
shown as an icon next to the vehicle outline and
a message will appear on the display. SeeDIC
Warnings and Messages on page 3-62for more
information.
Trunk Ajar Light
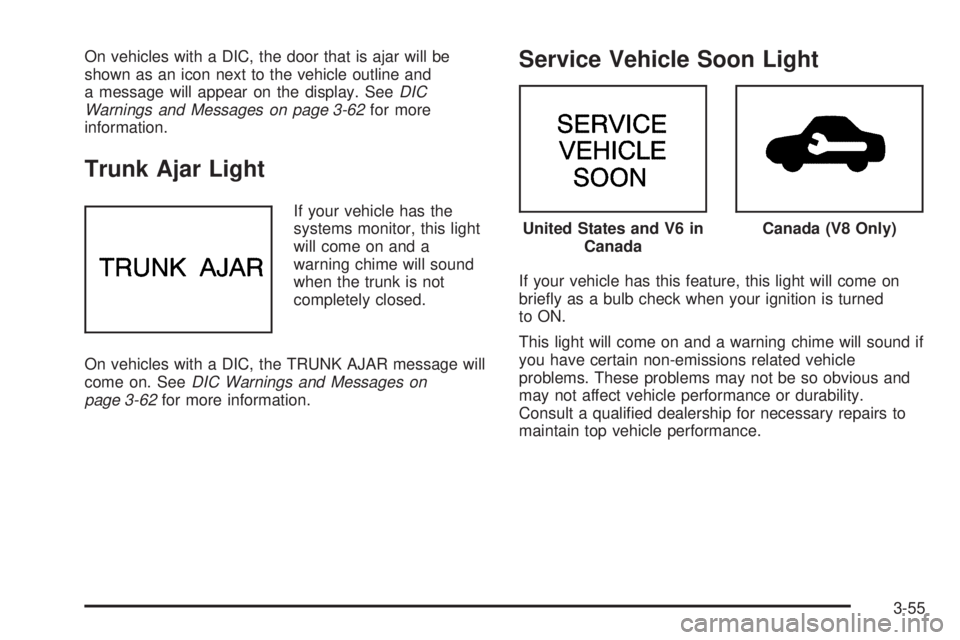
If your vehicle has the
systems monitor, this light
will come on and a
warning chime will sound
when the trunk is not
completely closed.
On vehicles with a DIC, the TRUNK AJAR message will
come on. SeeDIC Warnings and Messages on
page 3-62for more information.
Service Vehicle Soon Light
If your vehicle has this feature, this light will come on
brie�y as a bulb check when your ignition is turned
to ON.
This light will come on and a warning chime will sound if
you have certain non-emissions related vehicle
problems. These problems may not be so obvious and
may not affect vehicle performance or durability.
Consult a quali�ed dealership for necessary repairs to
maintain top vehicle performance.
United States and V6 in
CanadaCanada (V8 Only)
3-55
Page 170 of 438
Systems Monitor
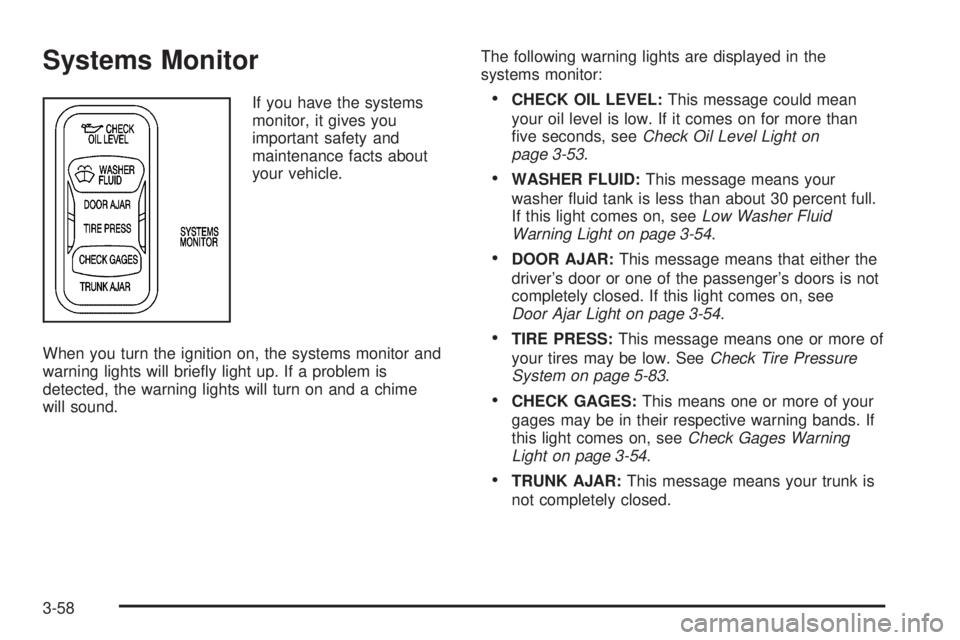
If you have the systems
monitor, it gives you
important safety and
maintenance facts about
your vehicle.
When you turn the ignition on, the systems monitor and
warning lights will brie�y light up. If a problem is
detected, the warning lights will turn on and a chime
will sound.The following warning lights are displayed in the
systems monitor:CHECK OIL LEVEL:This message could mean
your oil level is low. If it comes on for more than
�ve seconds, seeCheck Oil Level Light on
page 3-53.
WASHER FLUID:This message means your
washer �uid tank is less than about 30 percent full.
If this light comes on, seeLow Washer Fluid
Warning Light on page 3-54.
DOOR AJAR:This message means that either the
driver’s door or one of the passenger’s doors is not
completely closed. If this light comes on, see
Door Ajar Light on page 3-54.
TIRE PRESS:This message means one or more of
your tires may be low. SeeCheck Tire Pressure
System on page 5-83.
CHECK GAGES:This means one or more of your
gages may be in their respective warning bands. If
this light comes on, seeCheck Gages Warning
Light on page 3-54.
TRUNK AJAR:This message means your trunk is
not completely closed.
3-58
Page 174 of 438
When you have the oil changed according to the
maintenance schedule, you will have to reset the engine
oil life system. To reset the engine oil life system, see
“How to Reset the Engine Oil Life System” underEngine
Oil Life System on page 5-20.
Tire Pressure Status:Press the SELECT button until
TIRE PRESSURE appears in the display. TIRE
PRESSURE NORMAL is displayed when the Check
Tire Pressure System believes your vehicle’s tire
pressures are normal. If a potential problem is detected,
the display will show CHECK TIRE PRESSURE and
the tire pressure status will show TIRE PRESSURE
LOW. If you see the CHECK TIRE PRESSURE
message, you should stop as soon as you can and
check all your tires for damage. If a tire is �at, seeIf a
Tire Goes Flat on page 5-92. Also check the tire
pressure in all four tires as soon as you can. See
In�ation - Tire Pressure on page 5-80andCheck Tire
Pressure System on page 5-83.DIC Warnings and Messages
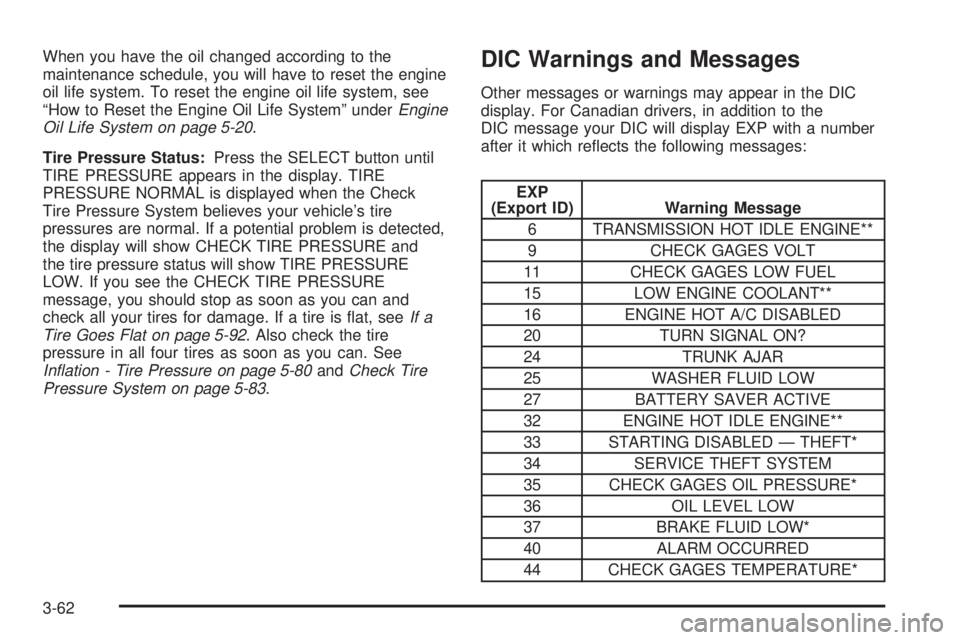
Other messages or warnings may appear in the DIC
display. For Canadian drivers, in addition to the
DIC message your DIC will display EXP with a number
after it which re�ects the following messages:
EXP
(Export ID) Warning Message
6 TRANSMISSION HOT IDLE ENGINE**
9 CHECK GAGES VOLT
11 CHECK GAGES LOW FUEL
15 LOW ENGINE COOLANT**
16 ENGINE HOT A/C DISABLED
20 TURN SIGNAL ON?
24 TRUNK AJAR
25 WASHER FLUID LOW
27 BATTERY SAVER ACTIVE
32 ENGINE HOT IDLE ENGINE**
33 STARTING DISABLED — THEFT*
34 SERVICE THEFT SYSTEM
35 CHECK GAGES OIL PRESSURE*
36 OIL LEVEL LOW
37 BRAKE FLUID LOW*
40 ALARM OCCURRED
44 CHECK GAGES TEMPERATURE*
3-62
Page 183 of 438
If you live on the line, you can pick the zone area you
are most likely to drive in. In Alaska, use Zone 9 or 10.
In Hawaii, use Zone 7.
Changing Your Zone Number
1. Press MODE to display COMPASS CALIBRATION.
2. Press SELECT to display RESET CHANGES ZONE.
3. Press RESET until your number appears.
4. Press MODE to exit the COMPASS CALIBRATION
MODE and store the new zone number. When the
MODE button is pressed, the DIC will return to
the VEHICLE DATA mode.
Calibrating the Compass
All electronic compasses need to know the magnetic
pro�le of your vehicle. This is called calibration and
is done automatically by your compass. However, if you
would like to manually calibrate the compass, the
following instructions will show you how.
Sometimes, strong magnetic �elds can affect the
compass. If the compass display does not show a
direction, and CALIBRATE COMPASS is displayed on
the DIC, try calibrating the compass as follows:
1. Drive the vehicle to an open, �at area.
2. Press MODE to display COMPASS CALIBRATION.3. Press SELECT to display PRESS RESET TO
RECALIBRATE and then press the RESET
button.
4. The display will change to SLOWLY DRIVE IN
SMALL CIRCLES. Drive the vehicle in small
circles. Do not drive faster than 10 mph (16 km/h).
5. Continue to drive in circles until the CALIBRATION
COMPLETE message is displayed on the DIC and
a direction is shown for the compass.
Your compass should be calibrated. You will know this
when a direction is shown and the CALIBRATE
COMPASS message is no longer displayed.
Compass Accuracy
Your compass may show different headings around
bridges, power lines, large metal objects and steep hills.
This is normal and is true of compasses in general.
If you put large metal objects like golf clubs in the trunk,
they could affect accuracy. If the affect is minimal, the
compass will adapt to these objects over time.
If you use an antenna with a magnetic base, it is best to
mount it away from the center of the trunk near the
rear window.
3-71
Page 184 of 438

The rear defog system can affect accuracy, and the
compass corrects for the rear defog. However, if the rear
defog is turned on while making sharp turns, the
accuracy may be off. When you turn the rear defog off
again, the accuracy returns to normal.
Be aware that metal objects are sometimes buried in
the ground. They can affect accuracy and you may not
know they are there. As an example, many concrete
roads have metal reinforcements inside.
Also, if you drive with the trunk open, this could affect
accuracy and could decalibrate the compass.
Audio System(s)
Notice:Before adding any sound equipment to
your vehicle, like a tape player, CB radio, mobile
telephone, or two-way radio, make sure that it can
be added by checking with your dealer. Also,
check federal rules covering mobile radio and
telephone units. If sound equipment can be added,
it is very important to do it properly. Added
sound equipment may interfere with the operation
of your vehicle’s engine, radio, or other systems,
and even damage them. Your vehicle’s systems may
interfere with the operation of sound equipment
that has been added improperly.Figure out which audio system is in your vehicle, �nd
out what your audio system can do, and how to operate
all of its controls.
Your vehicle has a feature called Retained Accessory
Power (RAP). With RAP, the audio system can be
played even after the ignition is turned off. SeeRetained
Accessory Power (RAP) on page 2-24for more
information.
Setting the Time
Press and hold HR or MIN for two seconds. Then press
and hold HR until the correct hour appears on the
display. AM will appear for morning hours. Press and
hold MIN until the correct minute appears on the display.
The time can be set with the ignition on or off.
To synchronize the time with an FM station broadcasting
Radio Data System (RDS) information, press and
hold HR and MIN at the same time until UPDATED and
the clock symbol appear on the display. If the time is
not available from the station, NO UPDATE will appear
on the display.
RDS time is broadcast once a minute. After tuning to an
RDS broadcast station, it may take a few minutes for
the time to update.
3-72
Page 207 of 438
If any error occurs repeatedly or if an error cannot be
corrected, contact your GM dealer. If the radio displays
an error message, write it down and provide it to
your GM dealer when reporting the problem.
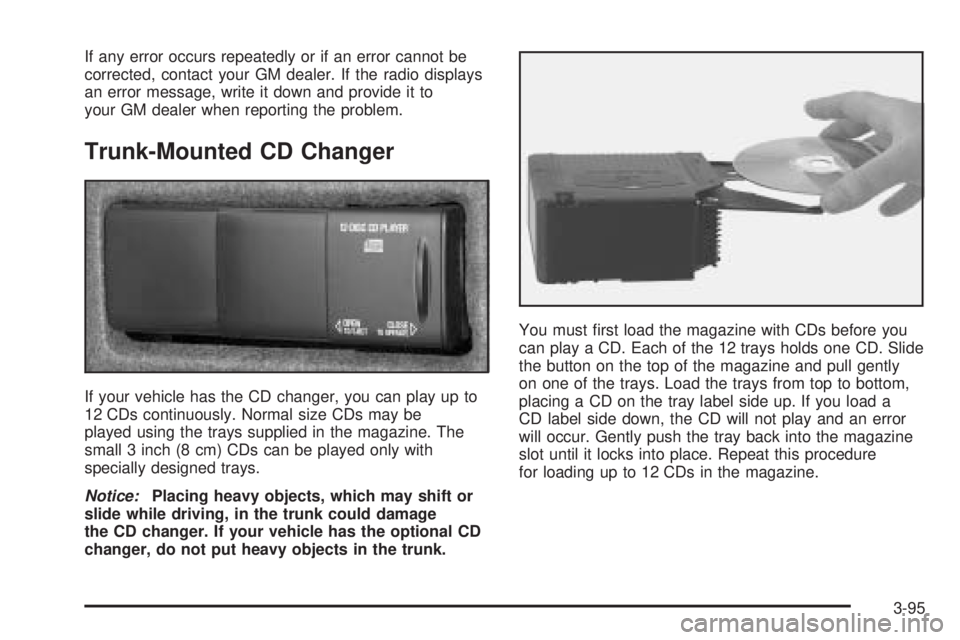
Trunk-Mounted CD Changer
If your vehicle has the CD changer, you can play up to
12 CDs continuously. Normal size CDs may be
played using the trays supplied in the magazine. The
small 3 inch (8 cm) CDs can be played only with
specially designed trays.
Notice:Placing heavy objects, which may shift or
slide while driving, in the trunk could damage
the CD changer. If your vehicle has the optional CD
changer, do not put heavy objects in the trunk.You must �rst load the magazine with CDs before you
can play a CD. Each of the 12 trays holds one CD. Slide
the button on the top of the magazine and pull gently
on one of the trays. Load the trays from top to bottom,
placing a CD on the tray label side up. If you load a
CD label side down, the CD will not play and an error
will occur. Gently push the tray back into the magazine
slot until it locks into place. Repeat this procedure
for loading up to 12 CDs in the magazine.
3-95
Page 209 of 438
Whenever a CD magazine with CDs is loaded in the
changer and the door is closed, the CD symbol will
appear on the radio display. If the CD changer is
checking the magazine for CDs, the CD symbol will �ash
on the display until the changer is ready to play. If CD
changer mode is entered during initialization, LOADING
will appear on the display. When a CD begins playing, a
CD and track number will appear on the radio display.
The CD numbers are listed on the front of the magazine.
All of the CD functions are controlled by the radio
buttons except for ejecting the magazine.
Playing a CD
If an error appears on the display, see “CD Messages”
later in this section.
The following radio buttons are used for the
trunk-mounted CD changer.
\1 (Forward):Press and hold this pushbutton to
quickly advance within a track. The elapsed time of the
track will appear on the display.
y2 (Next):Press this pushbutton to select the next
CD in the magazine. Each time you press this
pushbutton, the CD number on the radio display will go
to that of the next available CD.RDM 3 (Random):Press this pushbutton to listen to
the tracks on all of the CDs in random, rather than
sequential, order. RANDOM ALL will appear on
the display.
Press and hold this pushbutton to listen to the tracks on
the current CD in random, rather than sequential,
order. RANDOM ONE will appear on the display and a
chime will sound. Press this pushbutton again to
turn off random play.
4
s(Reverse):Press and hold this pushbutton to
quickly reverse within a track. The elapsed time of
the track will appear on the display.
5 (Previous):Press this pushbutton to select the
previous CD in the magazine. Each time you press this
pushbutton, the CD number on the radio display will
go to that of the previous available CD.
RCL (Recall):Push this knob to see how long the
current track has been playing. To change what
is normally shown on the display, track or elapsed time,
push this knob until you see the display you want.
Then hold the knob until the display �ashes.
wSEEKx:Press the down arrow while playing a
CD to go to the start of the current track if more
than eight seconds have played. Press the up arrow to
go to the next track on the CD. If either arrow is
held or pressed more than once, the player will continue
moving backward or forward through the CD.
3-97