2005 PONTIAC BONNEVILLE seat memory
[x] Cancel search: seat memoryPage 65 of 438
Keys...............................................................2-2
Remote Keyless Entry System.........................2-4
Remote Keyless Entry System Operation...........2-5
Doors and Locks.............................................2-9
Door Locks....................................................2-9
Central Door Unlocking System......................2-10
Power Door Locks........................................2-10
Delayed Locking...........................................2-11
Programmable Automatic Door Locks..............2-12
Rear Door Security Locks..............................2-14
Lockout Protection........................................2-14
Trunk..........................................................2-15
Windows........................................................2-17
Power Windows............................................2-18
Sun Visors...................................................2-19
Theft-Deterrent Systems..................................2-19
Universal Theft-Deterrent...............................2-19
Content Theft-Deterrent.................................2-21
PASS-Key
®III ..............................................2-21
PASS-Key®III Operation...............................2-22
Starting and Operating Your Vehicle................2-23
New Vehicle Break-In....................................2-23
Ignition Positions..........................................2-24
Retained Accessory Power (RAP)...................2-24
Starting Your Engine.....................................2-25
Engine Coolant Heater..................................2-26
Automatic Transaxle Operation.......................2-27Parking Brake..............................................2-30
Shifting Into Park (P).....................................2-31
Shifting Out of Park (P).................................2-33
Parking Over Things That Burn.......................2-34
Engine Exhaust............................................2-34
Running Your Engine While You Are Parked.......2-35
Mirrors...........................................................2-36
Manual Rearview Mirror.................................2-36
Automatic Dimming Rearview Mirror................2-36
Outside Power Mirrors...................................2-37
Outside Curb View Assist Mirror.....................2-38
Outside Convex Mirror...................................2-38
Outside Heated Mirrors..................................2-38
OnStar
®System.............................................2-39
HomeLink®Transmitter...................................2-40
Programming the HomeLink®Transmitter.........2-41
Storage Areas................................................2-44
Glove Box...................................................2-44
Front Storage Area.......................................2-45
Center Console Storage Area.........................2-45
Rear Seat Pass Through...............................2-45
Convenience Net..........................................2-45
Sunroof.........................................................2-45
Vehicle Personalization...................................2-46
Memory Seat and Mirrors..............................2-46
Section 2 Features and Controls
2-1
Page 101 of 438
Outside Power Mirrors
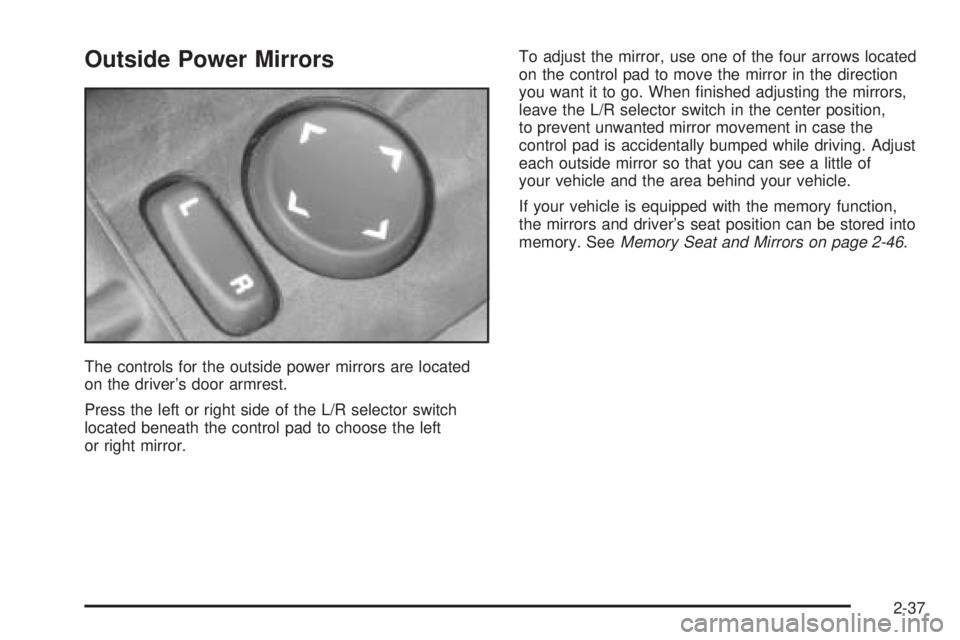
The controls for the outside power mirrors are located
on the driver’s door armrest.
Press the left or right side of the L/R selector switch
located beneath the control pad to choose the left
or right mirror.To adjust the mirror, use one of the four arrows located
on the control pad to move the mirror in the direction
you want it to go. When �nished adjusting the mirrors,
leave the L/R selector switch in the center position,
to prevent unwanted mirror movement in case the
control pad is accidentally bumped while driving. Adjust
each outside mirror so that you can see a little of
your vehicle and the area behind your vehicle.
If your vehicle is equipped with the memory function,
the mirrors and driver’s seat position can be stored into
memory. SeeMemory Seat and Mirrors on page 2-46.
2-37
Page 102 of 438
Outside Curb View Assist Mirror
If you have the memory seat and mirrors feature, the
passenger’s outside power mirror also includes a
tilt-down feature that operates when the shift lever is in
REVERSE (R). When the vehicle is shifted out of
REVERSE (R), the passenger’s mirror will return to its
original position after a �ve-second delay. This delay
prevents movement of the mirror if multiple gear
transitions (REVERSE (R) to AUTOMATIC
OVERDRIVE (D) to REVERSE (R)) occur during a
parallel parking maneuver. This feature can be
programmed on or off through the DIC personalization
programming menu. SeeDIC Vehicle Personalization on
page 3-64for programming instructions.
Outside Convex Mirror
The passenger’s side mirror is convex. A convex
mirror’s surface is curved so more can be seen from the
driver’s seat.
{CAUTION:
A convex mirror can make things (like other
vehicles) look farther away than they really are.
If you cut too sharply into the right lane, you
could hit a vehicle on your right. Check your
inside mirror or glance over your shoulder
before changing lanes.
Outside Heated Mirrors
If your vehicle has this feature, when you operate the
rear window defogger, the heated driver’s and
passenger’s outside power mirrors are warmed to help
clear them of ice and snow. See “Rear Window
Defogger” underClimate Control System on page 3-25
orAutomatic Climate Control System on page 3-28
for more information.
2-38
Page 110 of 438
Comfort Stop:Press and release the switch rearward
to the second position to express open the glass
panel to the comfort stop position. The comfort stop
position is designed to help reduce noise and make
passengers more comfortable.
Express Open:When the glass panel is express
opening, pressing the switch in any direction will stop it
in a partially-opened position. The glass panel may
be fully opened by pressing the switch rearward again.
If you press and hold the switch in the express open
position for more than one and a half seconds, the
express open operation will be overridden and
the sunroof will operate manually.
Close:To close the glass panel, press and hold the
switch forward. As the glass panel reaches the closed
position, it will open slightly toward the vent position and
then drop down to the closed position to provide a
better seal. The sunshade must be closed manually.
Vent:Once the sunroof is closed, it can be opened to
the vent position by pushing the switch upward. To
close the glass panel, pull the switch downward. The
sunshade must be opened and closed manually for vent
operation.Vehicle Personalization
Memory Seat and Mirrors
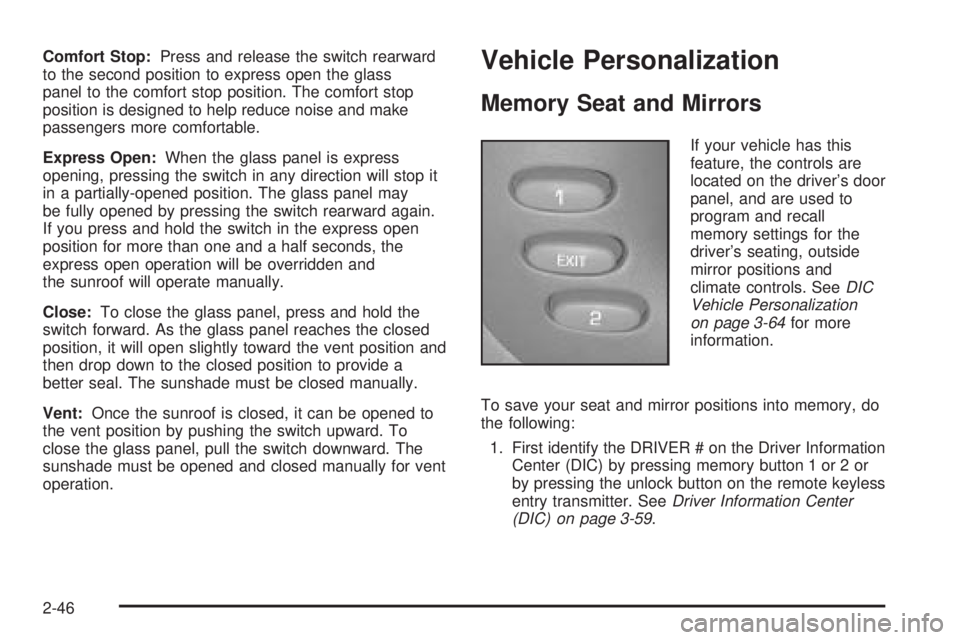
If your vehicle has this
feature, the controls are
located on the driver’s door
panel, and are used to
program and recall
memory settings for the
driver’s seating, outside
mirror positions and
climate controls. SeeDIC
Vehicle Personalization
on page 3-64for more
information.
To save your seat and mirror positions into memory, do
the following:
1. First identify the DRIVER # on the Driver Information
Center (DIC) by pressing memory button 1 or 2 or
by pressing the unlock button on the remote keyless
entry transmitter. SeeDriver Information Center
(DIC) on page 3-59.
2-46
Page 111 of 438
2. Adjust the driver’s seat and lumbar position to a
safe and comfortable driving position. Adjust both
outside mirrors to suit you. SeeDIC Vehicle
Personalization on page 3-64.
3. Press and hold the memory button corresponding
with your DRIVER # displayed on the DIC for
longer than three seconds. You will hear two beeps
con�rming that the seat and mirror positions
have been entered into memory.
To set the seat and mirror positions for a second driver,
follow the previous steps, but start by pressing the unlock
button on the remote keyless entry transmitter that
displays the other DRIVER # on the DIC. Be sure to use
the memory button which corresponds to the DRIVER #
identi�ed by the second remote keyless entry transmitter.
To recall your memory positions, your vehicle must be
in PARK (P). Press and release the memory button
corresponding to the desired driving position. The seat
and mirrors will move to the position previously
stored for the identi�ed driver. You will hear one beep.
To store the exit position for an easy exit, do the
following:
1. First identify the DRIVER # by pressing memory
button 1 or 2 or by pressing the unlock button on
the remote keyless entry transmitter.2. Adjust the driver’s seat to the desired exit position.
3. Press and hold the EXIT button for longer than
three seconds. You will hear two beeps con�rming
that the seat exit position has been entered into
memory.
To set the exit position for a second driver, follow the
previous steps, but start by pressing the unlock
button on the remote keyless entry transmitter that
displays the other DRIVER # on the DIC. Be sure to use
the memory button which corresponds to the DRIVER #
identi�ed by the other remote keyless entry transmitter.
To recall the exit position, your vehicle must be in
PARK (P). Press and release the EXIT button and the
seat will move to the exit position previously stored
for the current identi�ed driver. You will hear one beep.
If an exit position has not been stored for the current
identi�ed driver, the seat will move all the way back.
To stop recall movement of the seat at any time, press
the driver’s power seat control located on the outboard
side of the front seat.
Mirrors and lumbar positions will not be stored or
recalled for the exit position.
If you would like your stored driving or exit position to
be recalled when unlocking your vehicle with the remote
keyless entry transmitter, seeDIC Vehicle
Personalization on page 3-64.
2-47
Page 144 of 438
Outlet Adjustment
Use the knob located in the center of each outlet to
change the direction of the air�ow. Use the thumbwheel
located between the outlets to turn them on and off.
In vehicles equipped with rear seat outlets, you
can adjust the direction of the air�ow using the knob in
the center of each outlet. Use the thumbwheel
located between the outlets to turn them on and off.
Operation Tips
Clear away any ice, snow or leaves from the air
inlets at the base of the windshield that may
block the �ow of air into your vehicle.
Use of non-GM approved hood de�ectors may
adversely affect the performance of the system.
Keep the path under the front seats clear of objects
to help circulate the air inside of your vehicle more
effectively.
Climate Controls Personalization
If your vehicle is equipped with this feature, up to two
drivers are able to store and recall climate control
settings for the temperature, the fan speed and the
direction of the air�ow.Memory buttons 1 and 2 are located on the driver’s
door panel and correspond to the numbers 1 or 2 found
on the back of each remote keyless entry transmitter.
To store settings, do the following:
1. Select the desired temperature, fan speed and
air�ow mode. If desired, a separate temperature
setting may also be selected for the front seat
passenger. For information on how to do this, see
Automatic Climate Control System on page 3-28.
2. Locate memory buttons 1 and 2 on the driver’s door
panel.
3. Press the memory button on the door panel that
corresponds to the number on the back of the
transmitter you are programming, until you hear two
beeps. The beeps con�rm that your selection has
been saved and can now be recalled. For more
information on the memory feature, seeMemory
Seat and Mirrors on page 2-46.
Follow these steps each time you want to change the
stored settings.
To recall the climate control settings last stored on your
transmitter, press the unlock button on your remote
keyless entry transmitter and put the ignition in ACC
or ON.
3-32
Page 176 of 438
Tire Pressure Status – 144:If you see the CHECK
TIRE PRESSURE message, you should stop as soon as
you can and check all your tires for damage. If a tire
is �at, seeIf a Tire Goes Flat on page 5-92. Also check
the tire pressure in all four tires as soon as you can.
SeeIn�ation - Tire Pressure on page 5-80andCheck
Tire Pressure System on page 5-83.
Driver Identi�er DIC Display
This feature allows two different drivers to store and
recall their own preferred display mode. The
personalization settings displayed on the DIC are
determined by the remote keyless entry transmitter used
to enter the vehicle. After the unlock button on the
remote keyless entry transmitter (if equipped) is pressed
and the ignition is in ON, the DIC will display the
identi�ed driver. The settings can also be changed by
brie�y pressing one of the memory buttons located
on the driver’s door.
The DIC is used to program information for DRIVER #1
and DRIVER #2. The DIC will identify a person as
UNKNOWN DRIVER if neither DRIVER #1 nor
DRIVER #2 is identi�ed by the system.
DIC Vehicle Personalization
The DIC can be used to program the following
personalization features available with your vehicle:
Automatic Door Locks
Window Lock Out
Security Feedback
Delayed Locking
Perimeter Lighting
Memory Seats
Outside Curb View Assist Mirror
Driver ID
The DIC is used to program the personal choices of two
drivers. The drivers are recognized as DRIVER #1
and DRIVER #2. You will let the DIC know which driver
you are by using your remote keyless entry transmitter
or by pressing the appropriate memory seat control
button located on the driver’s door or by choosing the
driver with the DIC. Each remote keyless entry
transmitter was preprogrammed to belong to DRIVER #1
or DRIVER #2. Each remote keyless entry transmitter
may be programmed differently.
3-64
Page 177 of 438
When you press the unlock button on your remote
keyless entry transmitter, the DIC will change driver
numbers and the vehicle will recall the personalization
settings that were last made to correspond to your
remote keyless entry transmitter, including your radio
and climate control settings. SeeClimate Controls
Personalization on page 3-32.
If you unlock the vehicle using your door key instead of
your remote keyless entry transmitter, the DIC will
not change drivers and will recall the information from
the last remote keyless entry transmitter used or the last
driver change using the memory seat controls. If this
happens and you were not the last driver of the vehicle,
press your correct driver number on the memory seat
controls or press the unlock button on your remote
keyless entry transmitter or select the personalization
programming mode and choose the correct driver
number.
Use the following steps for personalization programming
instructions.
1. Turn the ignition on and keep the transaxle in
PARK (P).
2. Press the MODE button to reach personalization
programming display.
3. Press the SELECT button to enter personalization
programming mode.4. The �rst choice to be made will be DRIVER ID 1 or 2.
Press the RESET button to toggle between your
selections within a display and press the SELECT
button to choose the current selection and move on
to the next personalization feature.
You are now in the selection mode and the DIC is ready
to program your personal choices in memory.
Each feature that can be personalized will appear in the
display. Once you have made a selection for a
feature, the DIC will move on to the next personalization
feature.
Scroll through the following messages and feature
options:
AUTO DOOR LOCKS – OFF/ON
UNLOCK – OFF/ON
UNLOCK – KEY OFF/PARK
DOOR TO UNLOCK – DRIVER/ALL
WINDOW LOCKOUT–R+PASS/REAR
KEYLESS FEEDBACK – OFF/ON
LIGHTS FEEDBACK – OFF/ON
HORN FEEDBACK – OFF/ON
DELAYED LOCKING – OFF/ON
PERIMETER LIGHTS – OFF/ON
3-65