EM-52
[QR]
TIMING CHAIN
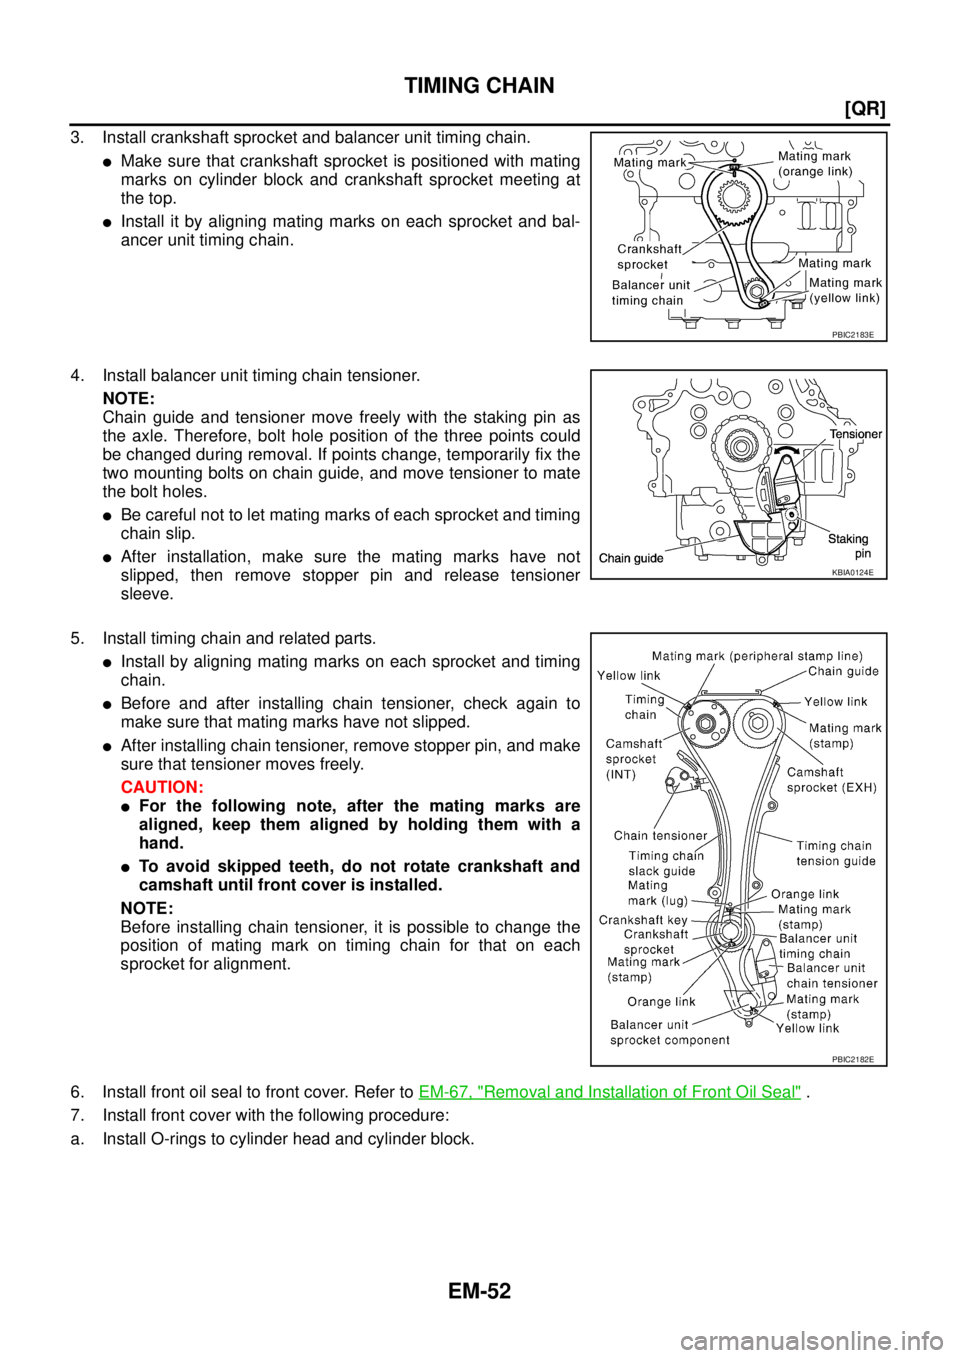
3. Install crankshaft sprocket and balancer unit timing chain.
�Make sure that crankshaft sprocket is positioned with mating
marks on cylinder block and crankshaft sprocket meeting at
the top.
�Install it by aligning mating marks on each sprocket and bal-
ancer unit timing chain.
4. Install balancer unit timing chain tensioner.
NOTE:
Chain guide and tensioner move freely with the staking pin as
the axle. Therefore, bolt hole position of the three points could
be changed during removal. If points change, temporarily fix the
two mounting bolts on chain guide, and move tensioner to mate
the bolt holes.
�Be careful not to let mating marks of each sprocket and timing
chain slip.
�After installation, make sure the mating marks have not
slipped, then remove stopper pin and release tensioner
sleeve.
5. Install timing chain and related parts.
�Install by aligning mating marks on each sprocket and timing
chain.
�Before and after installing chain tensioner, check again to
make sure that mating marks have not slipped.
�After installing chain tensioner, remove stopper pin, and make
sure that tensioner moves freely.
CAUTION:
�For the following note, after the mating marks are
aligned, keep them aligned by holding them with a
hand.
�To avoid skipped teeth, do not rotate crankshaft and
camshaft until front cover is installed.
NOTE:
Before installing chain tensioner, it is possible to change the
position of mating mark on timing chain for that on each
sprocket for alignment.
6. Install front oil seal to front cover. Refer to EM-67, "
Removal and Installation of Front Oil Seal" .
7. Install front cover with the following procedure:
a. Install O-rings to cylinder head and cylinder block.
PBIC2183E
KBIA0124E
PBIC2182E